New Artwork

Intercambiador ACART Residency Journal 3 - New Artwork!

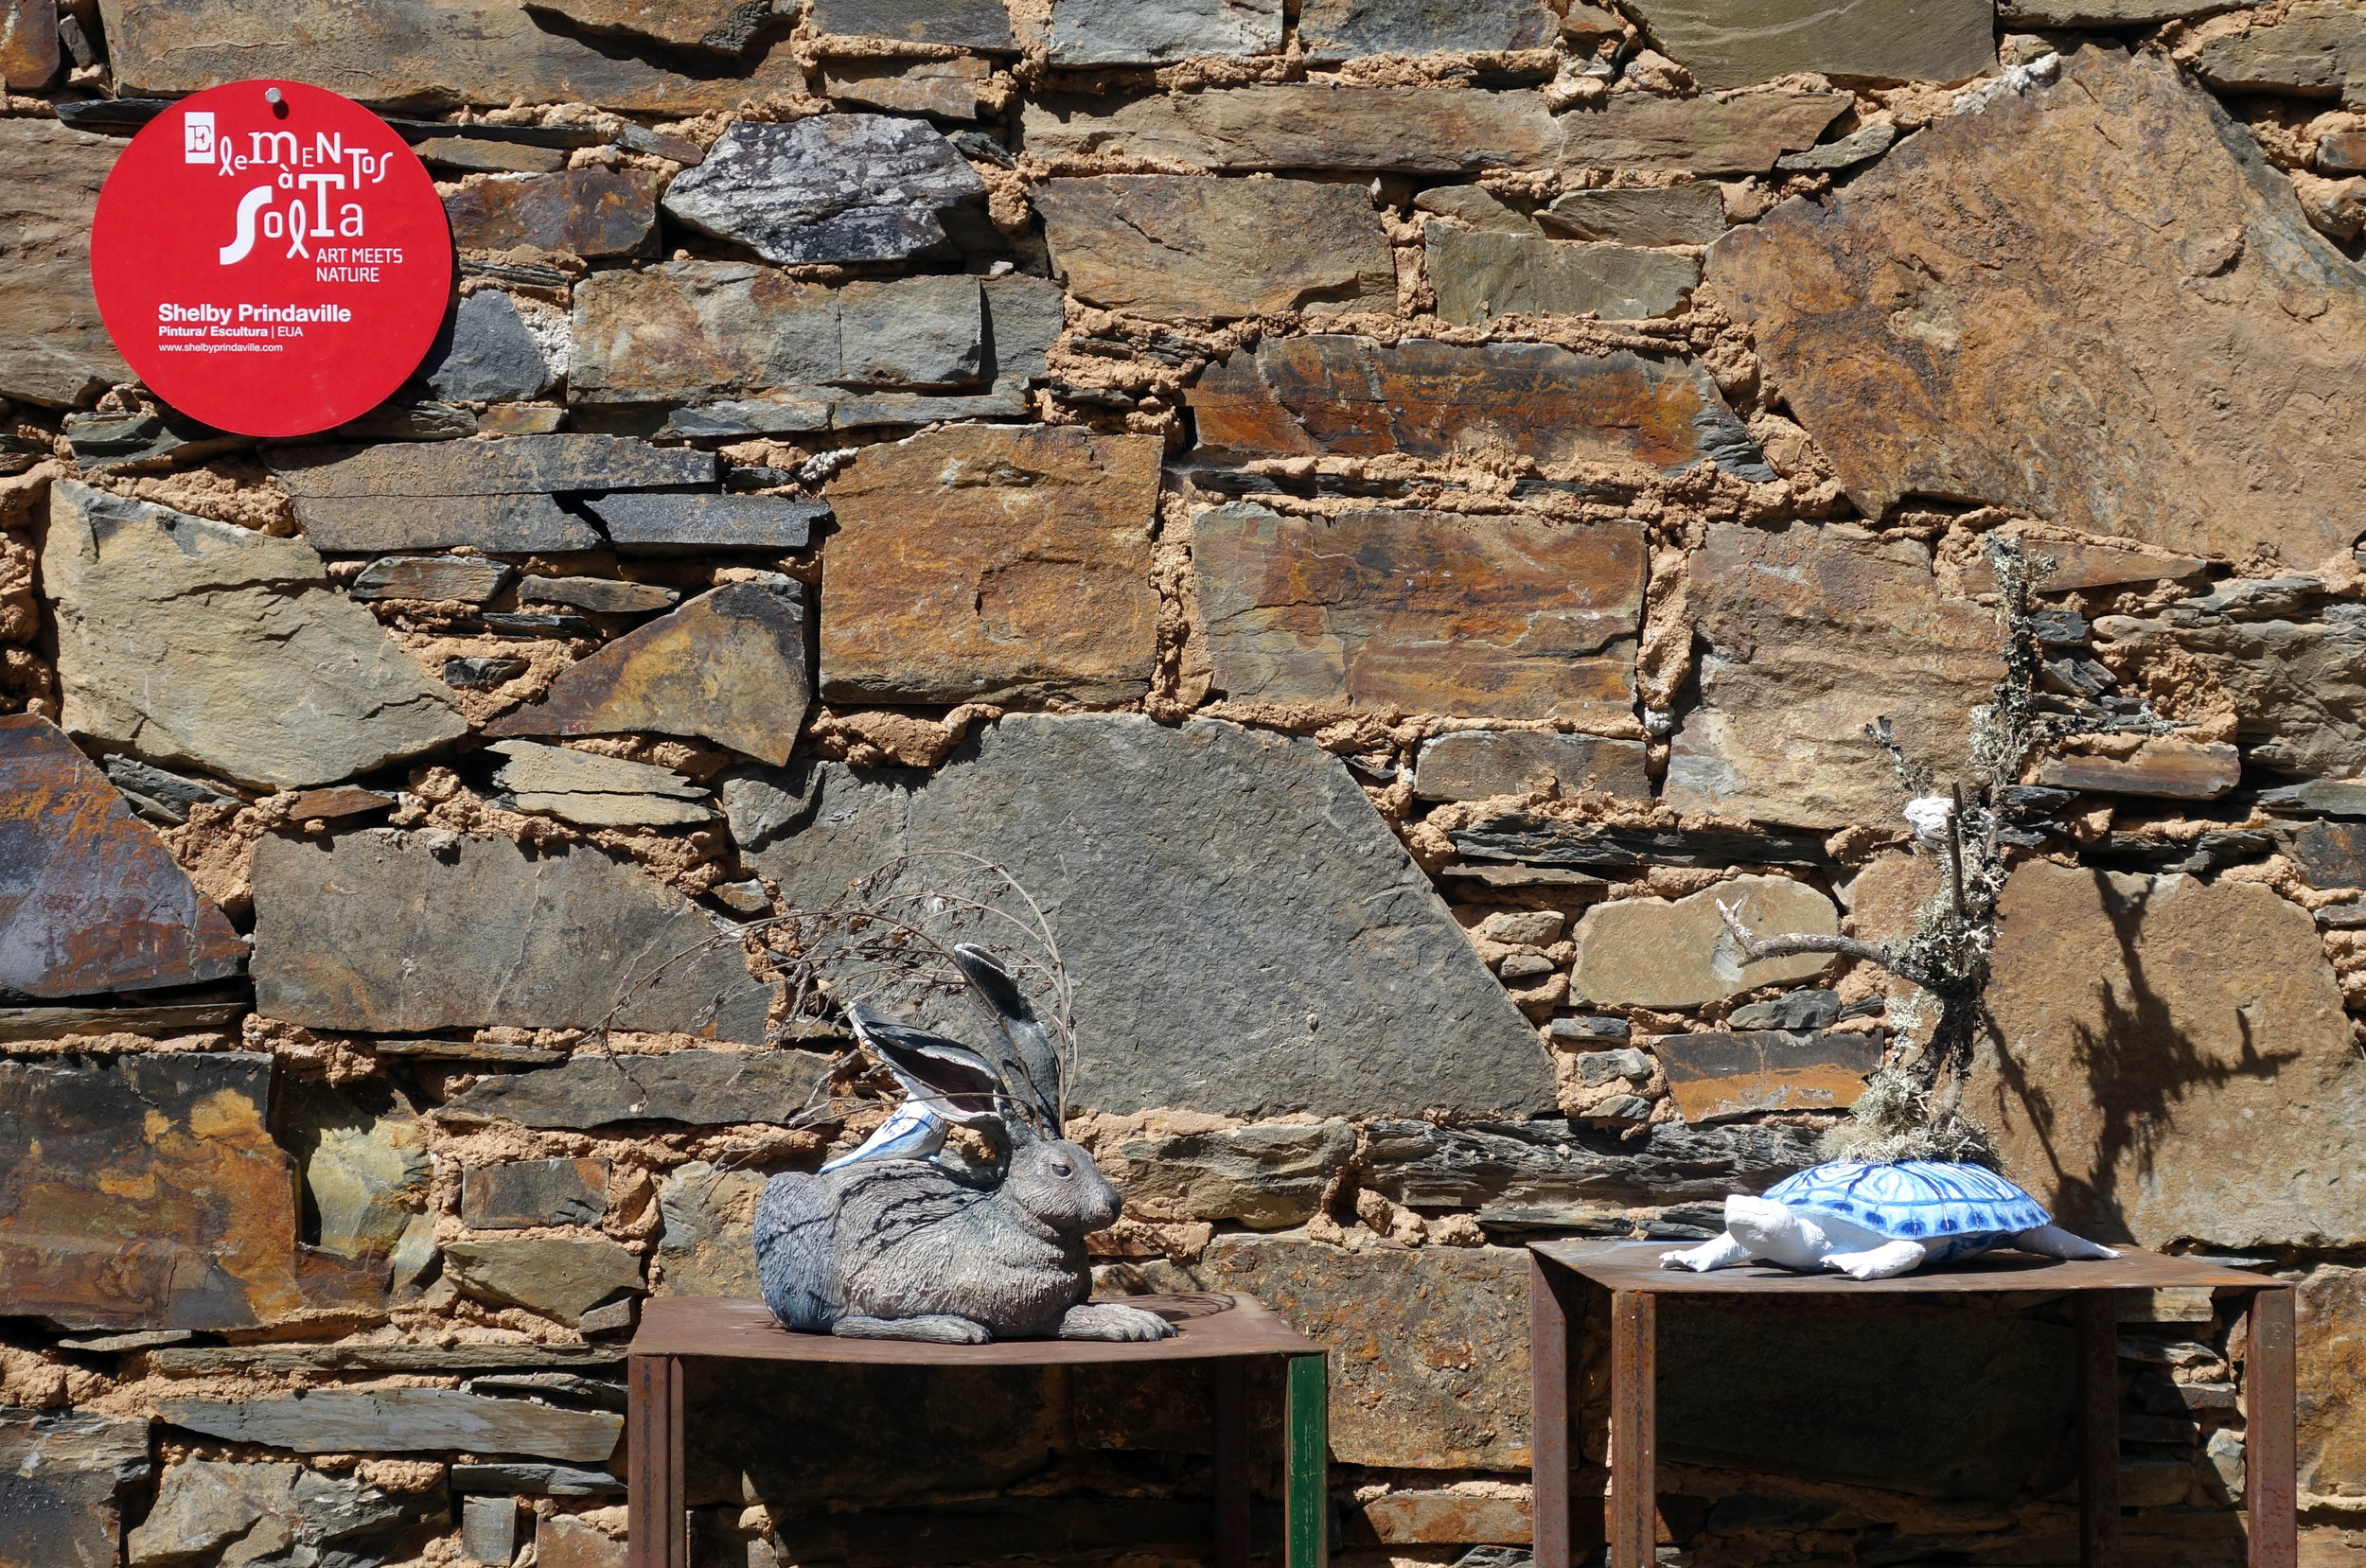
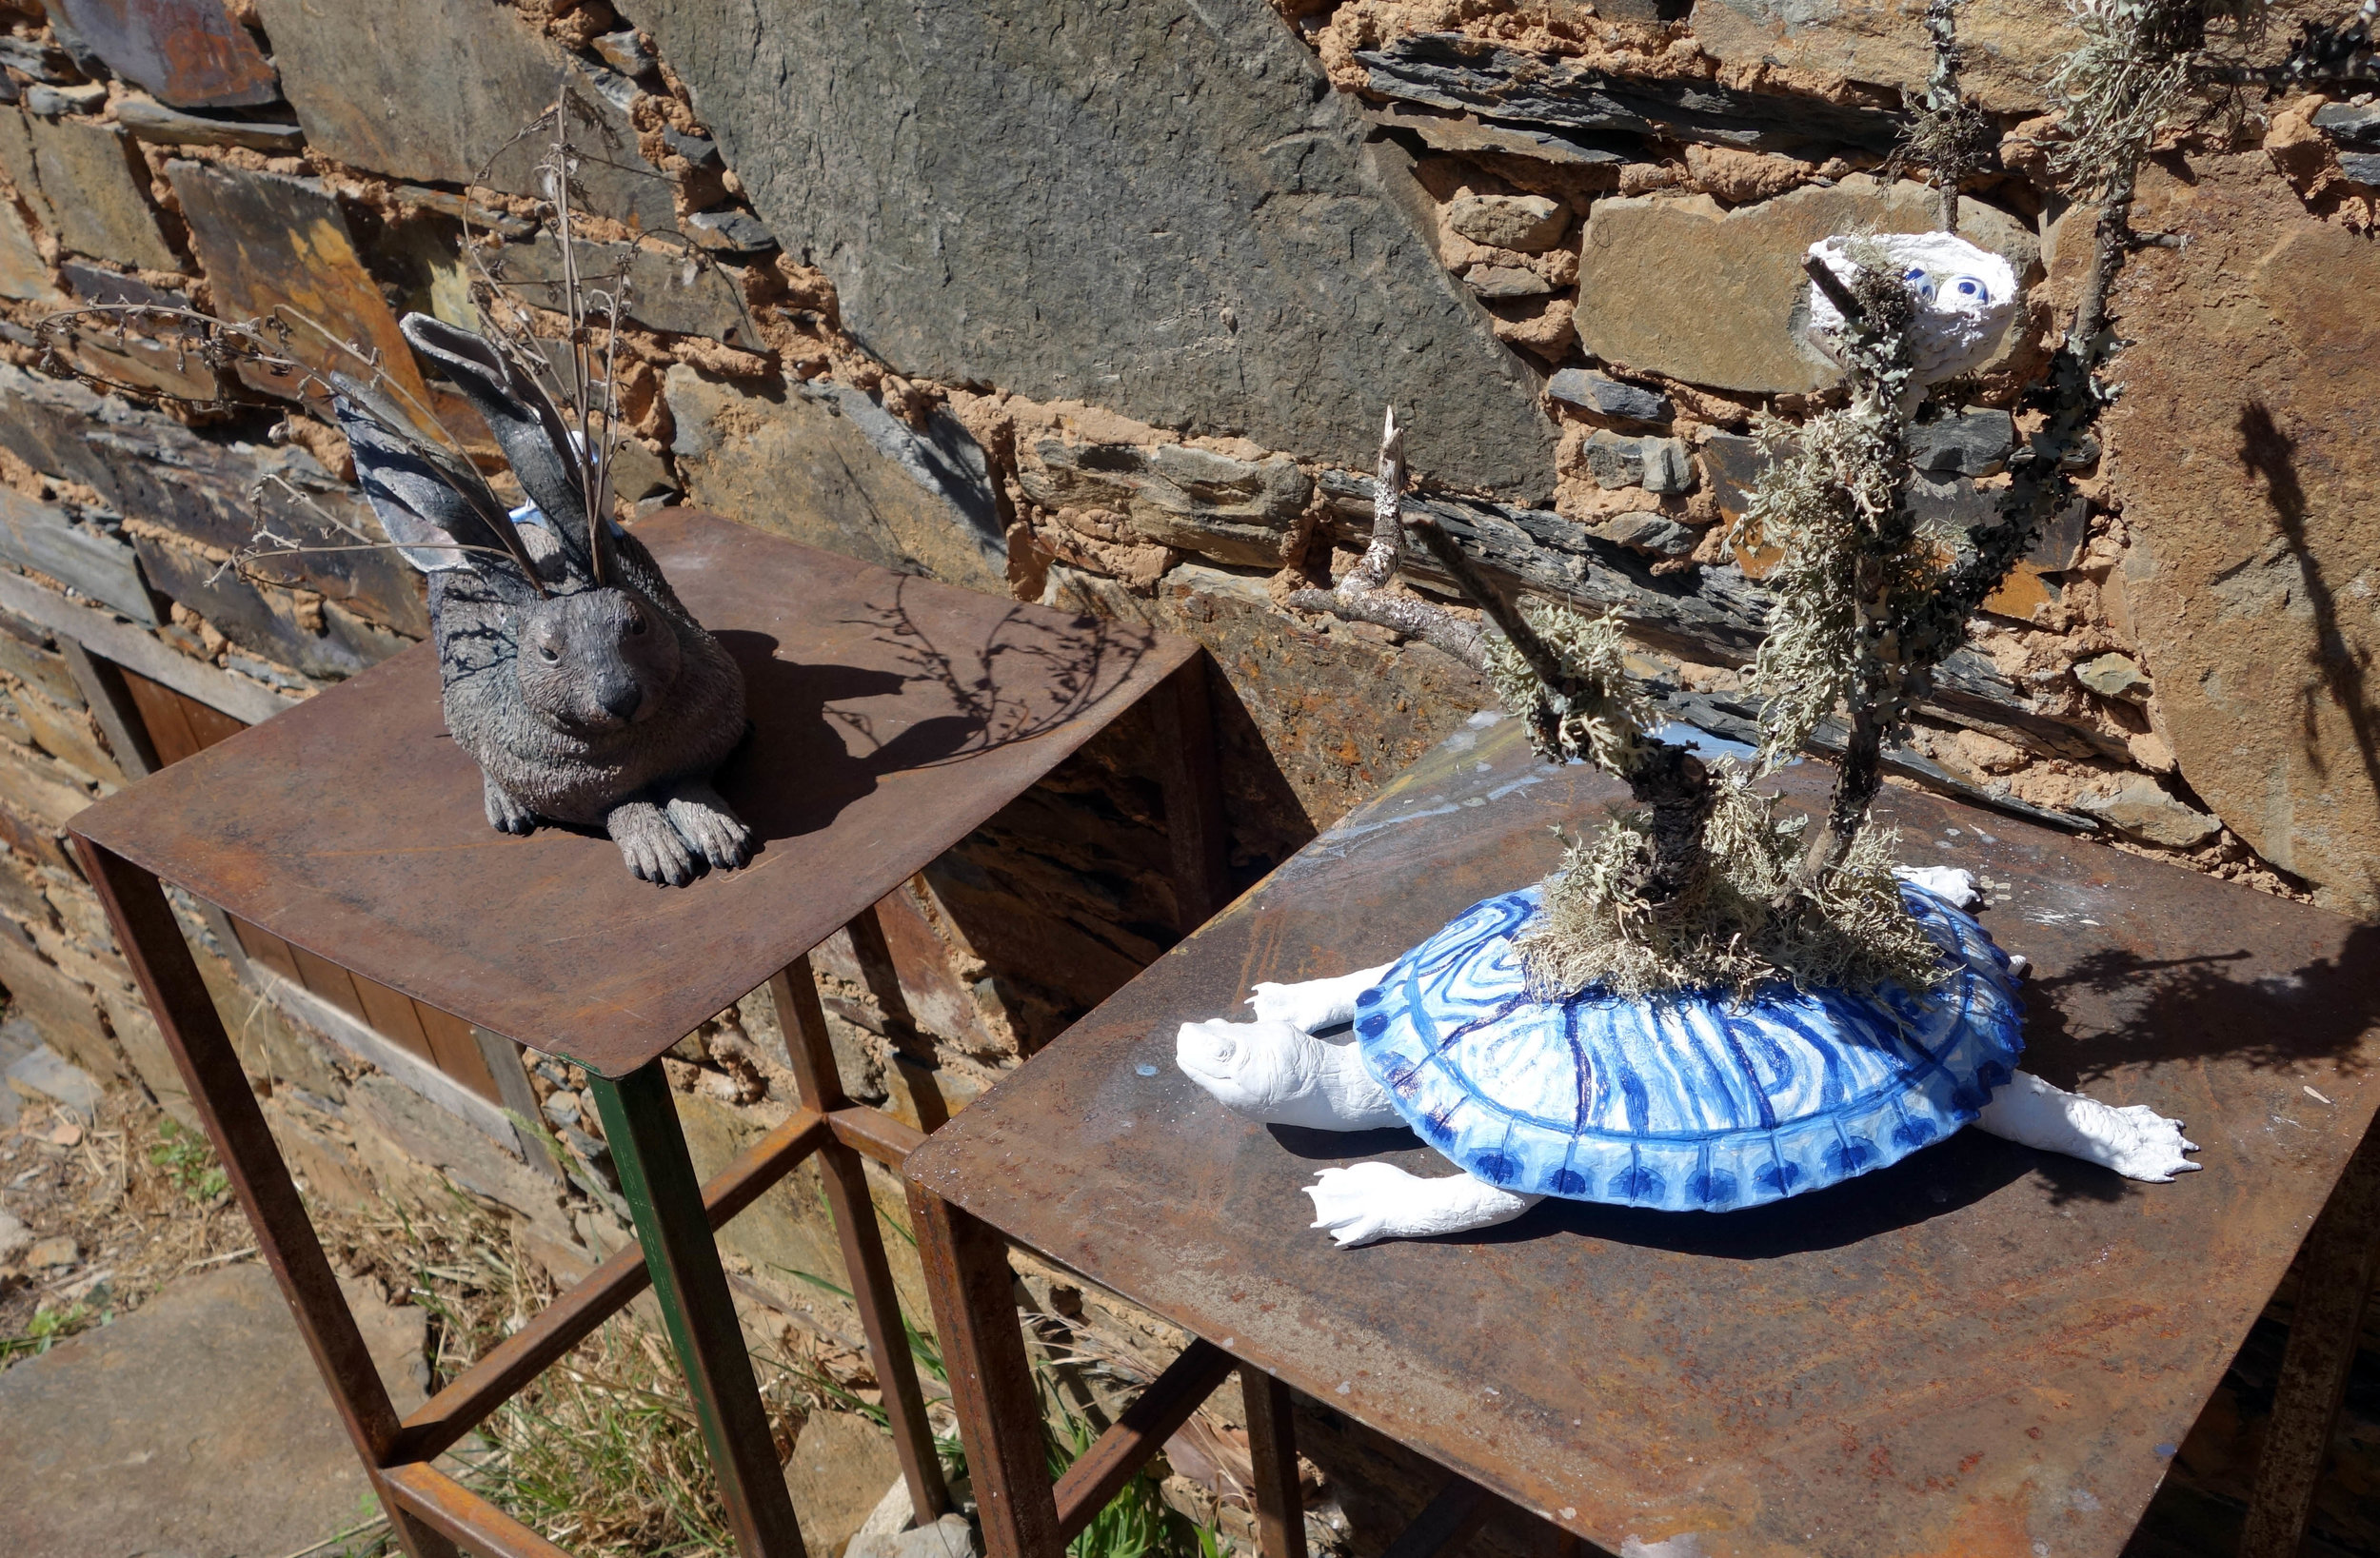
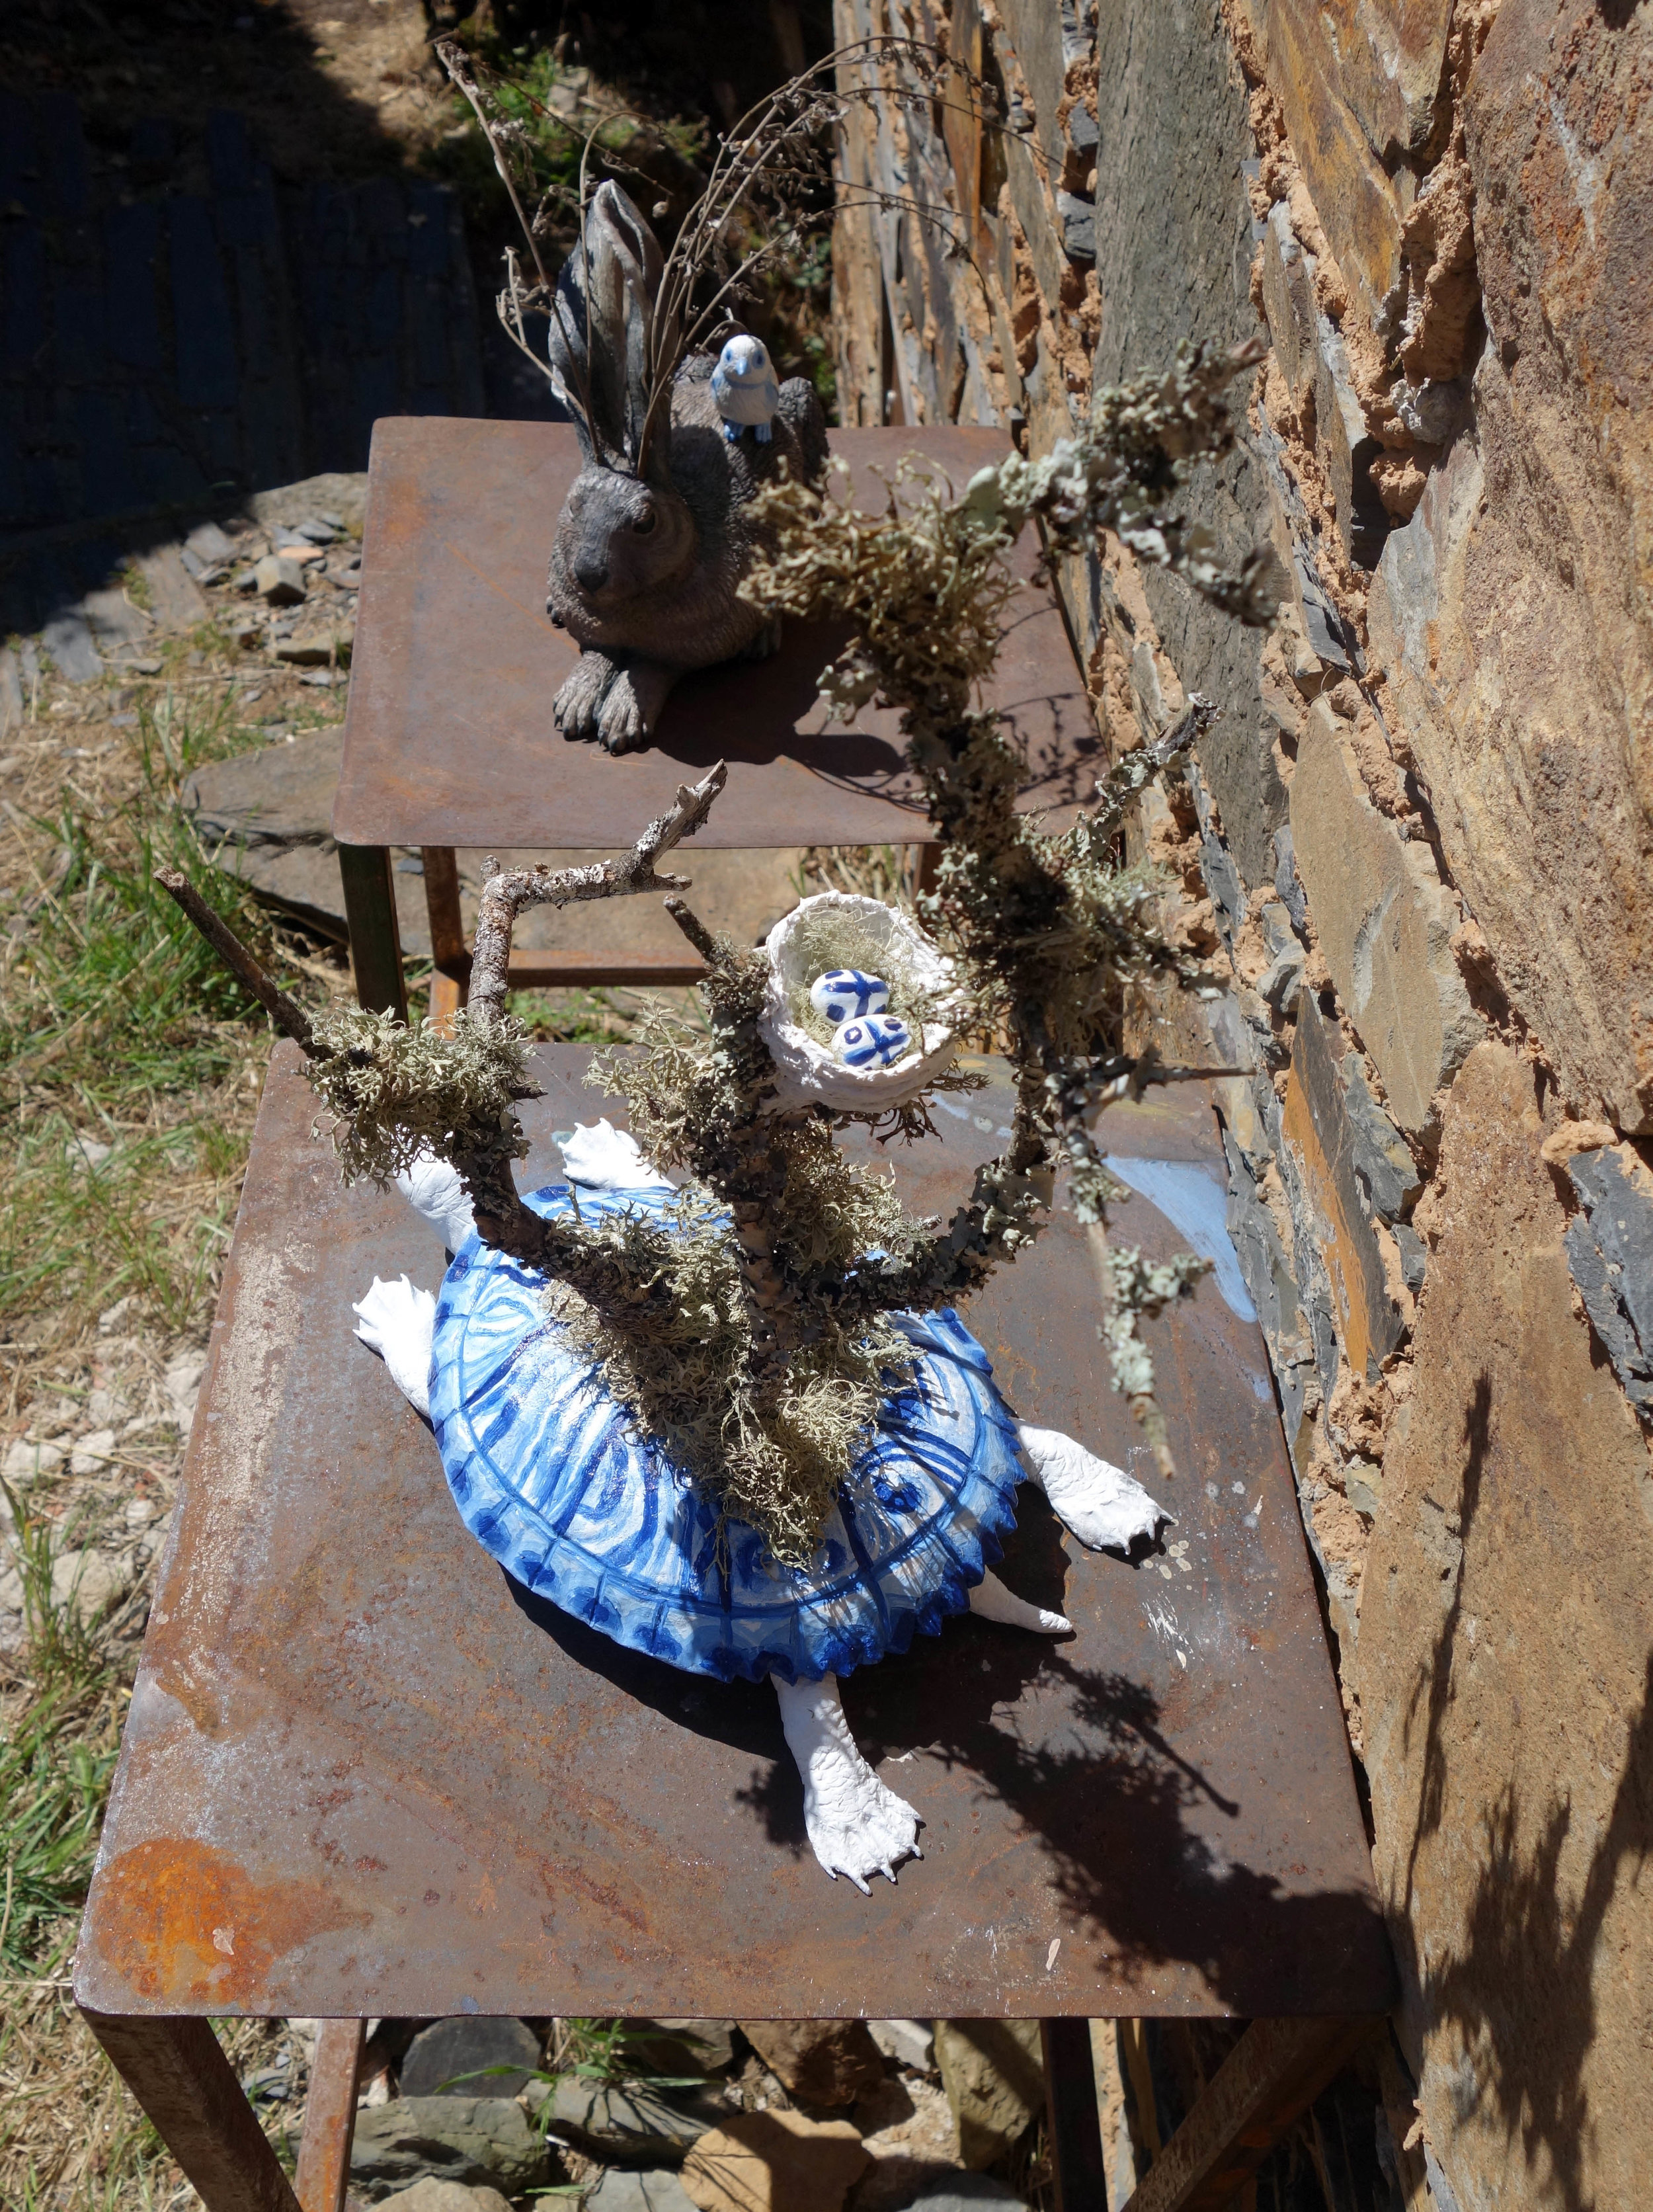
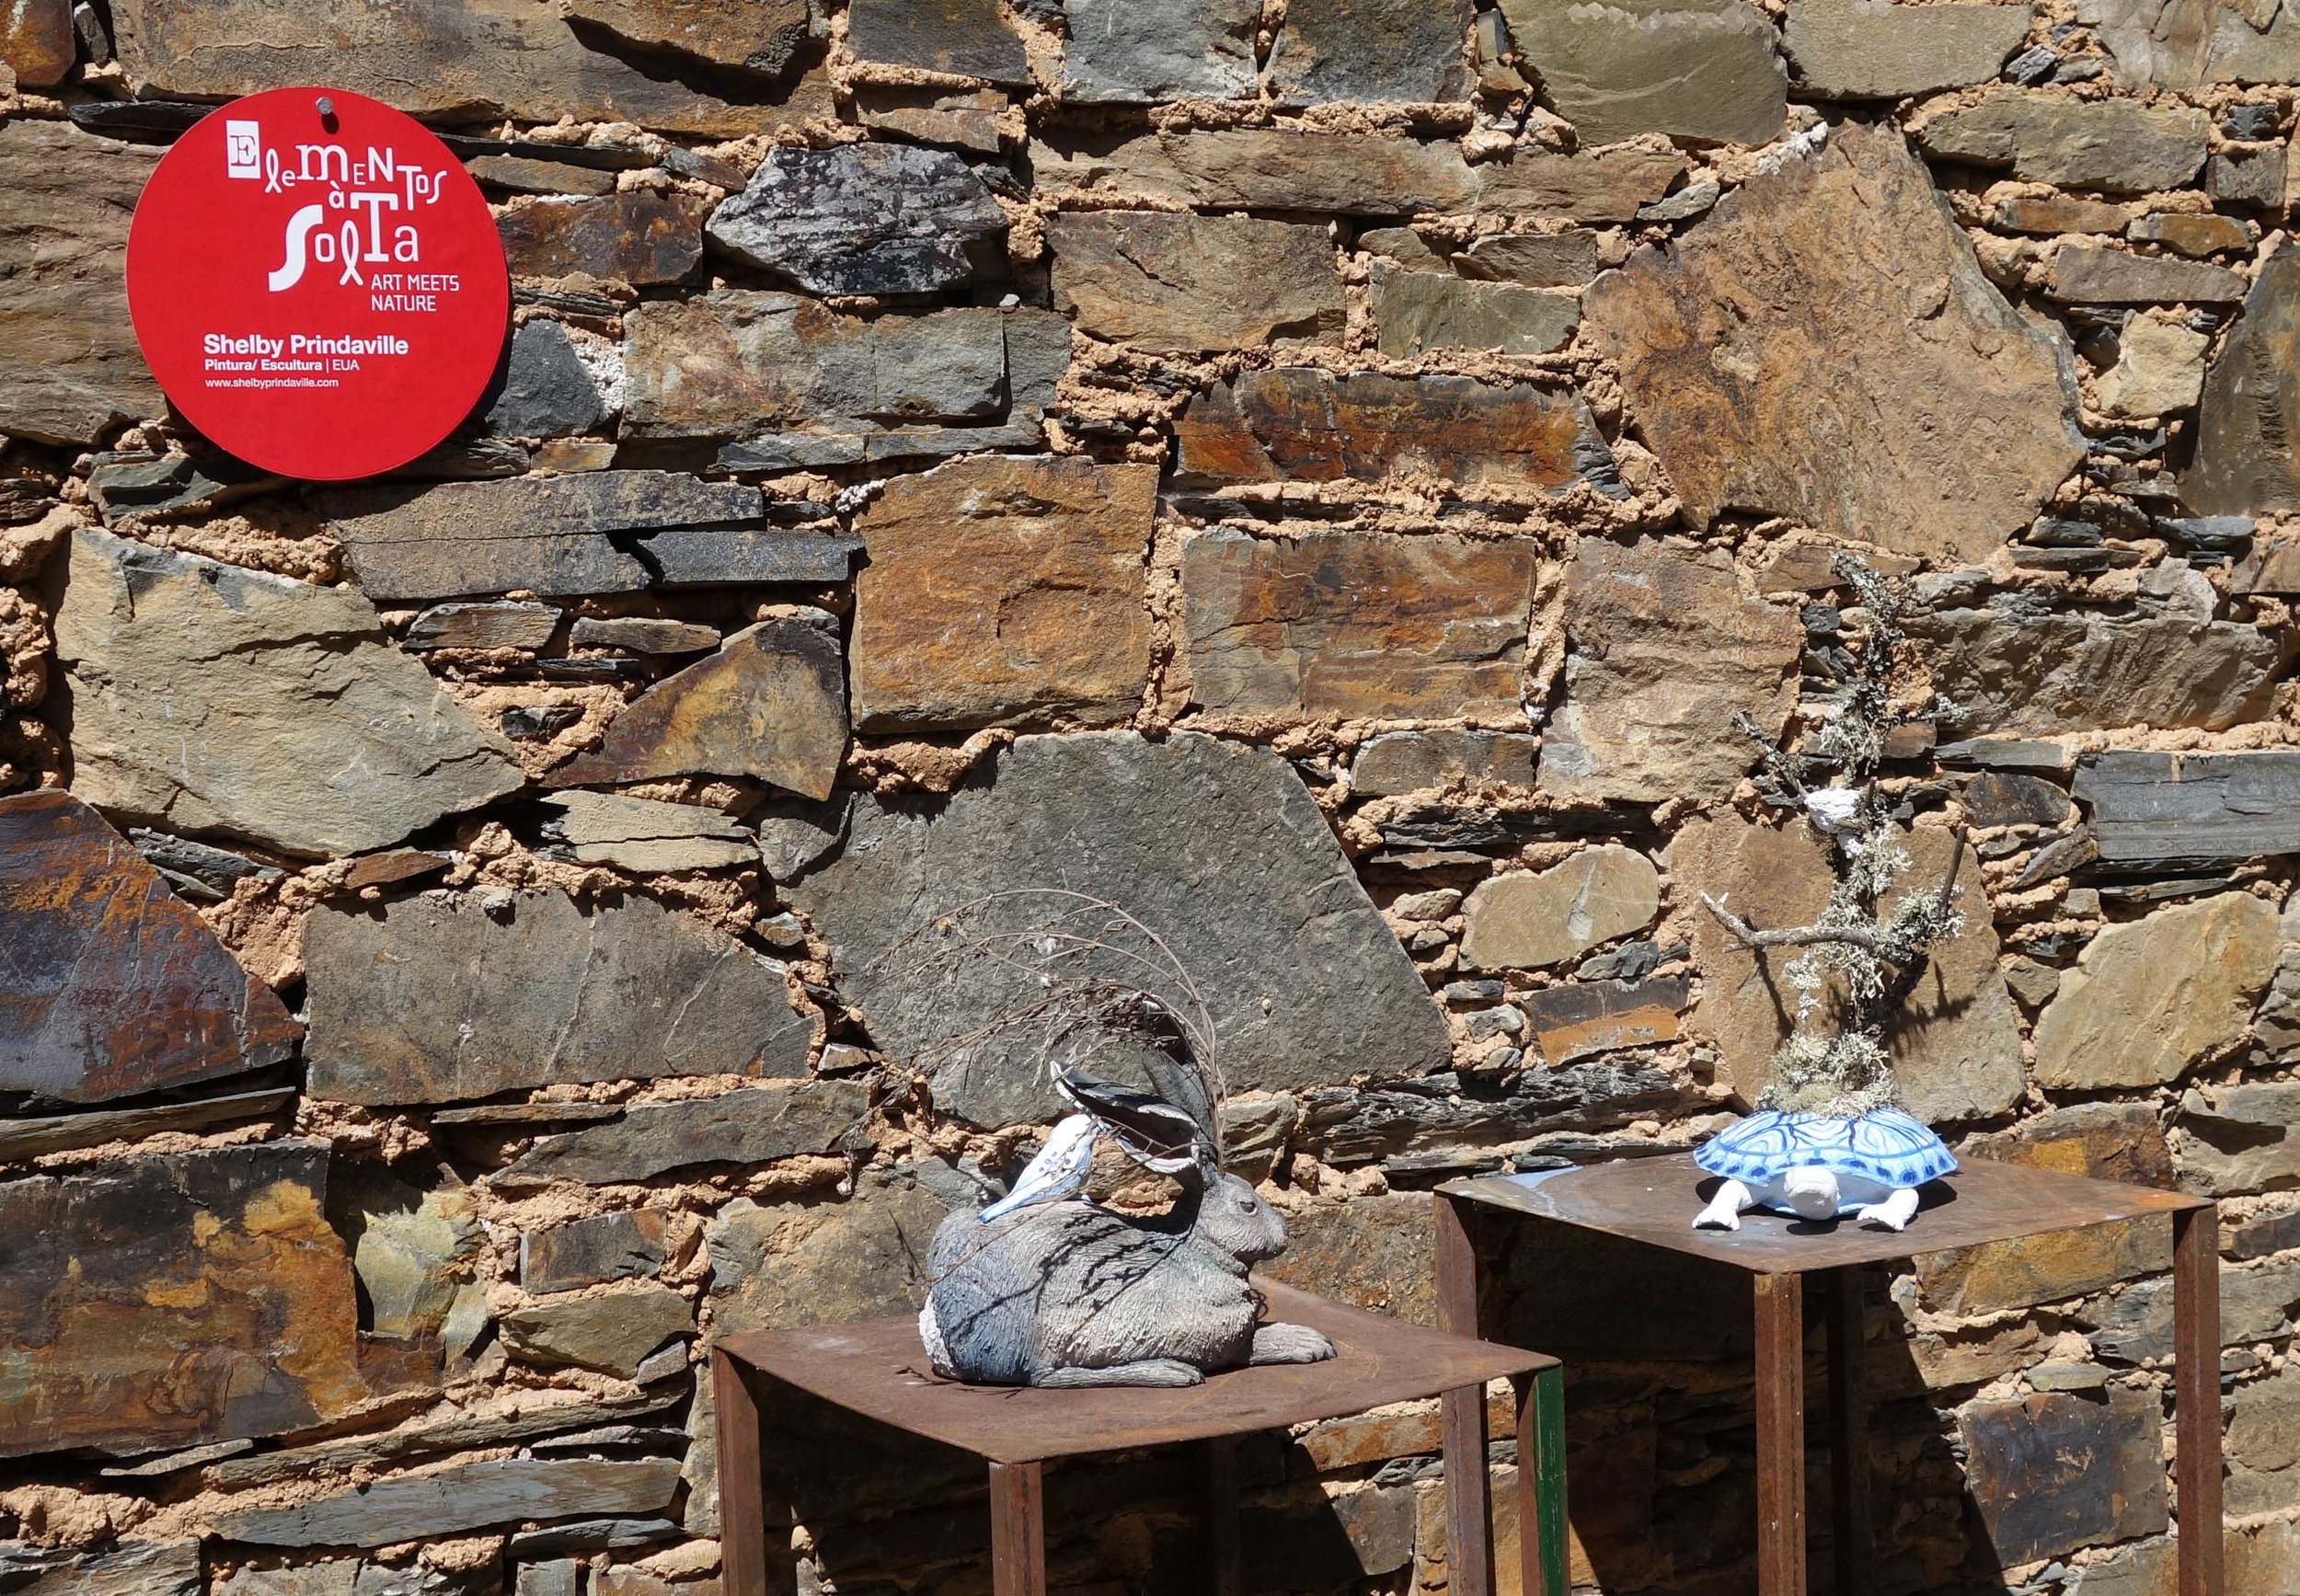
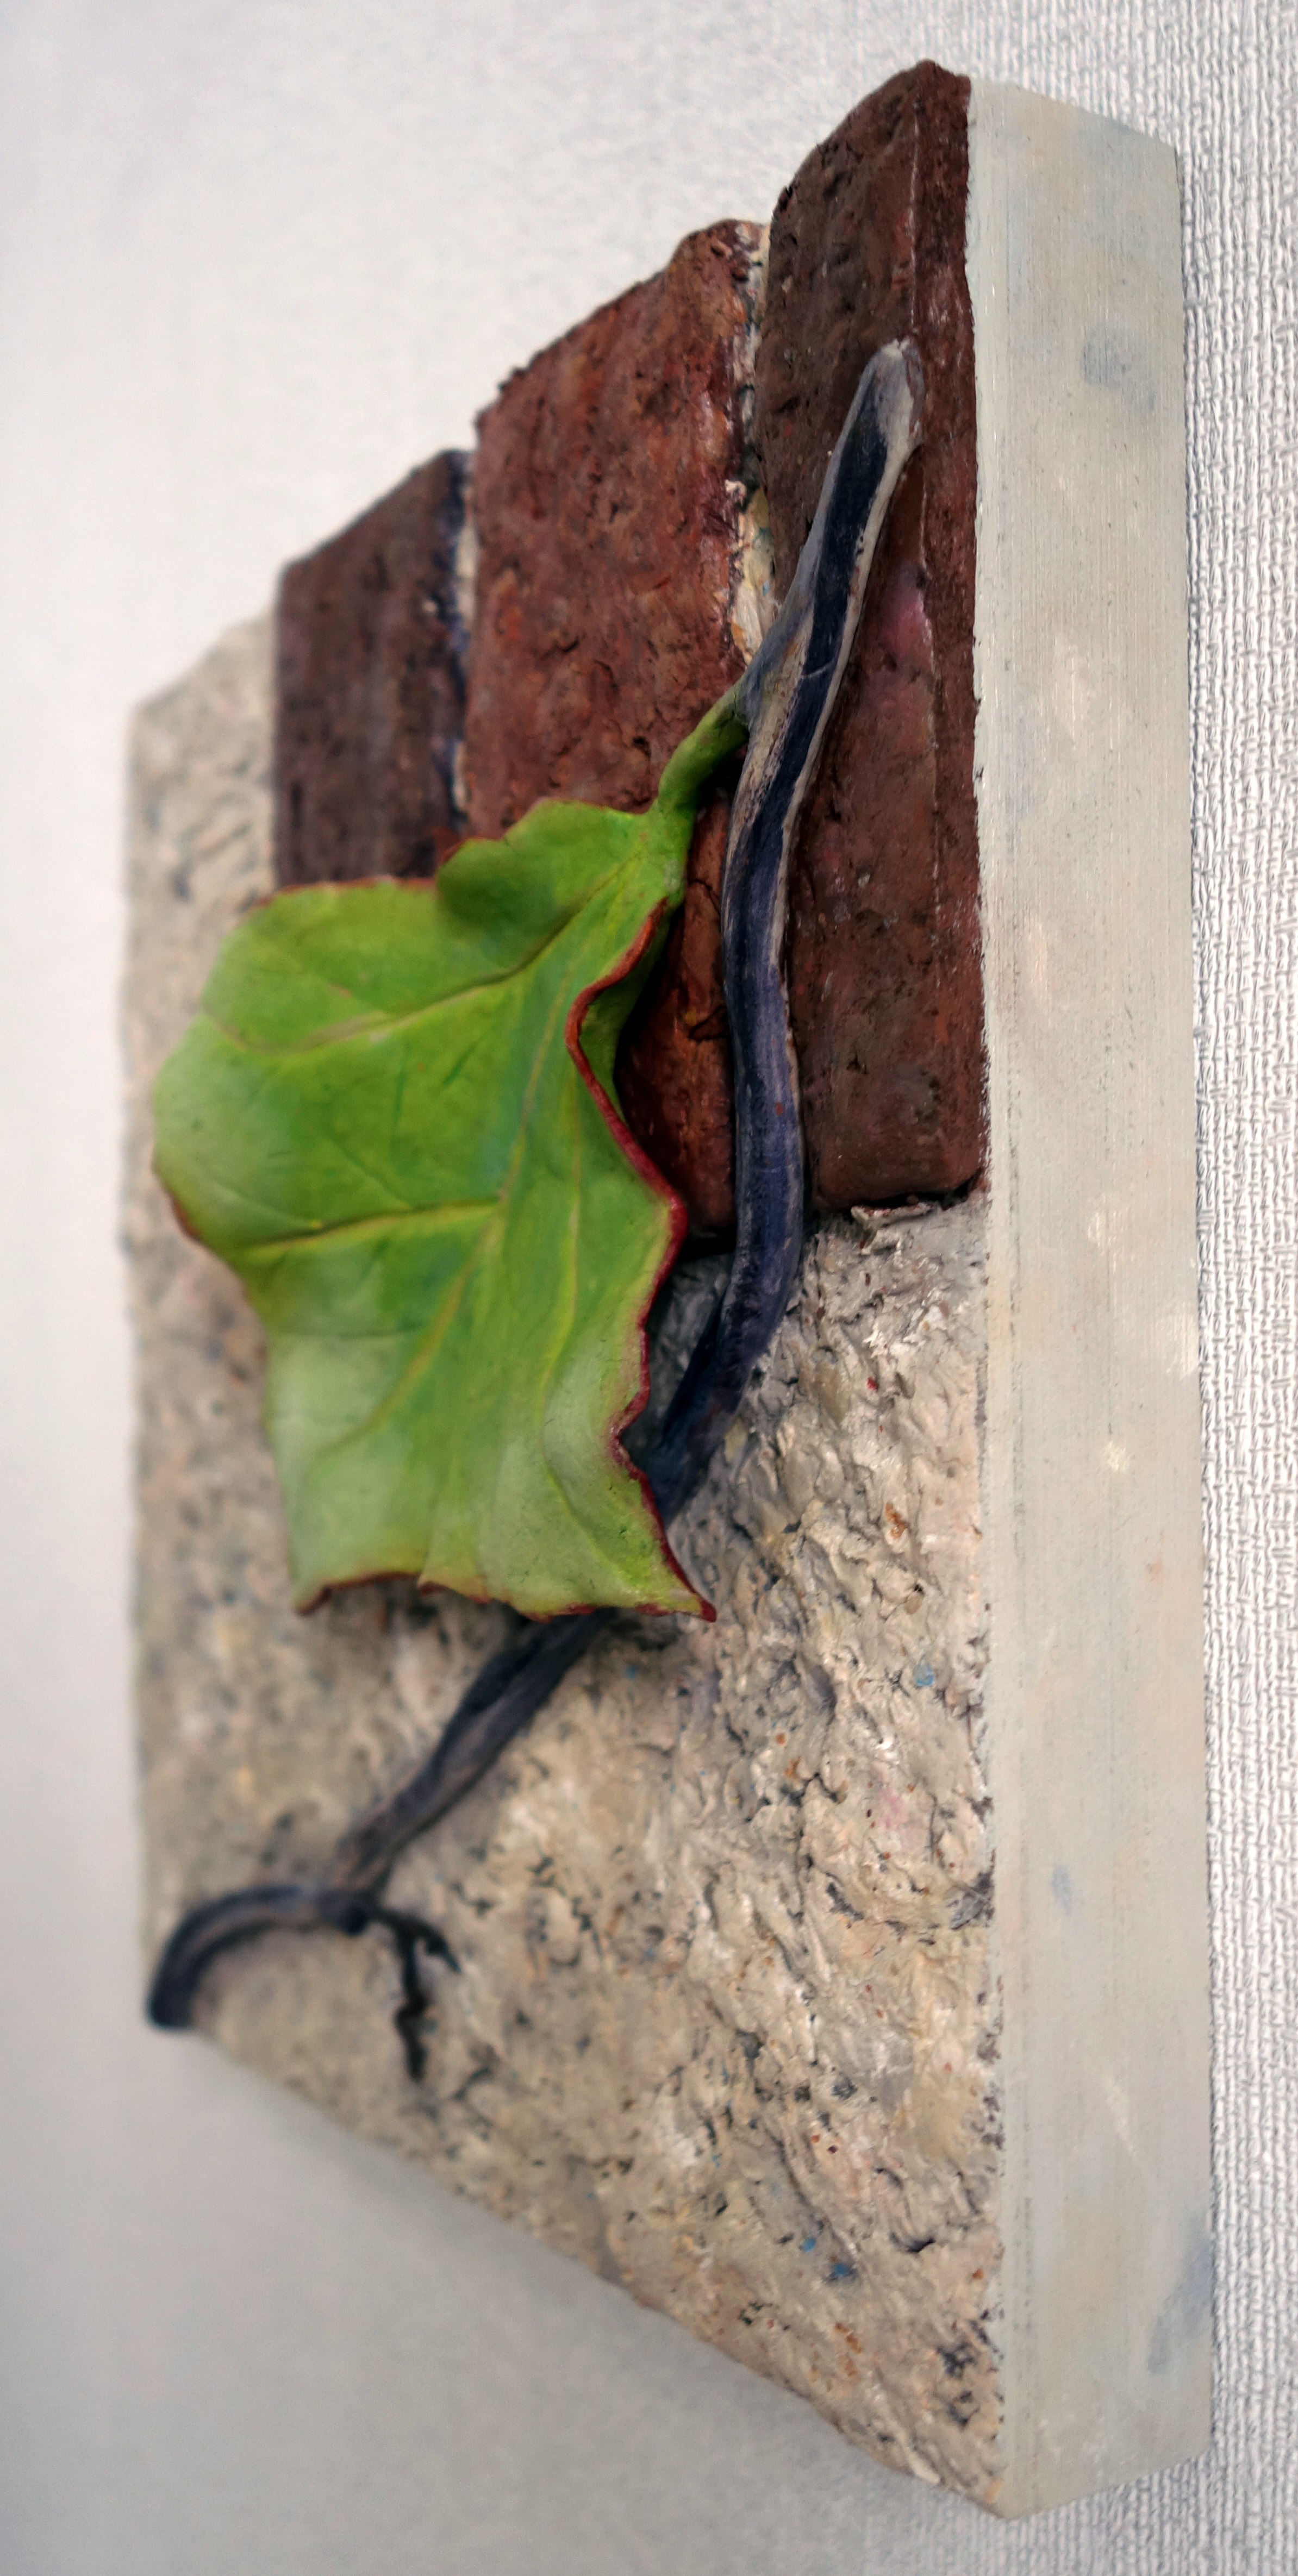
When I skyped with Juan about coming here, he mentioned that some of my work that interests him the most are my interactive plant pedestals.  I really enjoyed making those, but I made those in graduate school - a period in which I spent almost all my time making artwork and had access to a large woodshop and other facilities as well.  Now that I teach and often only really produce work during the summers and while on residency, it's much simpler to create more transportable (and easily exhibitable, which is a bonus) two-dimensional work.  I've started to push back at that limitation already - my pieces that I made in France are so delicate that showing anywhere other than locally is pretty difficult, and the sculptures I made earlier this summer in Portugal are even more fragile due to the found branches and lichens I used.  I decided I'd take Juan up on the challenge to create some new interactive plant pieces, and began brainstorming even before leaving for Europe.  

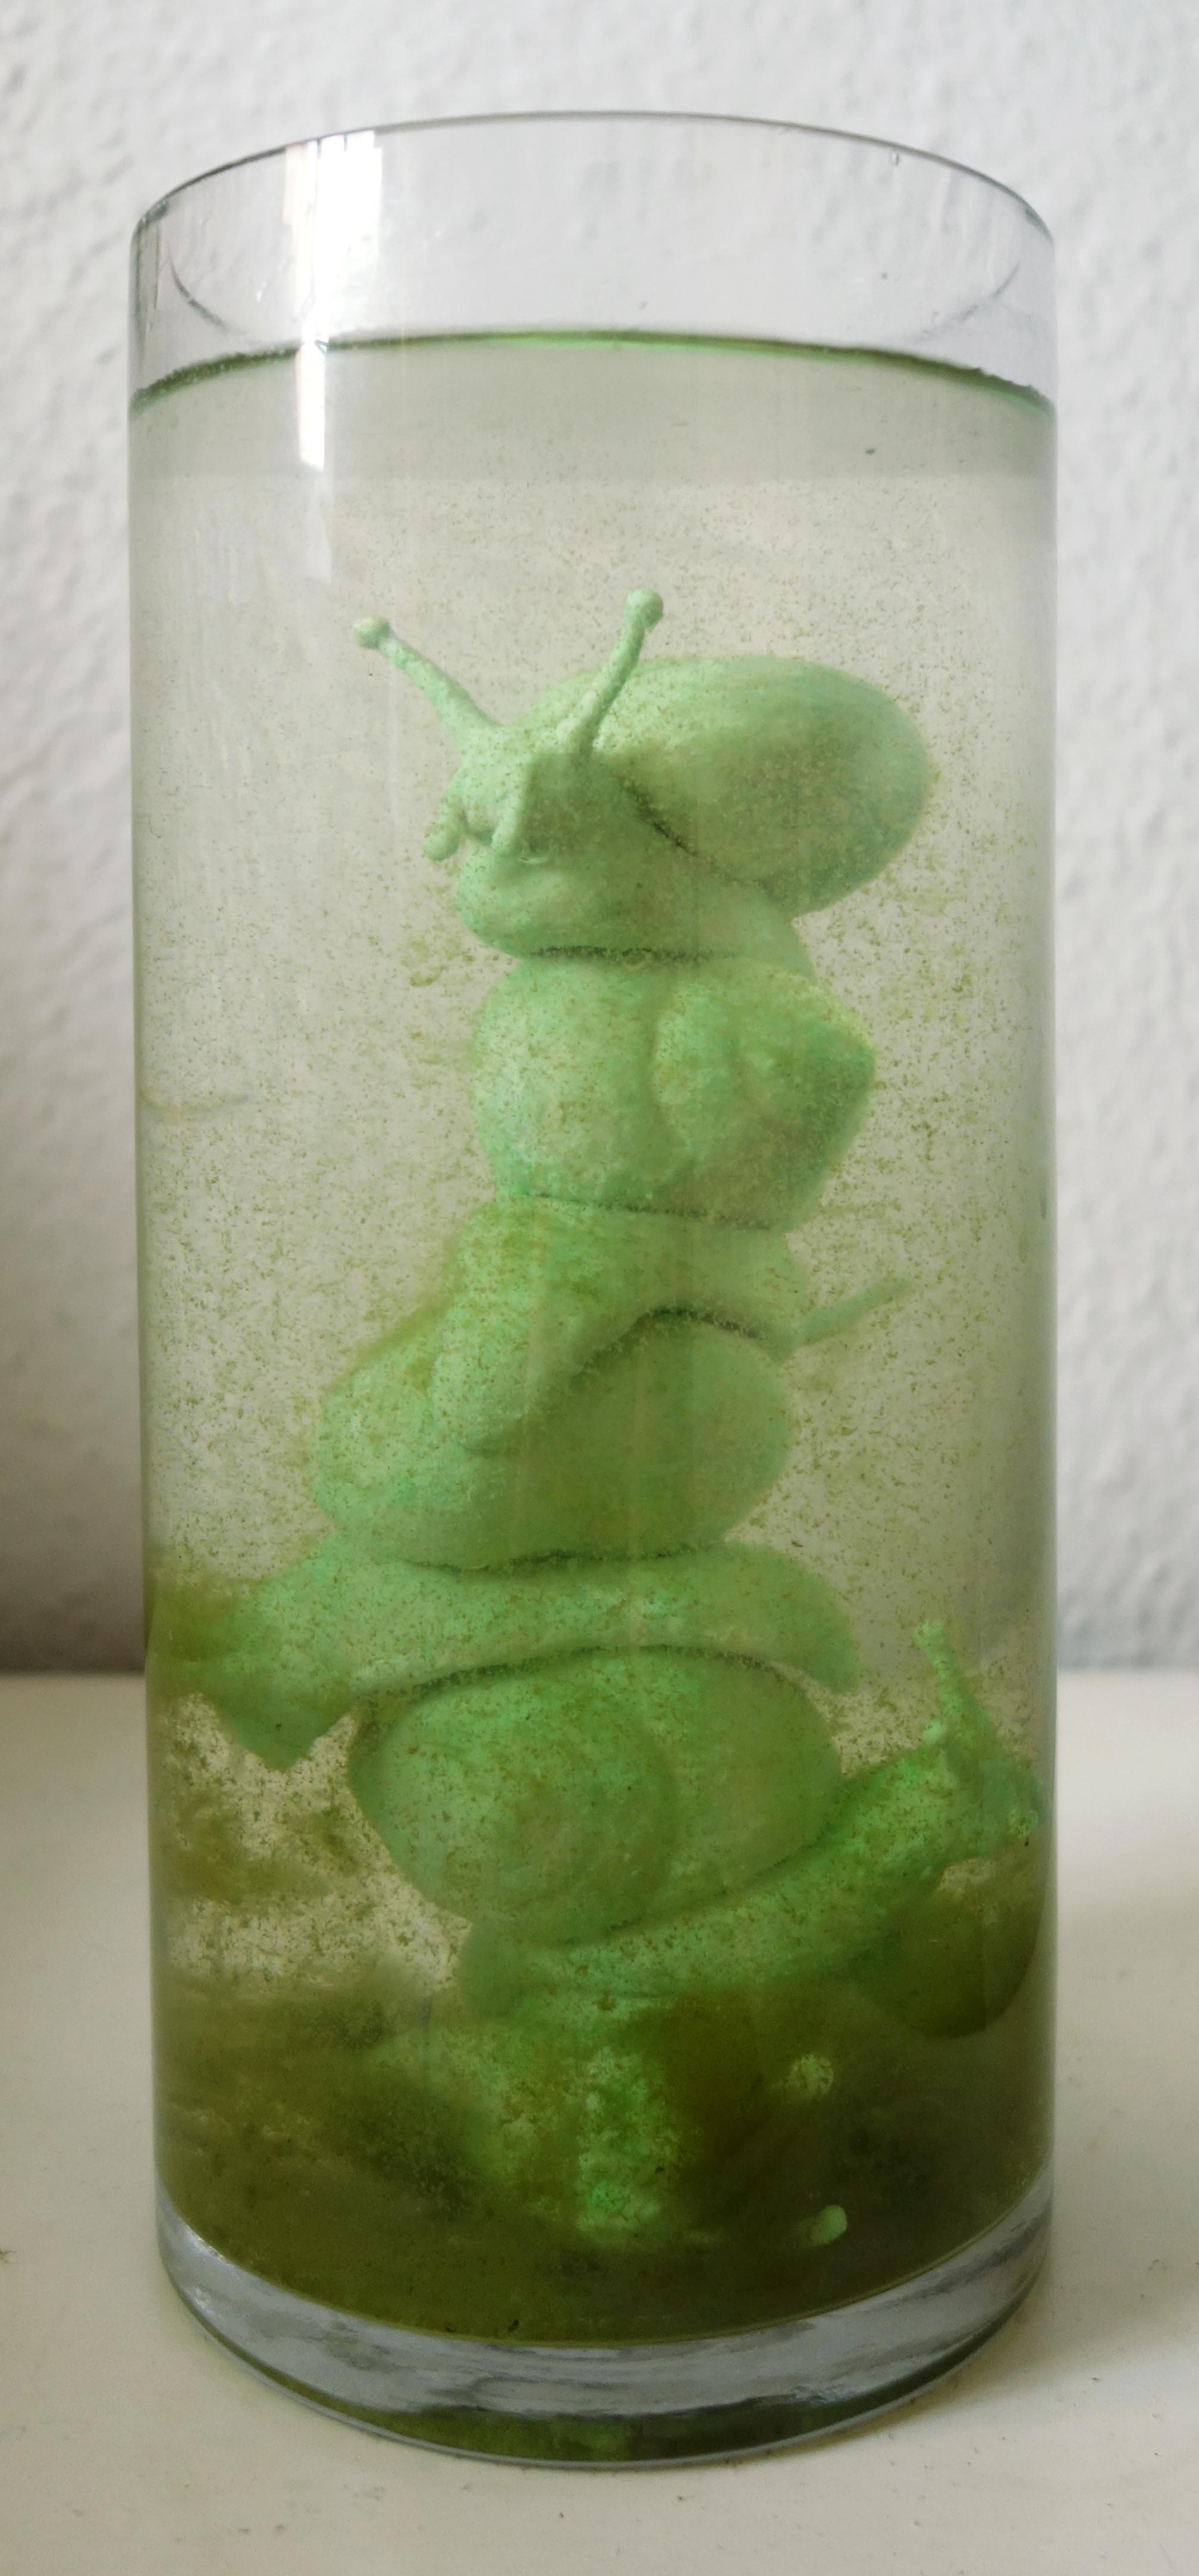
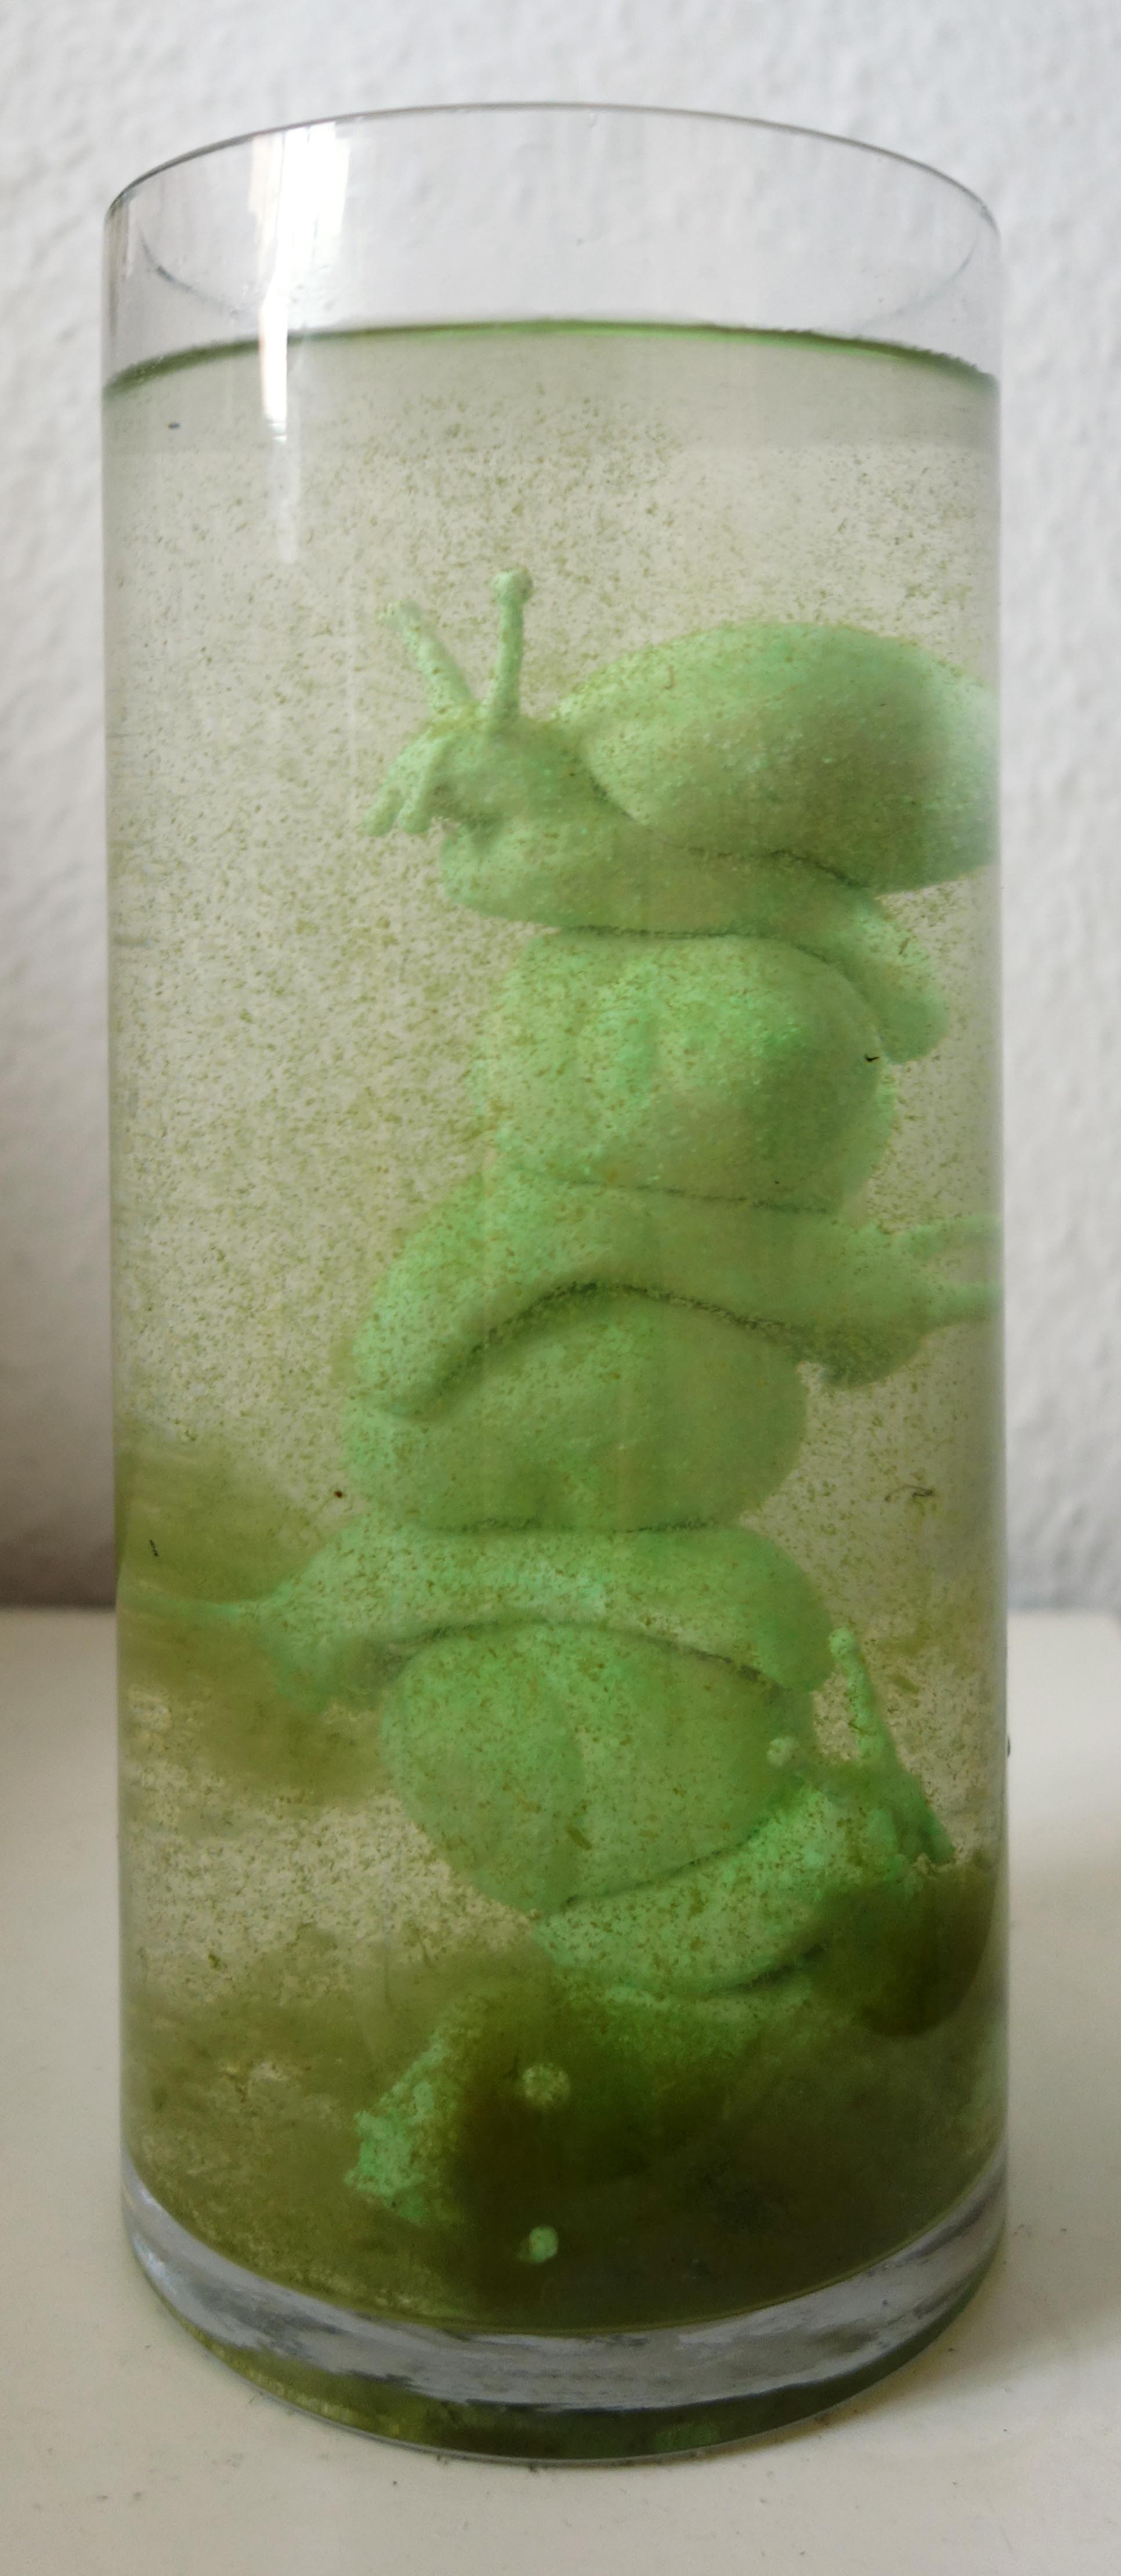
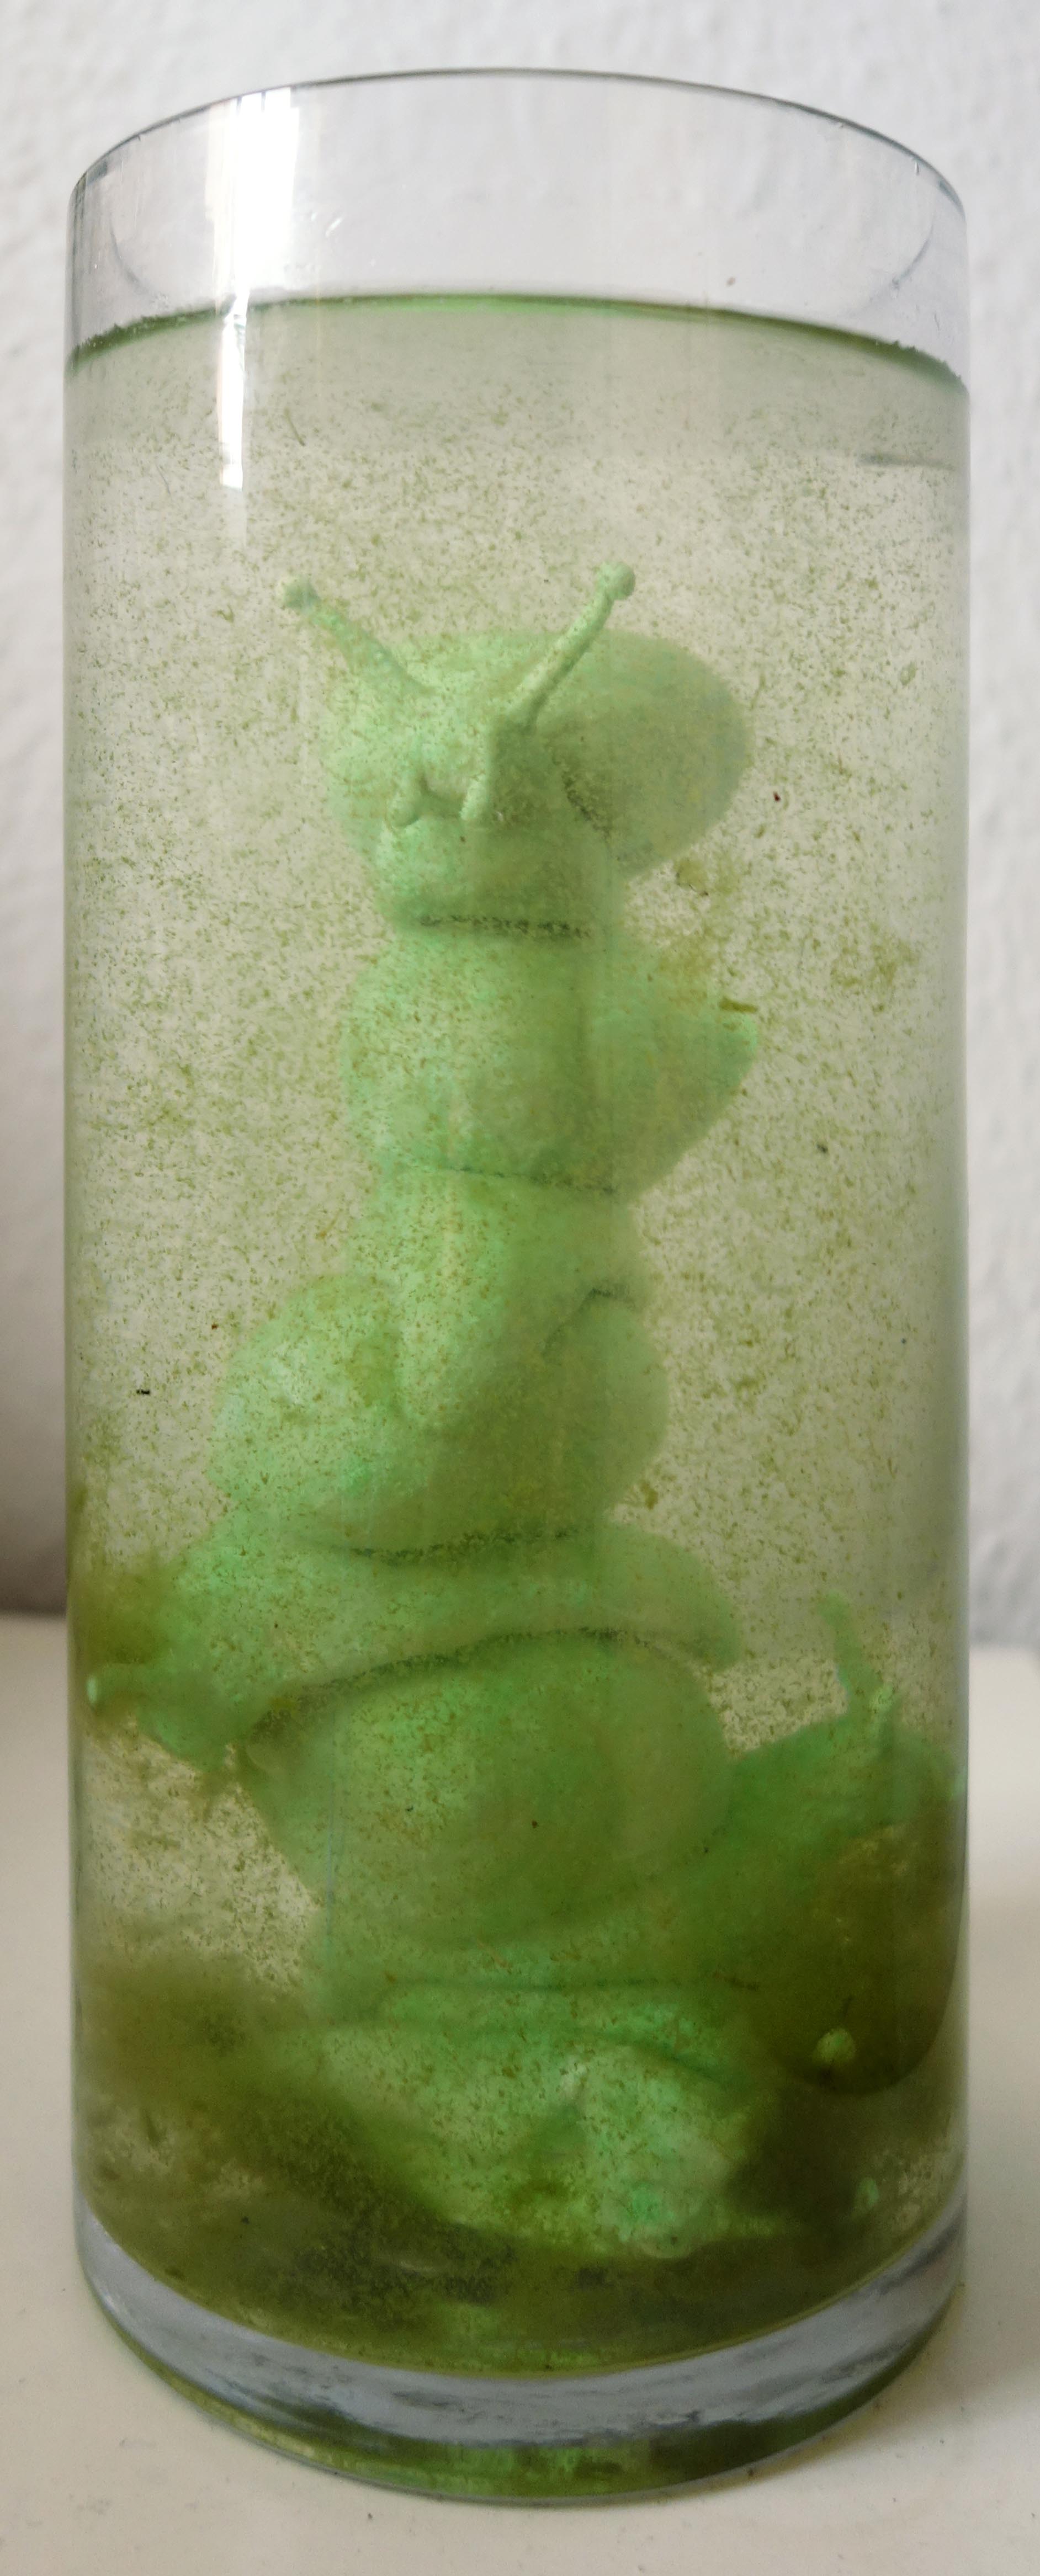
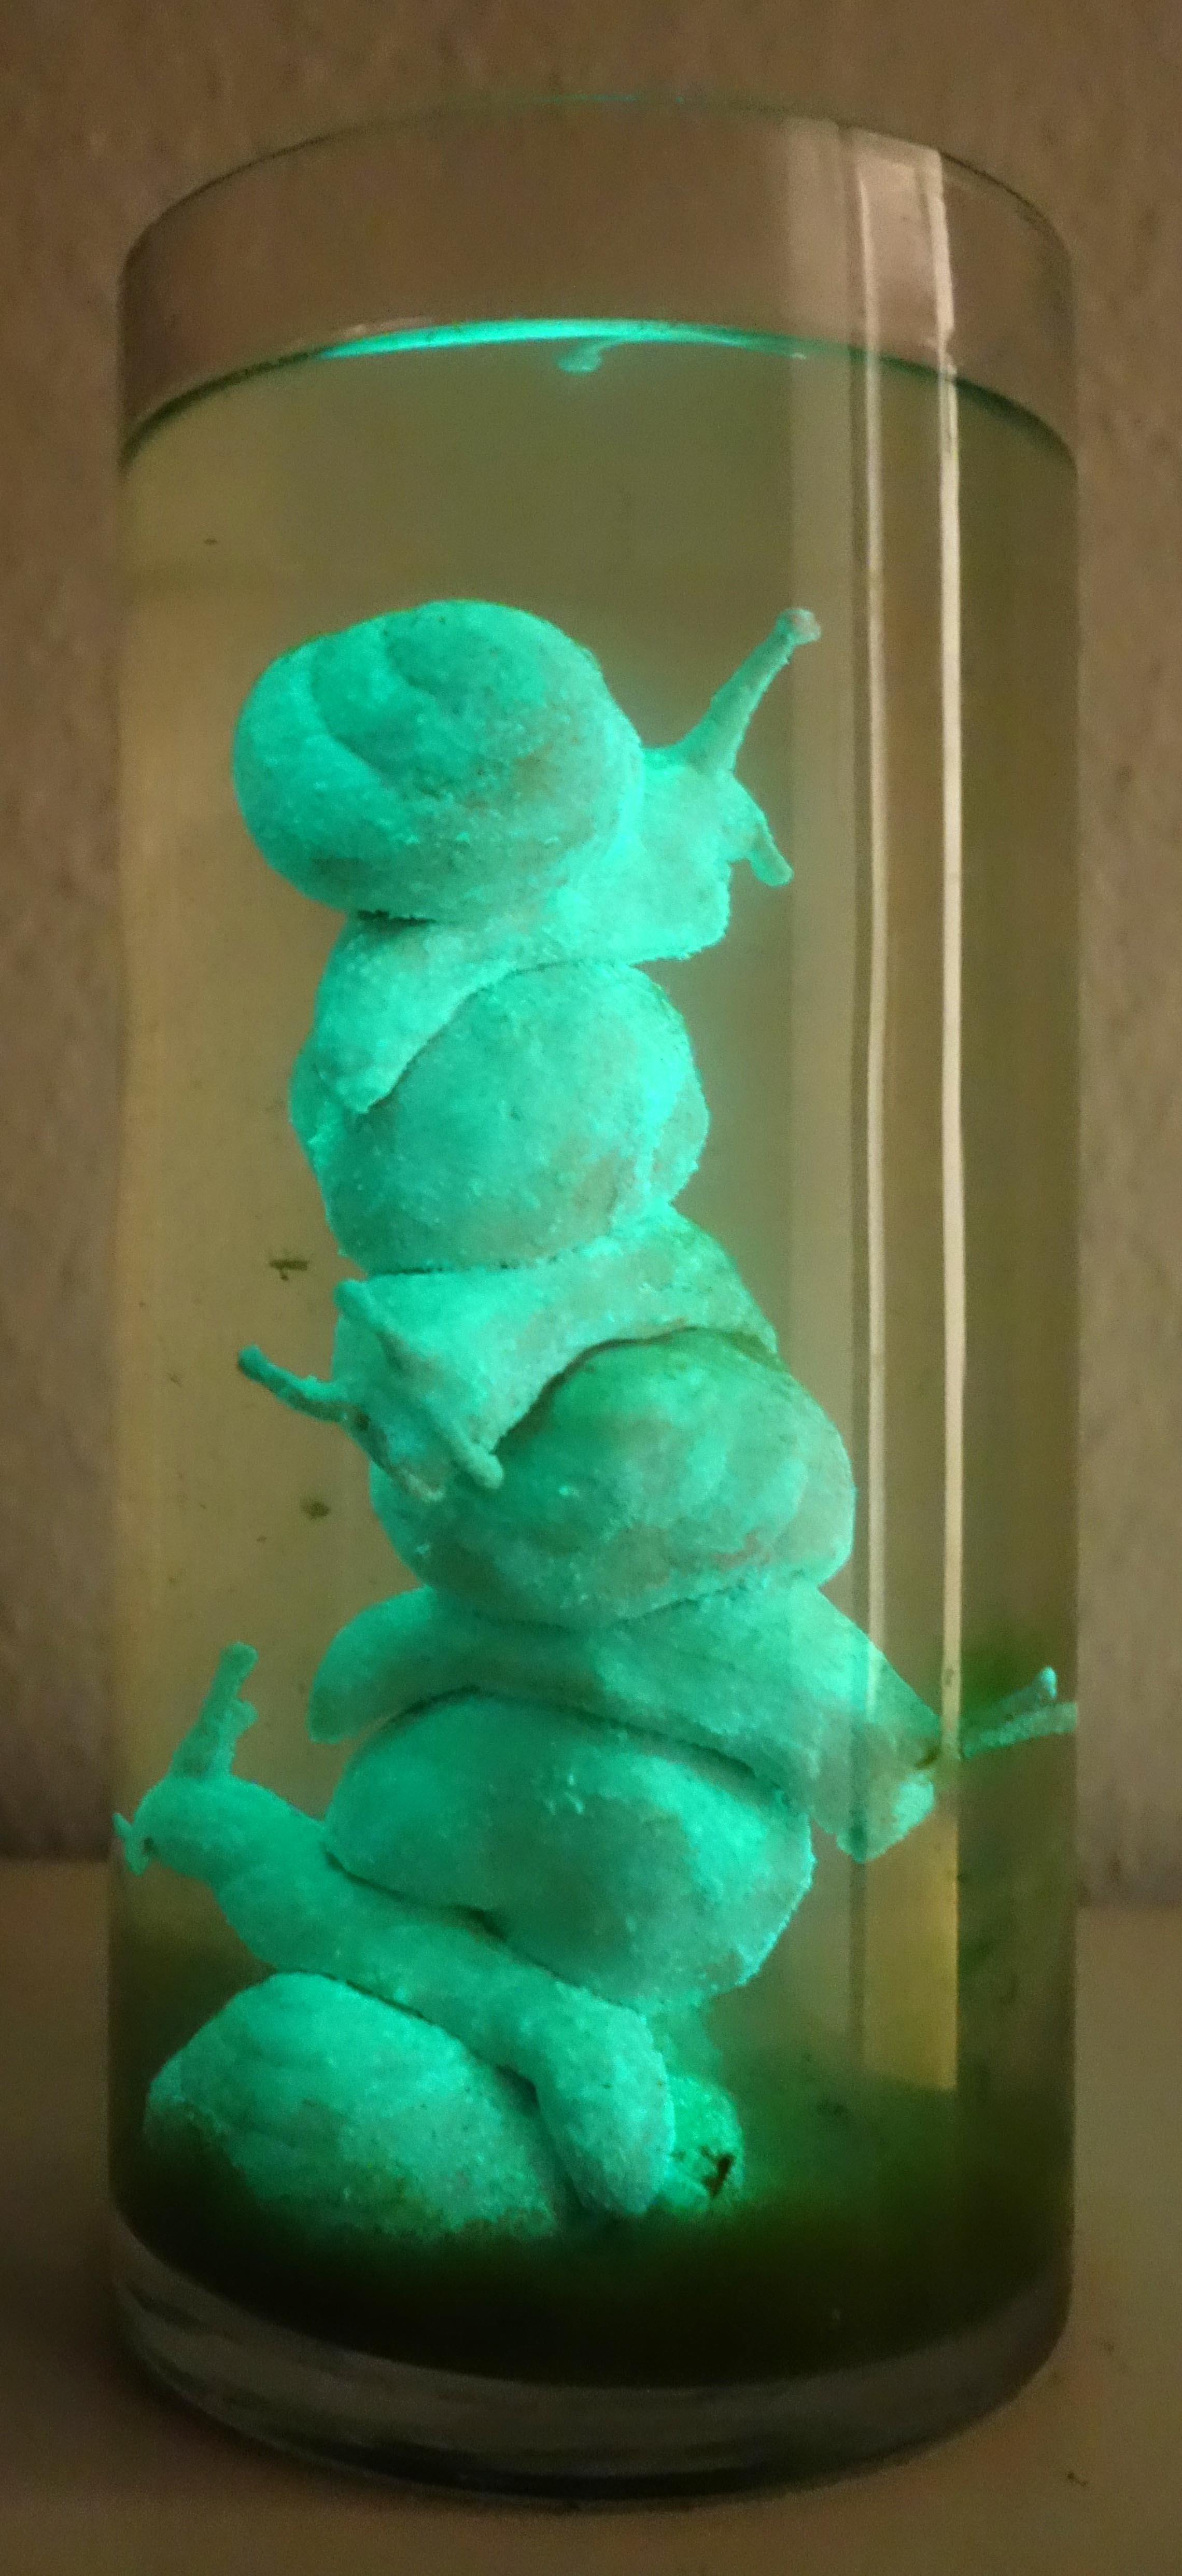
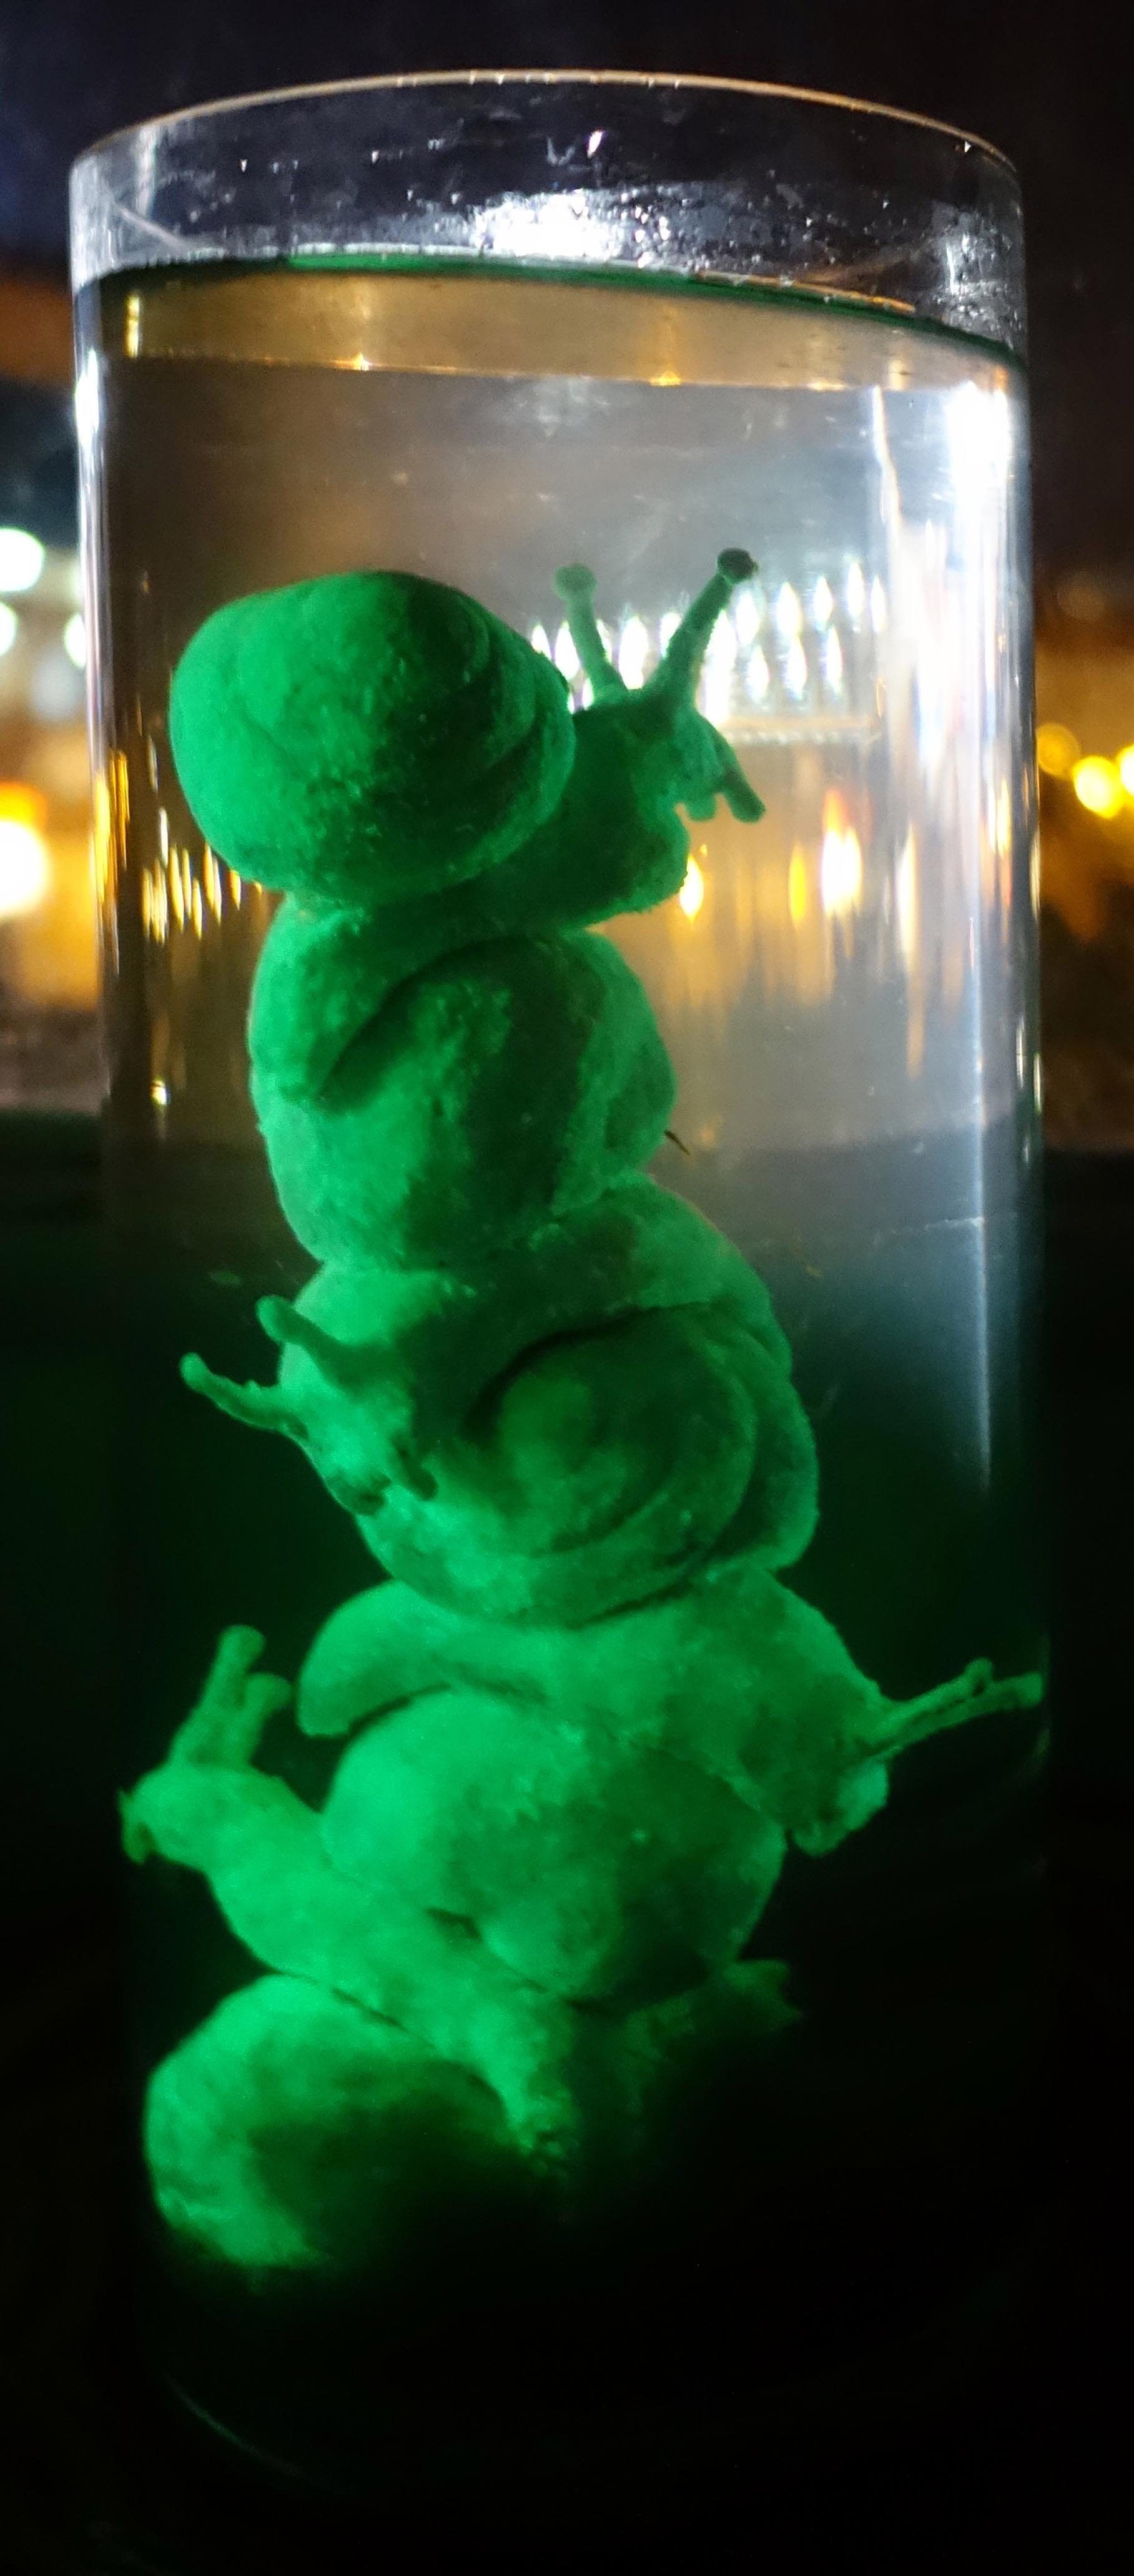
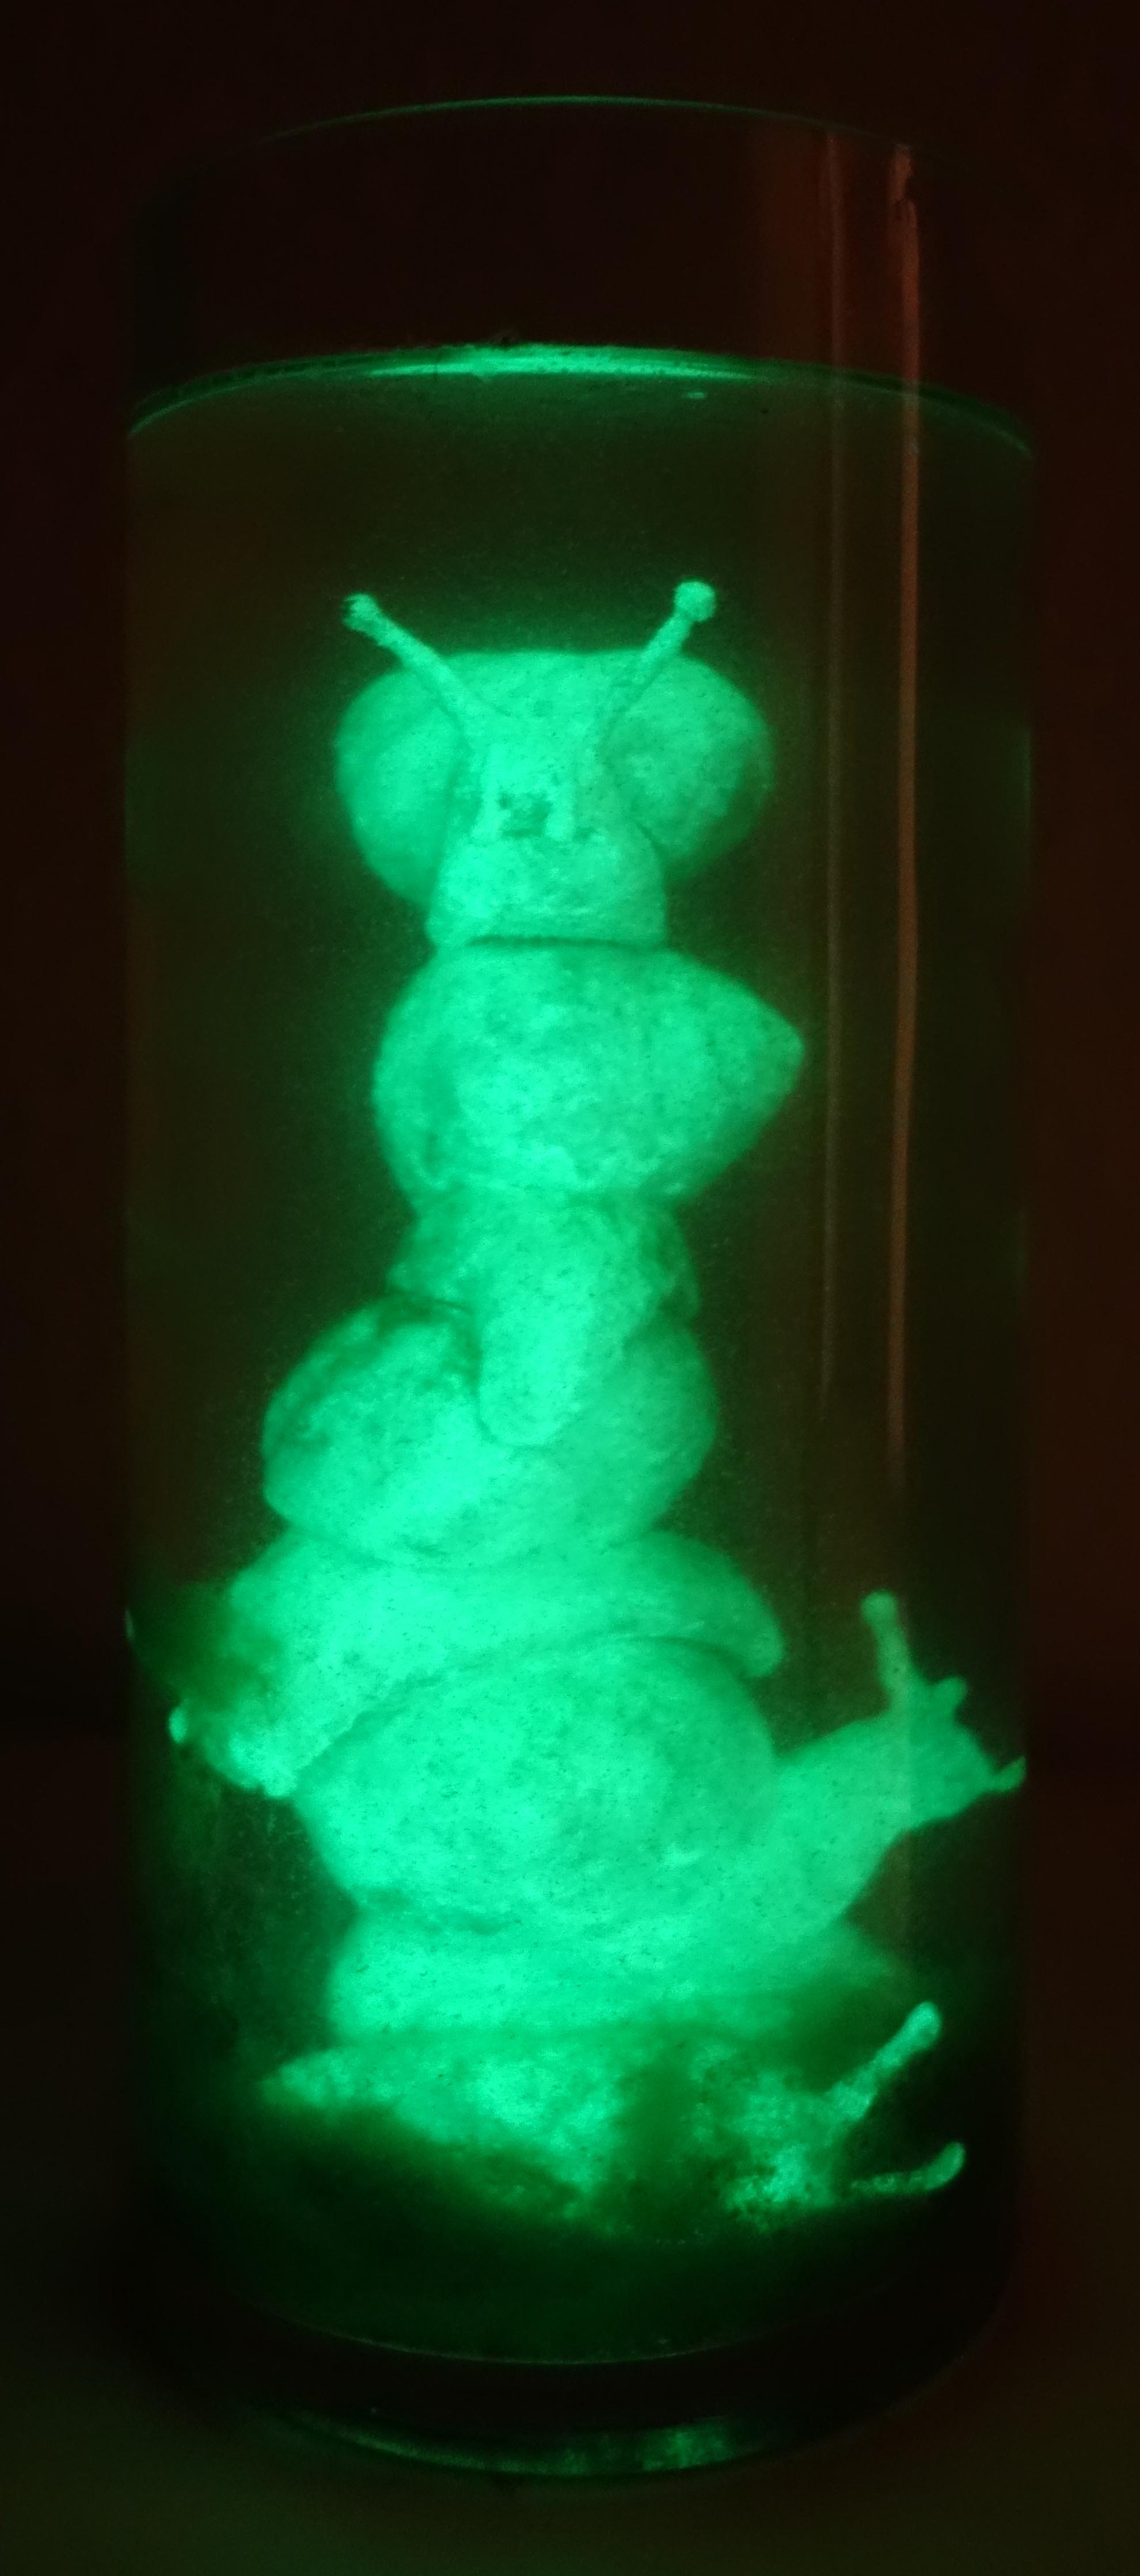
The clay I helped Dr. John Pojman create, 3P QuickCure Clay, is waterproof, and that's an angle I've been wanting to explore for a while.  I decided I'd like to create a sculpture that I'd then house in a glass container underwater, and as algae grew in the container, as algae tends to do when provided with water and sunlight, the sculpture would become partially or totally obscured - except I would coat the sculpture in a glow-in-the-dark powder and provide viewers with a black light to set the sculpture aglow.  Even back in Portugal, I'd briefly toyed with the idea of sculpting Balancing Act (my painting of a tower of snails), but then I thought I'd save it for this project instead.

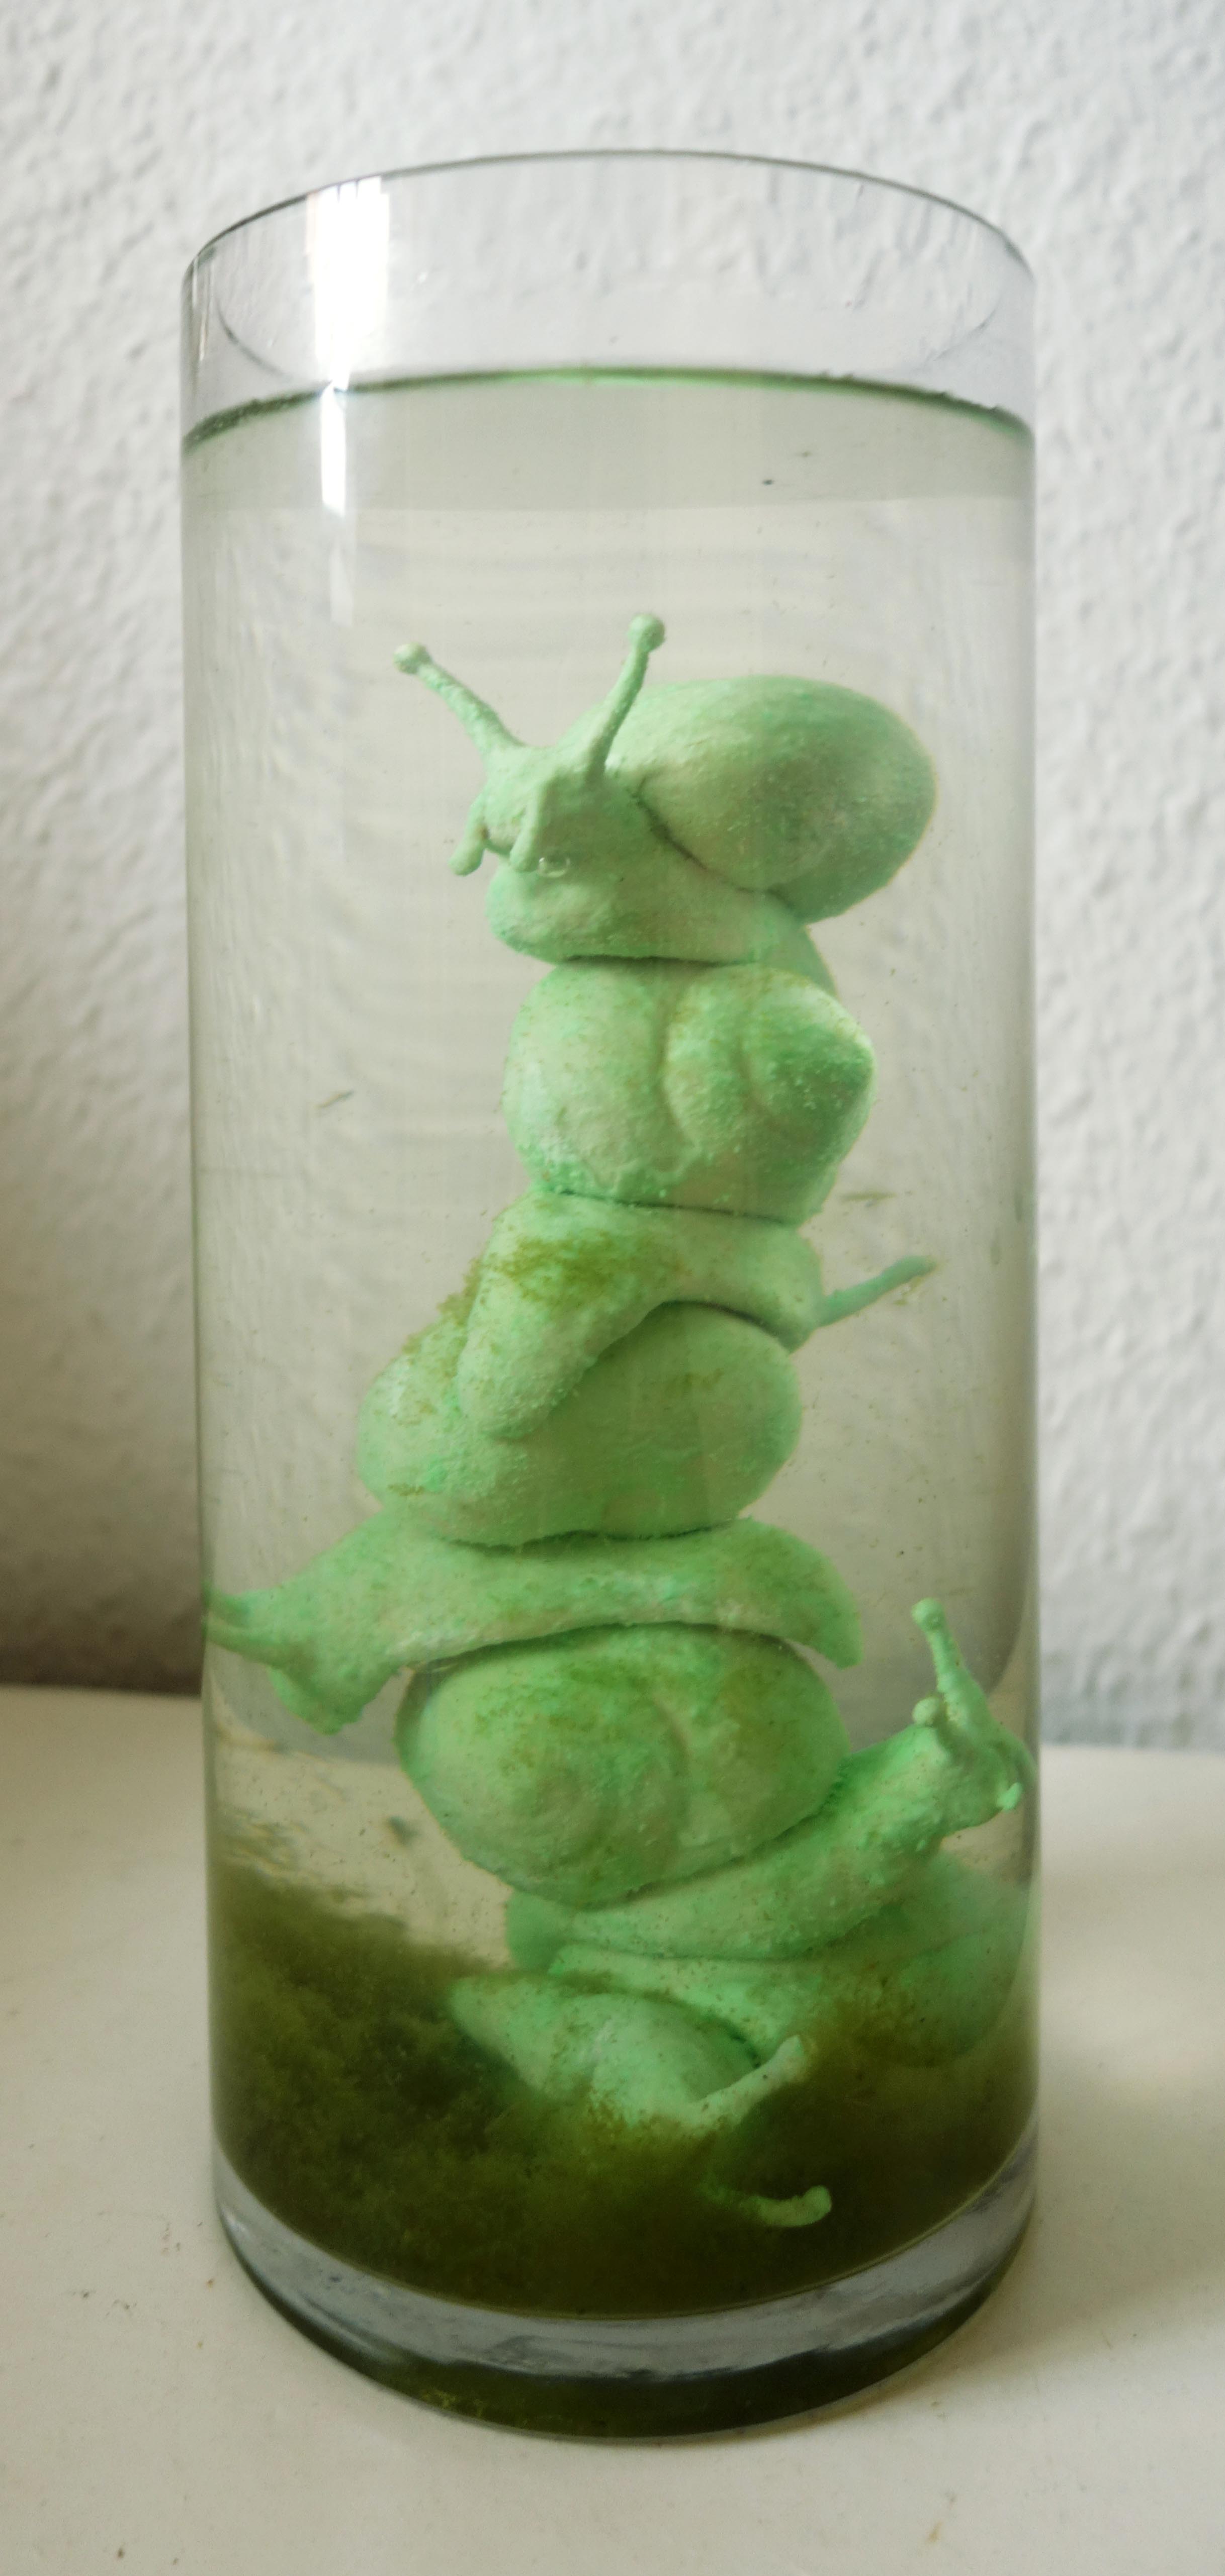
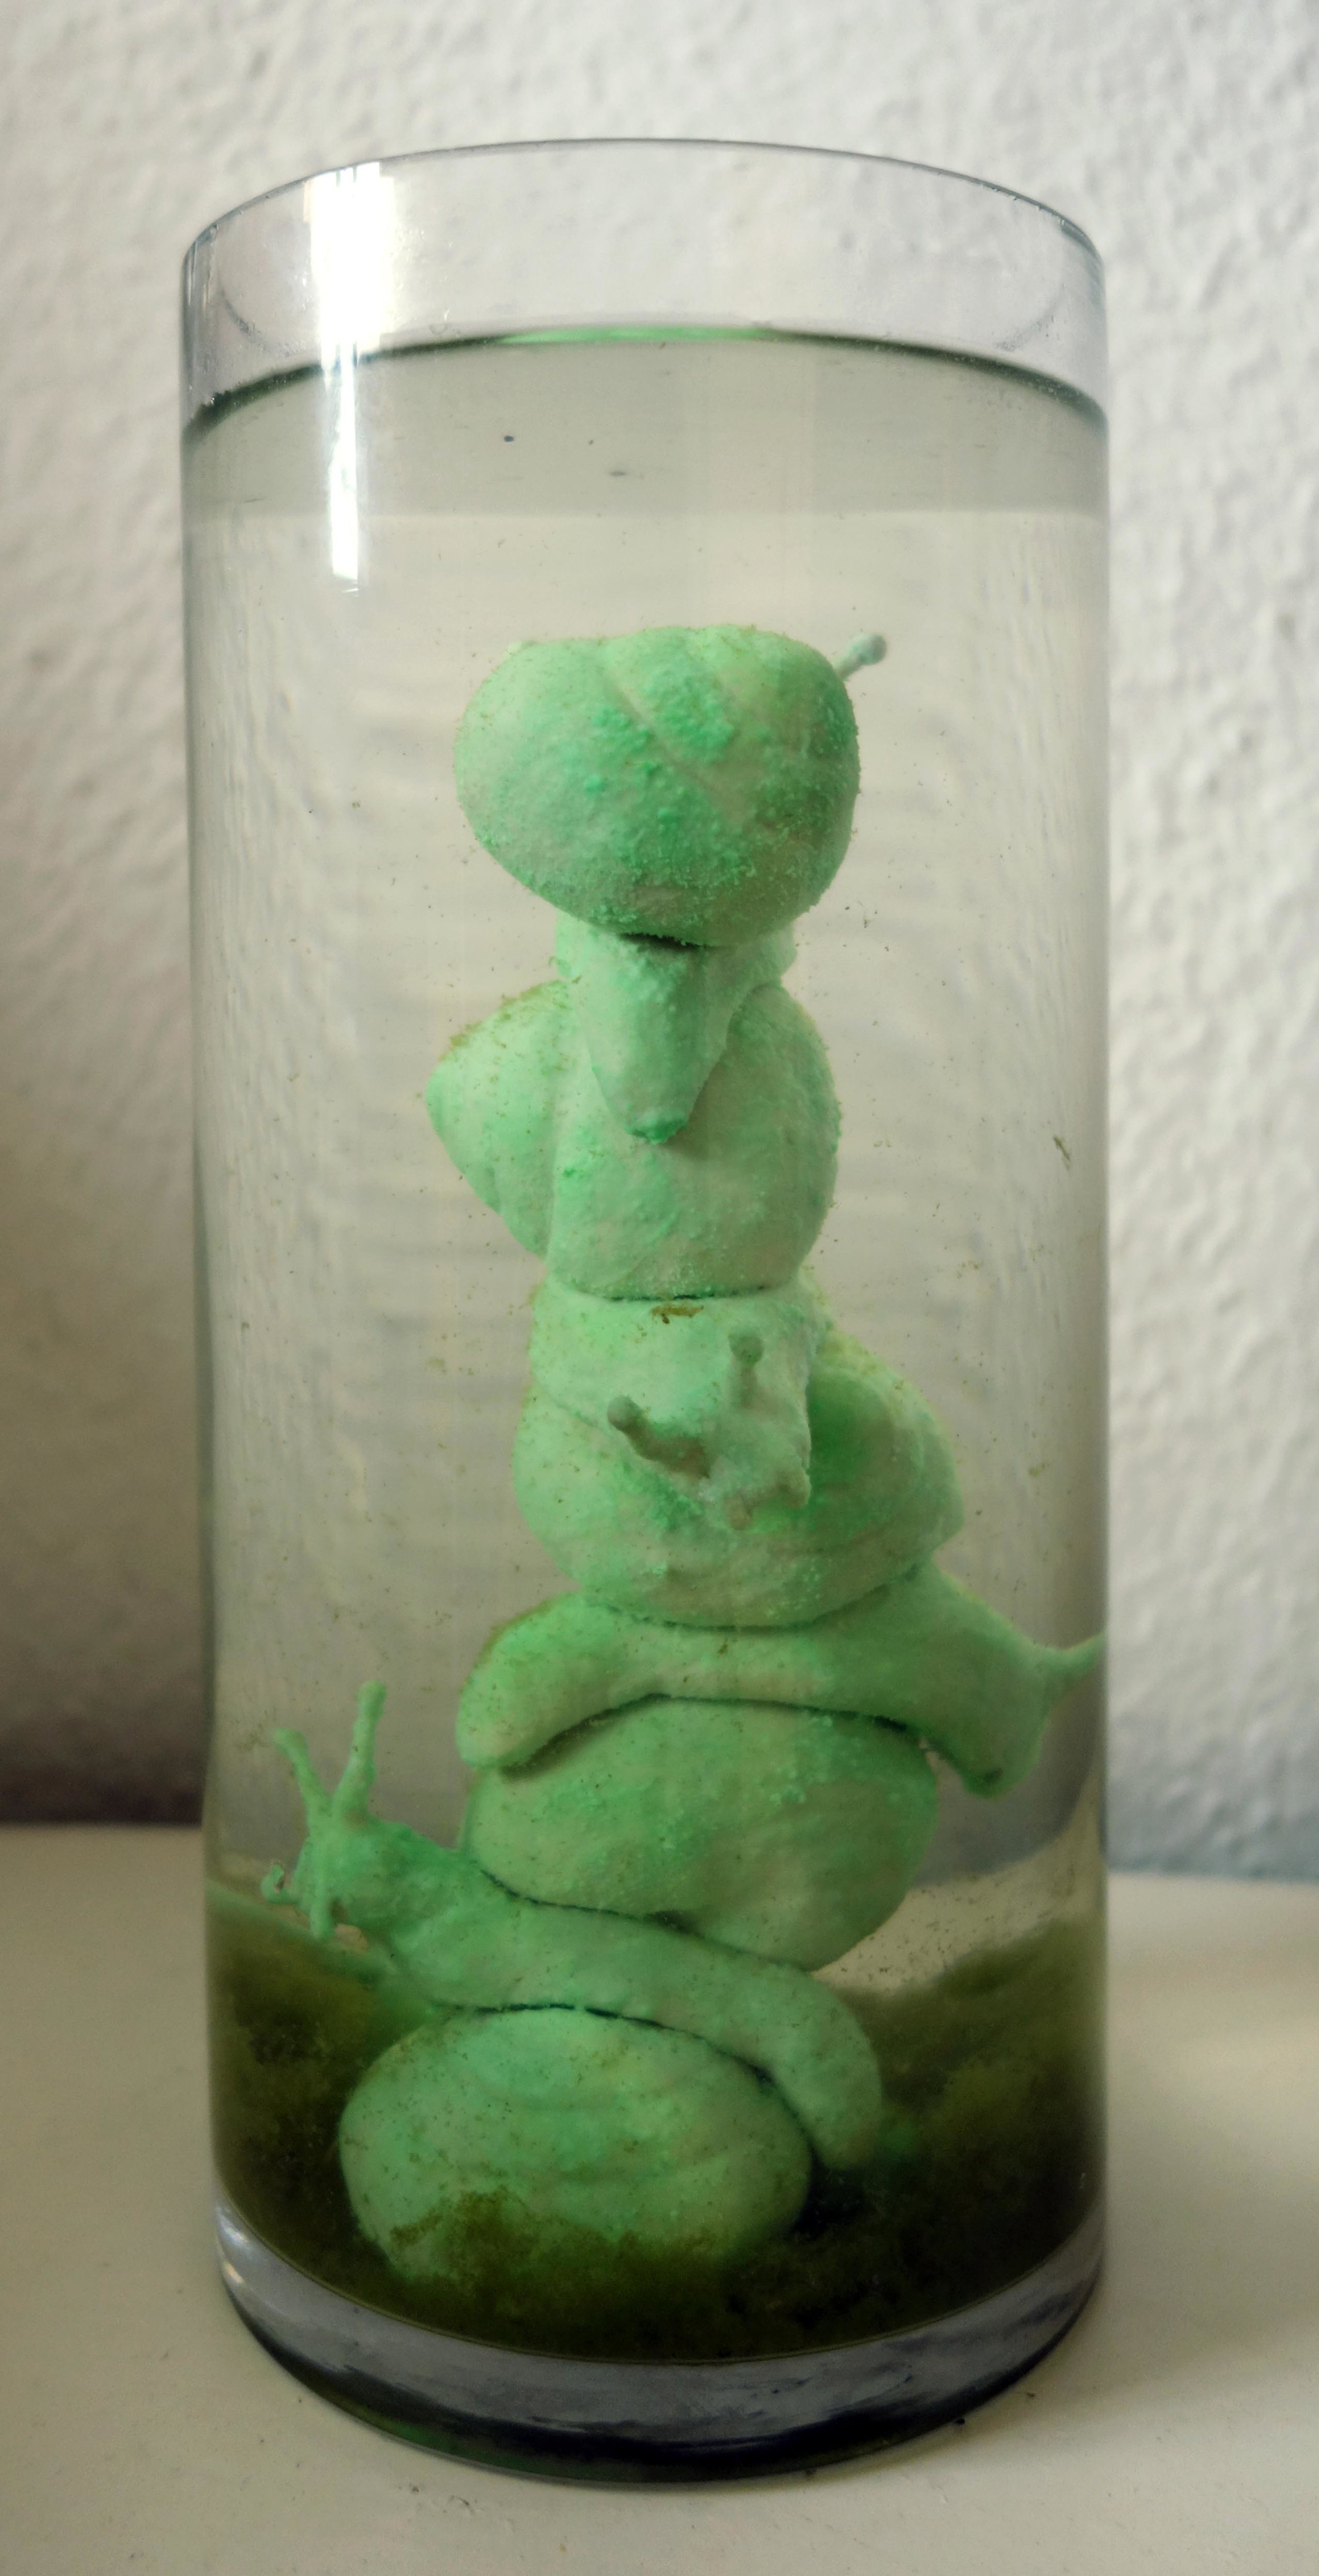
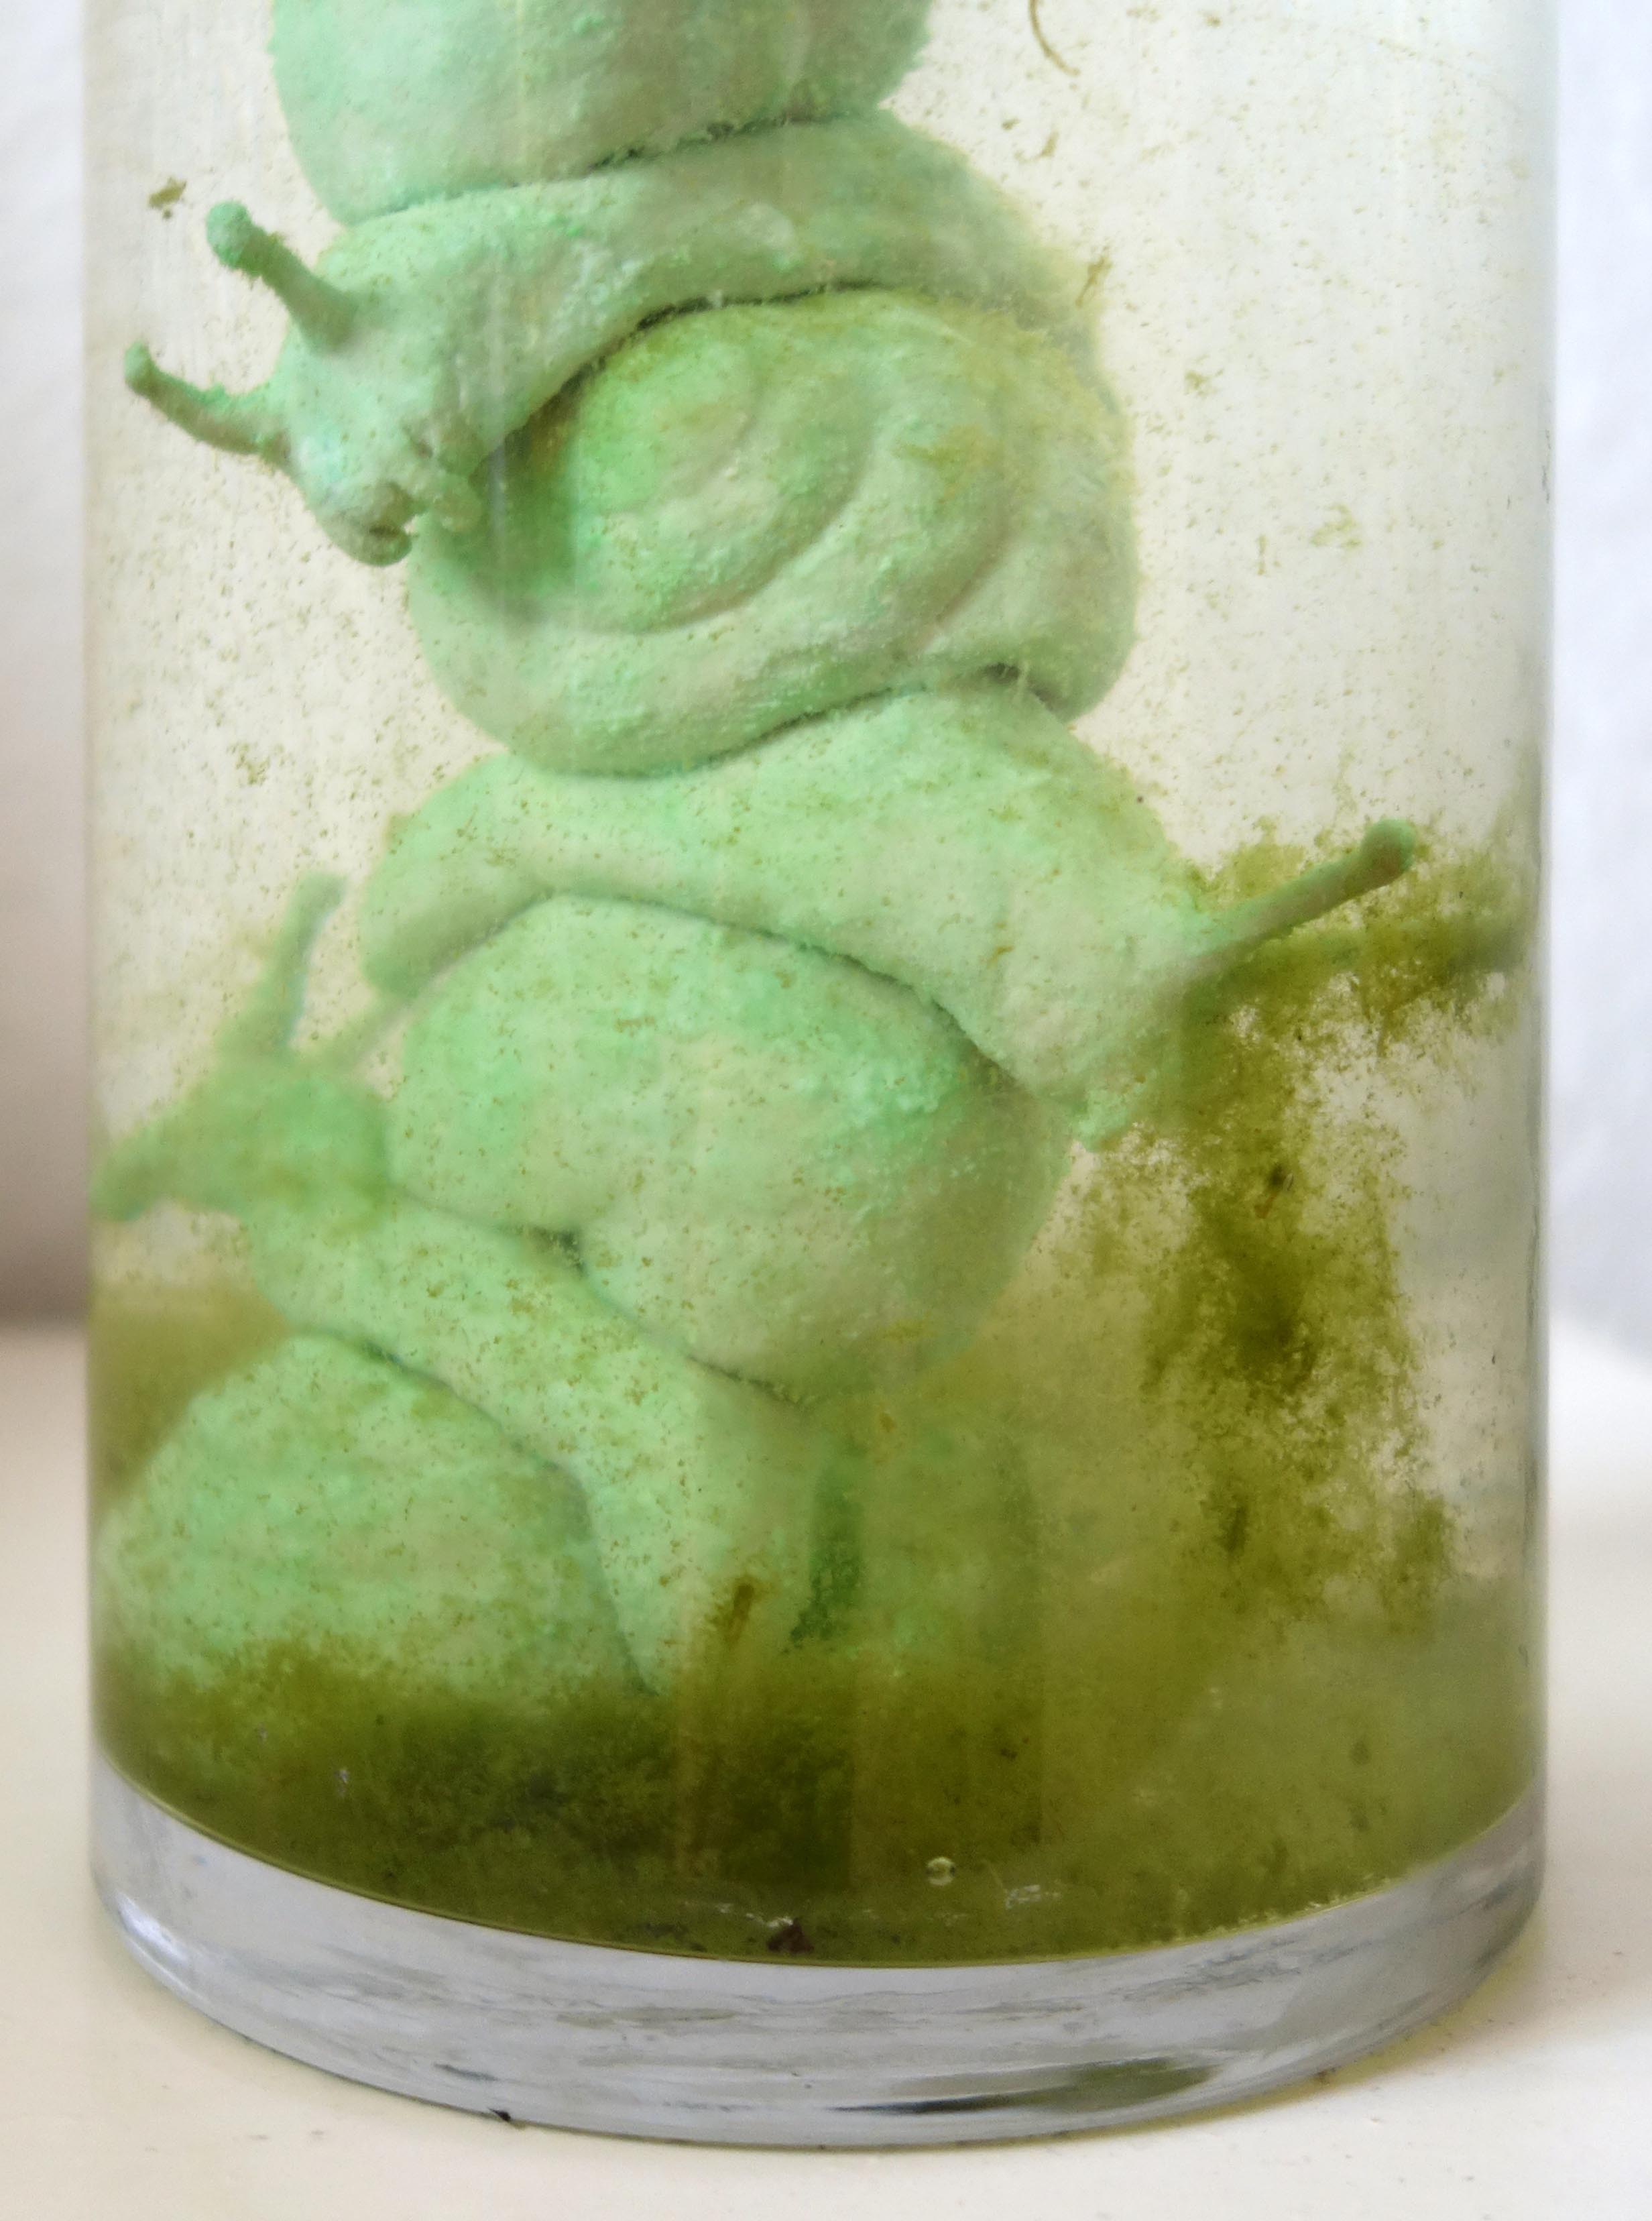
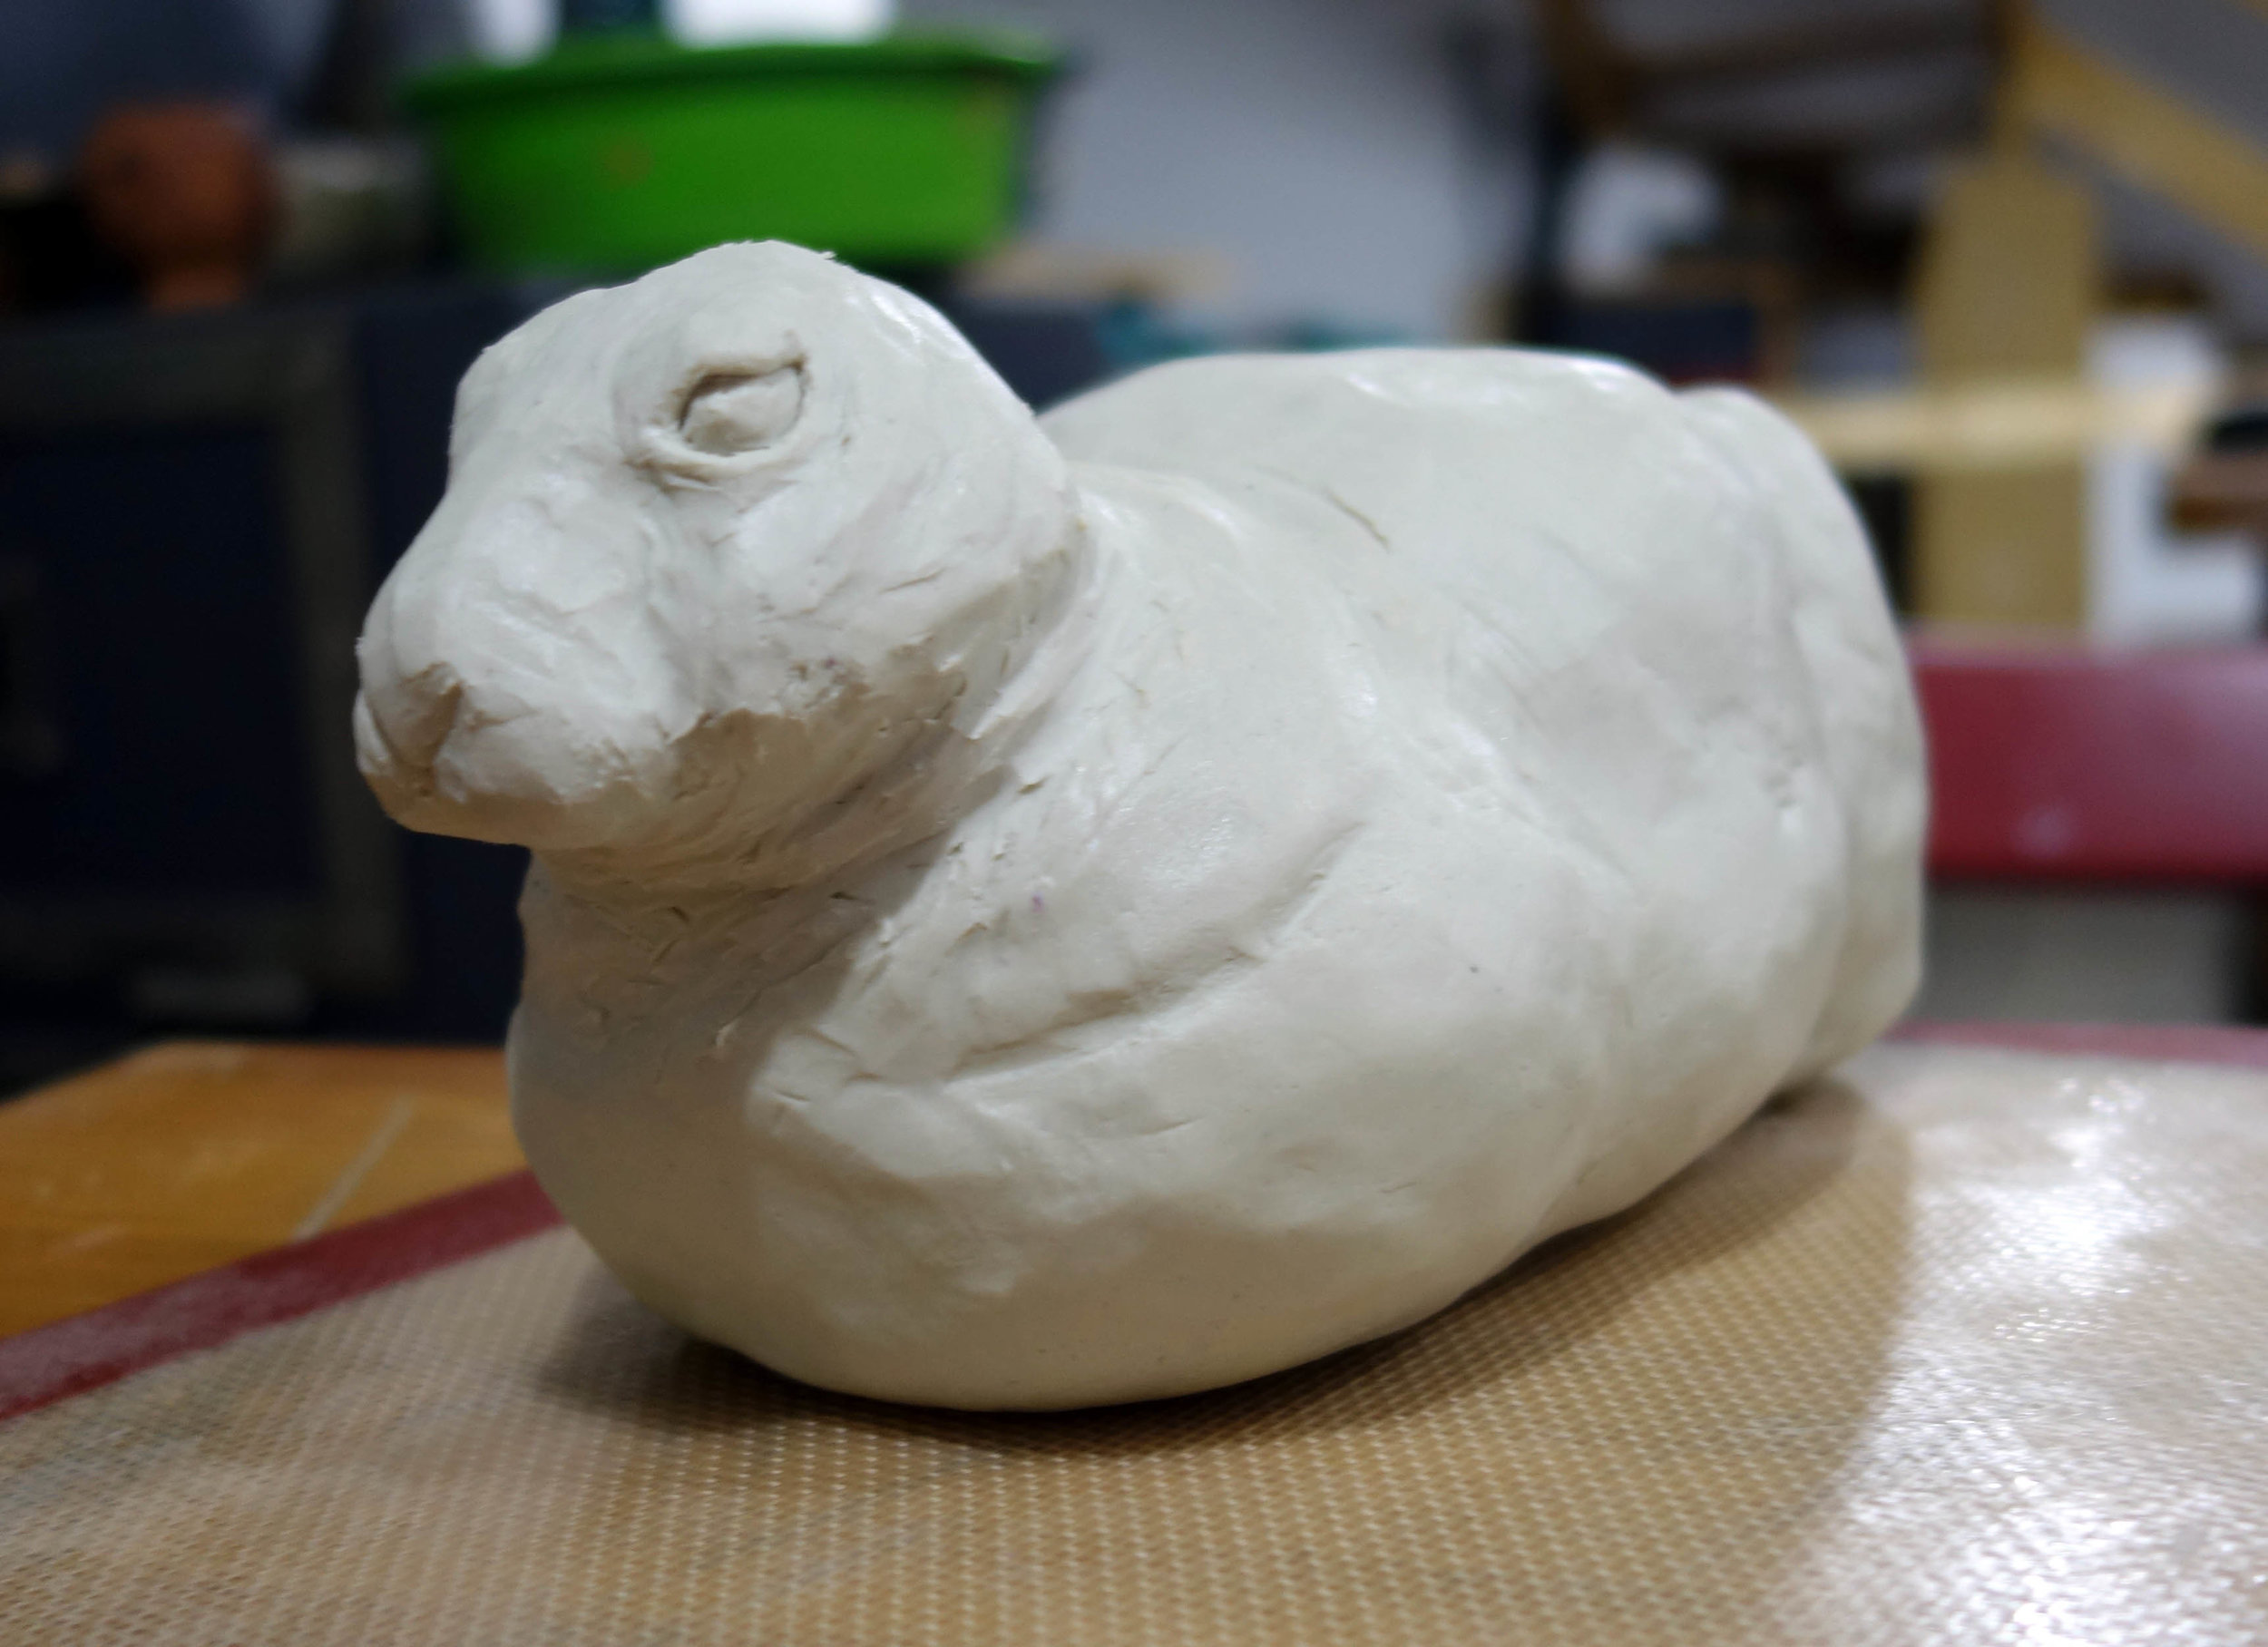
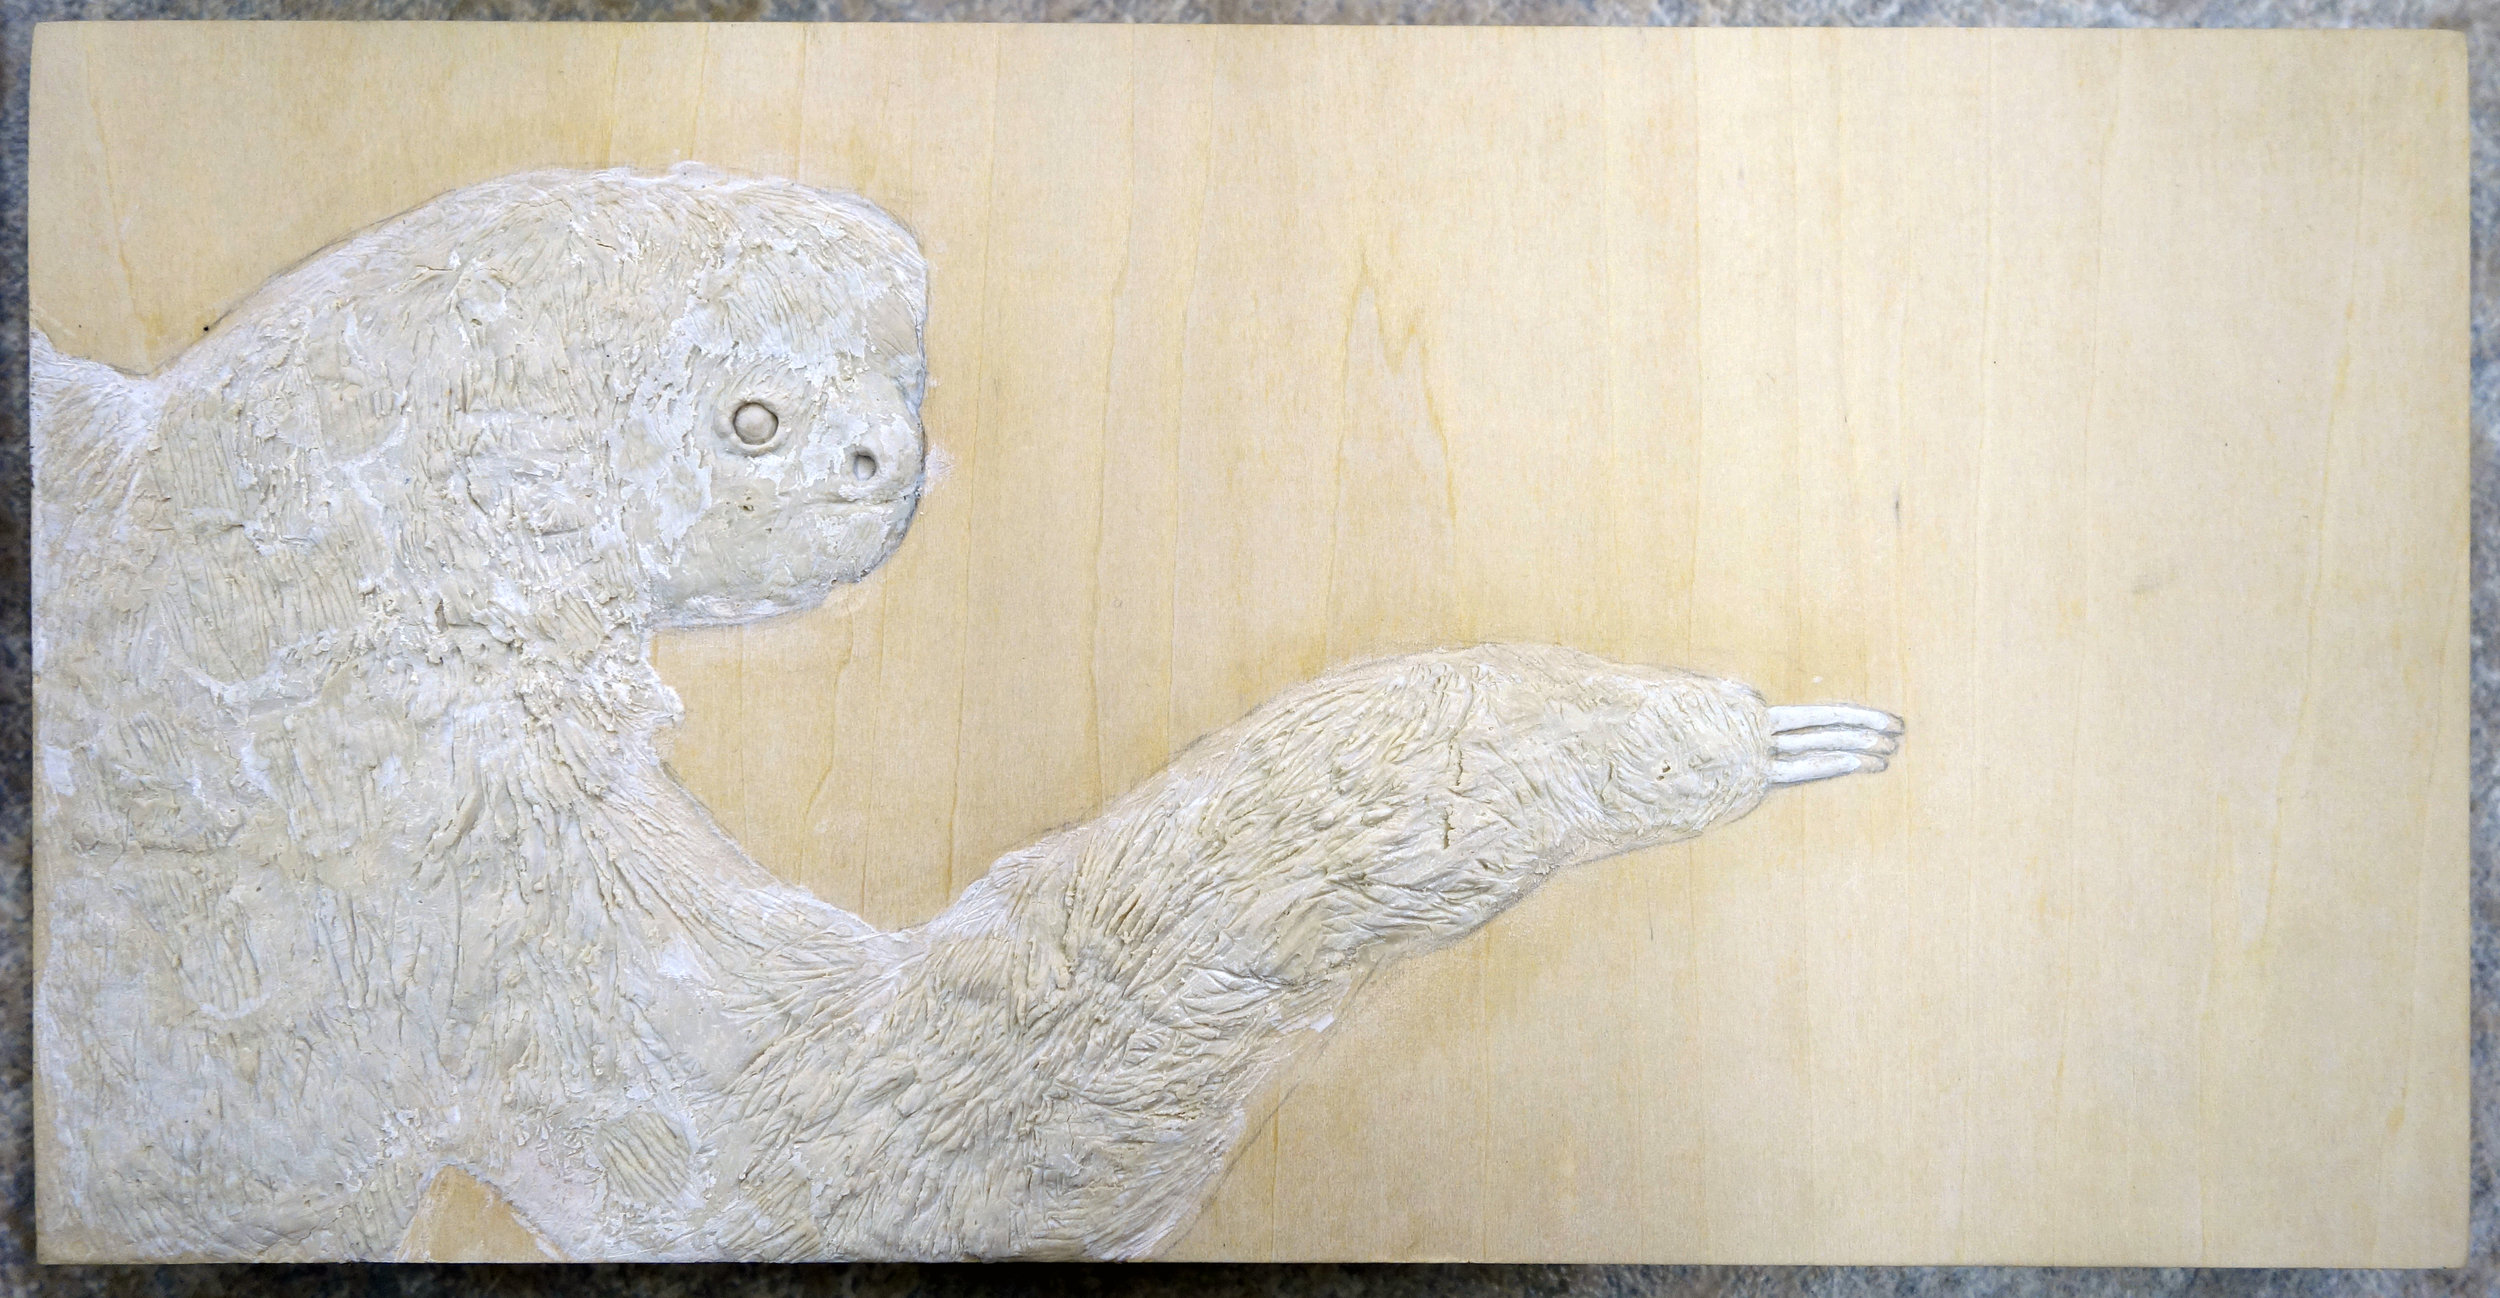
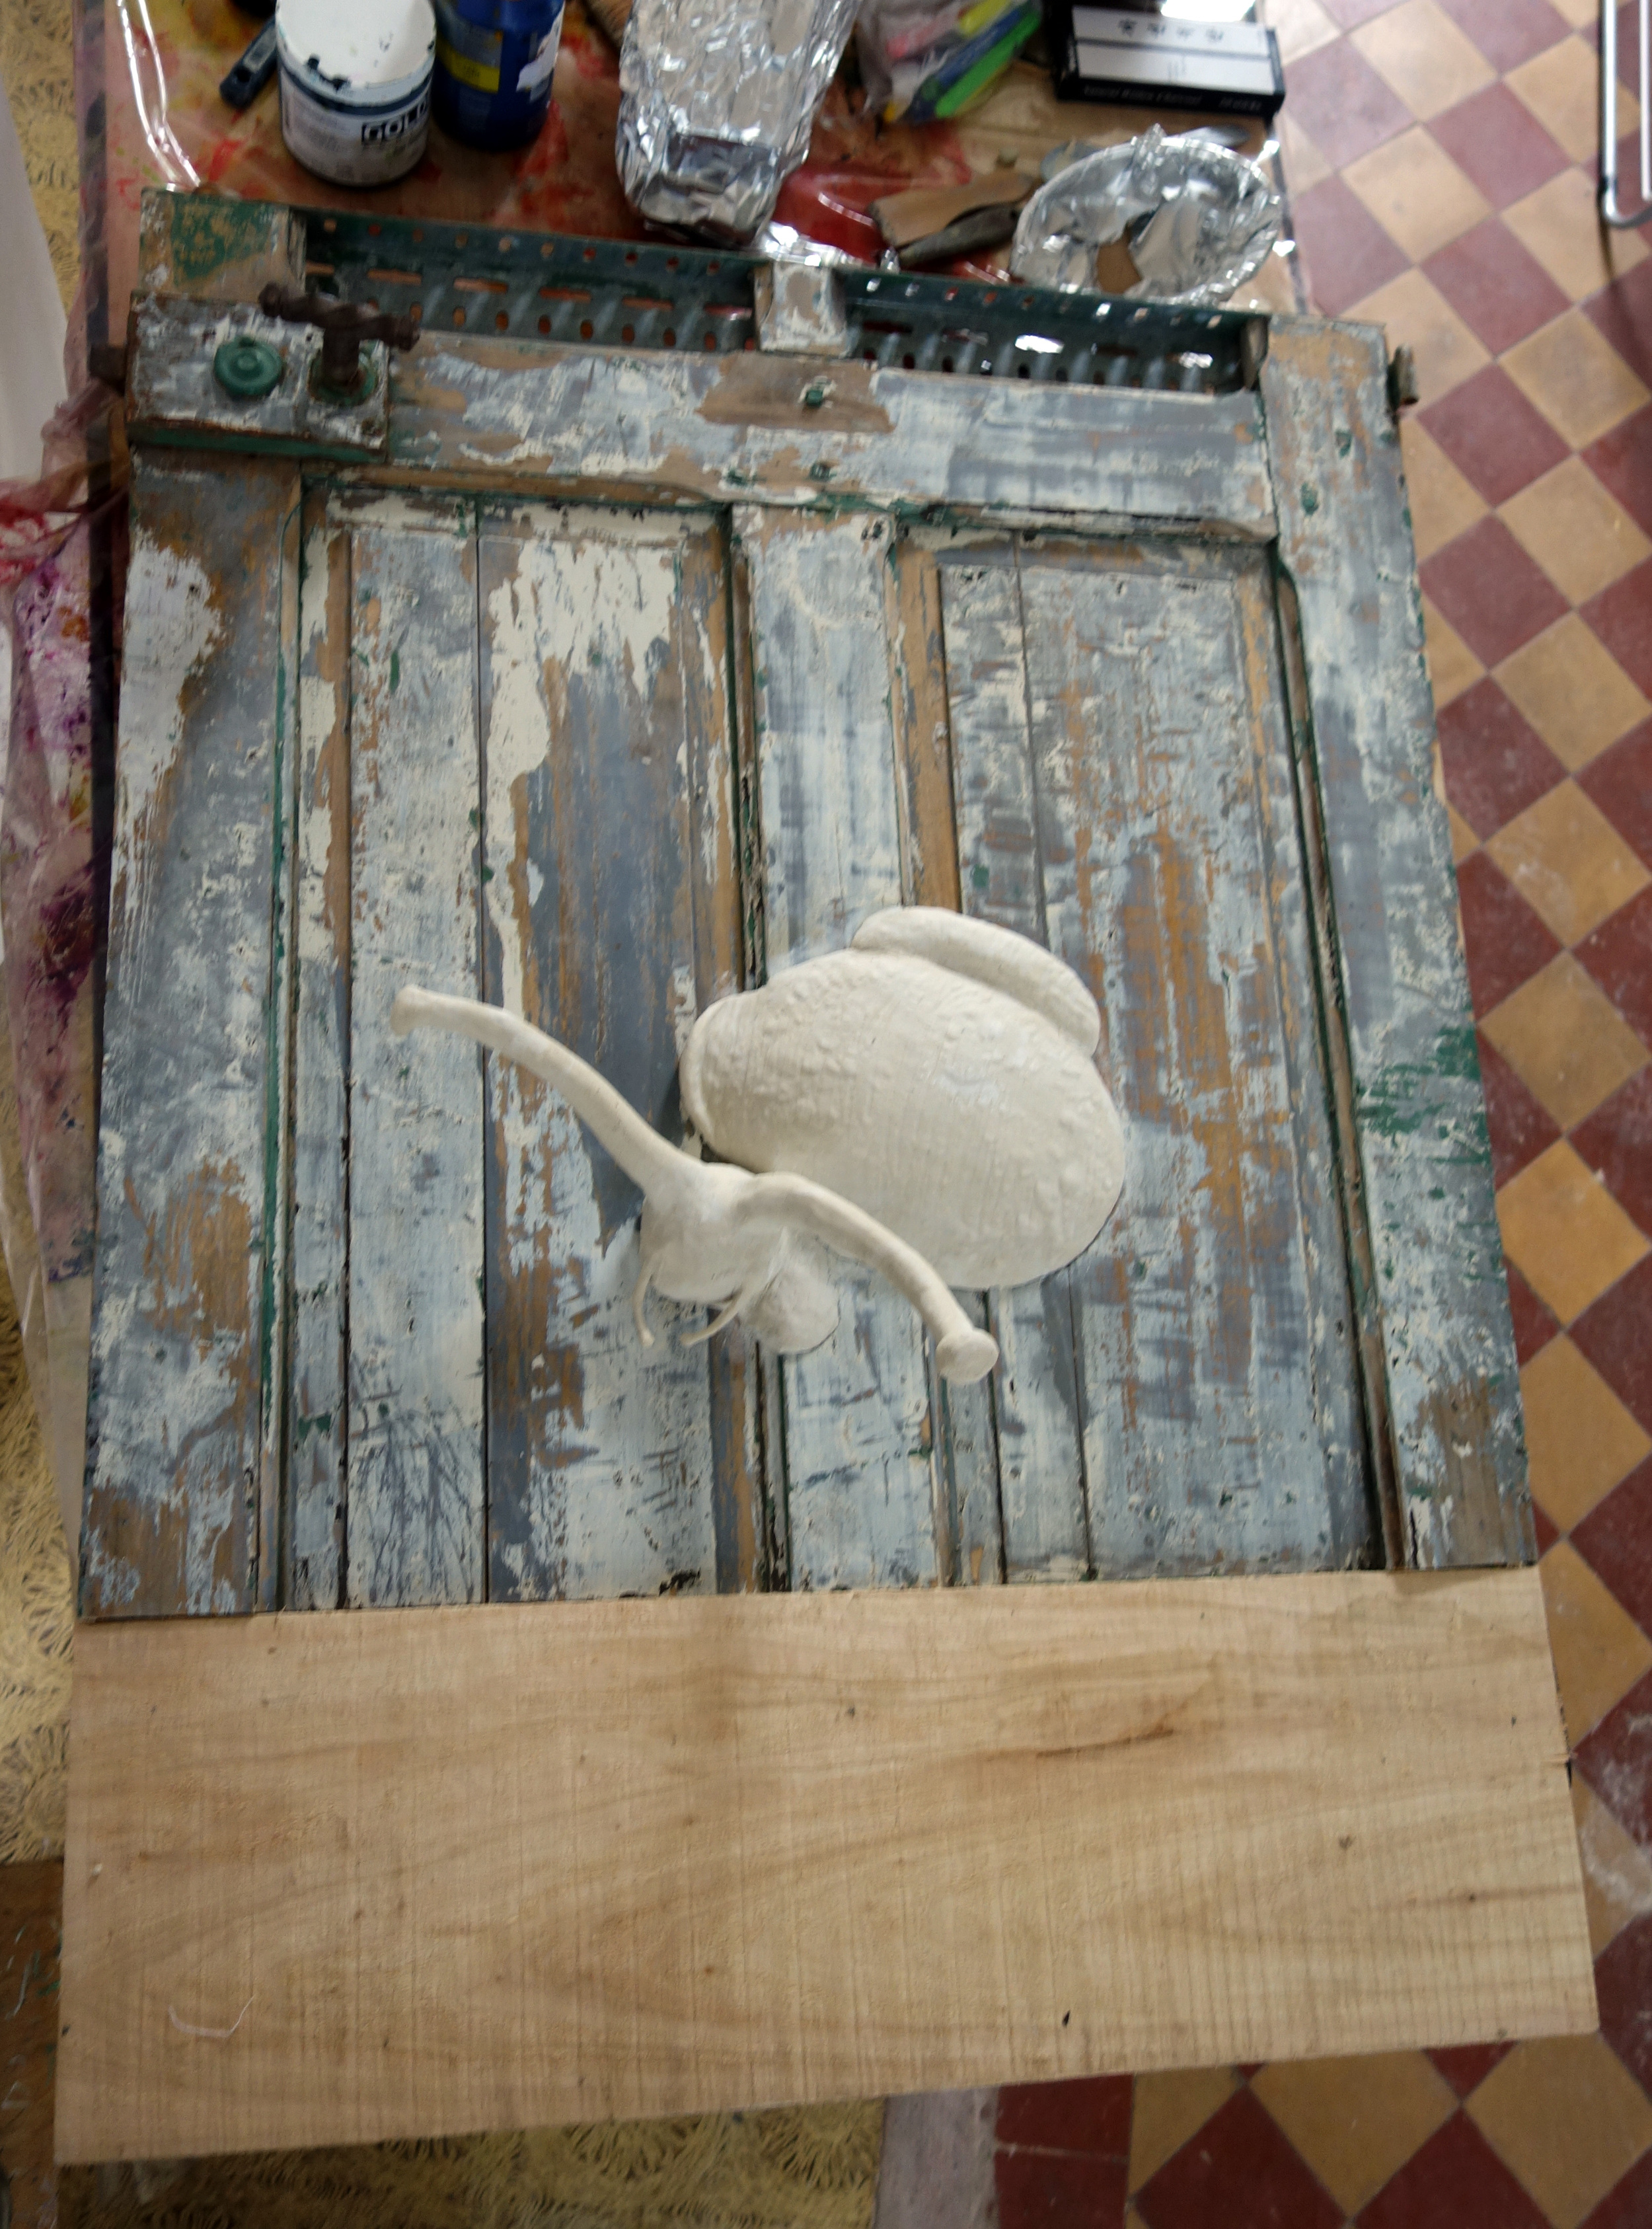
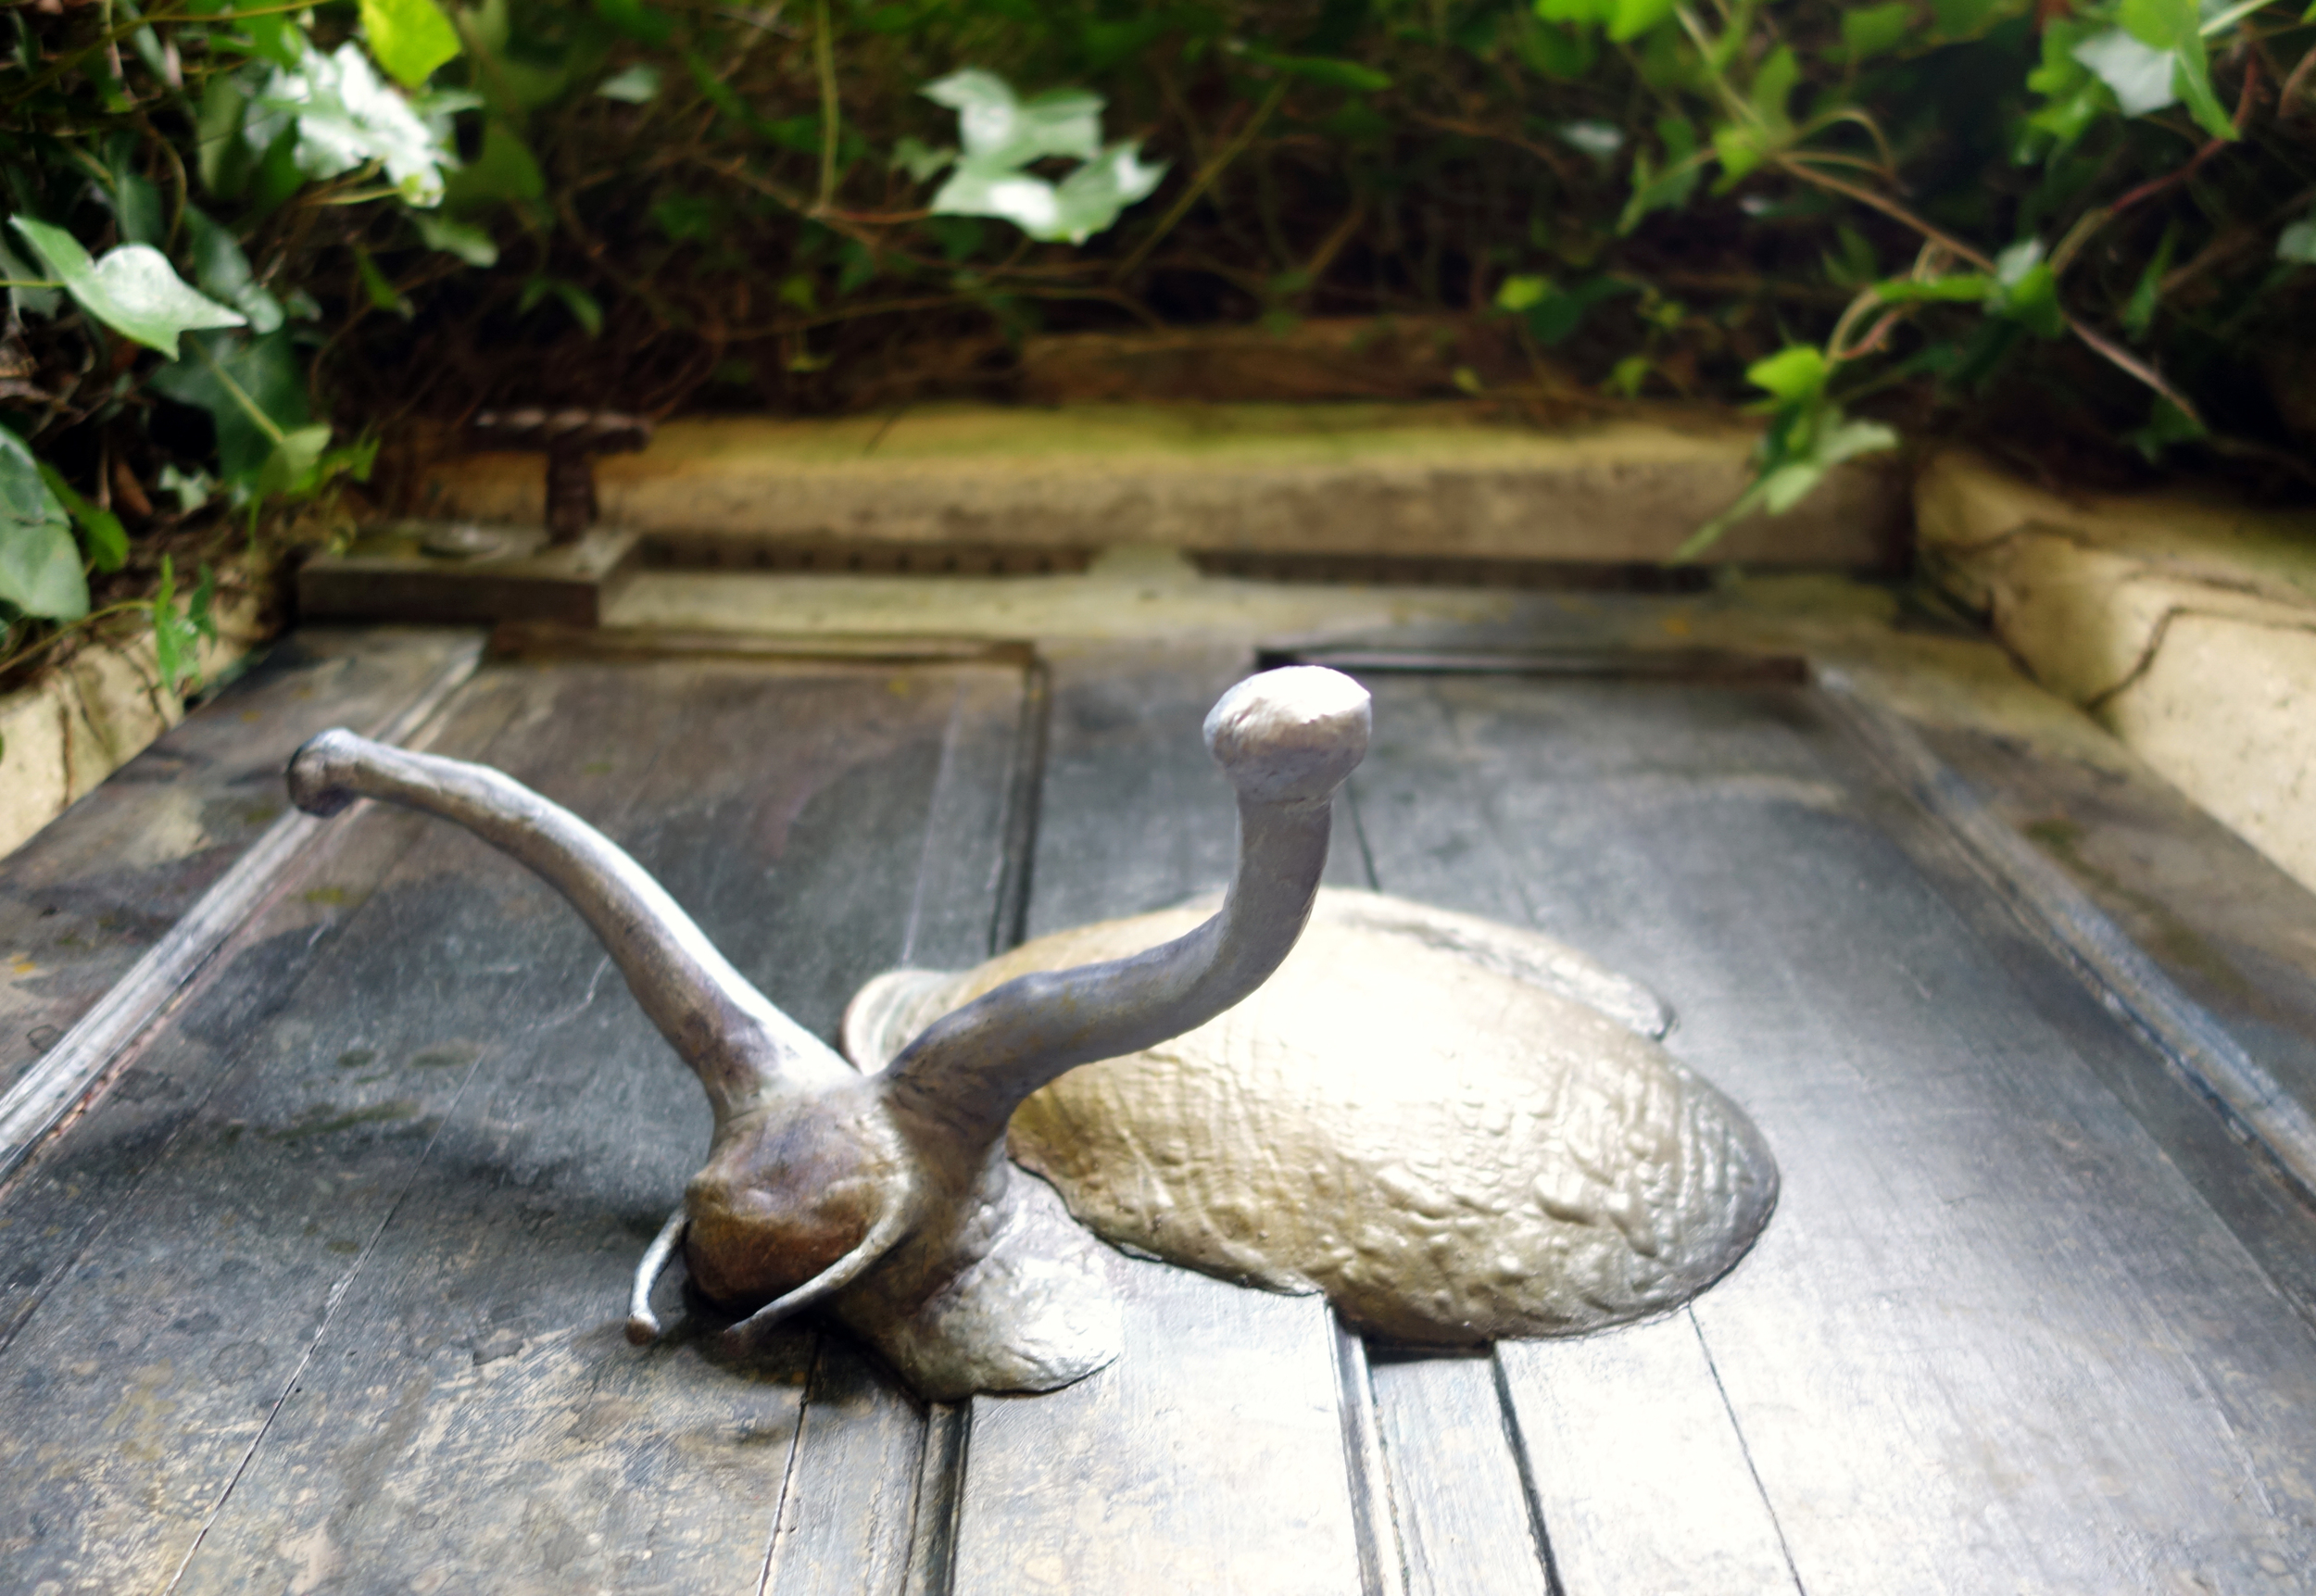
So when I started work in the studio, I began sculpting snails.  

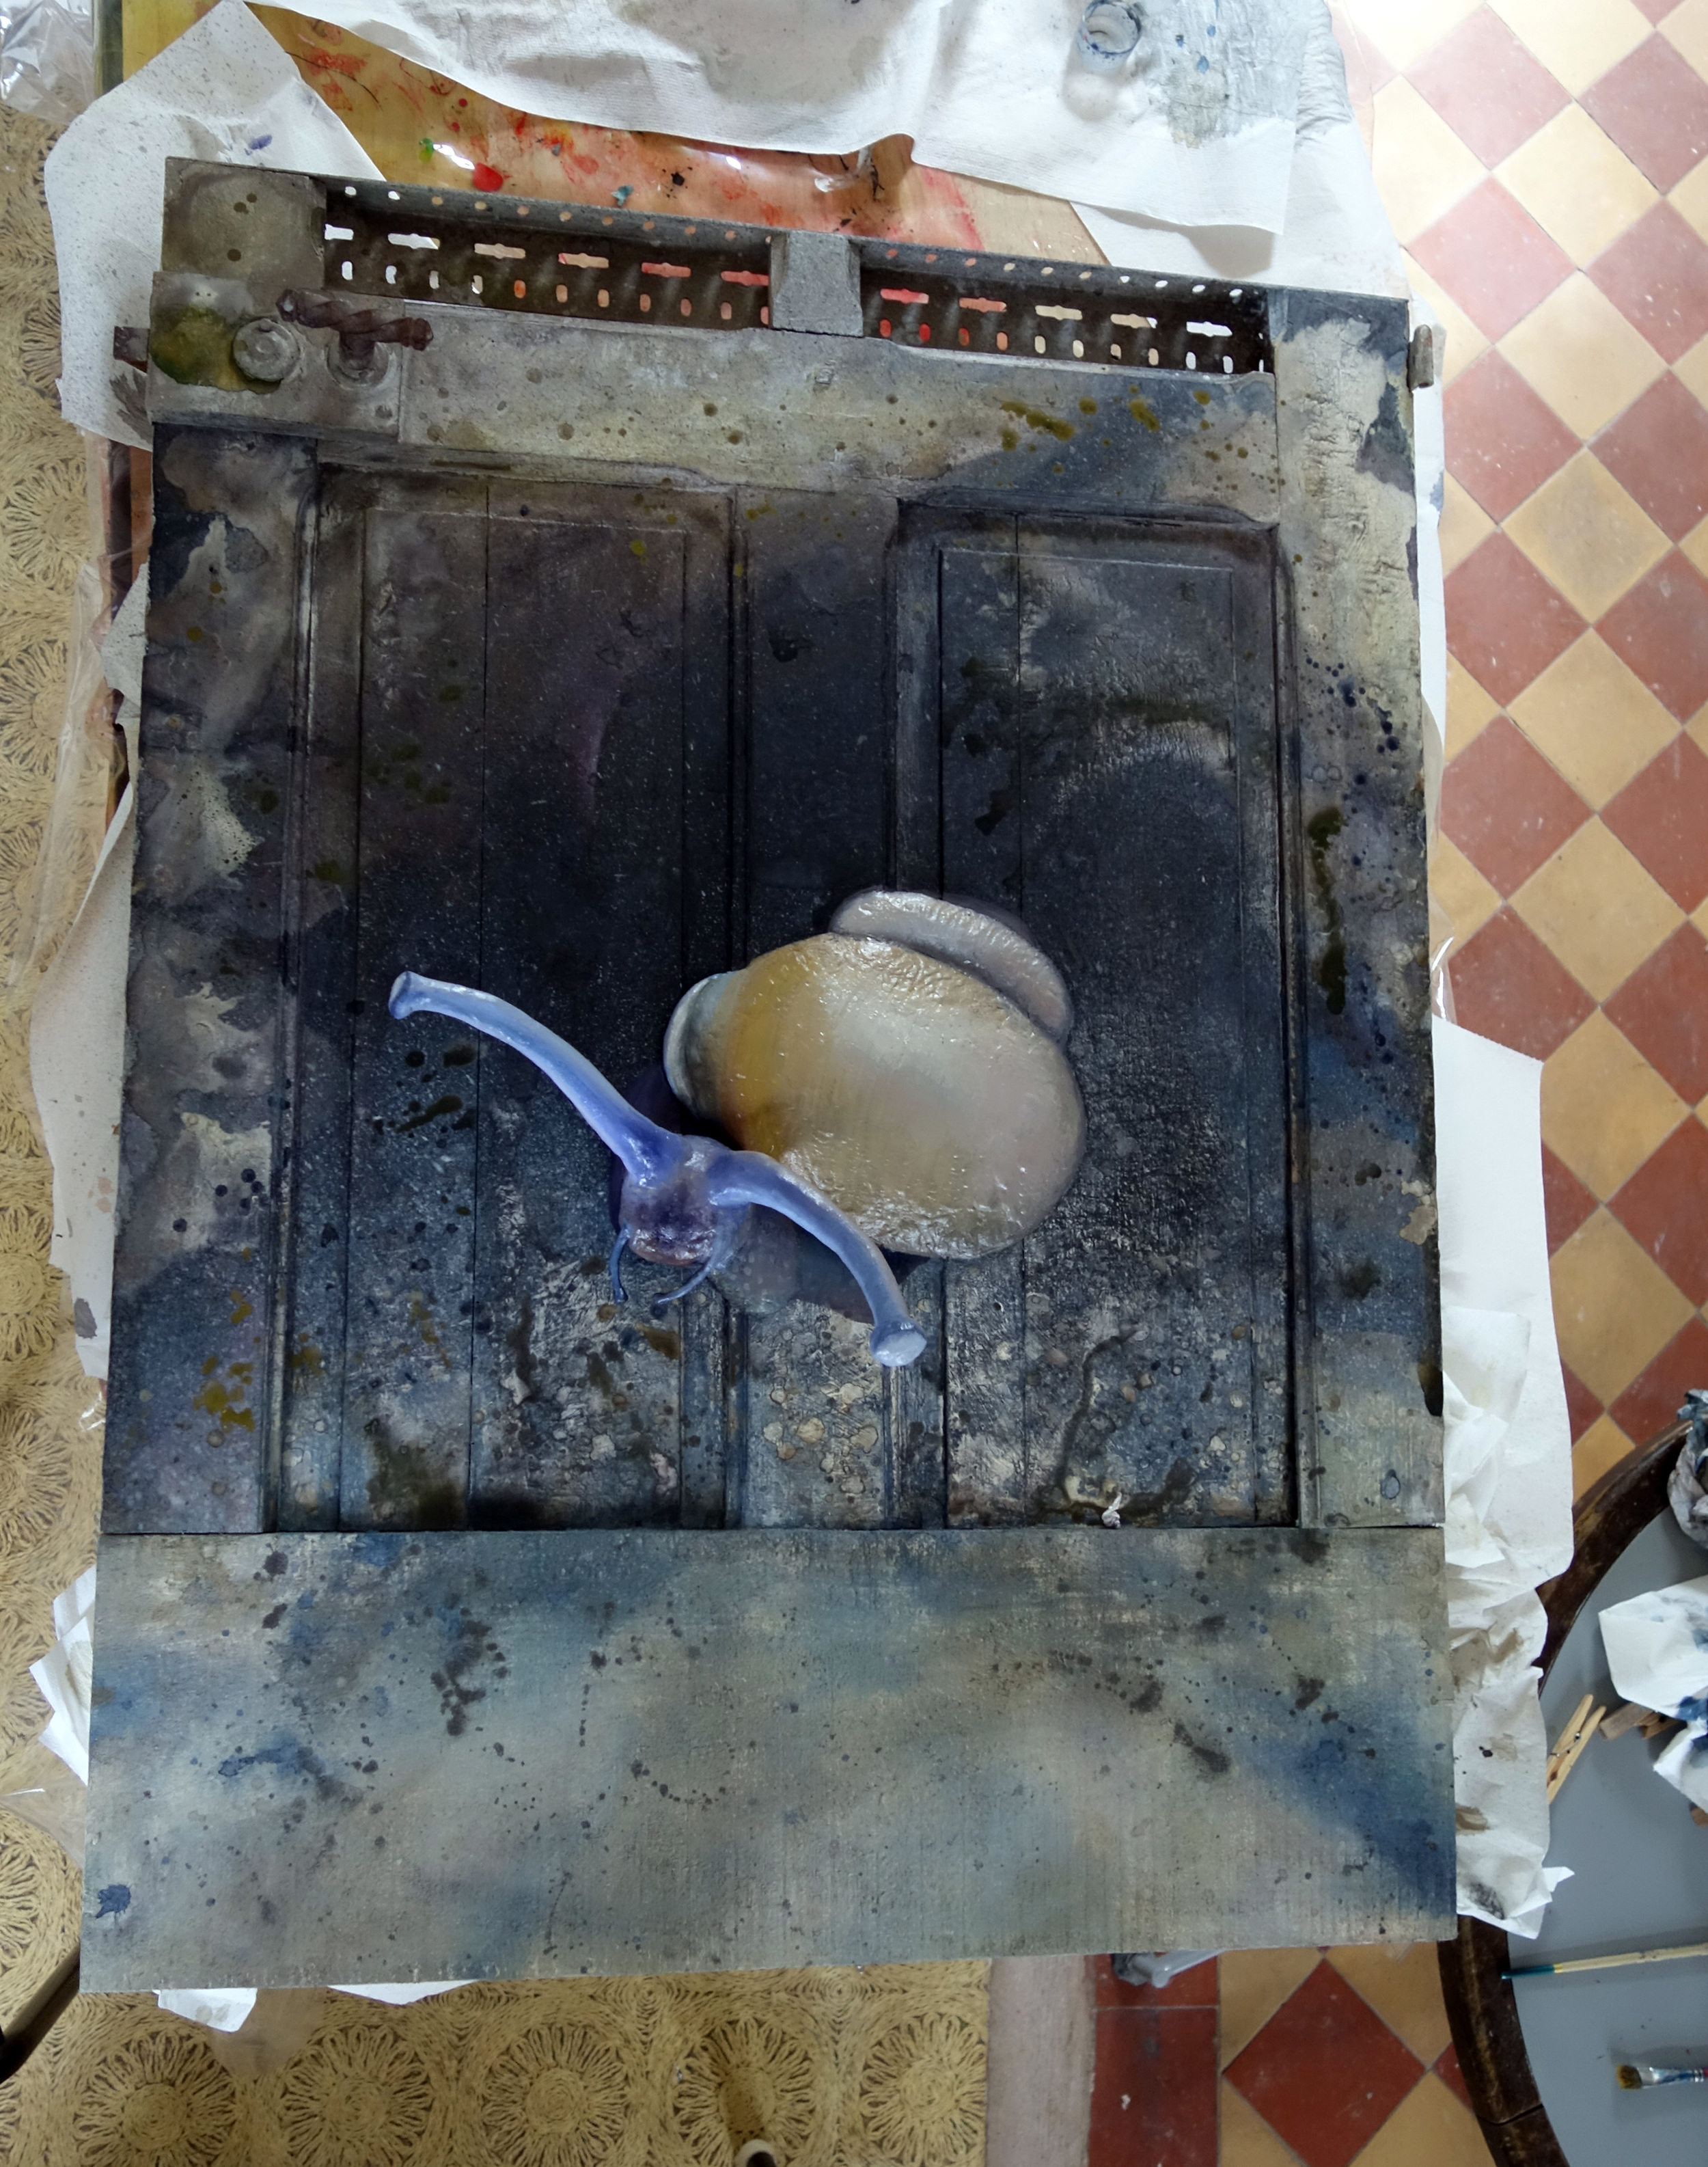
A sculpture is different from a painting, though, and in order to have the 3D version of the tower actually stand on its own, I couldn't have the bottom snail be upside down.  I didn't want them all to be upright, either, though... so I decided to have one snail be on its side and have that snail be on the bottom of the tower in a nod to the potential instability of all the rest.

After assembling all my individual snails into a tower, I hastily patted some glow powder onto it and cured it (the tower was moderately unstable while uncured).  I thought the amount of glow powder that actually adhered to the clay wouldn't be sufficient for my purposes, so after thinking about it for a day, I sprayed it several times with an aerosol satin varnish and each time before the varnish dried I added the glow powder to it until I felt I had a fairly solid coating.

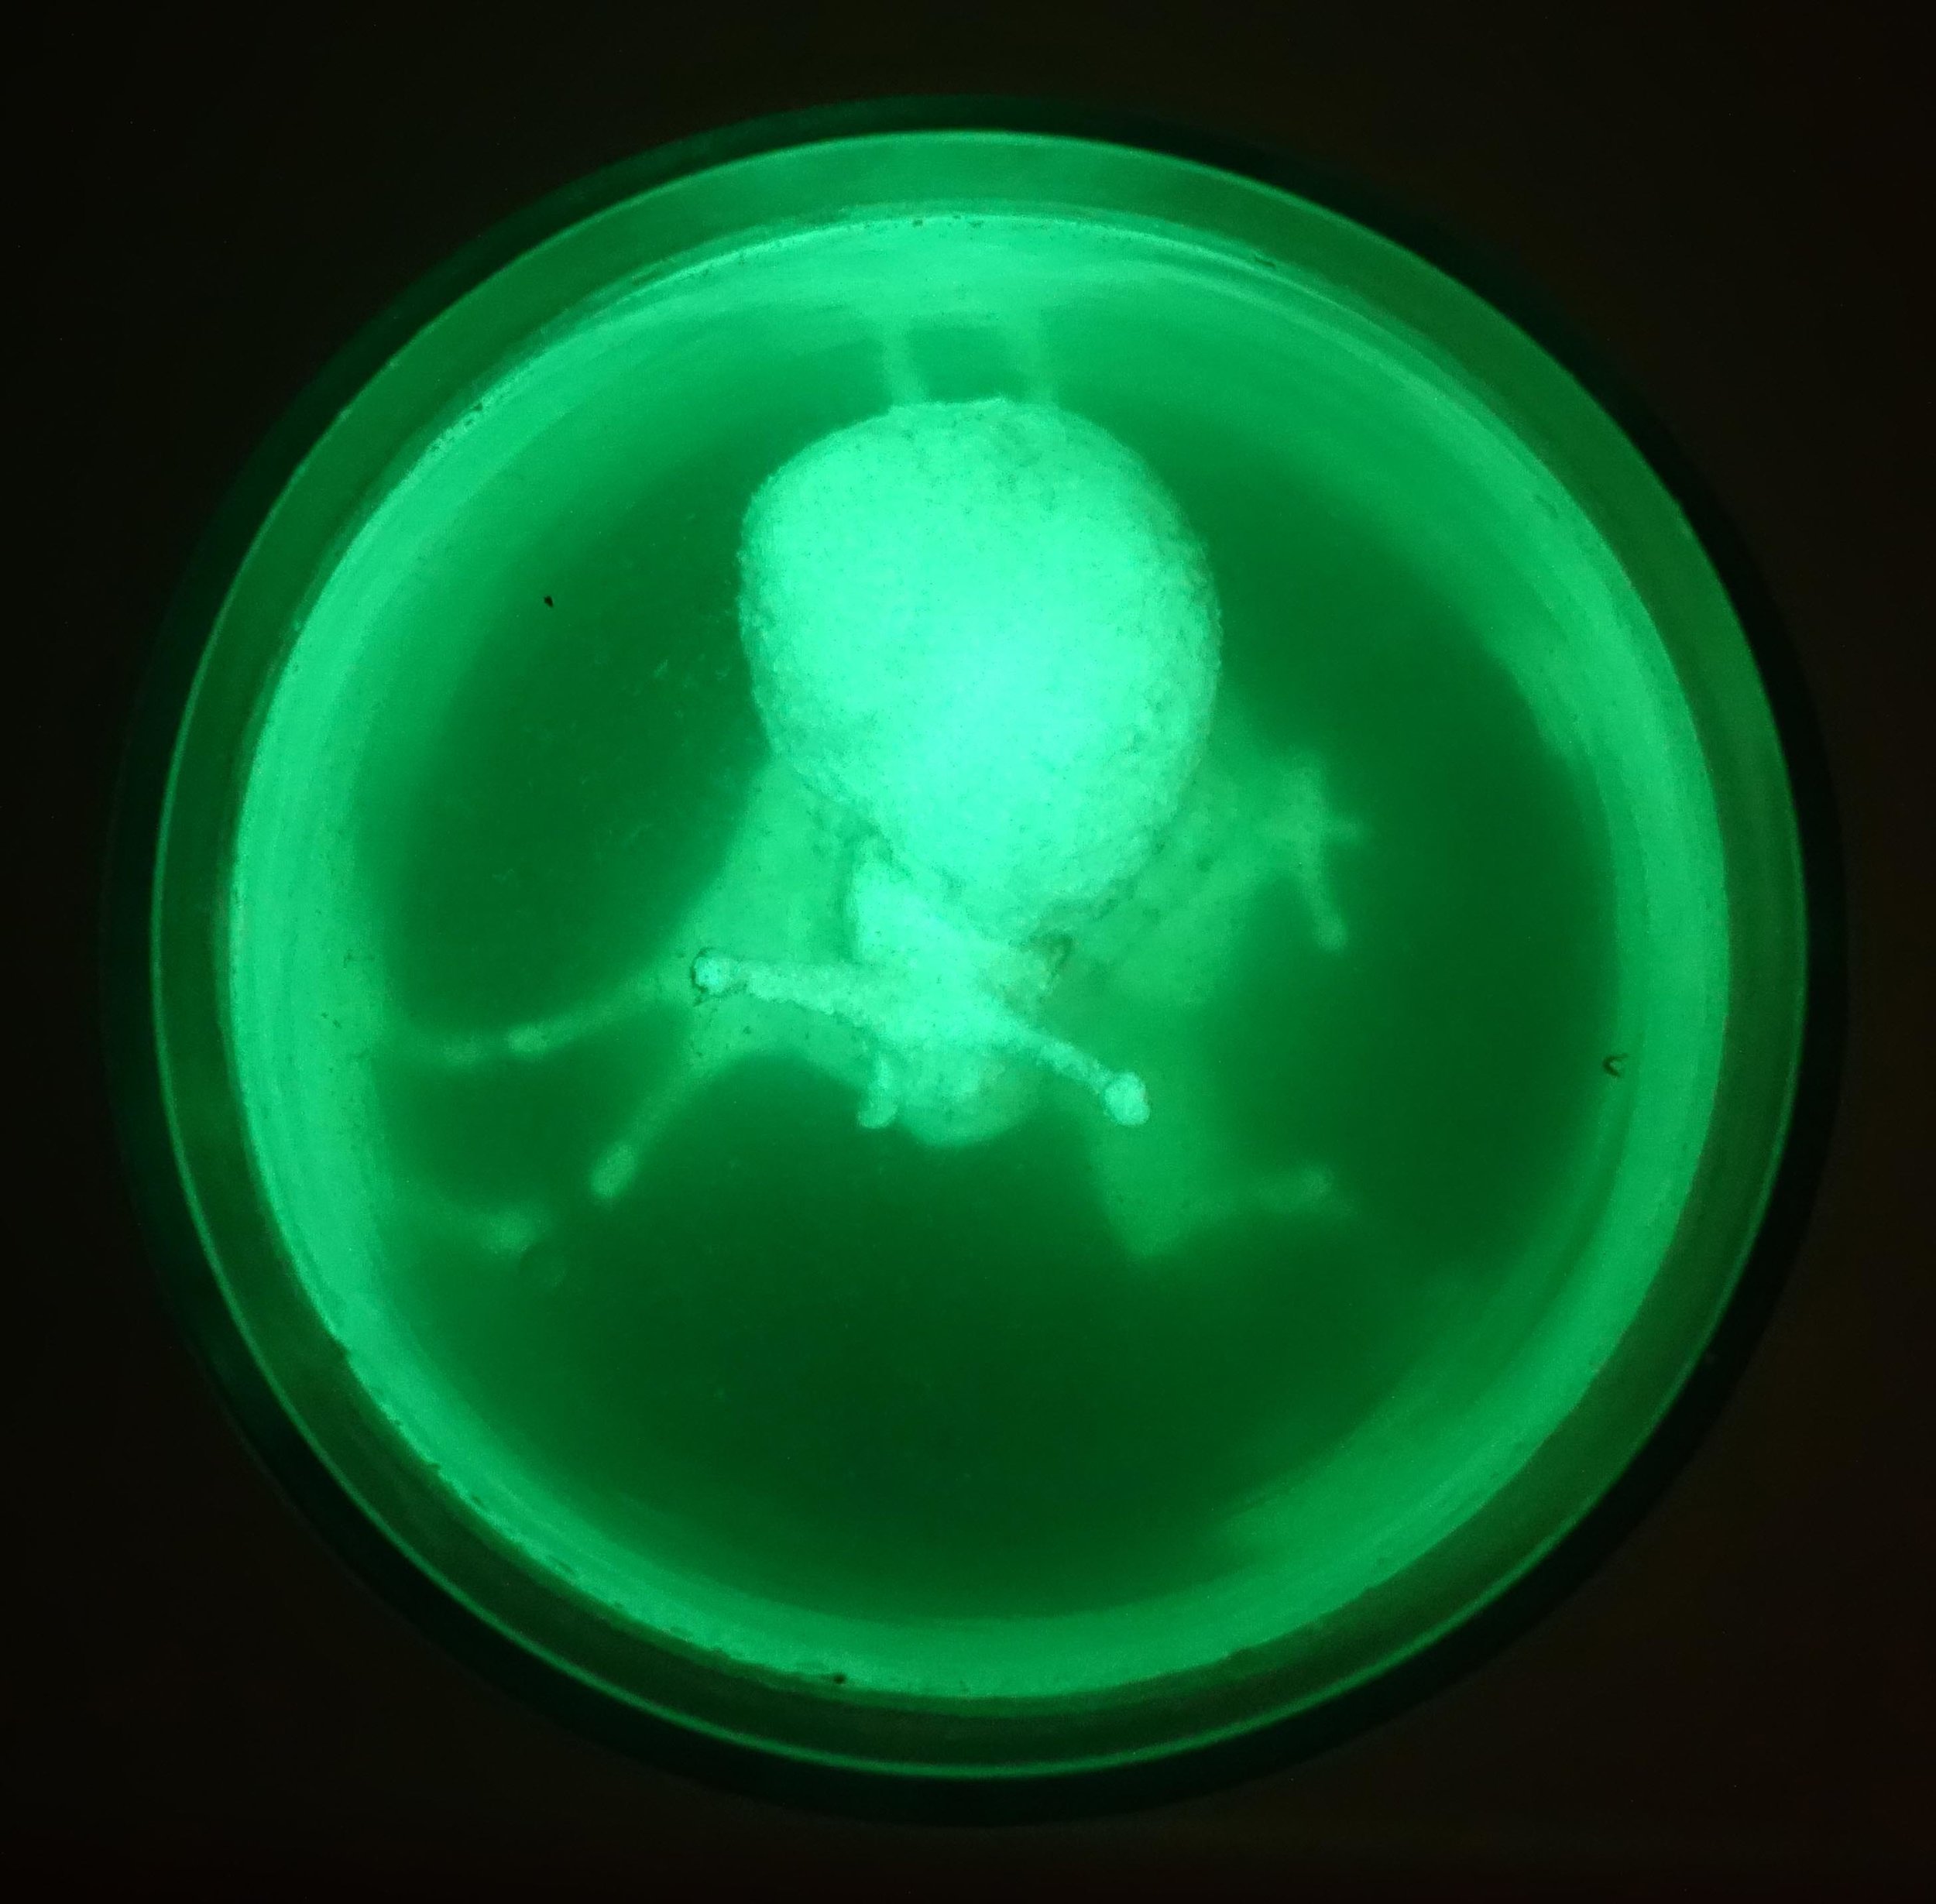
As all this was going on, the fountain water I had collected from the Real Jardín Botánico had been sitting in the window, slowing growing more algae.  Once the sculpture's coating seemed dry, I put it into a glass vessel I had purchased from a Chinese bazaar and poured the fountain water (and some additional tap water) in.

The piece will hopefully be ever evolving as the algae grows, but it's already far enough along for me to share some photos!

Cerdeira Village Residency Journal 6 Photos 1 - My Artwork

Here are a handful of photos of my overall exhibition space in the Cerdeira Village Elementos à Solta festival.  I already published individual piece images in my earlier posts, but here you can see some combined installation shots.

Cerdeira Village Residency Journal 5 - New Artwork!

When I was shopping at the market across from the Mosteiro dos Jerónimos, I saw a few azulejos tiles of rabbits, and I bought myself one of them - it reminded me a little of Albrecht Dürer's work.

After I finished the turtle sculpture, I decided I would do a rabbit and a bird as a partner piece to the turtle and nest mostly due to that market experience.  When I started looking at various images of rabbits in order to find one to sculpt, I decided that proportionally and structurally, a hare would be more interesting than a rabbit.  And given that I had been thinking about rabbits and hares due to this azulejos tile that reminded me of Dürer, I decided to base my sculpture off of Young Hare.

It was really quite fun sculpting a watercolor painting, as it were, and one that I highly admire.  I started off again with a styrofoam and wire base and then added QCC and began to form the body and head.  

I added the feet in three separate parts, and finally the claws and ears.  After every part was added, I detailed the fur and added some jackalope-esque branches in front of the ears.  This all took several days to come together, and obviously there were parts I had to construct myself in attempting to realize a three-dimensional animal out of a two-dimensional painting of it.

I had planned on sculpting a bird with the hare, but I liked the hare so much alone that I reconsidered.  As I was trying to decide what to do, I thought about how I would progress with the painting of the hare.  In the beginning I had thought about painting the rabbit in azulejos-inspired colors as well, but I realized when doing the turtle that the style that the shell and eggs looked quite good with it because they were fairly smooth, but when I tried to paint the turtle head and legs with various tints of blue, it got too busy and weird due to their pebbled surfaces (so I reverted them back to the clean white).  The fur of the rabbit is quite heavily textured, so I decided to paint it in a fairly realistic coloration through referencing Dürer's piece again but turning the colors just a little bit cooler in a nod to the azulejos theme and my own practice of using blue as a dominant color in my own work.

In deciding to paint it in naturalistic colors, though, I thought the two pieces wouldn't seem very related, so I figured I should do a bird - but a detachable bird, in case I ended up displaying the pieces separately as well or in case the bird didn't turn out so well.

I knew I wanted the bird to be in the azulejos color scheme, but I wasn't sure if I wanted to approximate an actual species/patterning like I did in the slider turtle shell design.  In the end, I decided the bird should be even more clearly a reference to the azulejos tiles; then there would be this strong representation in the bird and the eggs, a referential-but-also-naturalistic one in the turtle, and then an almost entirely naturalistic representation in the hare.

So here it is!  I also haven't accurately measured or titled it (though Young Hare will show up in the title somehow), but it is a mixed media ceramic sculpture including QCC, acrylic, and found branches.  Some of the photos below are of it in bright sunlight, so the cast shadows on the bird can be a little hard to parse, and all are against a brown/gray background which can make the branches difficult to differentiate too, but I will take photos of it in a white gallery space as well.

Cerdeira Village Residency Journal 3 - New Artwork!

When I woke up for my first morning in Cerdeira Village, I was still a little tired and quite sneezy - I thought I would escape from my Kansas allergies but there are apparently still plenty of plants I'm allergic to in Portugal!  I soon shook it off, though, and Julia and I made breakfast and started to get to know each other.  Next I went to set up my studio space; the atelier is downstairs and next door from the residency housing.  I took over two small pottery tables and a bigger workshop table and began working on my first piece.  

When I proposed my project for this very competitive residency, I took note of how ceramics-oriented the website was and my proposal was to make some fully 3D pieces out of QCC since of late I've been doing only relief work with QCC.  For my first sculpture, I decided I would create a slider turtle with branches growing atop its back supporting a nest.  I picked a turtle for a few reasons - 1) I'd sculpted two turtles a few years ago out of QCC but never felt I fully resolved their form and wanted to improve upon that work; 2) there is a multicultural myth that the world is supported on the back of a great turtle; 3) I hadn't seen very many animals in Portugal yet given that I'd only been there a couple days, but I had seen at least two different species of slider (red-eared and yellow-bellied) at the Estufa Fria in Lisbon.

I started the sculpture by carving a rough approximation of the shell out of styrofoam.  This was mostly to save on clay usage - I can only carry one bucket of it at a time due to the size and weight it occupies in my luggage, so I want to be smart in how I use it up - but also helps with the weight of the piece, which is important because I will have to ship my artworks back to the US and weight sharply increases the shipping costs.

Then I applied QCC in a relatively thin layer around the styrofoam and began to shape and detail it (hacking out bits of styrofoam as well if I needed to).  The shell took a lot longer than I thought it would to really shape properly; I did not finish it the first day.

I continued work the second and third days on the turtle.  After finally detailing the shell, I moved on to the head and feet.  I did them all separately so I could be very considered in my markmaking, and finally I assembled all the pieces and added a tail and other final detailing by the end of the third day.  I had planned to make the branches and nest out of the QCC as well, but I became enchanted by the local lichens that grow on the trees here and ended up pushing real branches into the turtle's back before curing the whole piece.

 Afterwards, I did add a nest and two eggs made out of QCC into the branches.

On the fourth and fifth days, I painted the turtle, nest, and eggs white.  I had got it into my head to reference the azulejos tiles so common to Portugal in the painting of the sculpture; the starting point was turning the natural light tan of the clay the bright white of the glazed tiles.  I had only brought one type of paint with me - my Golden OPEN Acrylics - which are great for normal painting needs but are really poor as a base coat due to their long dry time.  Here in Cerdeira Village, they seem to dry even slower - in fact, barely at all - and I ended up just going ahead and painting the turtle shell with an azulejos-inspired, painted-turtle-shell-based design on the sixth day here despite the shell still being faintly wet.  I also painted the eggs with a small decorative motif seen in the corners of some azulejos tiles.  The turtle and eggs took almost a week to dry, but aided by my eventual realization that I needed to put them outside in the sun to assist, they were handle-able by the time I needed to install them in their exhibition space the morning of June 2.

So here's the piece!  I haven't measured it yet, nor titled it (I've got some ideas mulling), but that will come.  It is a mixed media ceramic sculpture including 3P QuickCure Clay, acrylic, and found branches and lichens.

My New Mixed Media Relief of a Sloth

This is either finished or close to finished - I have a tendency to tweak works slightly for a number of days after the piece is "done."  

I'm naming it the closest English translation of the sloth's name: Pilgrim (Peregrina).

Pilgrim is 3P QuickCure Clay and acrylic on a 6x12" basswood panel.

Pilgrim.jpg

A Sneak Peek at My In-Progress Sloth Bas Relief

As I've mentioned before, I'm teaching an extra course this semester - Honors Seminar: Interdisciplinary Art.  The course is structured into a few different sections, with the first exploring my own interdisciplinary interests (science and art, particularly involving the fields of ecology, biology, anatomy, botany, and my collaborative work in chemistry with Dr. John Pojman developing 3P QuickCure Clay).  

For this segment, the students must use QCC and make at least one piece of artwork that explores the fields listed above that are interdisciplinary interests of mine.  Since it's such a personal-to-me assignment, I decided I'd join in on the project.  I'd considered doing a sloth for a while - I met and got to directly interact with one named Peregrina in Peru during my 2014 residency there - but I didn't want the piece to be too cutesy so I kept dismissing the subject matter until I felt ready to tackle it with a somewhat more complex take on the animal.   I decided the time is now, mostly due to finding this elongated panel (its dimensions are 6x12") which felt like a perfect match to the gangly nature of the sloth.  

I plan to paint it, so the end piece will look considerably different than this, but here's a sneak peek at the relief work before adding any paint.

La Maison Verte - Artwork 7

My seventh piece at La Maison Verte was my intervention in the garden - my conversion of the water-pump door into a piece of artwork.  The door is 41x31x6" and is a mixed media installation including the original door materials, a poplar plank and back braces to replace the rotting base, 3P Quick Cure Clay, acrylics, screws, epoxy, and satin polyurethane.  It's titled Genius loci.  The piece is meant to be permanent, but of course the eye stalks and tentacles of the snail are relatively fragile so they may break if visitors to the garden are not gentle with it; that's in keeping with my overall message about the environment.  Nature provides us with so many rewards but in turn requires some human consideration and restraint.

Below is documentation of the project from start to finish!

And finally, a panoramic view to finish the post off:

La Maison Verte - Artwork 6

I was bound and determined to finish a sixth piece in time for the exhibition in the Jardin Botanique de Marnay-sur-Seine, and I did it just in time!  This is 3P Quick Cure Clay and acrylic on an 8x8" birch panel.  I'm calling it Climber

La Maison Verte - Artwork 5

Here's my fifth piece!  It's 3P Quick Cure Clay and acrylic on a 8x6" birch panel.  It features one of two indistinguishable (apart from dissection) species - either Arion ater, the black slug, or Arion rufus, the red slug - enjoying one of the many rainy days we've had here in France.  I'm titling it As Right as Rain.

La Maison Verte - Artwork 4

Here's my fourth piece!  It's titled Floating and is 3P Quick Cure Clay and acrylic on a 16x12" birch panel.  The whole thing is super shiny because I used a gloss varnish to seal and protect it, but I managed to get some images that aren't quite so glare-filled.  I also ended up gloss varnishing The Slightest Disturbance as well. 

La Maison Verte - Artwork 3 Progress Pics

I was much better about taking progress photos for this piece!  Here are some images documenting my process on Under the Bonnets.

La Maison Verte - Artwork 3

My third piece is pretty much done!  It's titled Under the Bonnets and it's 3P Quick Cure Clay, balsa wood, and acrylic on a 6x6" birch panel.  

La Maison Verte - Artwork 2 Underlying Frog Relief

Sometimes I get asked about how I went about making a piece, and I've been trying (and mostly forgetting!) to document my processes a little more.  I did remember to take this photo of the frog prior to painting the piece but after curing the 3P Quick Cure Clay onto the birch panel.  As you can see, I sculpted very light bas relief for the parts of the frog rising up out from the water apart from the eyes, which are in a comparatively higher relief, though both are dwarfed by the grass protrusions.

La Maison Verte - Artwork 2

And my second piece - again, I may tweak it further, but it's taking longer and longer between tweaks...

The Slightest Disturbance features a Rana ridibunda or the synonymous Pelophylax ridibundus and is a mixed media relief piece made out of 3P Quick Cure Clay and acrylic on a 6x8" birch panel.  

La Maison Verte - Artwork 1

I'm not certain this is completely finished yet, but it's close.

This piece is tentatively titled Every Side is North.  It is 3P Quick Cure Clay and acrylic on a 6x6" birch panel.

Puffin Painting #1 - Byssal Bird

And here's the finished first painting!  It's a conceptual, experimental piece - those are real Atlantic blue mussel shells (Mytilus edulis) adhered to the panel; I beachcombed some while I was in Iceland and was quite interested in their coloration and form and how I might use them to break the picture plane.  I wanted to explore ideas of illusionism, perspective, shaped or irregular canvases, cast shadows, organic versus architectural form language, and intertidal zone ecosystems.

I'm titling this painting Byssal Bird, and it's a mixed media piece with acrylic, watercolor, Atlantic blue mussel shells, and epoxy on a 16x12" basswood panel.

Byssal Bird.jpg

Puffin Painting #2 - Littoral Layers

I'm almost done with the first puffin painting - the one I gave you a sneak peak of - but in the meantime I'm potentially done with the second; I've been adjusting it over the past couple days and I may go back into it again, but here's where it's at now.  If I do go back into it, it'll be for minor changes at this point.  I'm typically pretty bad about taking progress photos (particularly in taking well lit/consistent lighting source ones, so please excuse the slight lighting changes in the thumbnails) but I'm trying to make more of an effort to document my processes.  

I'm titling this one Littoral Layers.  The final piece is graphite, charcoal, and acrylic on a 16x20" basswood panel.  I typically do start with a line drawing (after preliminary sketching, of course), but then in paintings where I add to the natural support media for the background, I usually paint in the beginnings of a background before moving on to the foreground elements and then go back and forth until there's a resolution.  This painting was different in that I really developed the foreground elements before addressing the background, though after that I did my normal switching back and forth routine.

Littoral Layers.jpg

New Series Started - Puffin Paintings!

I've started a new series of paintings on the juvenile puffin, Toti, that I met at the tail end of my residency in Iceland in 2014.  Toti was a puffling that failed to launch and imprinted on humans, so he is now a permanent resident at the Saeheimar Aquarium.  I wanted to start on these pieces sooner, but better late than never.

Here's a sneak peak of progress on the first painting!

The Saga of My Most Recently Commissioned Amphiuma Painting

Recently, I was hired to do another commissioned painting of an amphiuma - an aquatic salamander with vestigial legs that looks like an otherworldly sea serpent or eel.  My patron saw my first commissioned amphiuma painting done for Dr. John Pojman (it hangs in his office above his amphiuma Chrissy's aquarium) and wanted an original piece for herself.

The new amphiuma commission.

The previously commissioned portrait of John's amphiuma Chrissy.

Unfortunately, after mailing the new piece off to my customer and tracking it through delivery, there was radio silence.  I worried that she didn't like the piece but also considered that she may have just been waiting to open it on a specific date (an upcoming birthday, for instance) so I made a mental note to send her an email in a week or two to check in.  Before I could, she emailed me, and it transpired that the package was, in fact, not delivered (or possibly, not delivered properly and stolen off communal property).

Queue multiple weeks of back-and-forth with UPS, but finally the insurance paid out such that I had been paid to make the commission and my client received a refund on never having received the commission, so we were both made mostly whole again.  Even though it's possible it's now lurking in a box in a UPS subbasement or was pawned for the value of the frame, I like to imagine the painting is hanging in a place of pride over a drug lord's couch somewhere.  Since I do have the digital image, though, I can at least run off reproductions, so it's not completely lost to the world.