glazing

Rolling with Ceramic Glaze Changes

Speaking of glazes: I’ve been learning that the discipline of ceramics involves many variables, and some of the variables are less constant than I’d expect. In the discipline of painting, when I use up paint and I need to buy replacement tubes, they are very consistent in formulation so they are almost never perceptibly different. In ceramics, due to weight, volume, and cost issues we mix most of our glazes ourselves. This introduces a lot more human error compounded by potential supply line vendor changes in the ingredients and user contamination. To continue the comparison, it’d be like if I switched brands and sometimes even types of paint and expected continuity!

To state it simply: I’ve learned that when a bucket of glaze is gone and we remix it, I cannot expect the same aesthetics or behavior from the new glaze as from the old, even if they are purportedly the same. In some ways this is disconcerting, of course. But it is also a real opportunity, and it adds some exciting pressure and novelty into the glazing process. The novelty is self-explanatory; the pressure comes from if you want consistency since you only have as long as those buckets last for the desired effects to relatively predictably result.

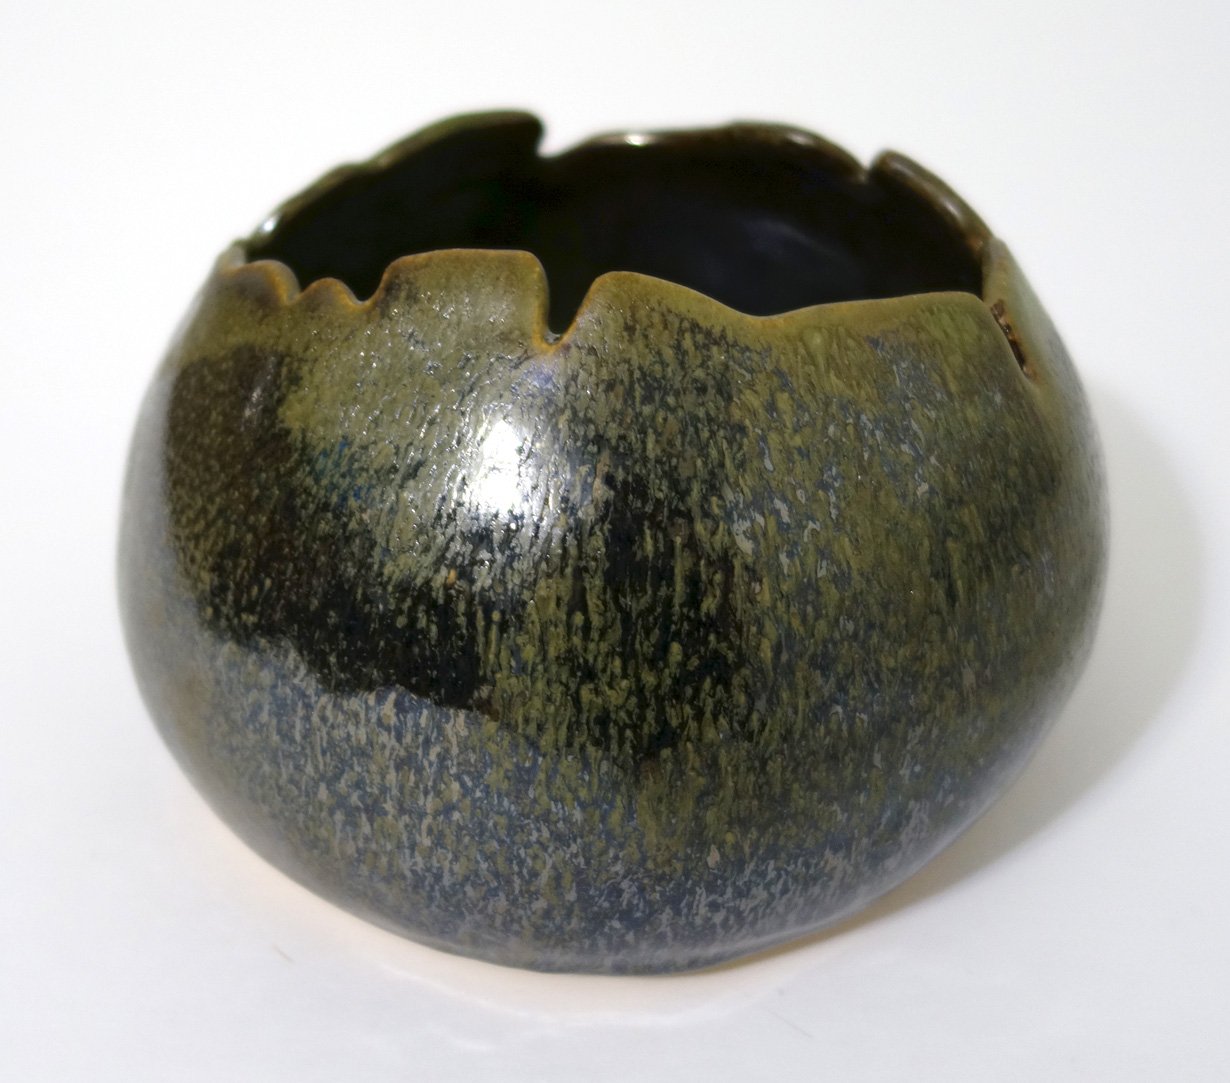
Below is how Cone 6 Larry’s Black under Iron White looked with the bucket of Iron White that we were using last year.

You can see that the Iron White behaved in a very glossy way, was relatively thin at one coat but varied in thickness dependent on number and types of application coats with opacity ranging from translucent to decently opaque. At its most opaque, it was white. The Larry’s Black underneath went to a glossy and stable spectrum of various values of blue dependent on the application thickness of both colors.

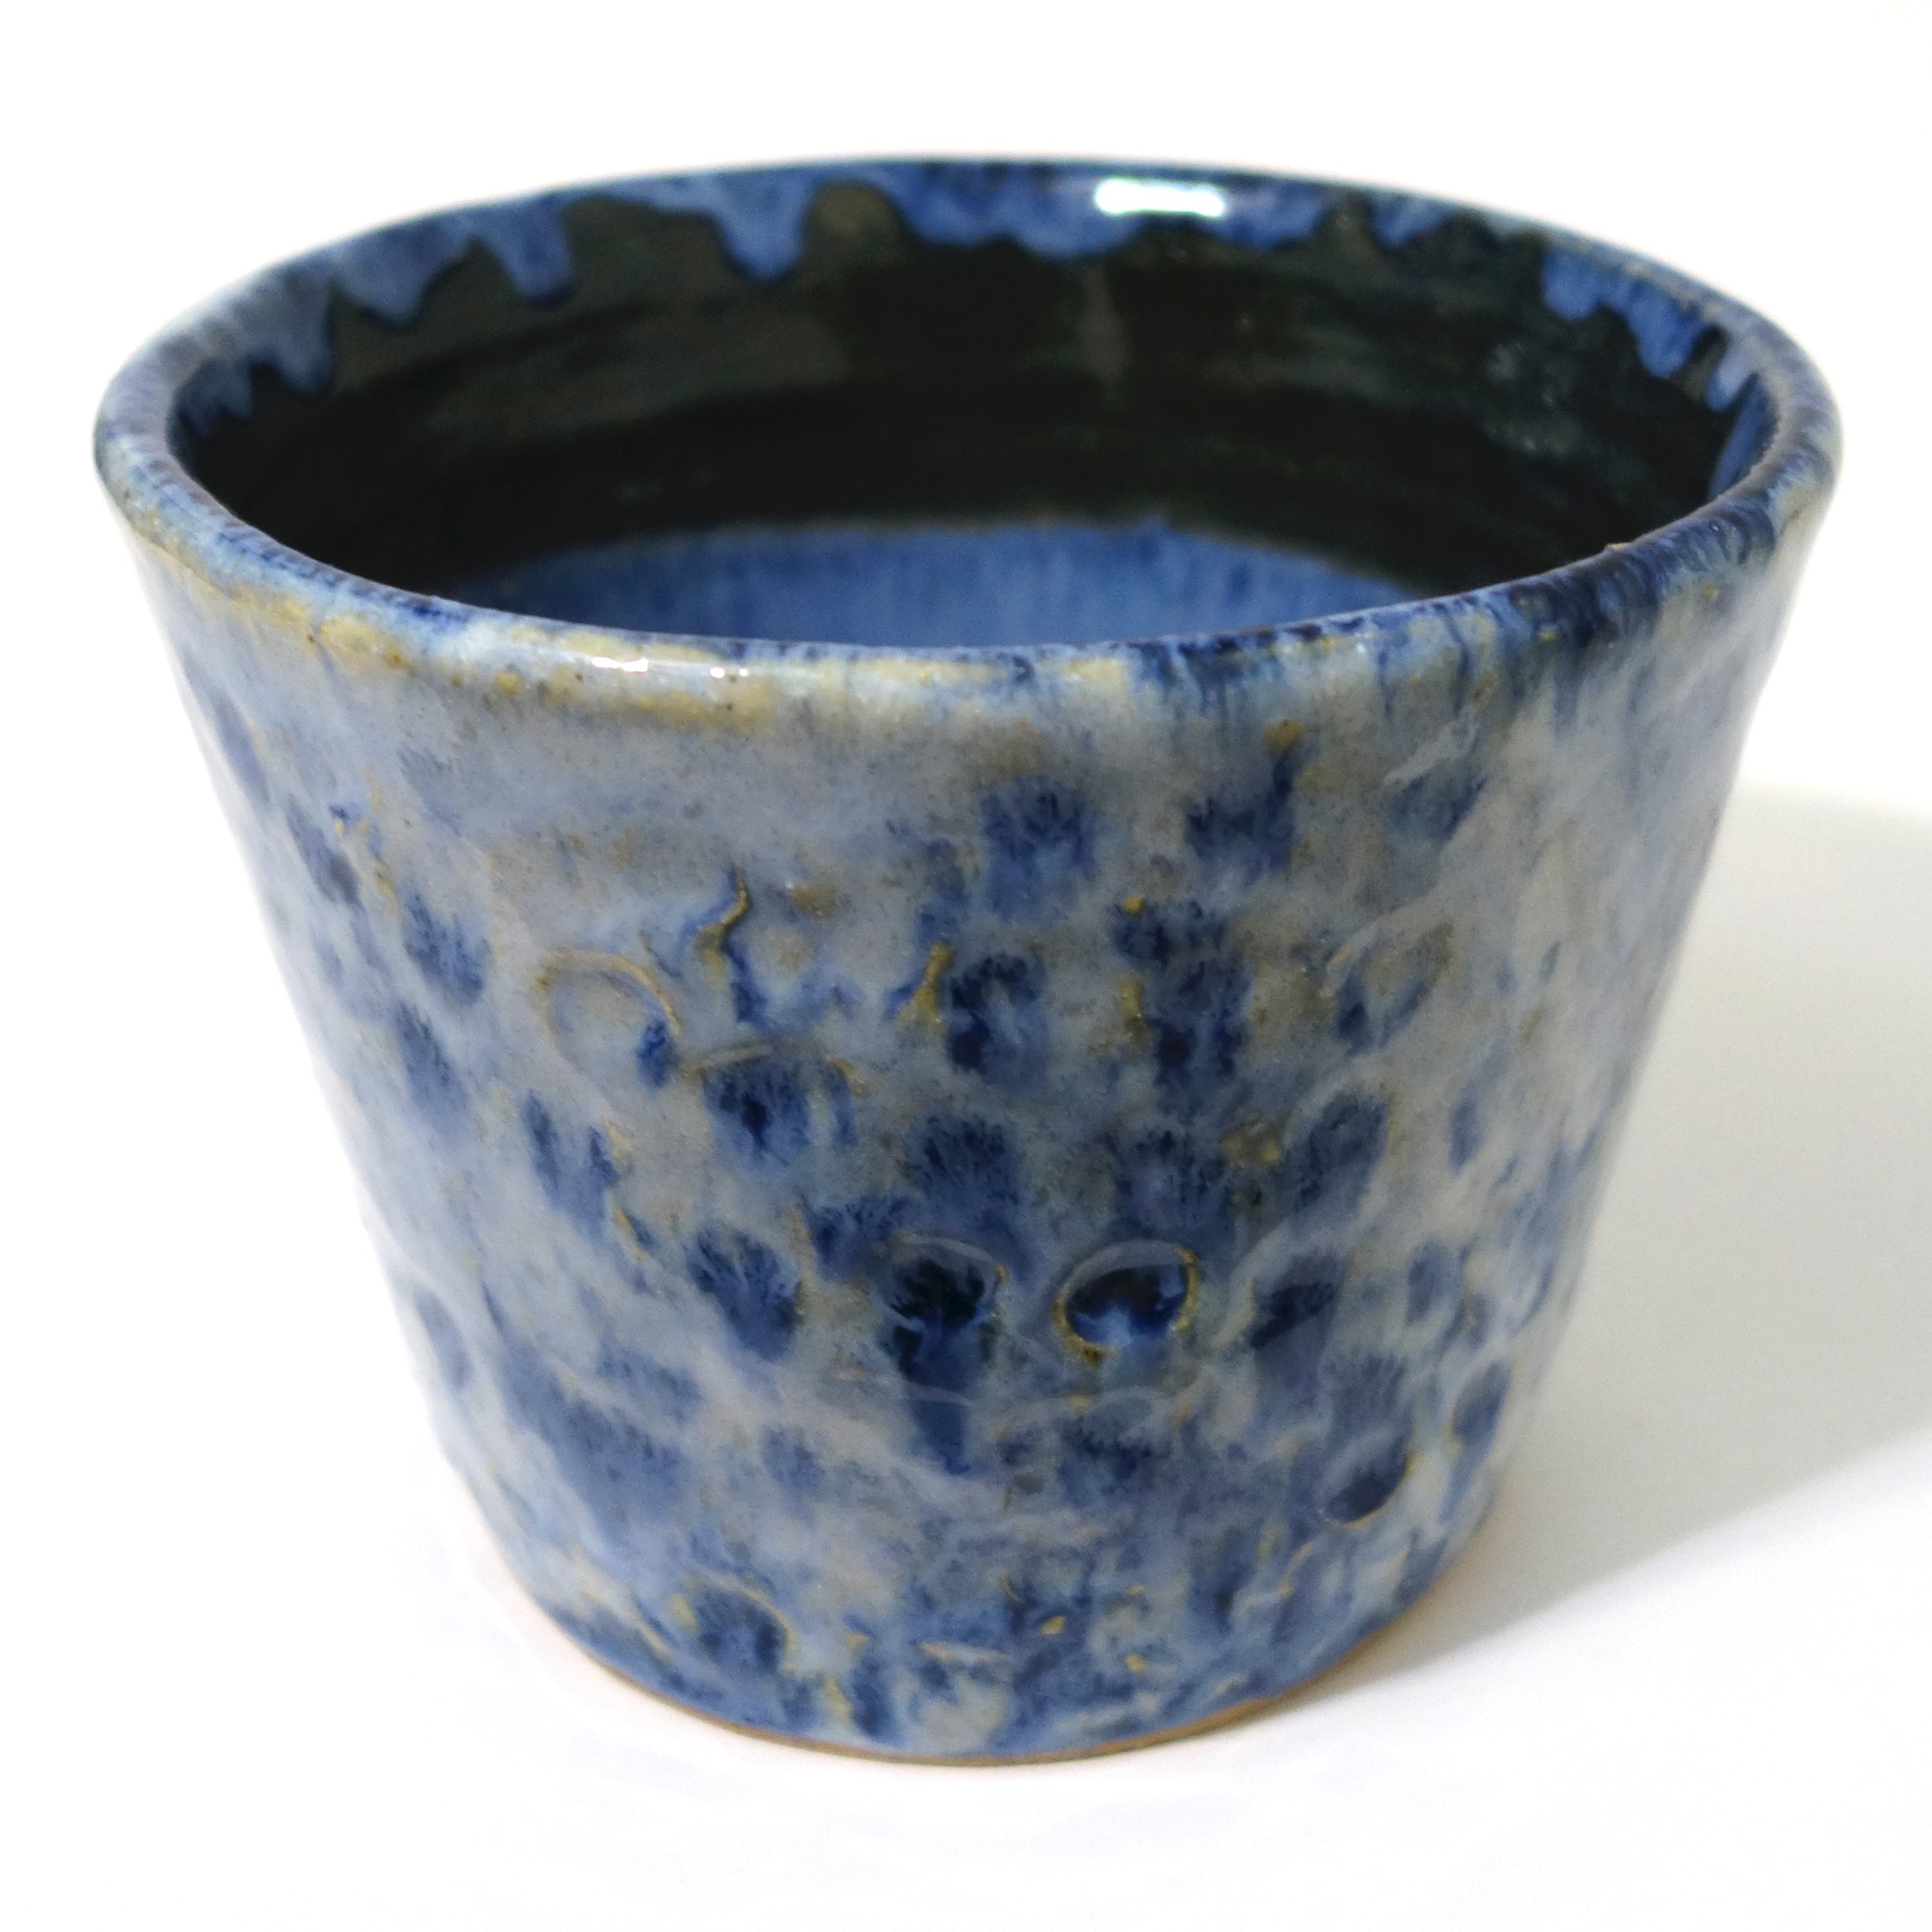
We used up that bucket of glaze a few months ago, and the new Cone 6 Iron White appeared. Below are two new pieces that use Green Tweed, Larry’s Black, and the new mix of Iron White.

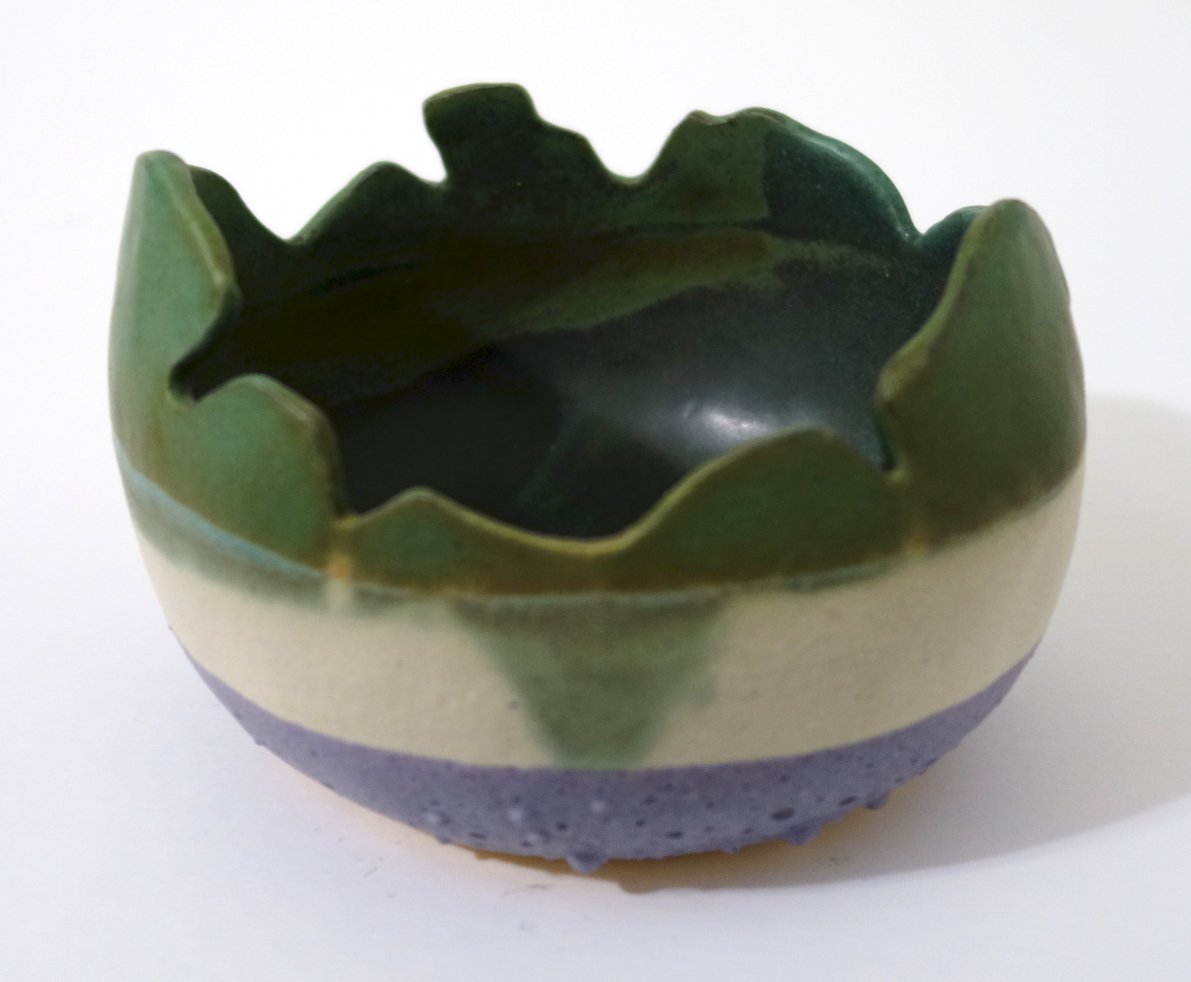
This Iron White is thicker at one application coat, a little yellower, and more opaque and matte. It also interacts quite differently with Larry’s Black. The matte-over-gloss effect causes the Iron White to crater and blister atop Larry’s Black; you can see it does not do that over Green Tweed as Green Tweed is itself more of a matte glaze.

Cratering and blistering are frequently considered “glaze defects,” but I enjoy the texture that some “glaze defects” provide - if you review my body of stoneware ceramic work you’ll notice that I am drawn to crawling as well.

Since these were my first pieces with the new bucket of Iron White, I didn’t know about this new interaction yet - I was expecting glossy results aligned to that first batch above. Now that I know, I’ve glazed a bunch of new ceramics with this cratering/blistering effect in mind, and they are waiting in the kiln until it’s filled up and ready to fire. I’m excited to see them come out!

New Cone 6 Glaze Combination!

When my parents visited this past fall, my mom tried her hand at ceramics! Then at Thanksgiving, she glazed her first piece. She decided to use four different Cone 6 glazes on the small dish - she overlapped Green Tweed, Red Earth and Iron White around the sides, and then filled in the bare central triangle left in the middle with Baby Blue.

Red Earth was a new-to-the-studio glaze that we had recently acquired; it was an old recipe our ceramics faculty Paul Adamson unearthed and wanted to try again. I didn’t imagine it would look very good in combination with Green Tweed, but the overlap on my mom’s dish was small so I figured it wouldn’t matter.

When my mom’s first piece of ceramics came out of the glaze firing, I was really surprised - the overlapped spot of Red Earth over Green Tweed looked metallic and reflective! So far, I’ve only seen that kind of glaze result from raku, and those are somewhat unstable and decorative (not watertight). I was excited to see what this new food-safe stoneware glaze combination would look like on a larger scale, so I tried it out on several pieces! This glaze combination seems somewhat chaotic in terms of its uniformity, density, and reflectiveness, but I’ve always enjoyed the balance that natural chaos can bring to my tight artistic hand.

There are two views of each of the three pieces above. The bowl and egg-shaped vase both use Green Tweed as the base and then have Red Earth applied to most of the top. The striped planter combines Iron White, Green Tweed, and Red Earth in different layers.

Here are three more pieces - two more broken-eggshell vessels and another planter! These also experimented with Iron White, Green Tweed, and Red Earth in different ways. I need to take better notes on my processes, as I no longer remember the order of layering on each of these and I didn’t write it down, but more testing will reveal all such secrets in time.

Overall, I’m really pleased with how these all turned out and plan to continue experimenting with these glaze combinations more in the future!

New Ceramics!

My latest batch of ceramics has come out of the final firing! I started these pieces around three months ago, but ceramics take time and sequential processing. Though there’s still quite a bit of trial and error, I feel that I am honing my glazing skills! There are several glazing combinations from this go-round that I’m definitely going to be revisiting. There is also a new glaze color in this set - Green Tweed - that we didn’t have on hand before; I glazed it blind (meaning I had no samples of it to see how it’d turn out) so I didn’t use it on too many pieces, but it turns out I really like it both solo and in combination with other colors so I’ll be adding into a more regular rotation.

Above you see three new small dishes or bowls. The photography of ceramics is difficult because they are three-dimensional objects with variance - how many photos do I need to share to truly capture enough of each artwork? For these, I think one photo sufficiently captures each piece, though on the one with the hand-painted rings, there are rings on the exterior of the dish as well which I’m not sure is evident. Maybe I should have taken a side photo too?

However, for the small bowl above, I think at least two photos are needed to understand the glazing; another could provide even more coverage, but I believe only one would be insufficient.

All of the eight pieces immediately above are planters with drainage holes, as demonstrated by the final photo in the grid.

For many of the more complexly glazed pieces, I think my photographs - even multiple - don’t fully capture their totality. I should experiment to see if different photo setups can help, but also I think some artwork is always going to be best suited for in-person appreciation!