handmade ceramics

New Stoneware!

I’ve been steadily, slowly making food-safe, high-fire stoneware ceramics as well. Here are some pieces I produced this past year which I hadn’t gotten around to publishing until now!

First we have small plates - I’ve been using them as dessert or appetizer dishes!

Next, I’ve been continuing my landscape vase series! These are “rainy” versions.

My Obvara Raku Vases

And here’s the last batch of obvara raku ceramics from my recent workshop at Dakota Potters Supply - these are the burnished vases!

This first oblong vase was the only one that I saw and heard crack during the sequential baths. It is still usable decoratively, but it does have that asterisk about it so I likely won’t exhibit or sell it. (Note, I purposely selected photos of it that don’t draw attention to the relatively large crack.)

While at the workshop, I thought that was my only casualty - but when I was applying kitchen wax to the surfaces at home, I noticed this next squat vase has a small hairline crack as well. It’s not nearly as apparent as the above piece’s flaw as it requires close examination to spot. While a crack is never ideal, in a low-fired piece like these which was always going to be decorative (not water-tight nor food-safe), it’s far less problematic than it would be in a piece intended for that kind of usage. I’ll probably keep this one myself!

The rest of the below vases are completely unblemished. This little bud vase is the smallest of the bunch.

Next we have a larger, somewhat soft rectangular vase!

And finally, a somewhat flared cylindrical vase.

I hope you’re as into the obvara pieces as I am. I really like the aesthetics this process produces - but more than that, from a conceptual standpoint I love the organic chaos that creates those aesthetics.

My Obvara Raku Plates and Platters

In my previous post, I shared the obvara raku bowls I made on my October 21, 2023 workshop at Dakota Potters Supply. I also made some plates and platters! As always, you can click on any of the photos below to see them larger.

This first burnished plate depicts a bear, and you can’t convince me otherwise.

This next burnished plate is smaller than the first - it’d be good to hold jewelry or other small items.

A small obvara raku plate by artist Shelby Prindaville.

This final piece is the largest - it’s a platter or tray, and it has some light texture on its inside surface.

My Obvara Raku Bowls

Here is the first batch of my obvara raku pieces from my Dakota Potters Supply workshop on October 21, 2023 - I made enough that I plan to publish three posts covering the artwork! This post shares my obvara bowls and bowl-like vessels.

Again, as background, obvara is a low-fire scalding-and-sealing process wherein you create a fermented sourdough/beer bath, plunge approximately 980°C naked ceramics fresh out of the kiln into it, wait for them to start to bloom with different tan-to-brown markings, and then arrest the surface carbonization process by rinsing the pieces off in a water bath.

The obvara process itself scalds and somewhat seals the surface of the pottery, but I went ahead and added a thin layer of kitchen wax to these pieces as well for extra protection and sheen unification. All of the below images in each gallery row are of the same artwork from different angles.

This first open bowl has a burnished-smooth surface!

This second piece is another open bowl, but this time the surface has some light texture as well as a more variable form.

This third piece is burnished smooth and a bit more closed, though there’s a quite variable lip. All of the pieces I’ll be showing you are handbuilt, pinch-pot designs.

Next we have another burnished and even more closed vessel! This one was a favorite of my fellow workshop attendees; they loved how the obvara surface turned out.

While you can click into each of the above images to see them larger, I want to close this post out with just one large image of the last burnished bowl I made!

An obvara raku handbuilt bowl by artist Shelby Prindaville.

My Favorite Ceramic I've Made Yet: My Last April 2023 Raku Saggar Piece

I have a lot of my own ceramic pieces that I love, and there are a number of those that I plan to keep for myself for the foreseeable future! I’m pleased with each of the ceramics that came out of my recent April 2023 raku workshop; that work spans the realm between good to fantastic. One piece I made is my favorite ceramic I’ve made yet, though, which is a hurdle that was relatively easy to pass when I was a beginner back in early 2020, but is now a much rarer event.

This piece, like the others in this series I’ve made, was dipped in three coats of ferric chloride, wrapped in Muehlenbeckia axillaris or Creeping Wire Vine and then aluminum foil, and saggar-fired in a raku kiln. It is finished with kitchen wax.

Ceramic glazing in general is a lottery; there are a lot of variables and some are outside of your control. I think I won that lottery with this vessel!

April 2023 Raku Crackle and Saggar Ceramics

This is my second post reviewing my April 2023 raku workshop ceramics! This one will cover two of my three “baked potato” aluminum foil saggar-fired ceramics and my clear crackle piece.

Based on my experimentation using plants at my April 2022 raku workshop, I only had real luck with saggar firing Muehlenbeckia axillaris, colloquially known as Creeping Wire Vine. I therefore used it again! Below is a plate that was dipped in three coats of ferric chloride and then wrapped in the vine and then aluminum foil and fired. The Muehlenbeckia axillaris impact is relatively subtle because it mostly went white to medium gray, but the plate overall turned out well. The very first time I did this “baked potato” technique, I used a matte clear acrylic spray. The second time, I went with gloss. I didn’t really love either, so this time, I went with applying a kitchen wax. I really like the way the wax looks, so I think that’ll be the winner moving forward!

Next, I did the same process with a vase - on this piece, I also sprinkled just a little sugar on as well for some small-scale spotting in the design. This one’s interesting as the Muehlenbeckia axillaris is more apparent, and it produced the full value spectrum on the same vase; the top vine piece is white to light grey, while the bottom vine carbonized a lot more and turned medium grey to black.

And finally, I chose to do a clear crackle on a small, necked vase. Handbuilding necked vessels is tricky, and I complicated matters with this piece by leaving my building process evident on the outside to contribute texture (while smoothing it for structure and stability on the inside). This was quite risky; I knew there was a good chance this piece could crack or break with thermal shock due to the thinner seamed areas. However, I was fortunate - it made it through the firing completely unscathed! I wanted to enhance the seams and stress spots that I had intentionally retained, so I painted over each of them and the lip of the vase with wax before glazing with Clear Crackle on the exterior. As I’ve explained before, this means the glaze doesn’t stick to the waxed areas, and the wax burns off in the kiln. The exposed, unglazed clay body then carbon traps the smoke in the post-kiln reduction atmosphere, turning a dark, smoky grey. I finished the piece by putting kitchen wax on the unglazed areas.

Again, none of the “cracks” in the below piece are structural - they are all decorative and this vase is fully sound.

April 2023 Raku Copper-Glazed Ceramics

I’m going to do a few different posts about my April 2023 raku workshop pieces because there’s a lot of good work to share. In this first one, I will review my copper-glazed pieces!

Below is a platter, which has some texture on its surface; I imprinted an equine femur into the clay body thanks to bones I was allowed to keep using from the LSU SVM anatomy lab. I first glazed it with White Crackle, then wiped the white crackle back down so that it stayed in the impressions, and also applied it to the rim. Then I glazed over the top with Copper Sand. I thought this would impact the coloration, but the white crackle (at least at that thickness) only really affected the sheen; where it was applied the glaze is glossy rather than matte. Though it’s not precisely what I envisioned, it’s a strong piece.

Next, we have a small, leaning vase. I chose to apply wax to the rim and throat. Then I glazed the exterior with Copper Sand, keeping in mind that the glaze doesn’t stick to the waxed areas. In the kiln the wax then burns off, allowing the unglazed clay body to carbon trap the smoke from the reduction afterwards. I was planning on staining the raw clay, but I ended up holding off as the variably smoky surface is interesting in its own right. I need to actually decide, as I will want to wax the raw surface if I don’t stain it.

This is probably the biggest of my raku pieces this go-round. This vase vessel has Litho Carb on the inside and Copper Sands on the outside. (I really like Copper Sand as it’s pretty predictable in its behavior for me, which is a rarity when doing raku.) The interior lip has an abalone-like appearance!

Next, we have my “golden bowl.” This piece is glazed with Dakota Potter’s new Peacock on the interior, and once again uses Copper Sand on the exterior. One of my students kept hovering her hands above it and singing reverential “aaah” noises!

And below is my final copper raku piece of the workshop! This one is an oddball shape; I wanted to push myself to make some handbuilt, necked vessels and in doing so created this flora-inspired vessel. I glazed it with Litho Carb on the inside and Midnight Luster on the outside.

My 39.57, -97.66 Ceramics

After I made my 100% wild, site-specific Whiterock Conservancy ceramic collection entitled 41.816, -94.646 Ceramics, I knew I wanted to add other geographic coordinates to my oeuvre. Upon discussing this wish with family and friends, my father suggested that I might be able to get some wild clay from the brick plant Cloud Ceramics in my hometown of Concordia, Kansas. We brainstormed different supplies of ash for me to create custom ash glazes with, and settled on ash from my parents’ Republican River Valley firewood and the local Cloud County landfill (they burn organics like fallen tree limbs).

Several calls and trips my dad took to fetch the requisite media later, I had two different colors of native clay as well as the two aforementioned sources of ash. The clay from the brick plant arrived in dry chunks, and it had a lot of rocks and different densities of clays embedded in the pieces. After trying a couple of other methods (sifting and straining), I ended up going back to my tried-and-true, low-tech solution for cleaning the clay: meticulously smushing little pieces of it by hand to remove the debris and equalize consistencies.

I began working on this series in late November. I had a deadline of mid-February if I wanted to include 100% site-specific ceramics in my solo show in the Frank Carlson Design Room. That’s a turnaround of less than three months! I tasked my studio assistant work study students with helping me clean the clay, which helped speed up the process. I also tried to keep the pieces relatively small to maximize the number of pieces I’d be able to complete.

Here are some photos of the process!

As you can see above, after we cleaned the clay I handbuilt 30 ceramic pieces (15 out of each clay color) and bisque fired them. I then separated them into two different firings: half went into a cone 8 electric kiln firing and half went into a cone 9 gas reduction firing. After sifting the ash and removing all the larger chunks, I created 9 different custom ash glazes: 8 using all possible combinations of yellow clay, grey clay, landfill ash, and fireplace ash in 1:3 ratios, and 1 hybrid glaze with 1:1:1:1 proportions of each. I wasn’t sure what any of the glazes would look like, so I ensured each color of clay and kiln setting had the full range of options and asked my work study students to take copious notes so that we could learn from the results.

Here are my 39.57, -97.66 Ceramics! I managed to finish these in time to include in my Frank Carlson Design Room solo show. I like them all, but I am particularly in love with the ones that came out of the cone 9 gas reduction firing. I’ve only fired a few times in gas kilns so far, and this is the first time I’ve gotten really good reduction - it’s gorgeous! I like them so much that I want to make more (and larger) pieces to add into this collection, and glaze with a little more intention now that I know what the custom glazes I created will do. The clay cleaning process is tedious enough that there is a limit to how long I’ll want to keep working with each wild batch of clay, but my interest hasn’t waned in the Concordia series yet.

I Bought a Rock Tumbler!

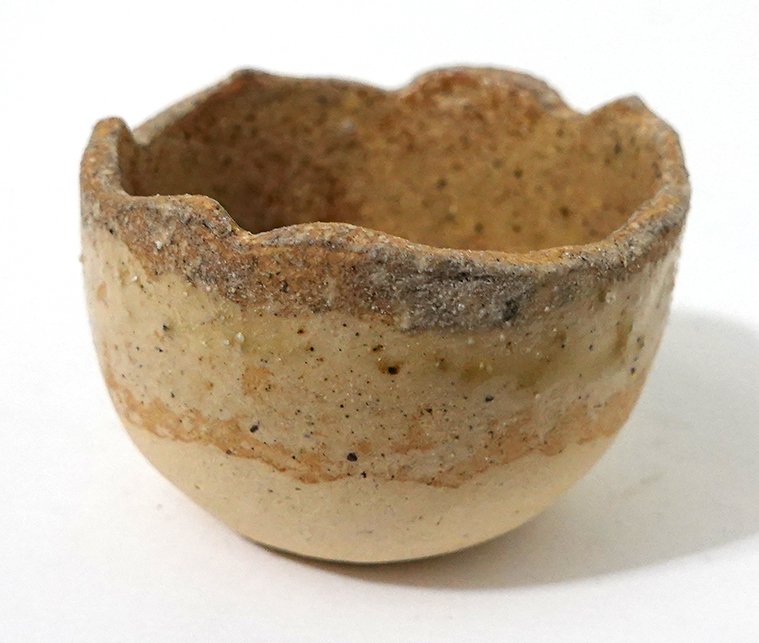
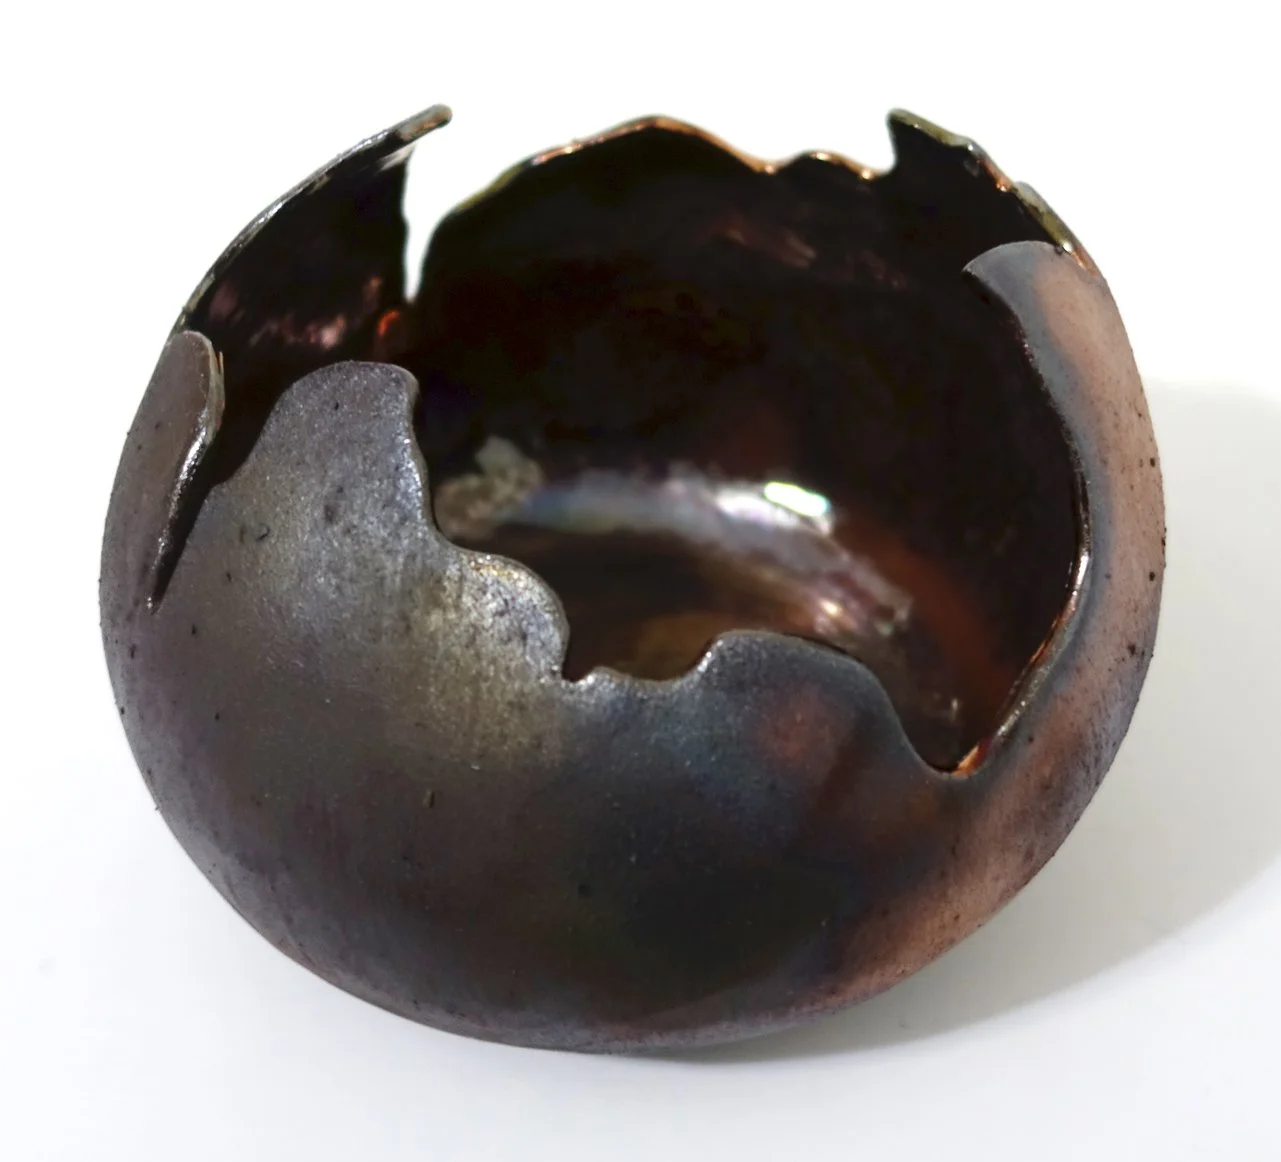
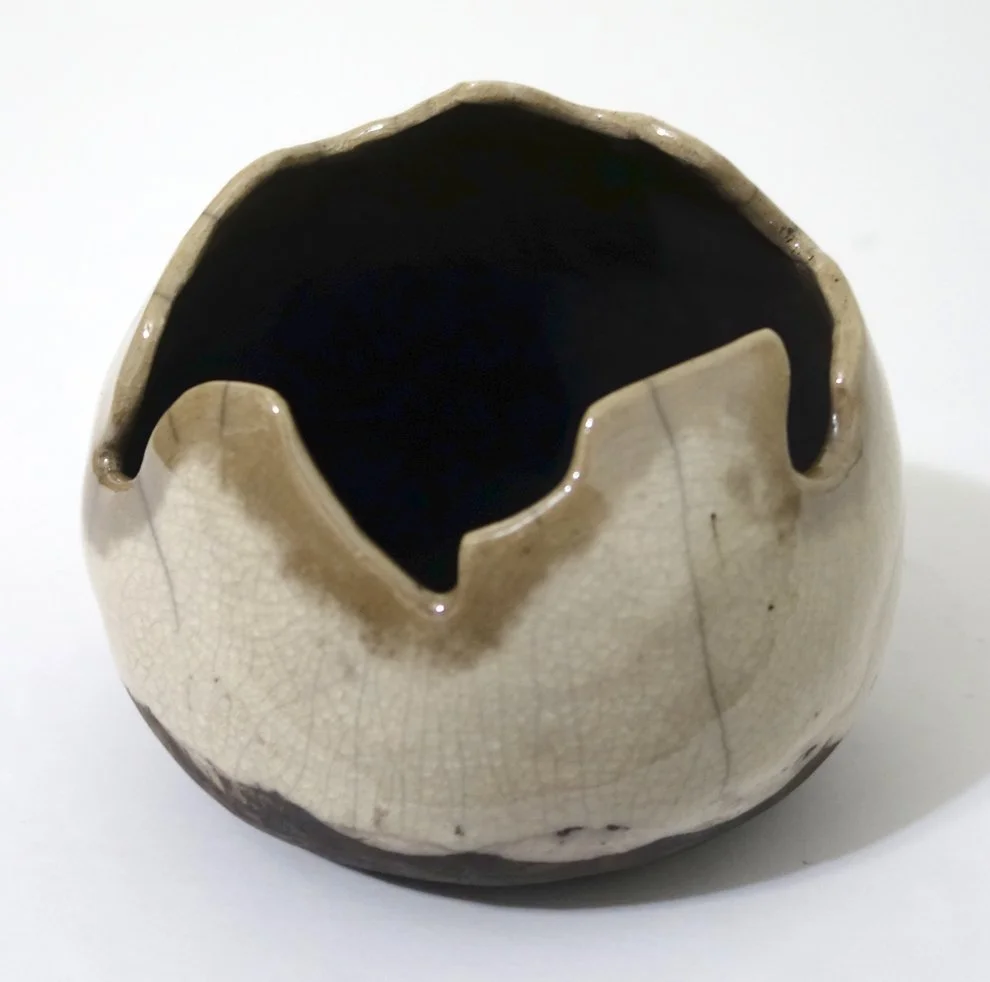
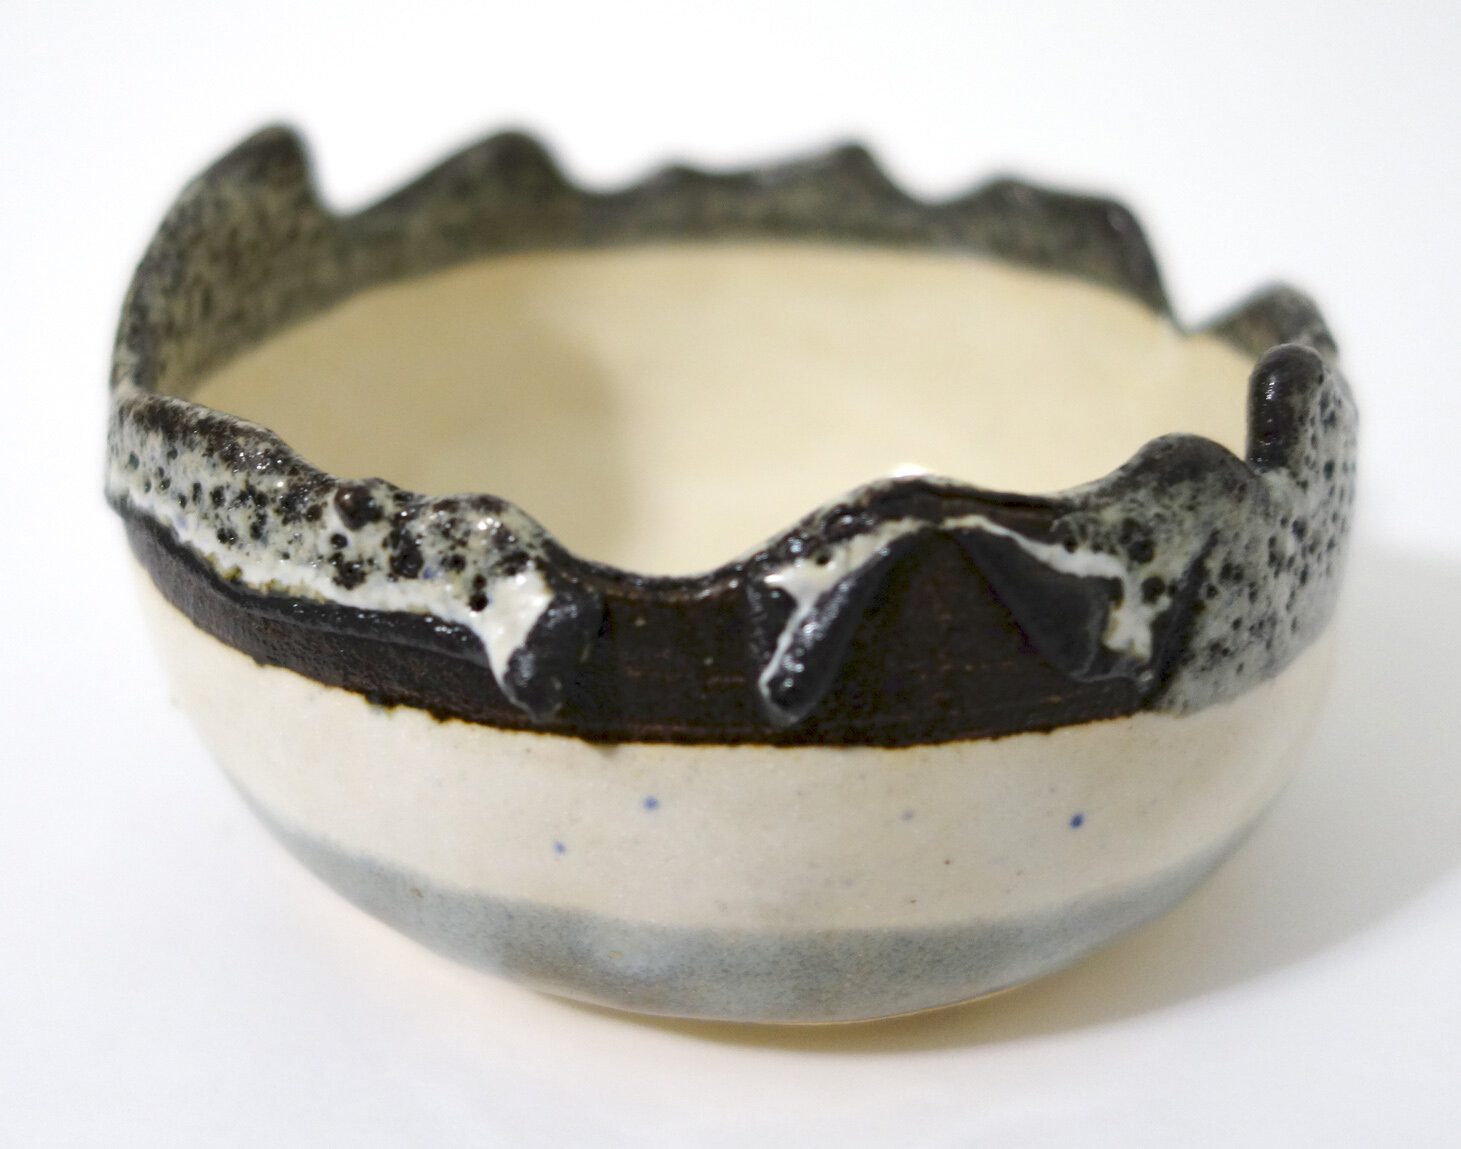
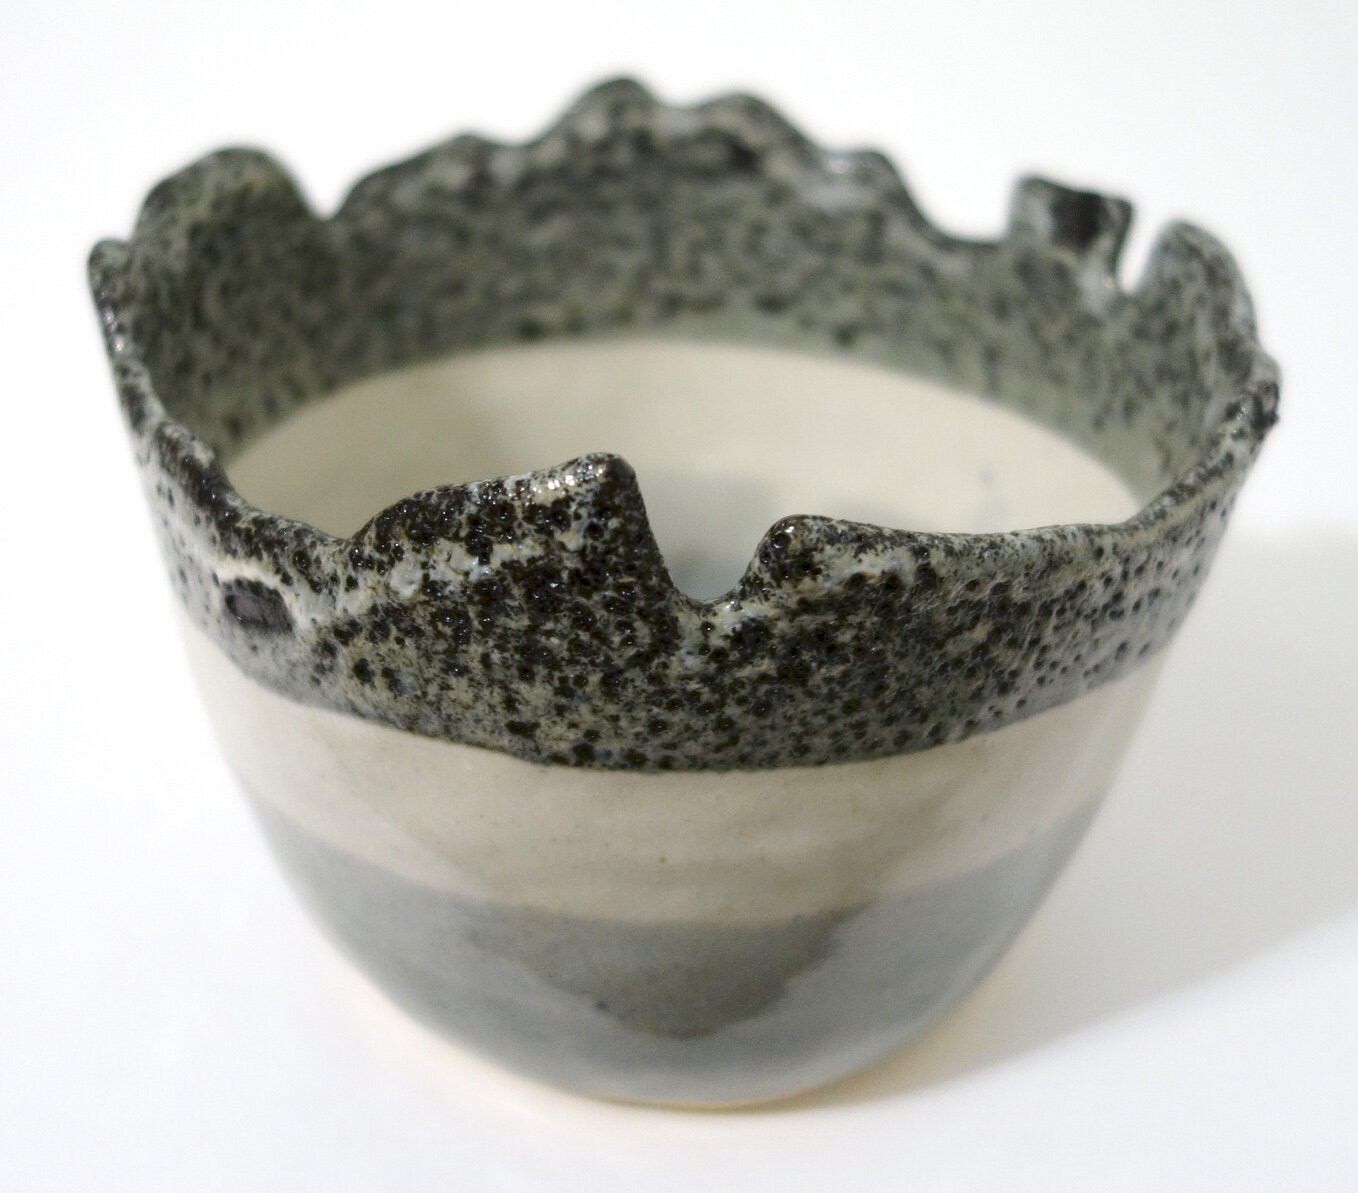
I’ve wanted a rock tumbler for a couple of years, but not quite enough to commit. However, I have also begun to amass broken ceramics, from raku thermal shocks to glaze fusing with kiln shelves to squirrel casualties (they try to bury nuts in my outdoor container plant collection in the fall, and repeatedly fail while digging up my plants and breaking planters in the process). Some of the broken pieces were favorites, so I just carefully collected the pieces and held onto them. (I did try to glue one planter back together, and realized that just doesn’t work well enough.)

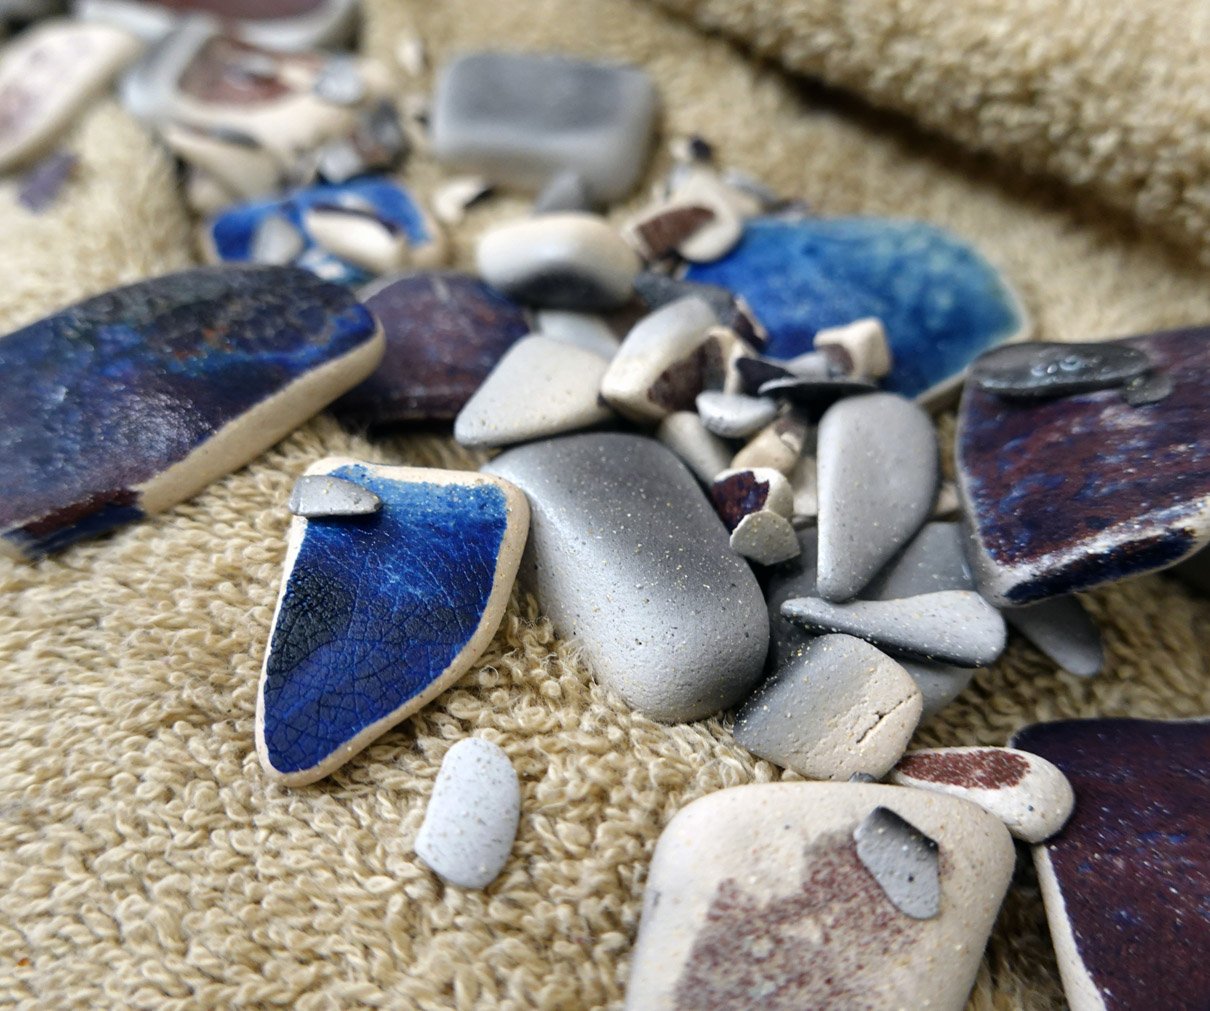
It dawned on me that given my now multi-year interest in ceramics, I’ll have a renewable resource for the rock tumbler beyond an occasional rock harvest. I’ve beachcombed tumbled tiles before and even used them in assemblages, so I know I like the aesthetic - and, of course, the conceptual power of the push/pull between man and nature that creates them. If I make them myself out of my own handmade ceramics, I could generate enough to use the tumbled pieces for magnets or mosaics! I can also use any rejects as top dressing for plants, and I have a near infinite need there as my plant collection is unreasonably large and continuously expanding.

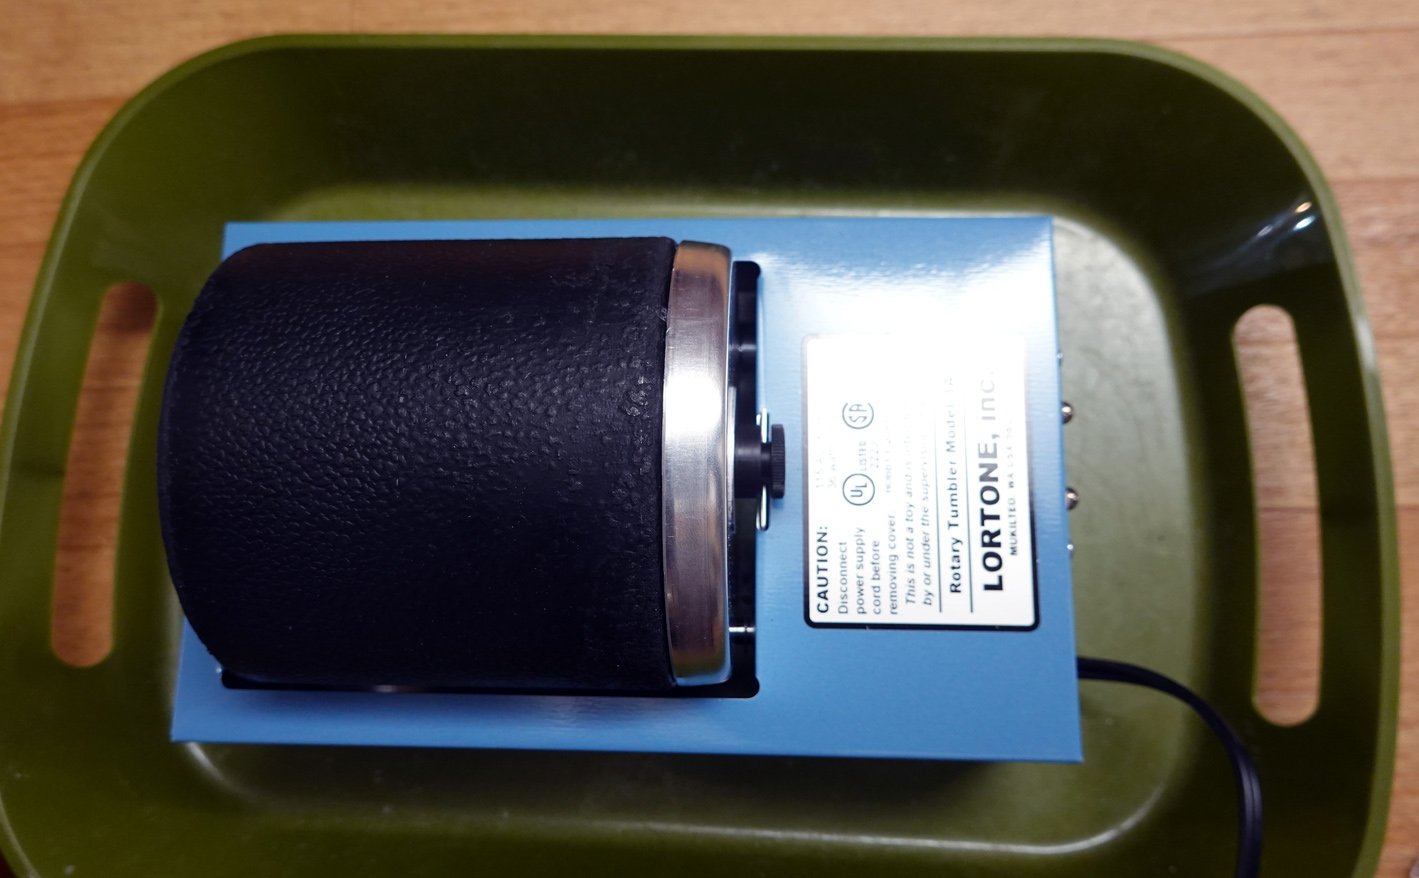
I began to research rock tumblers in early November. At first, I thought I’d just get a hobby one like the entry-level National Geographic model. However, I learned it doesn’t cost that much more to buy a quality version. I decided to go with Lortone as the maker. I wanted a rotary style - vibratory models also exist, but for my ceramic purposes I need the rotary tumbling action as vibrations are more helpful for surface polish while tumbling is what knocks down harsh edges.

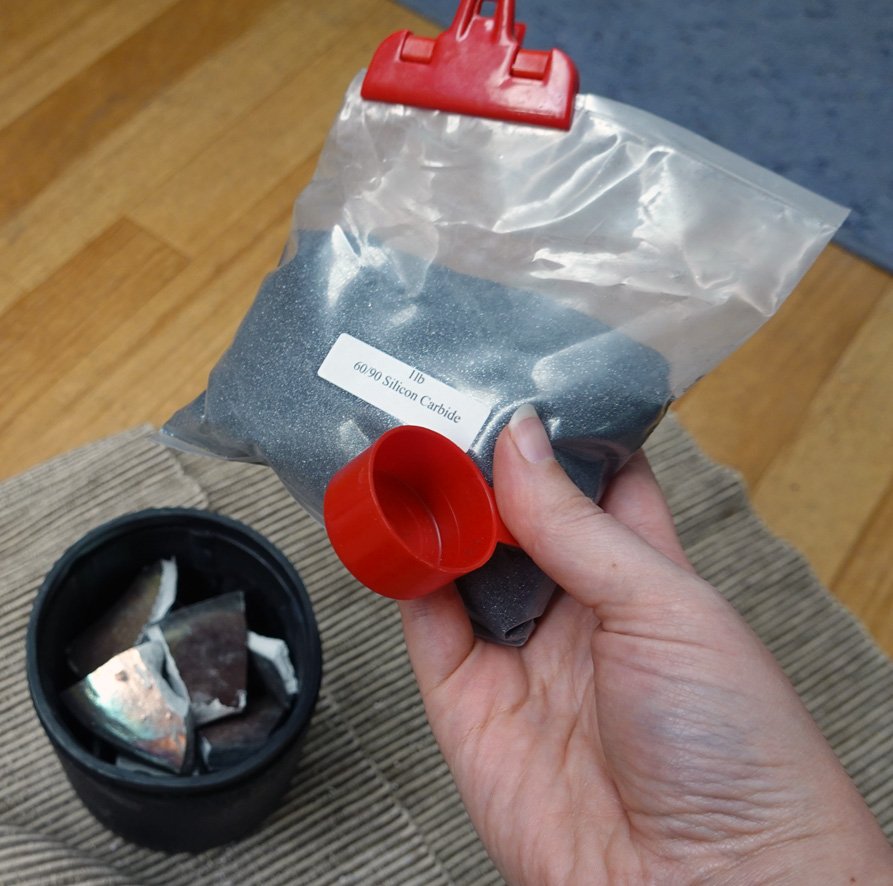
Most rock tumbling aficionados recommend a double-barreled design, but those were sold out and I imagined it might take several months for stock to replenish given holiday demand - I didn’t want to wait that long! I considered going for a bigger volume barrel next, but then I thought about the quantity of material I have to do at any one time and in reality, it’s not that much. I eventually settled on the Lortone Model 3A tumbler. While I think I’d likely have gone with the double-barreled 33B if it’d been in stock, I also think that running two barrels at once is more for those who plan to process mostly rocks rather than ceramics. With rocks, you need to go through several stages of polish to achieve a smooth finish; with ceramics, they start with a smooth glass finish and you just need to knock the sharp sides down! I can do that in just one rough grit tumbling session.

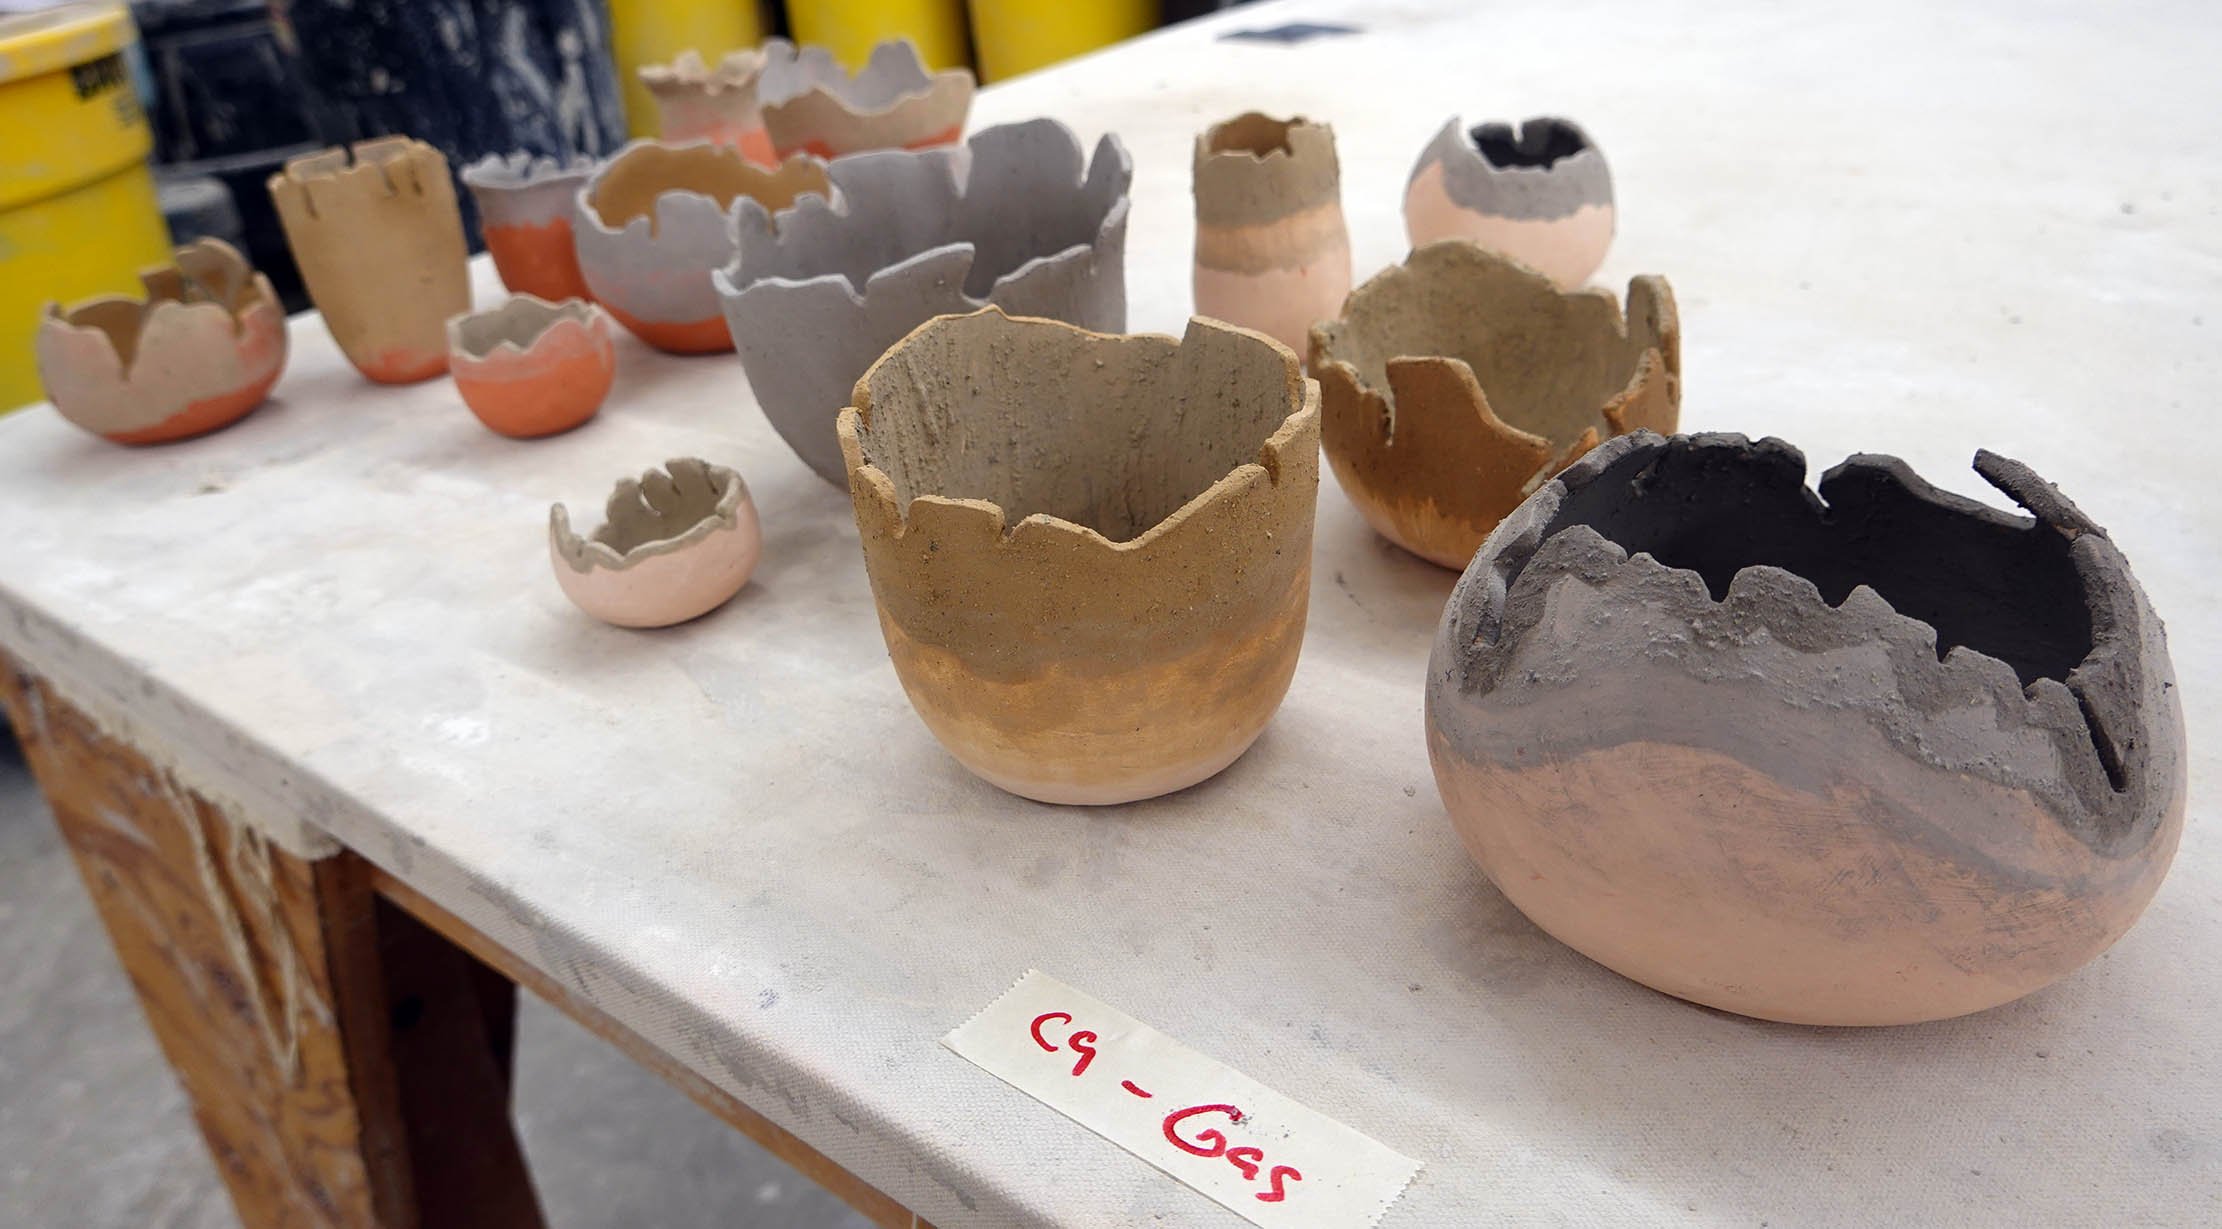
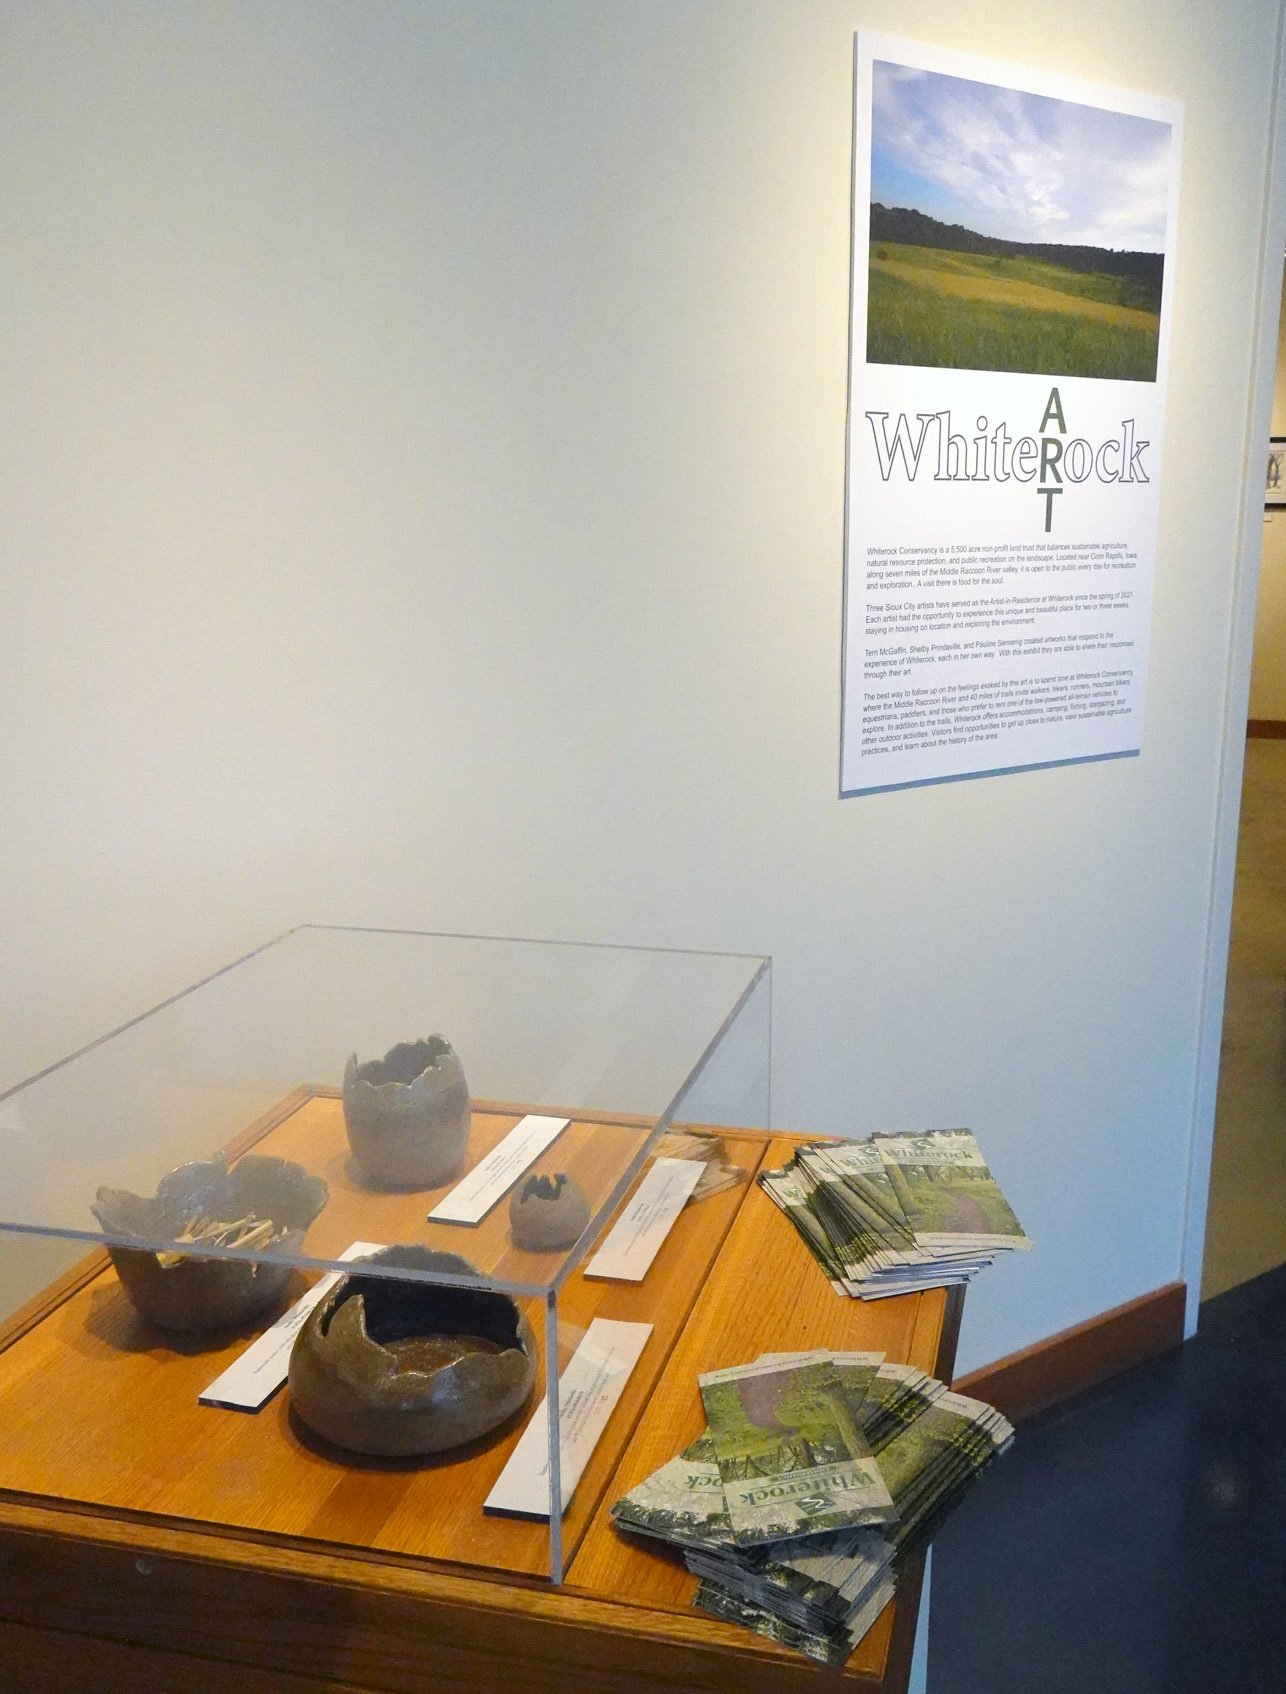
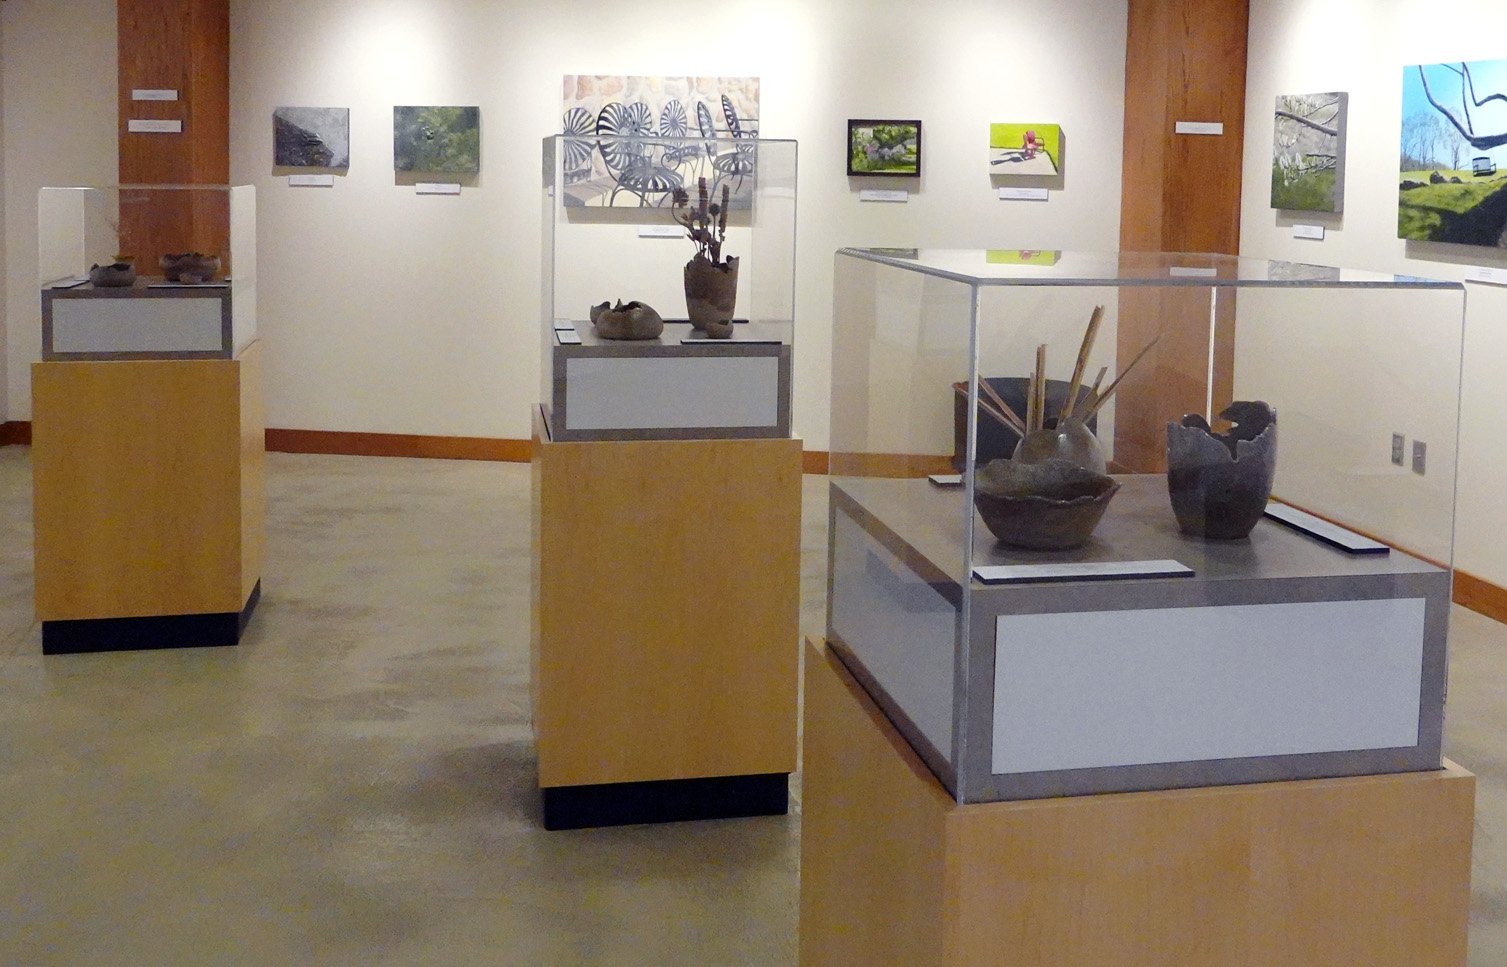
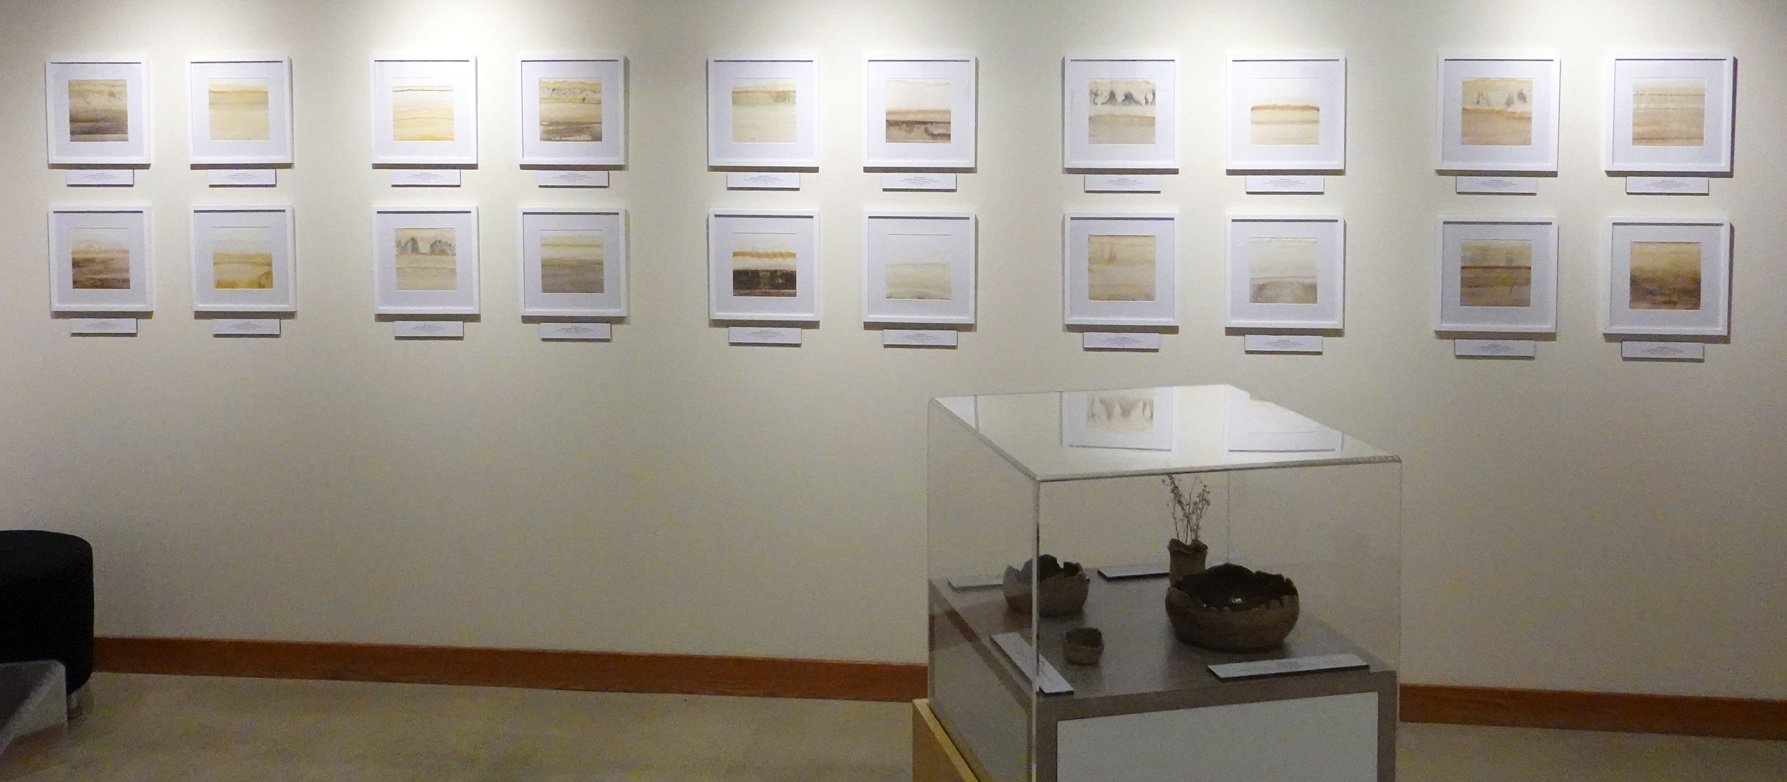
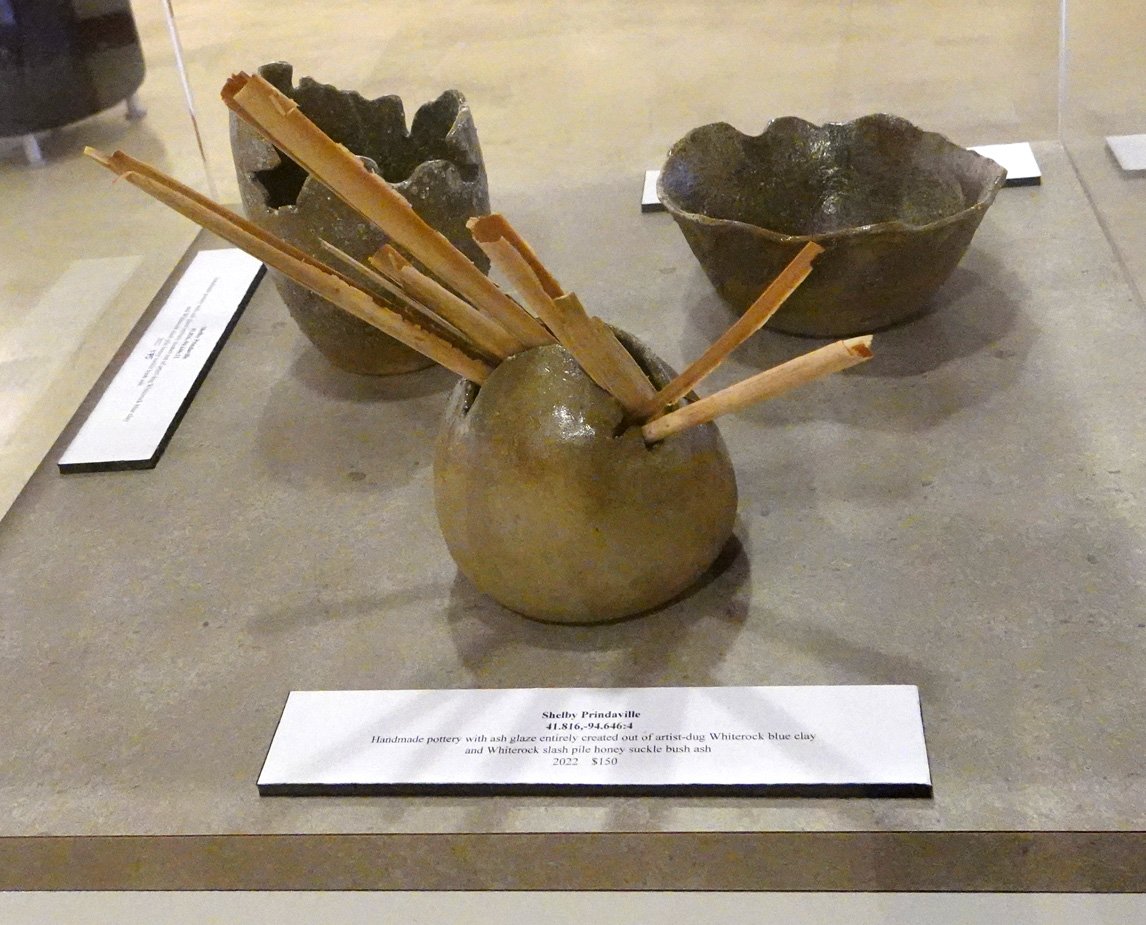
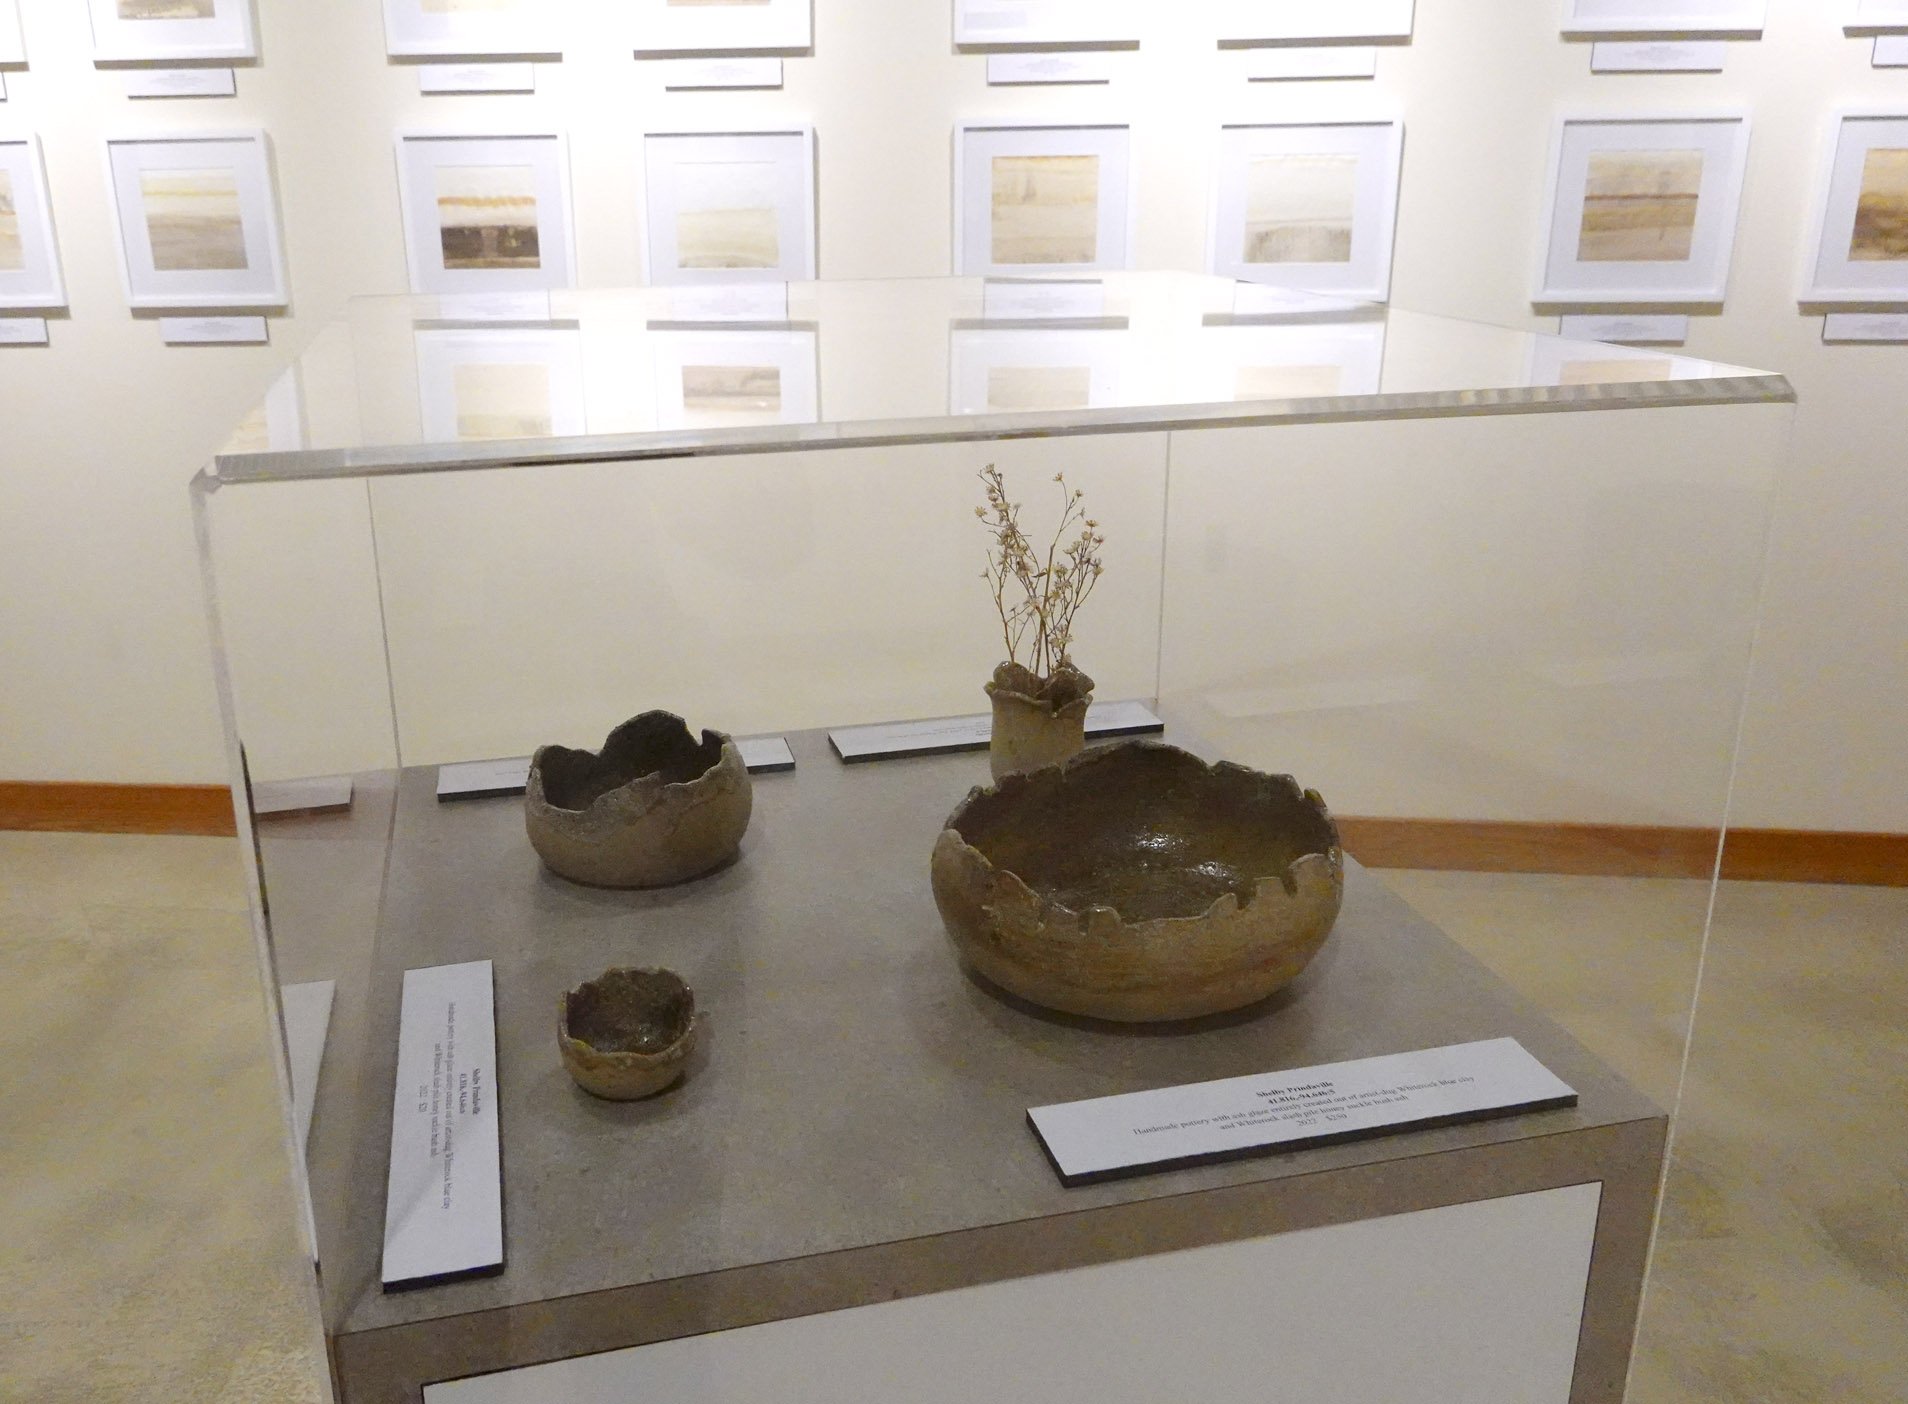
I’ve only owned my tumbler for a few weeks, so I’m still learning, but I’m having a lot of fun and have run through my backlog of broken ceramics already! In trying to find more fodder, I’ve realized I can easily recycle my ash test tiles I created when testing ash glaze recipes for my Whiterock 41.816, -94.646 ceramic collection, so I’m still working on processing those. I love that I now have a use for otherwise already-served-their-purpose ceramics like test tiles too.

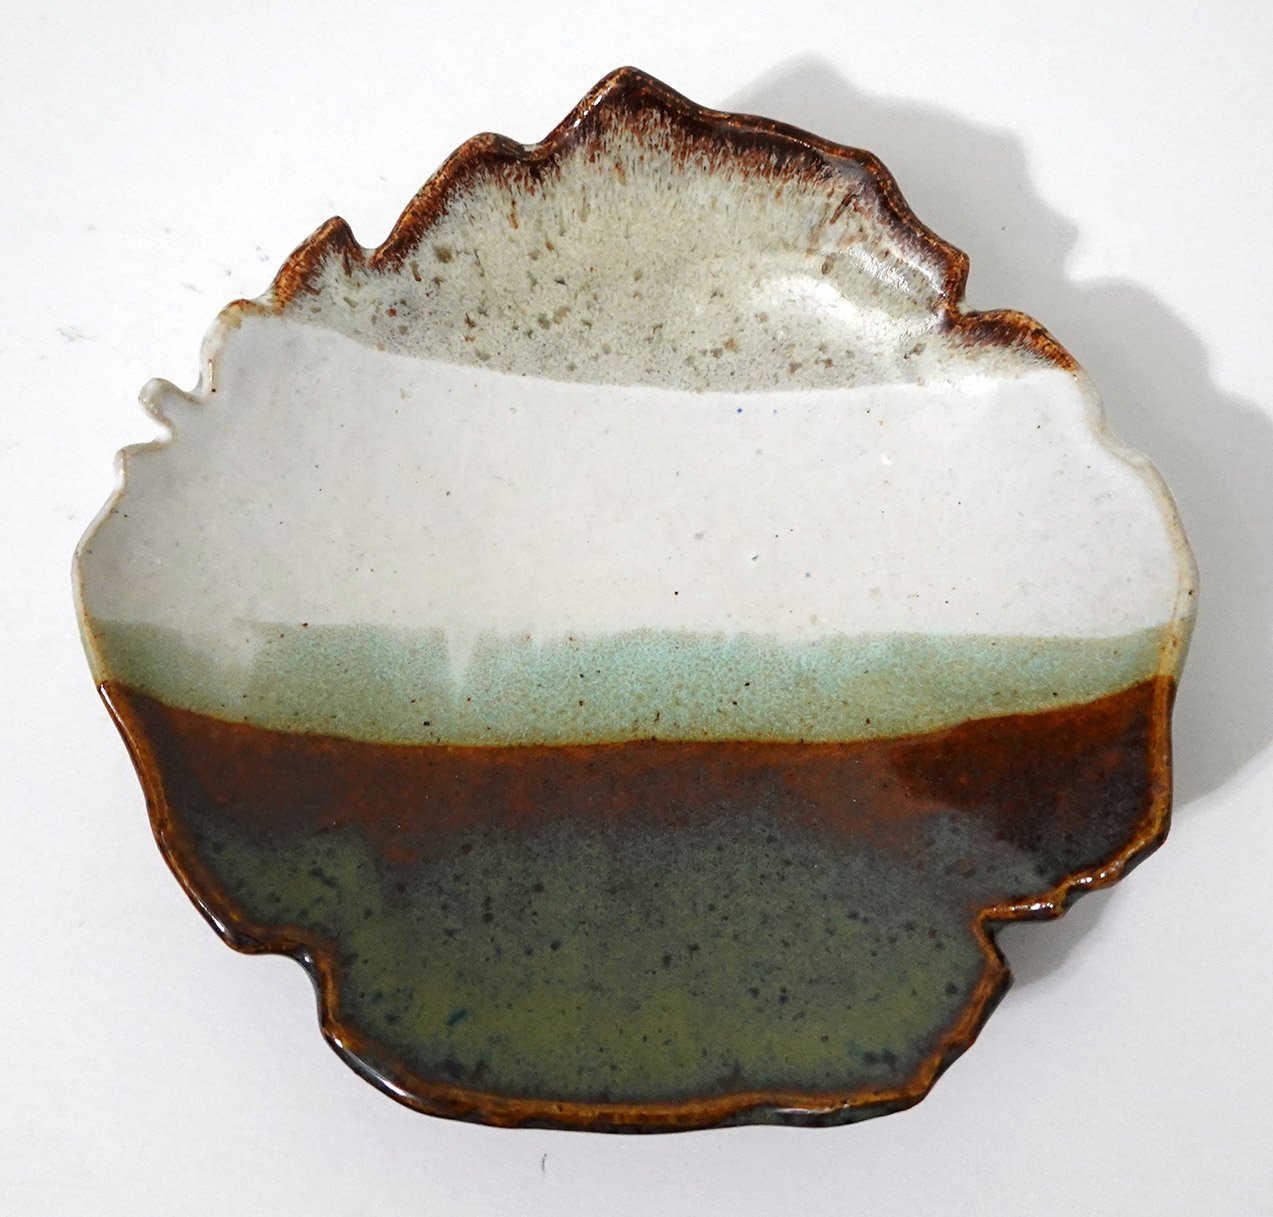
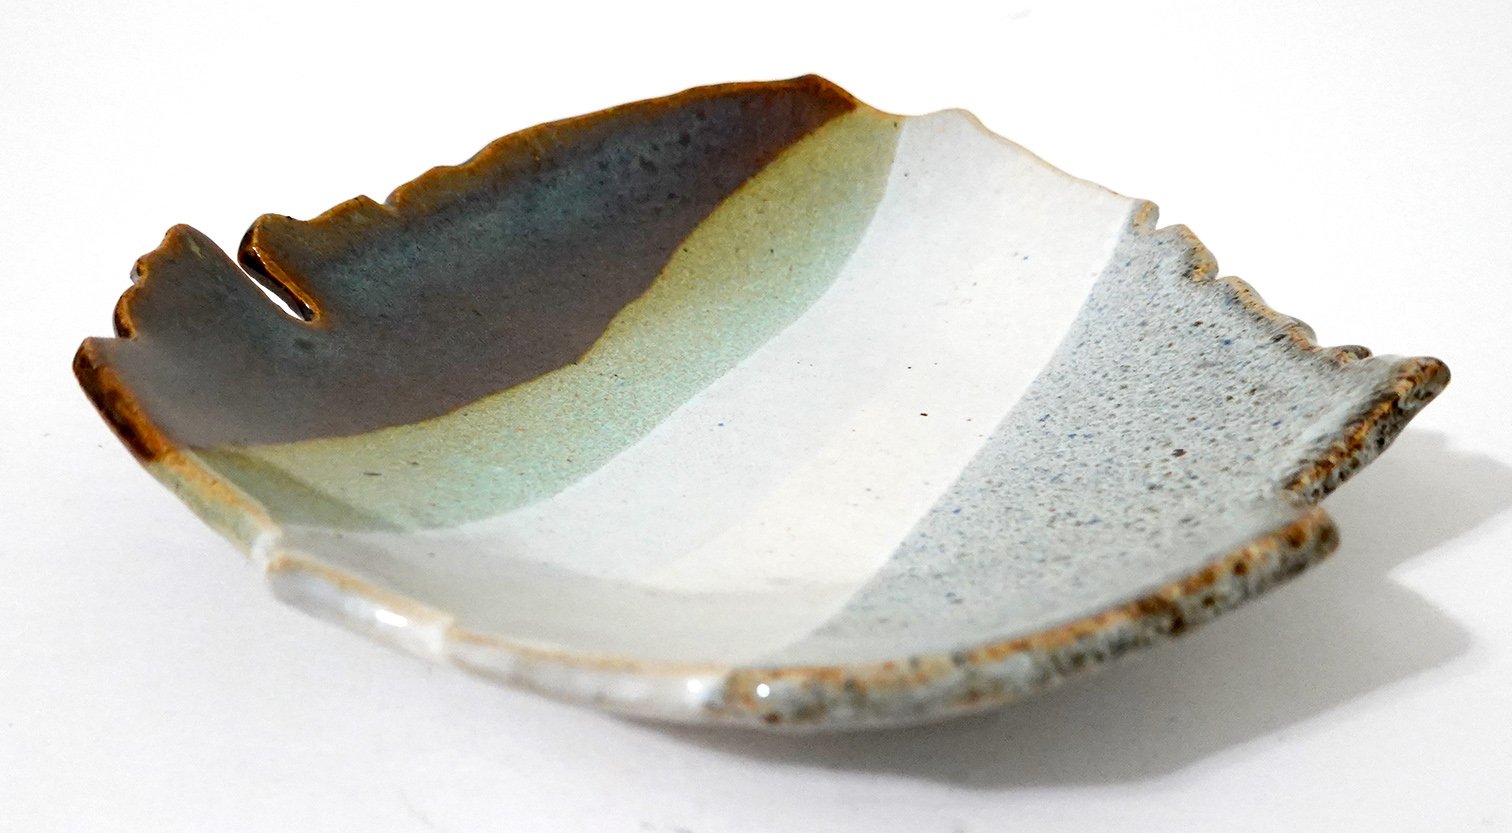
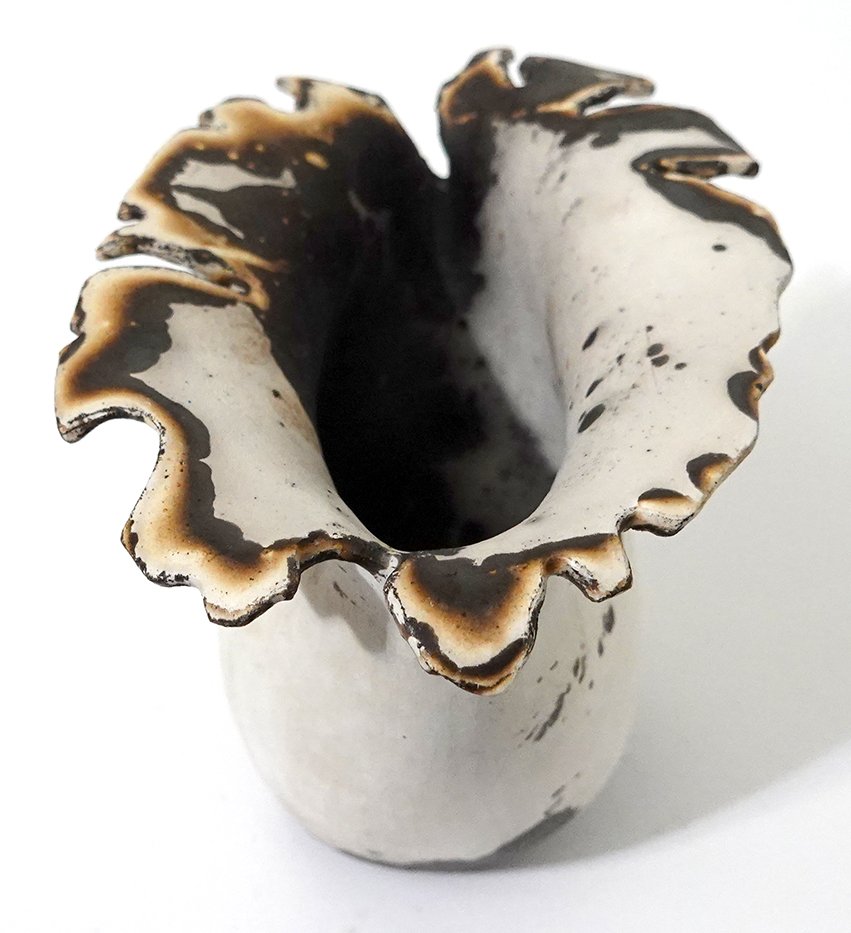
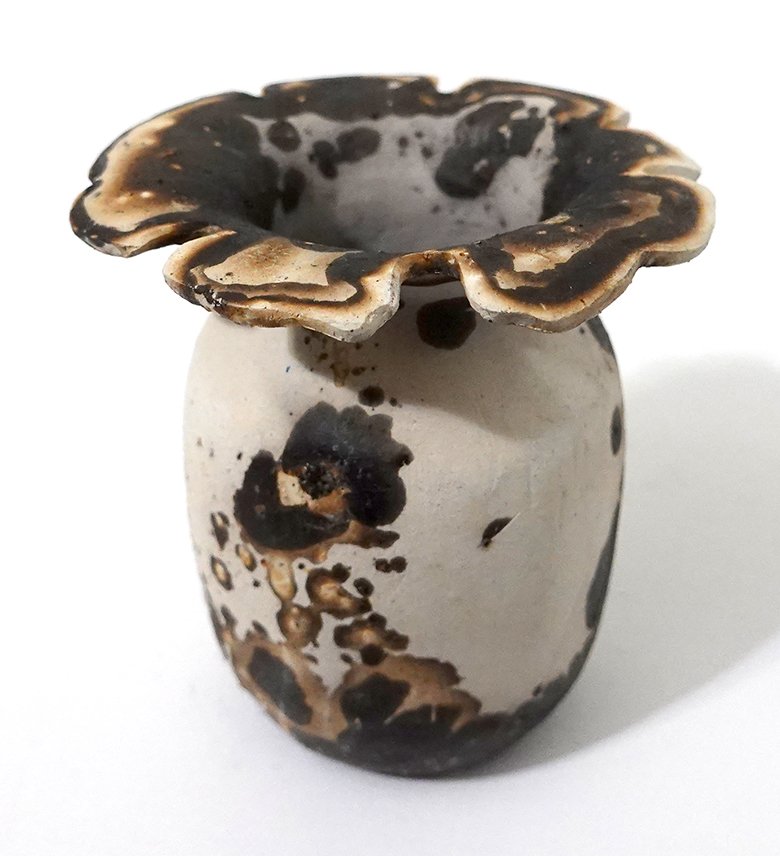
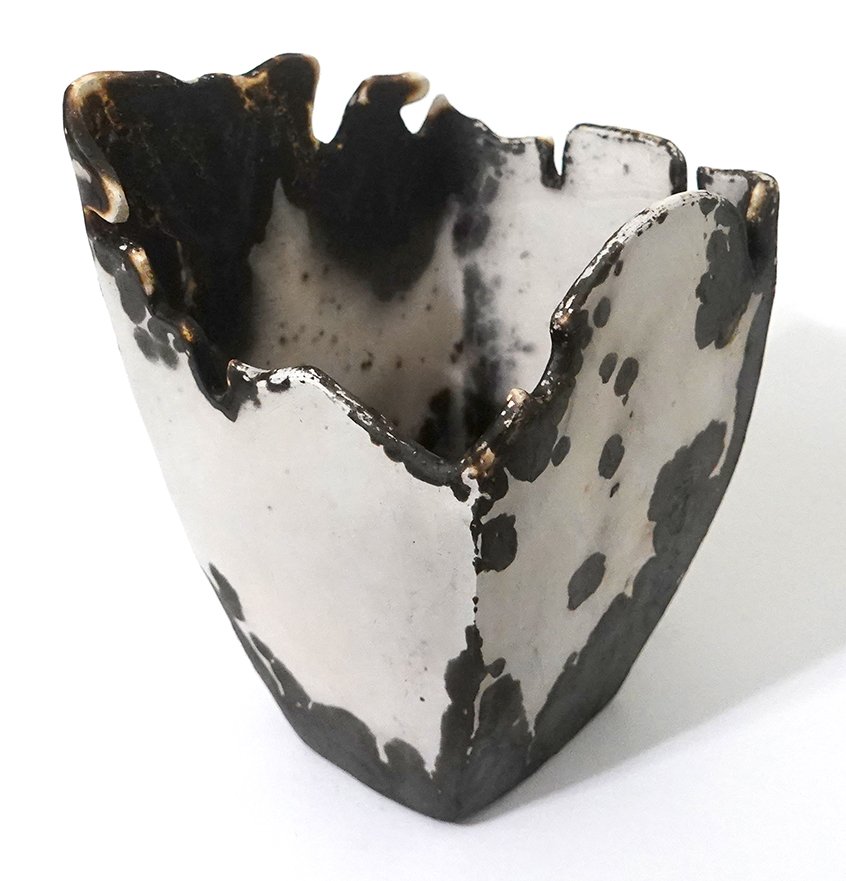
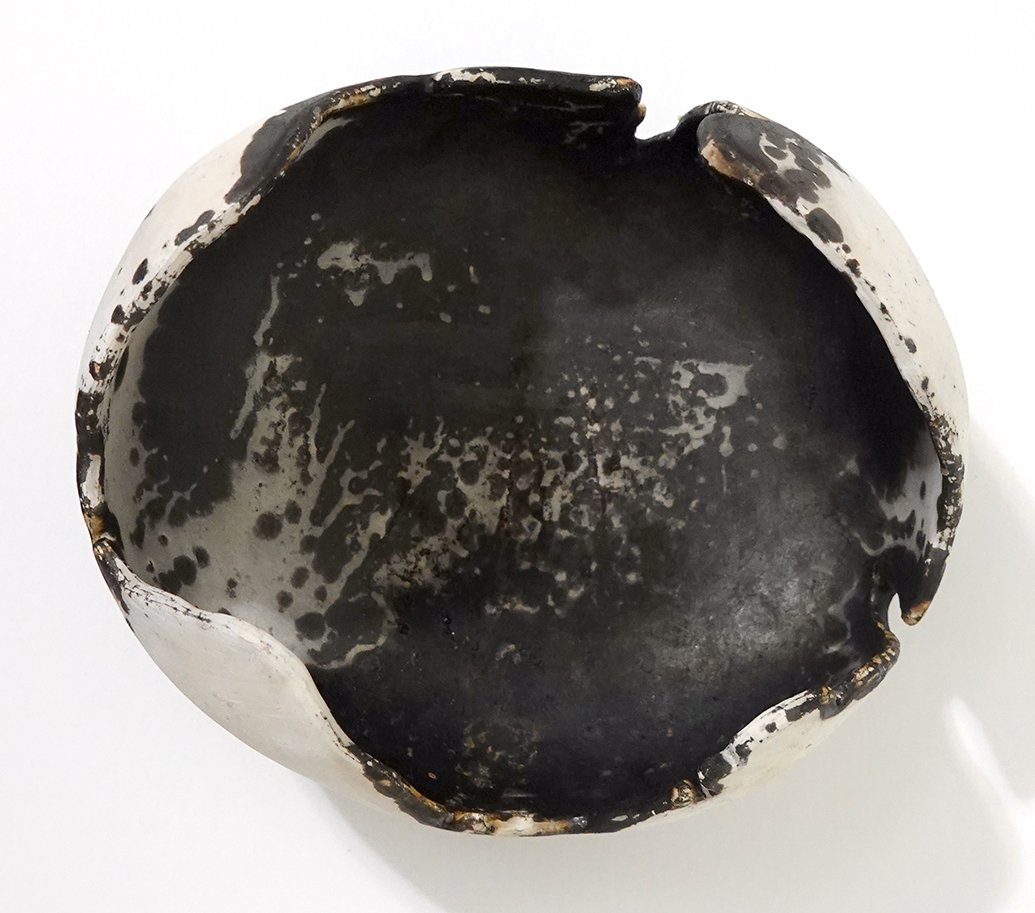
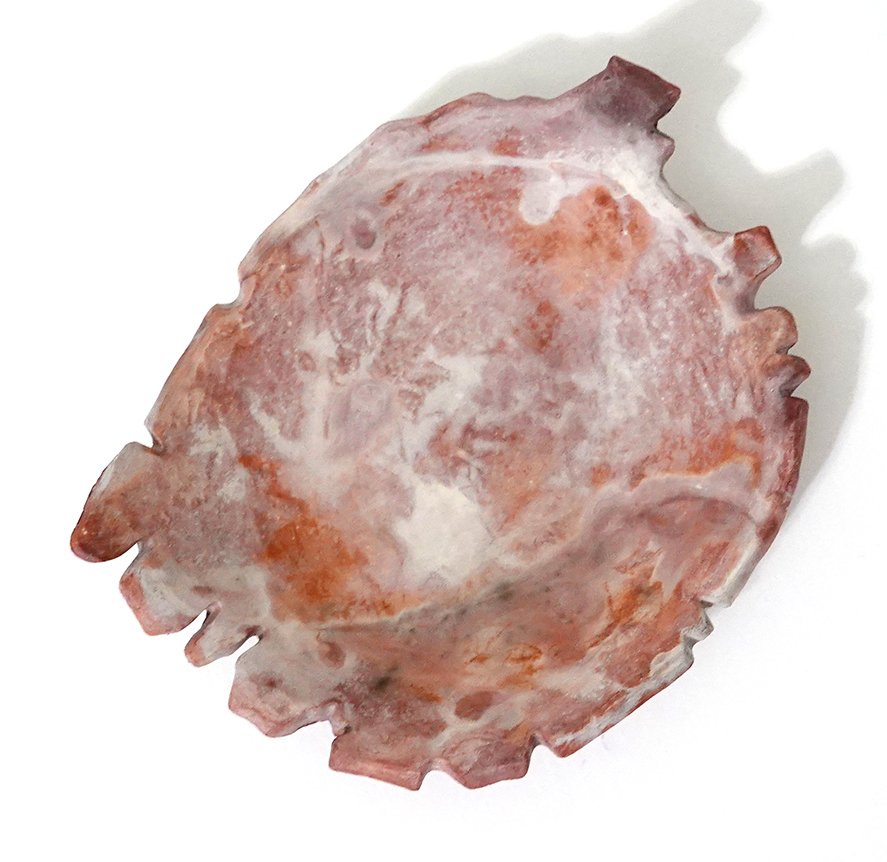
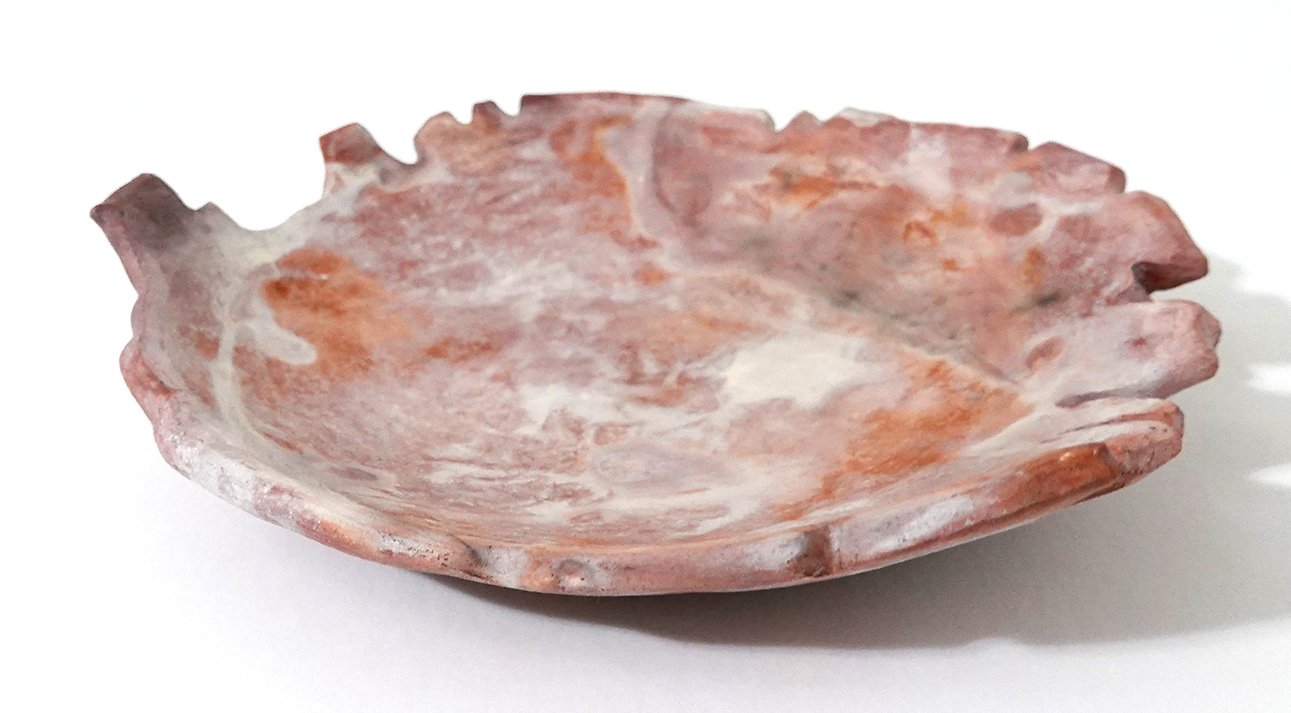
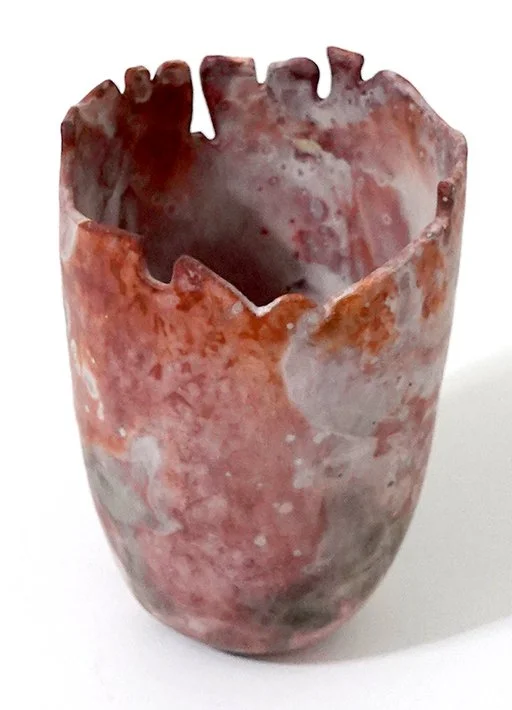
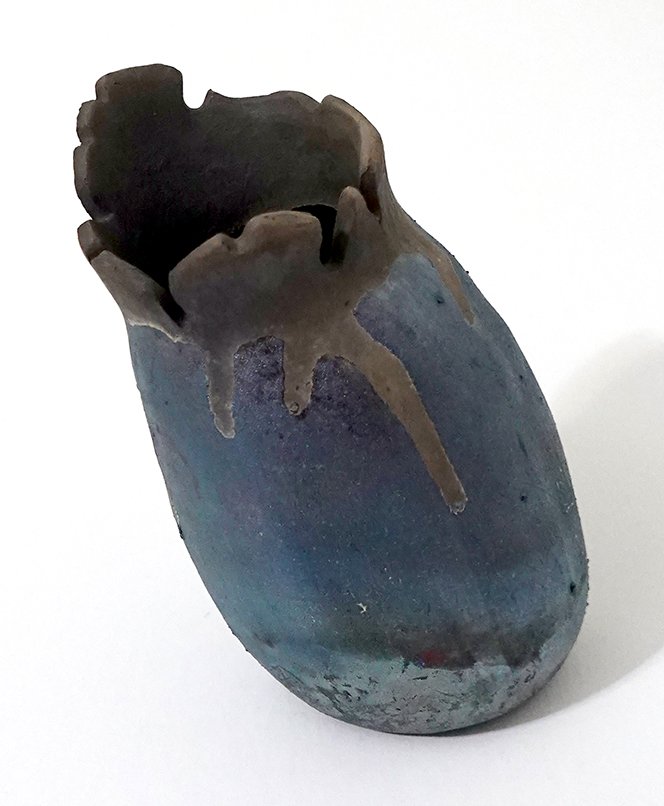
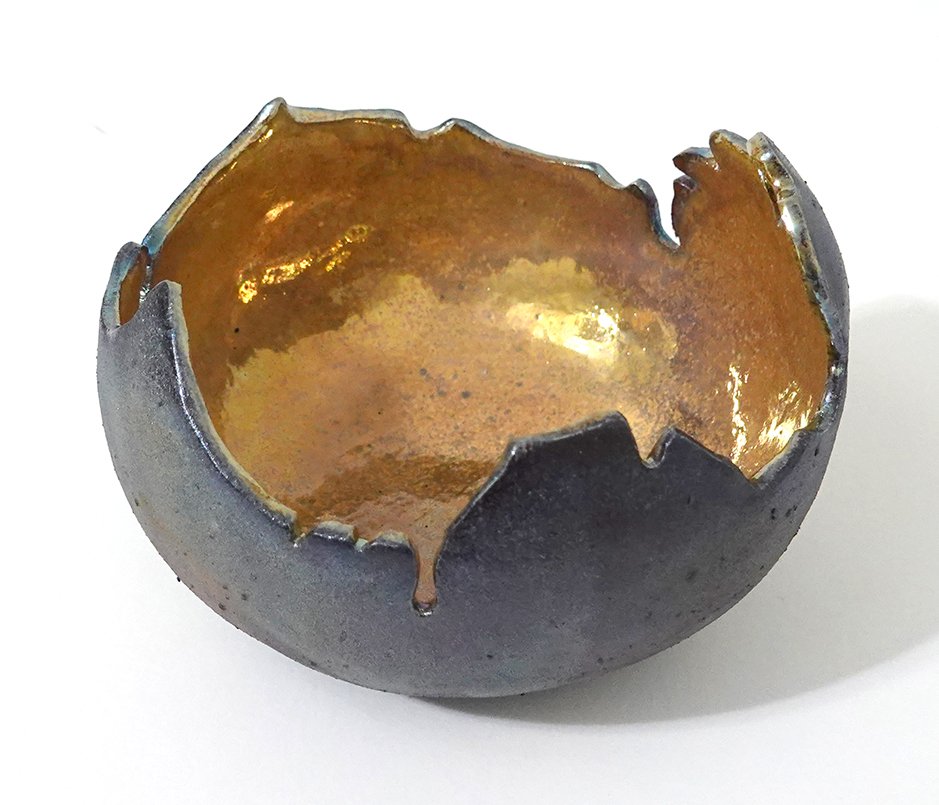
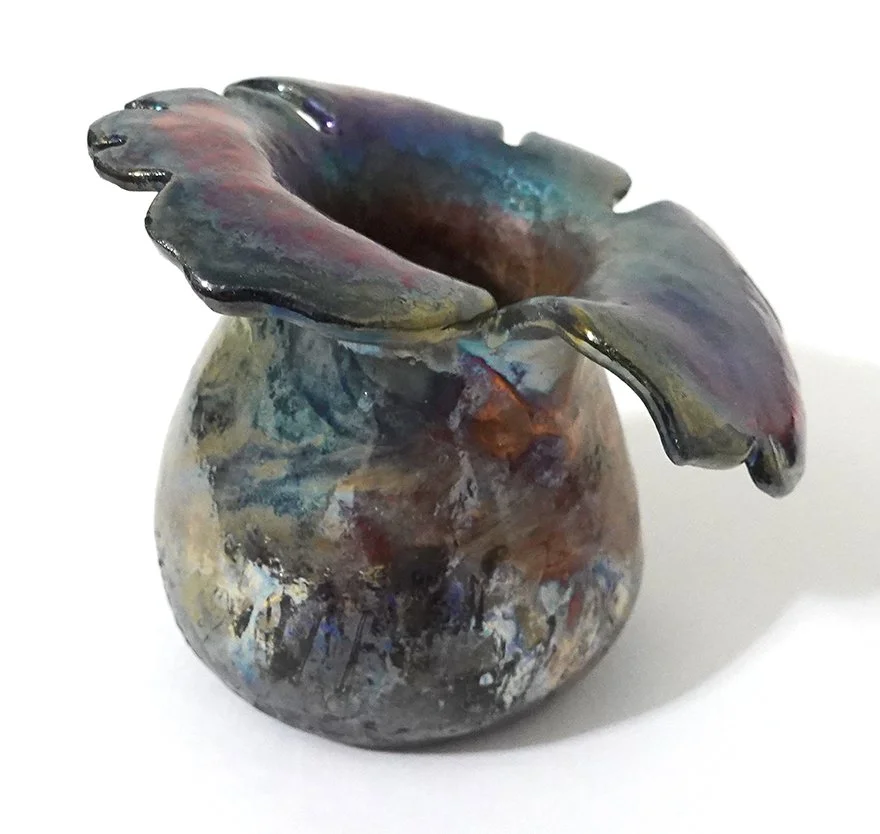
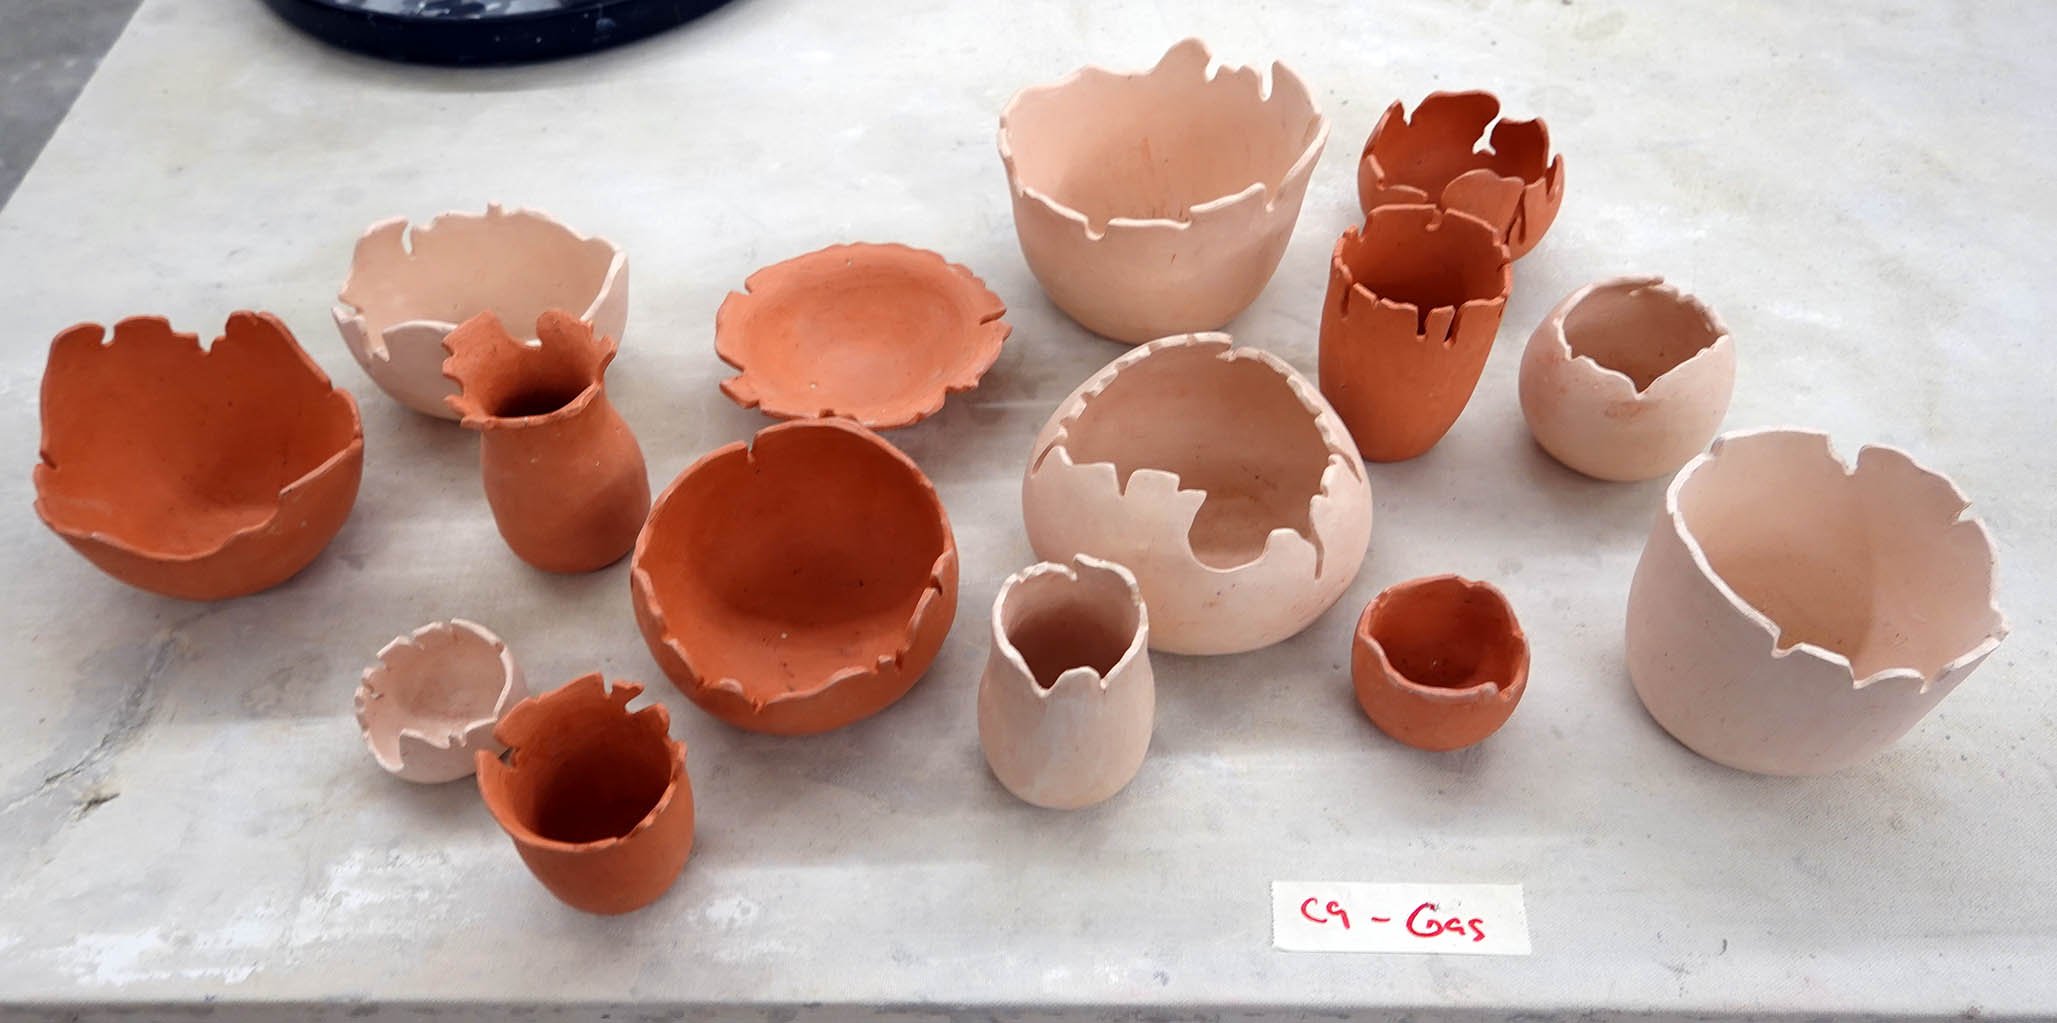
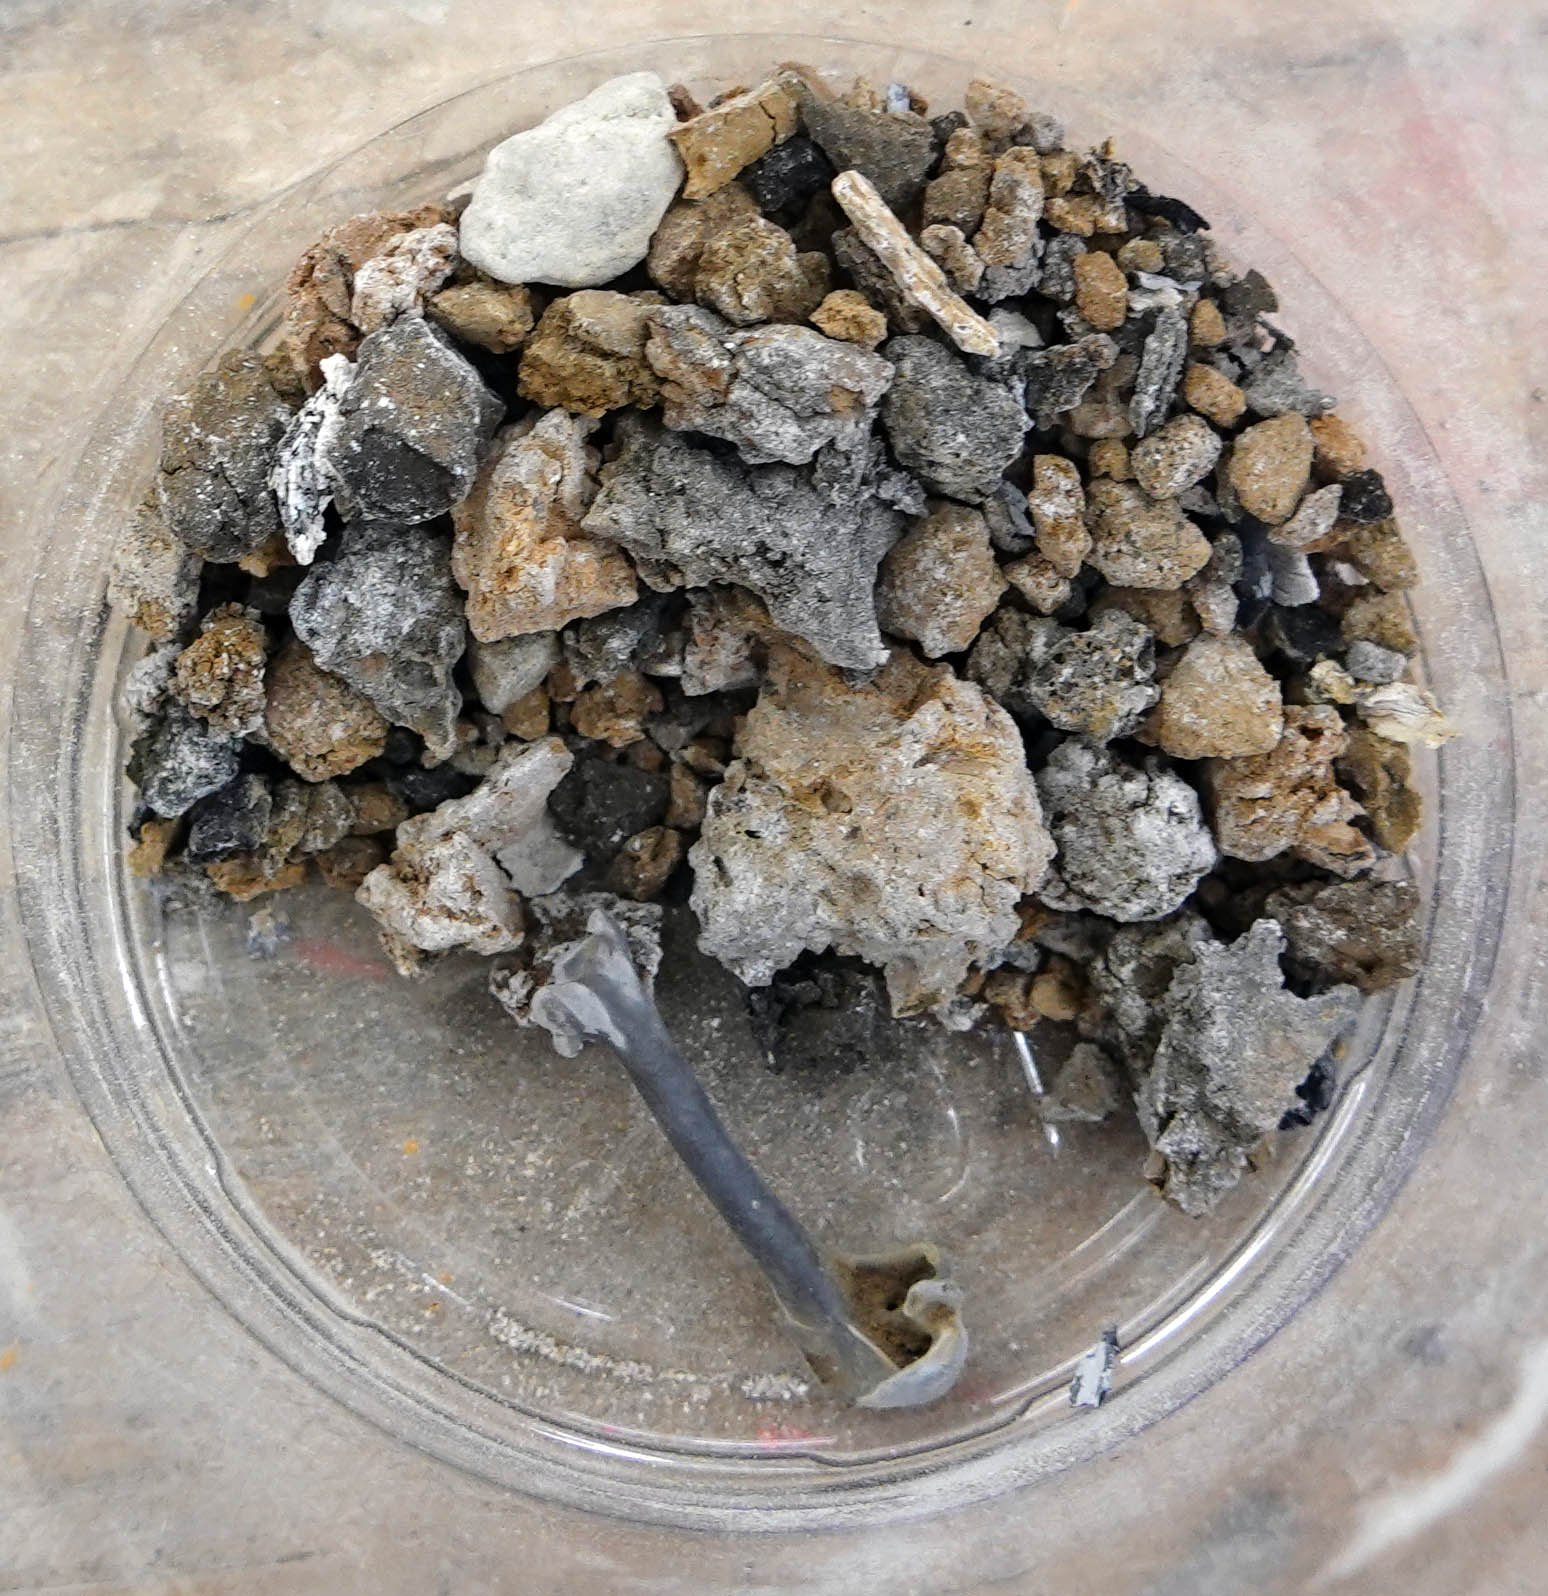
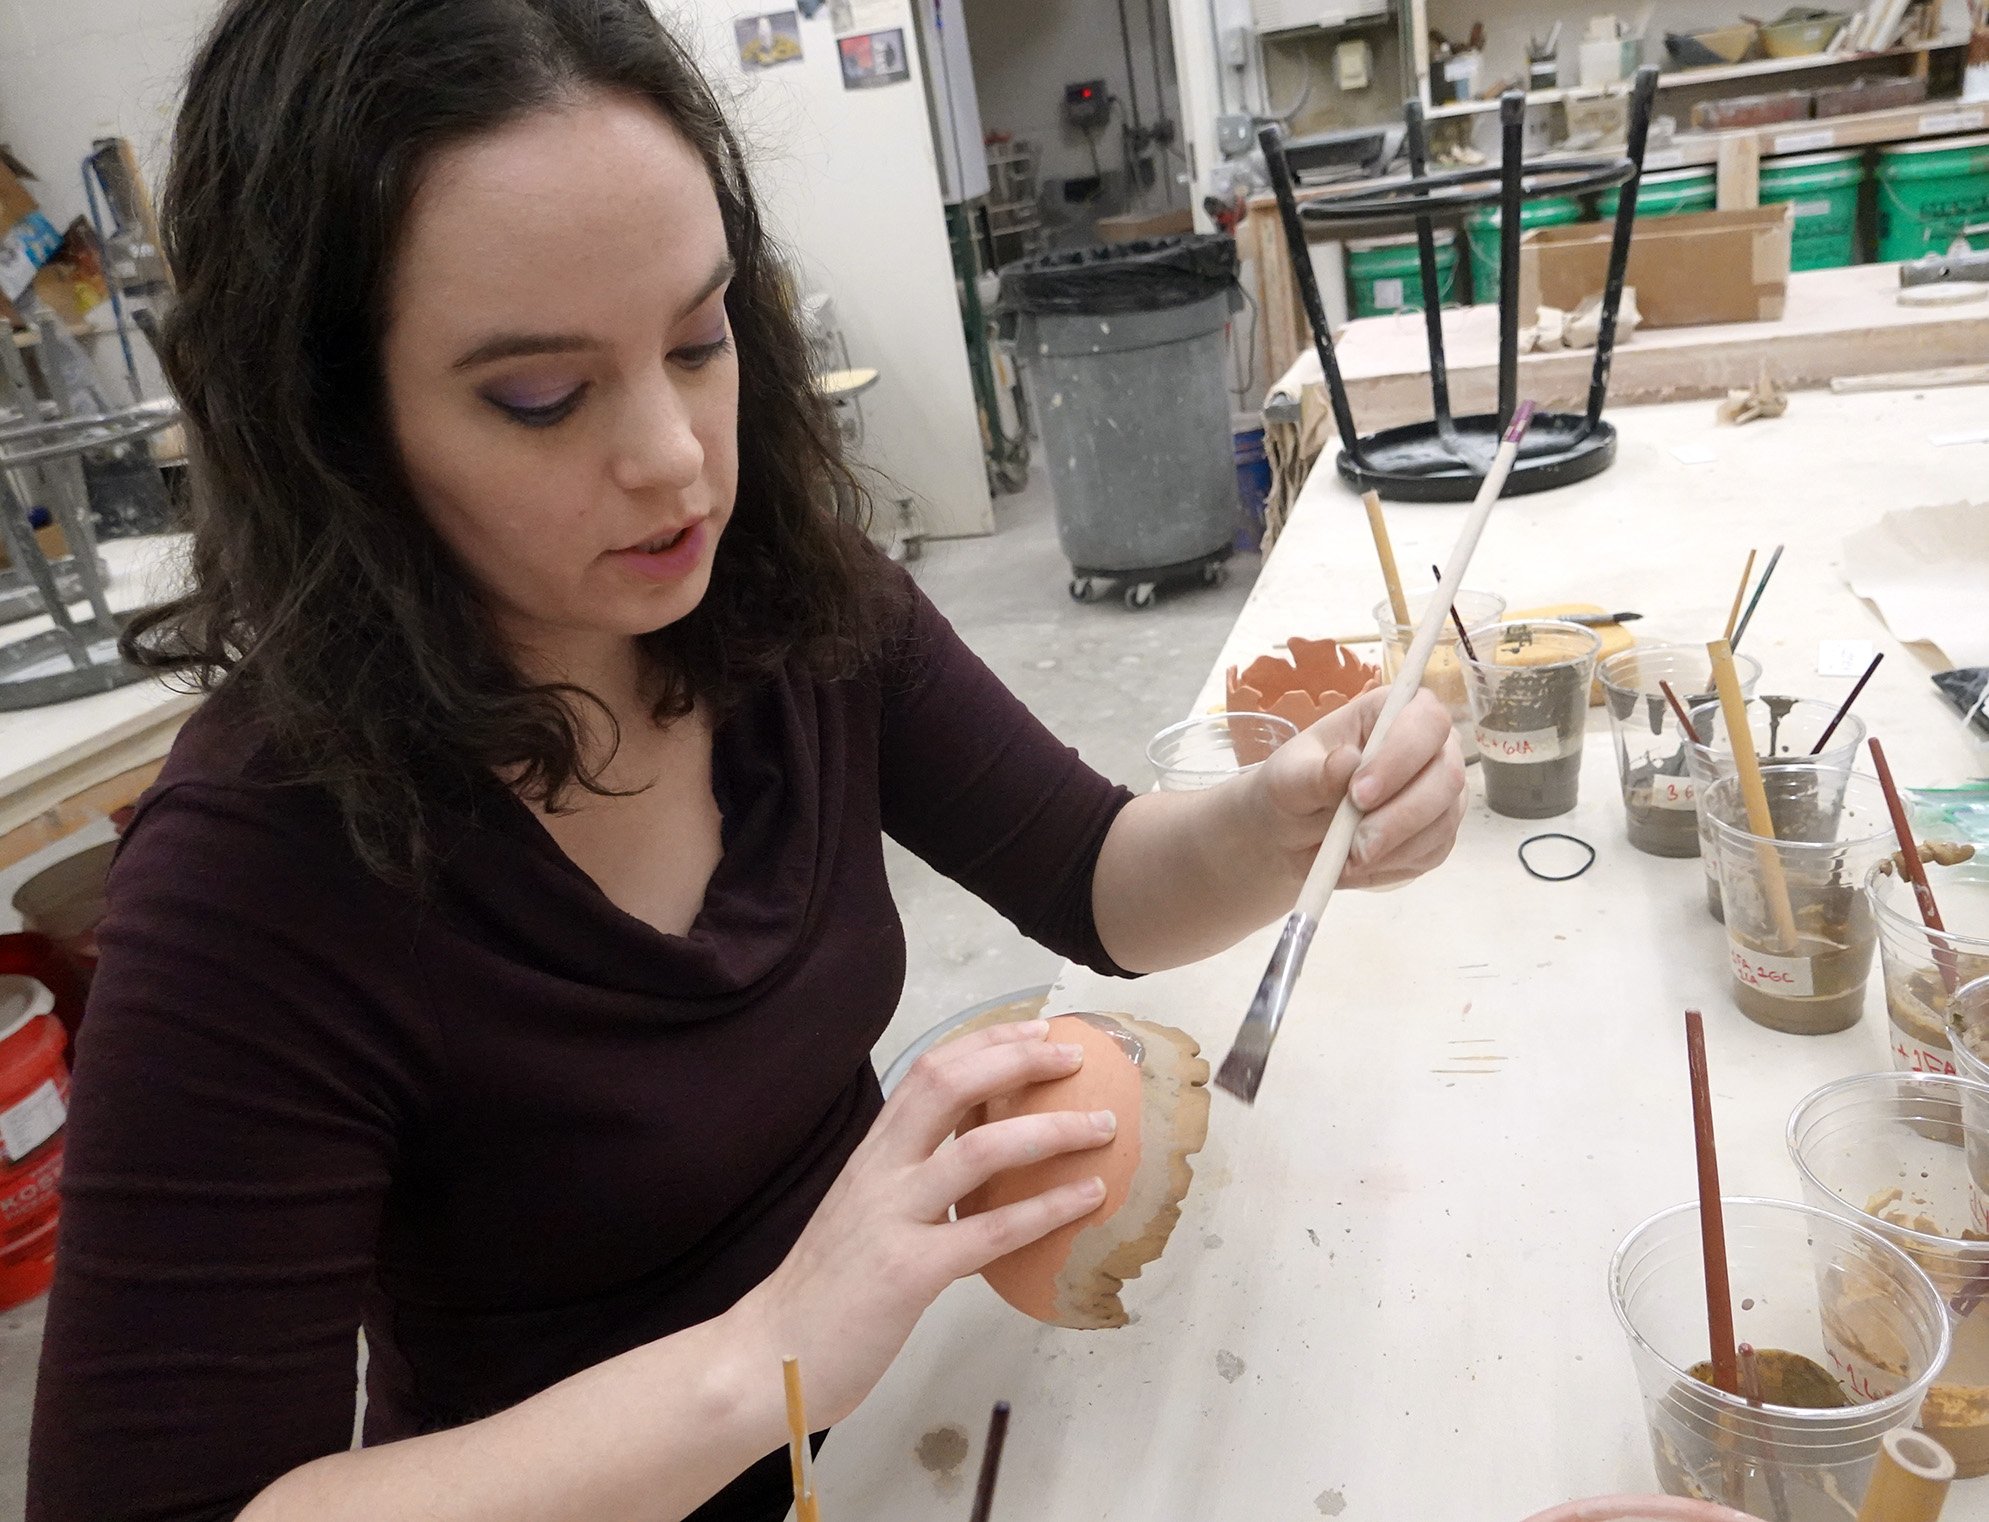
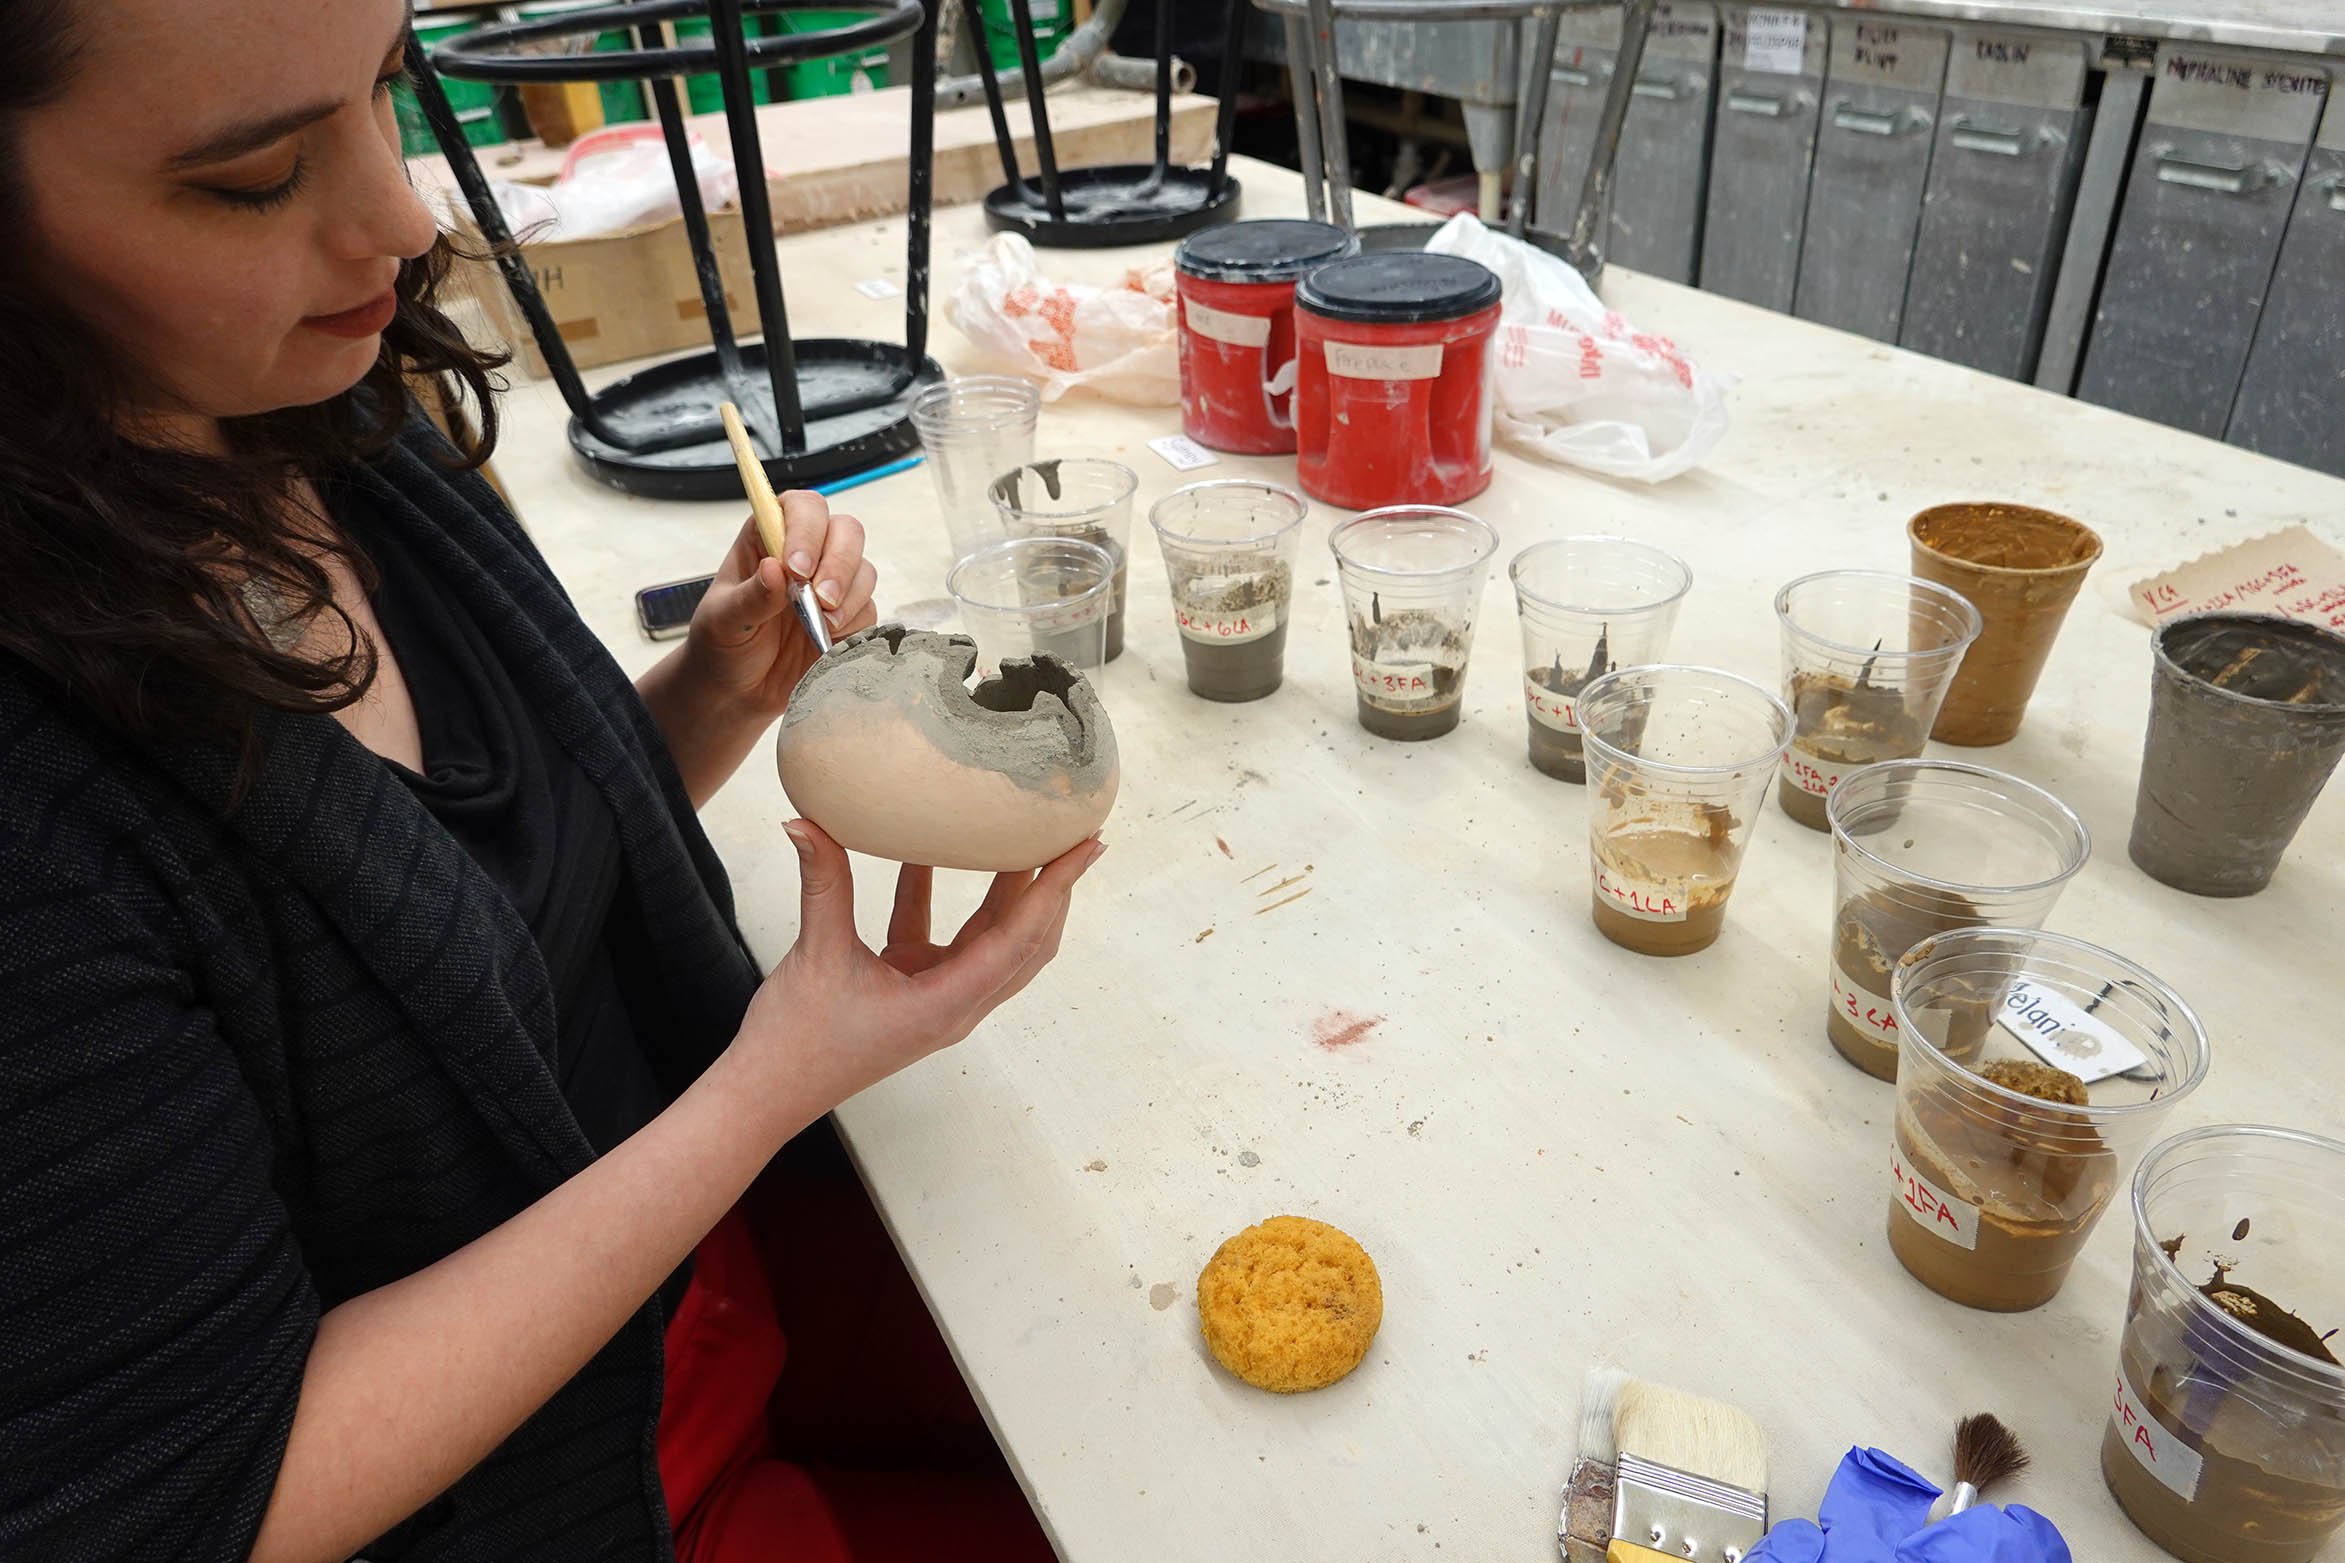
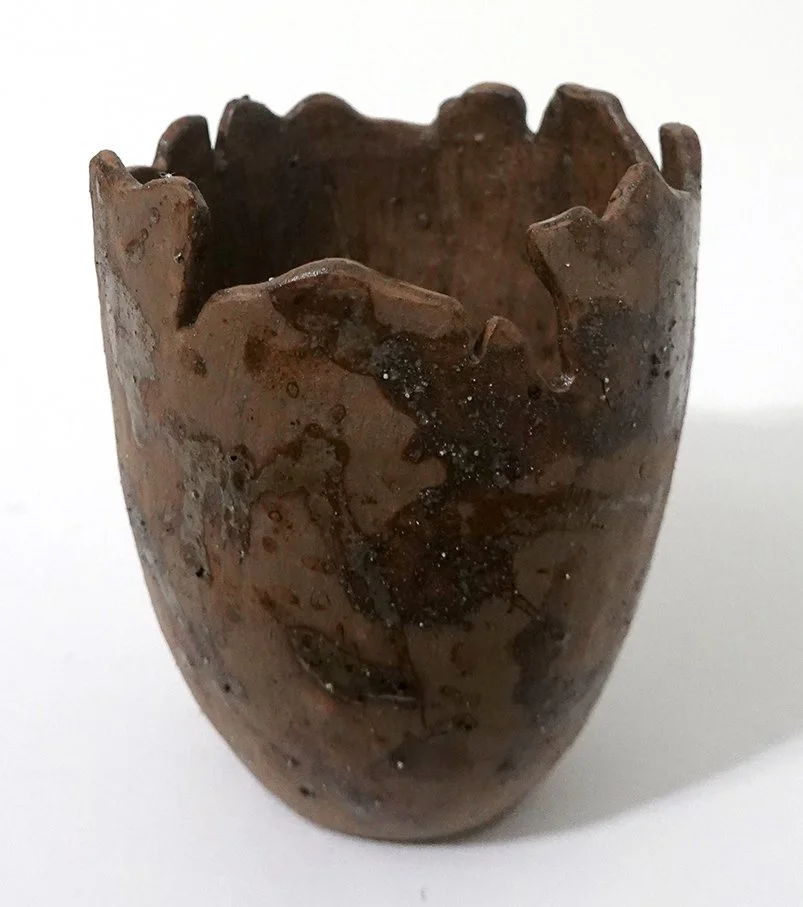
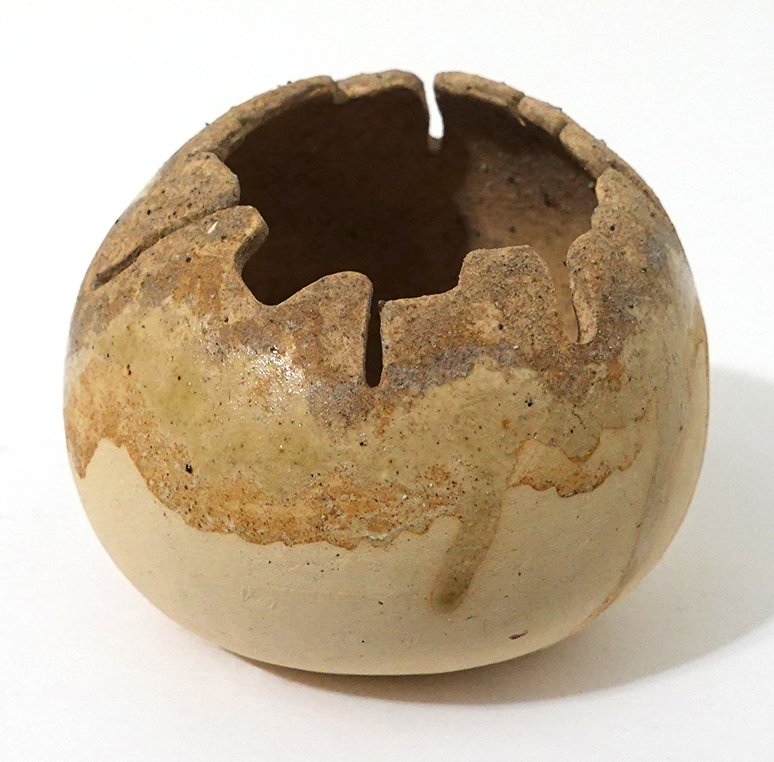
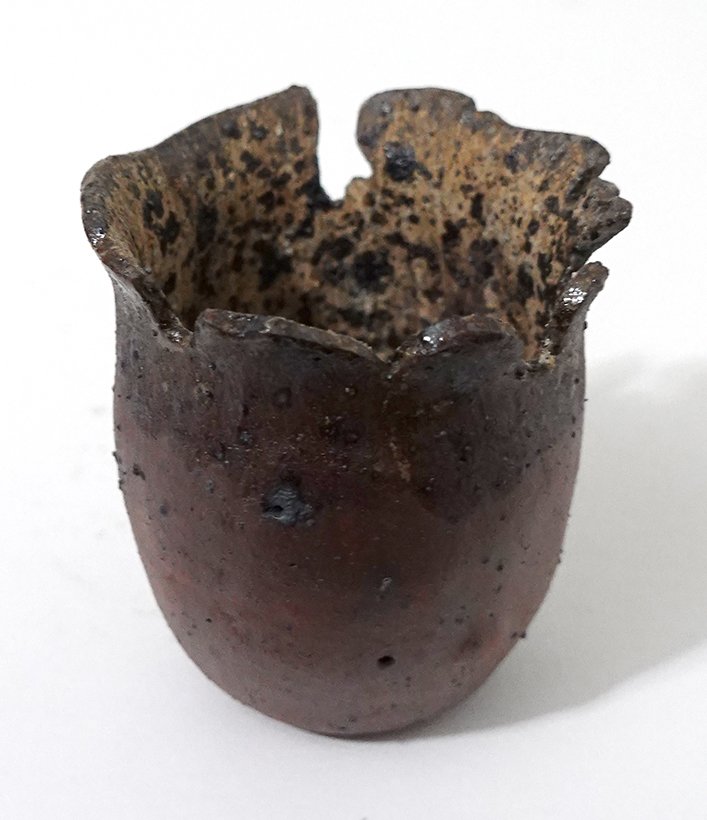
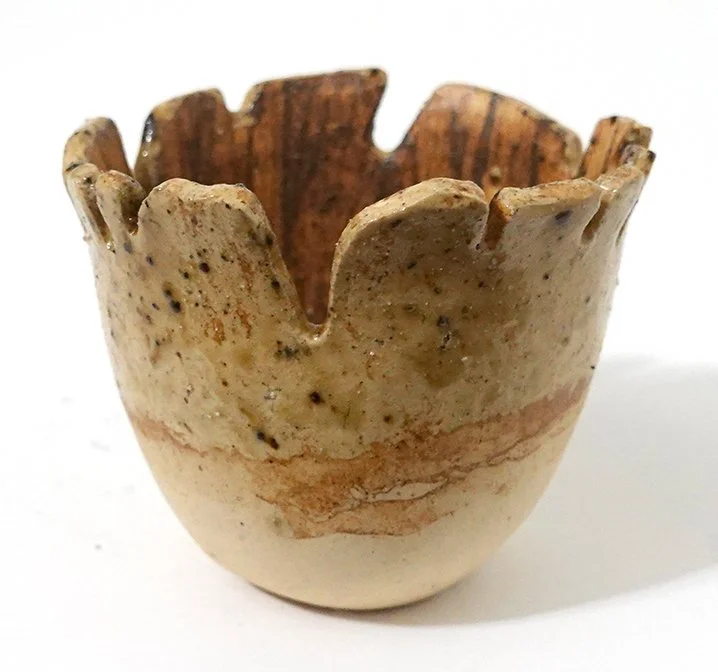
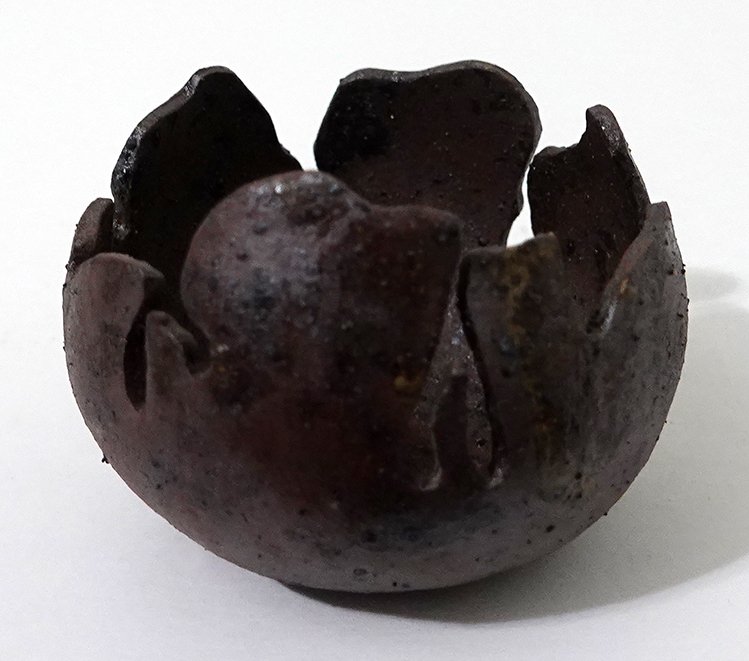
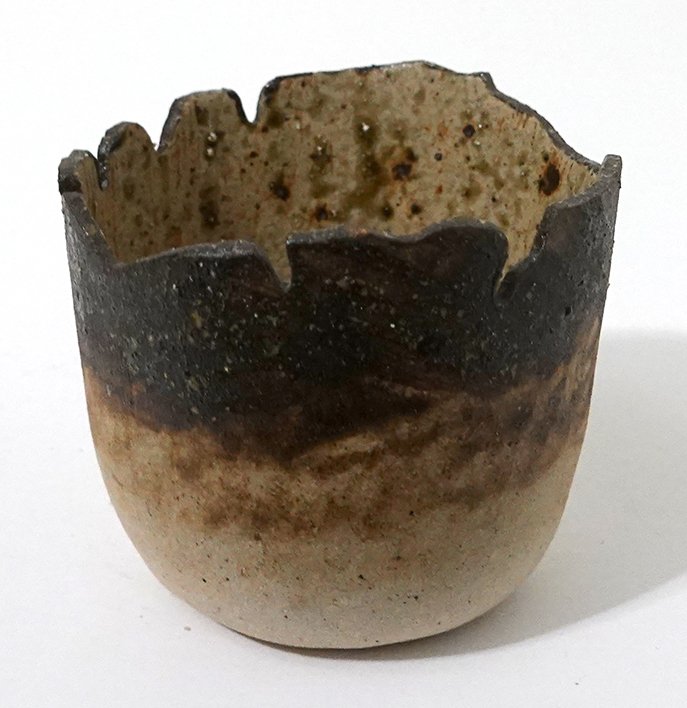
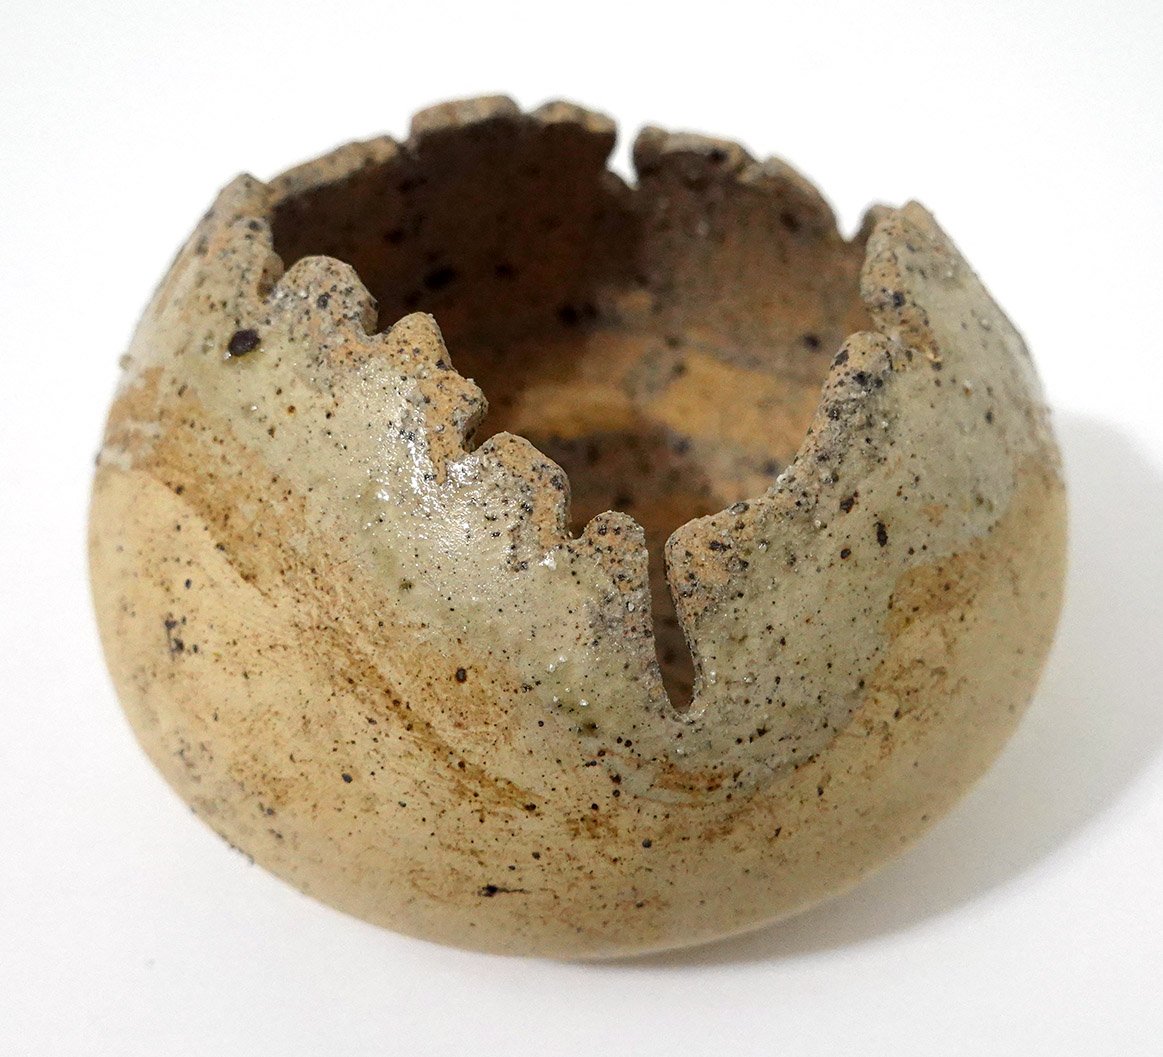
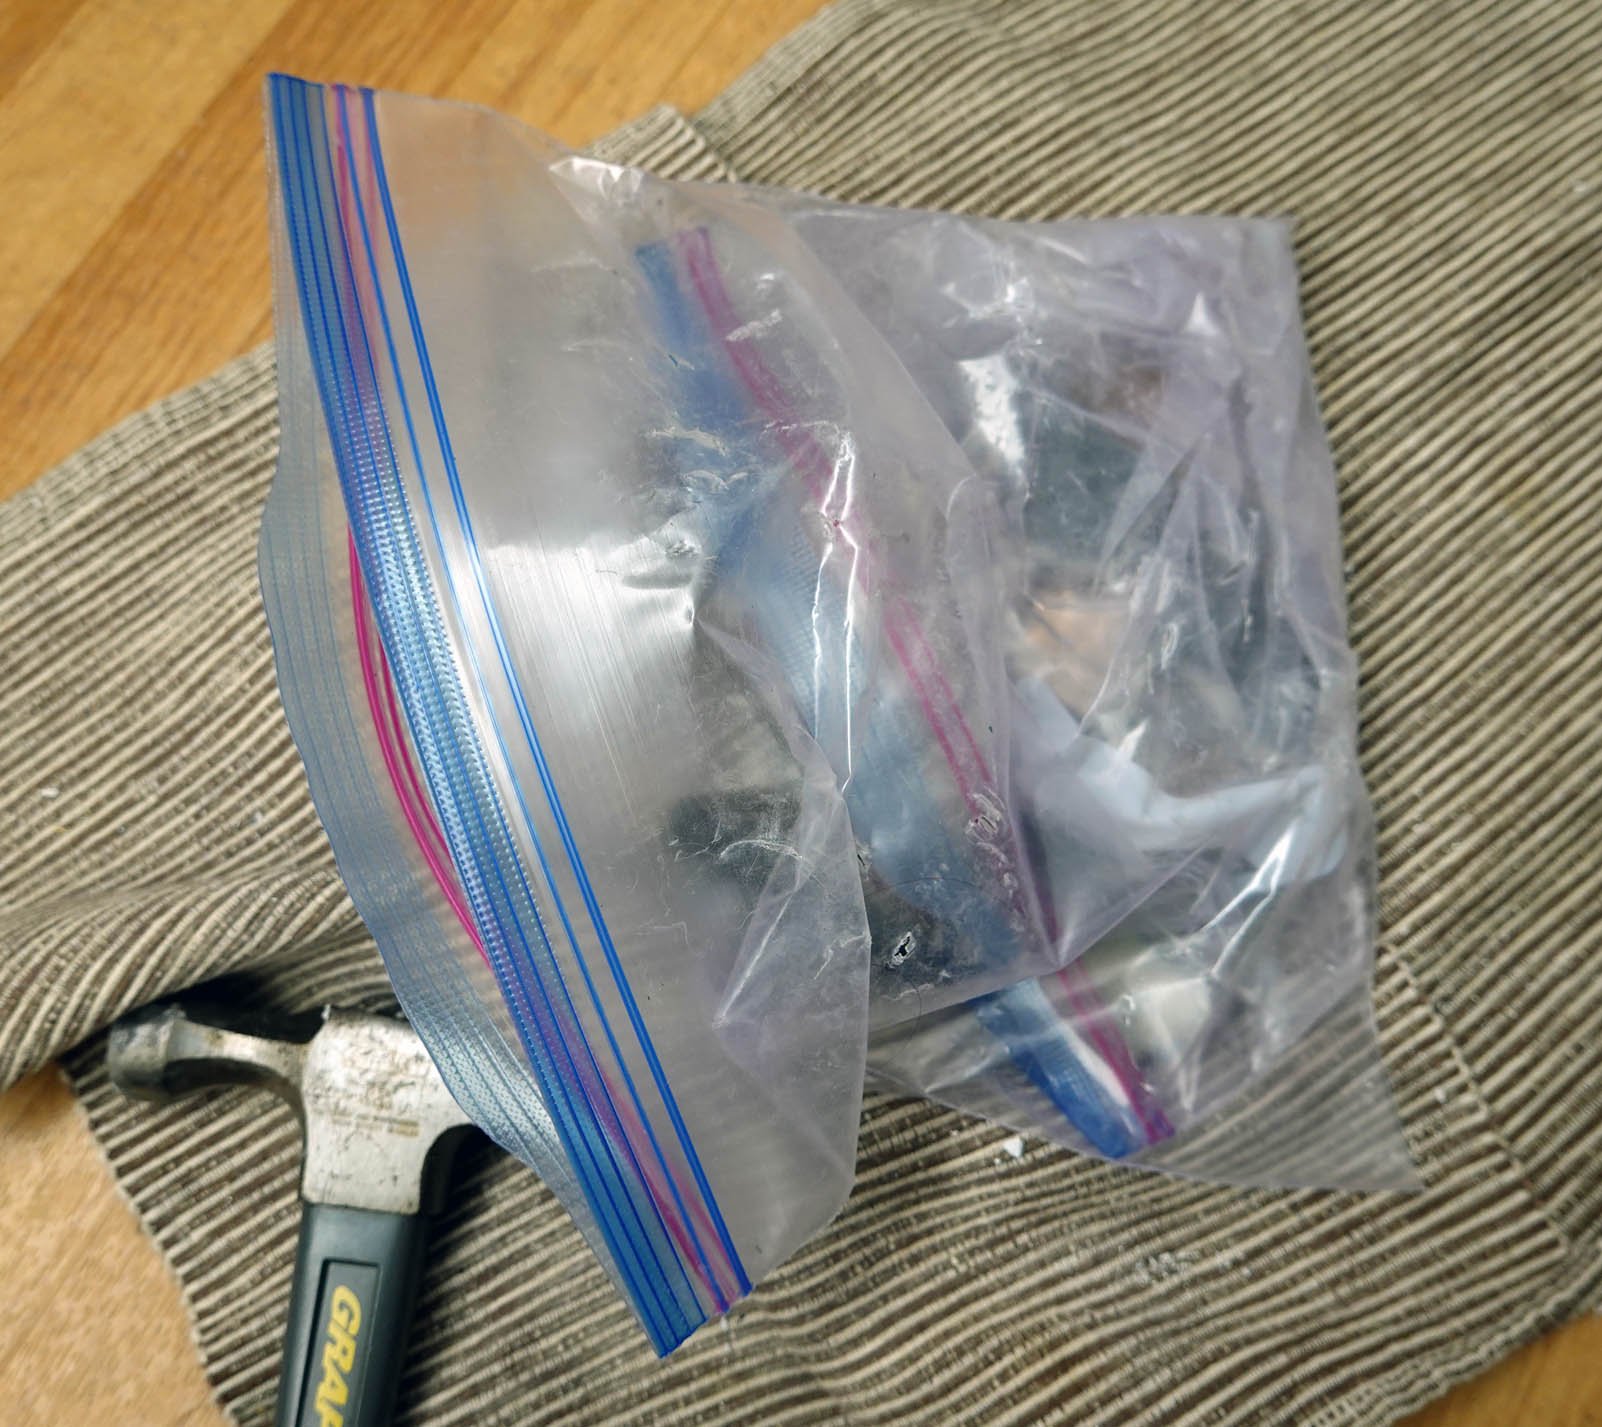
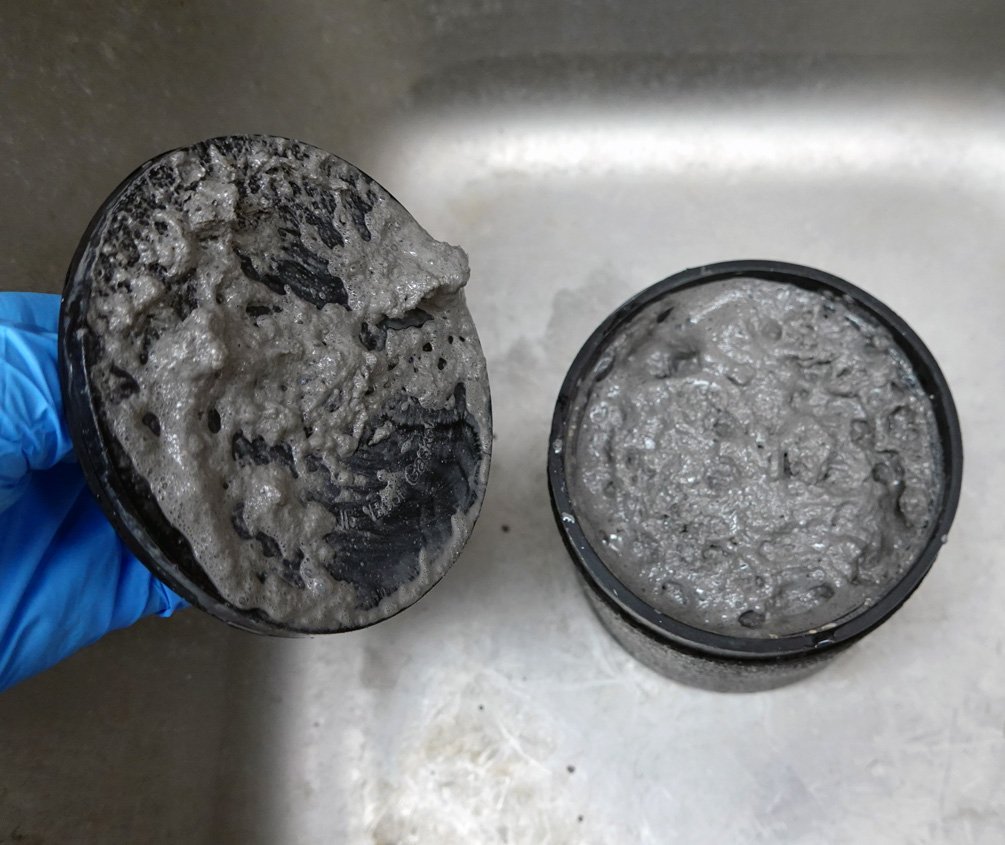
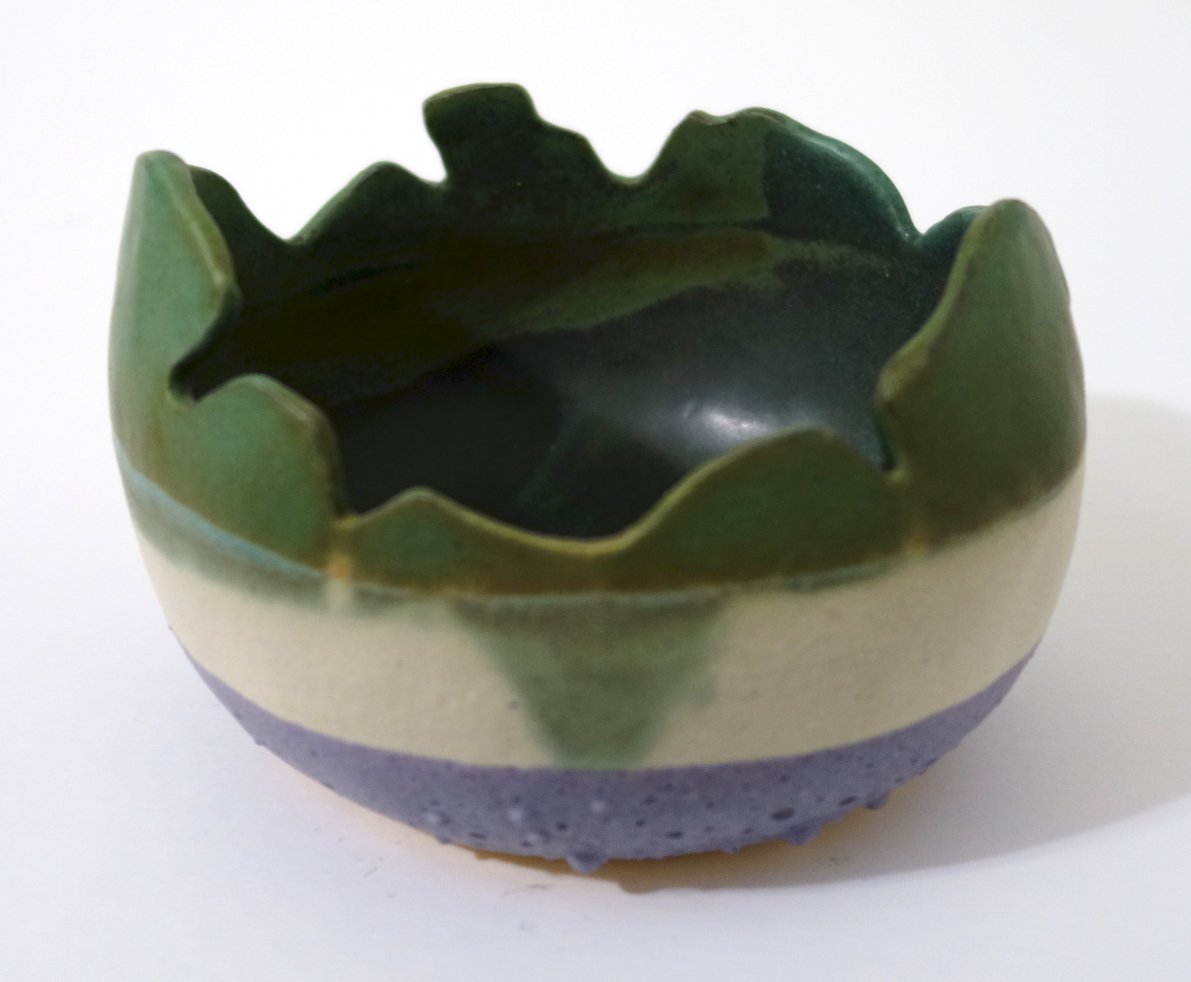
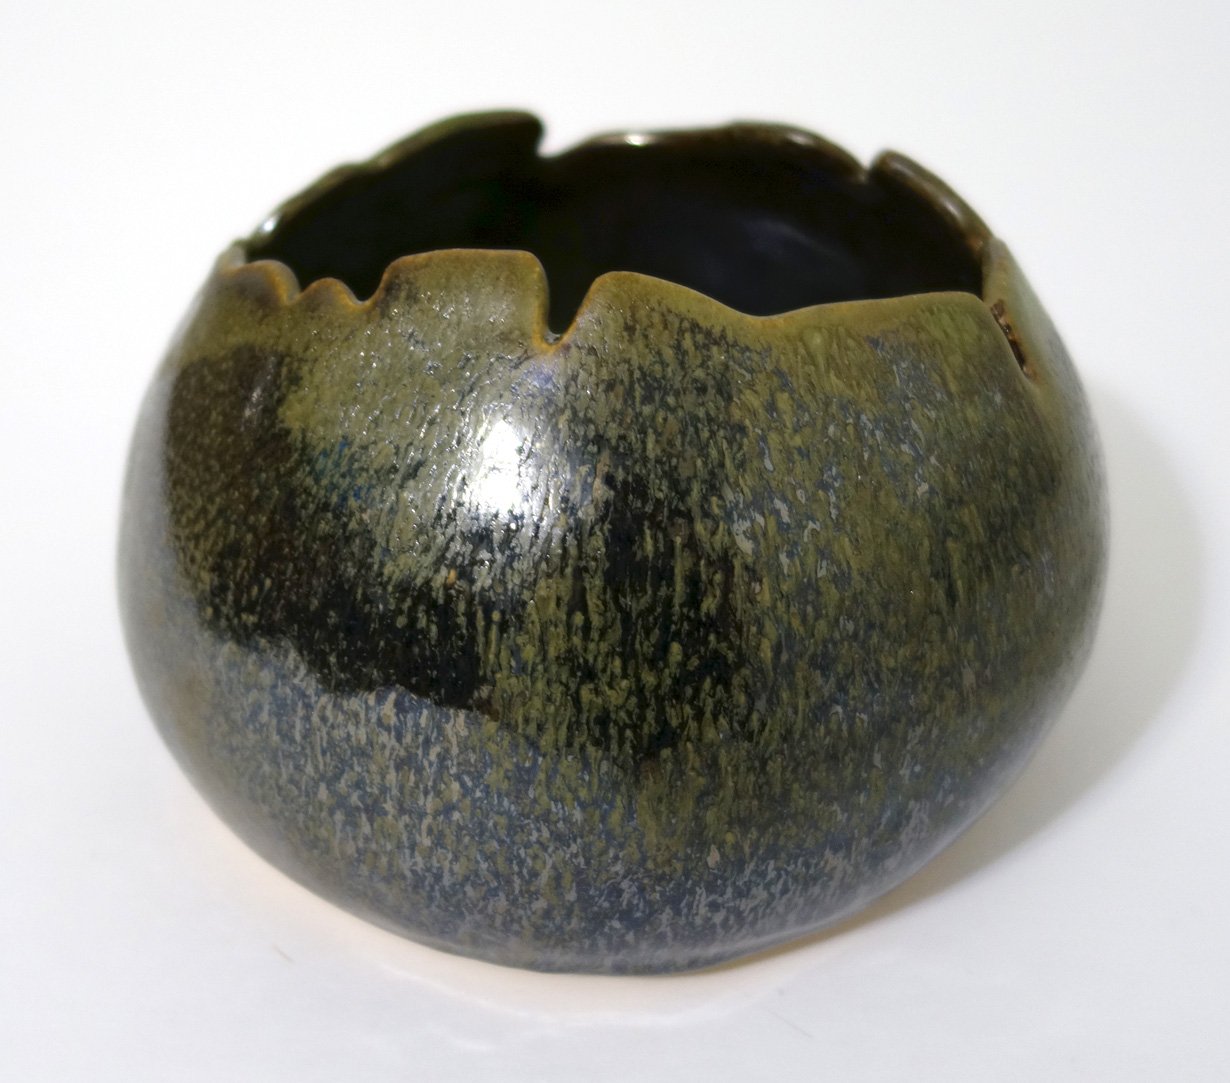
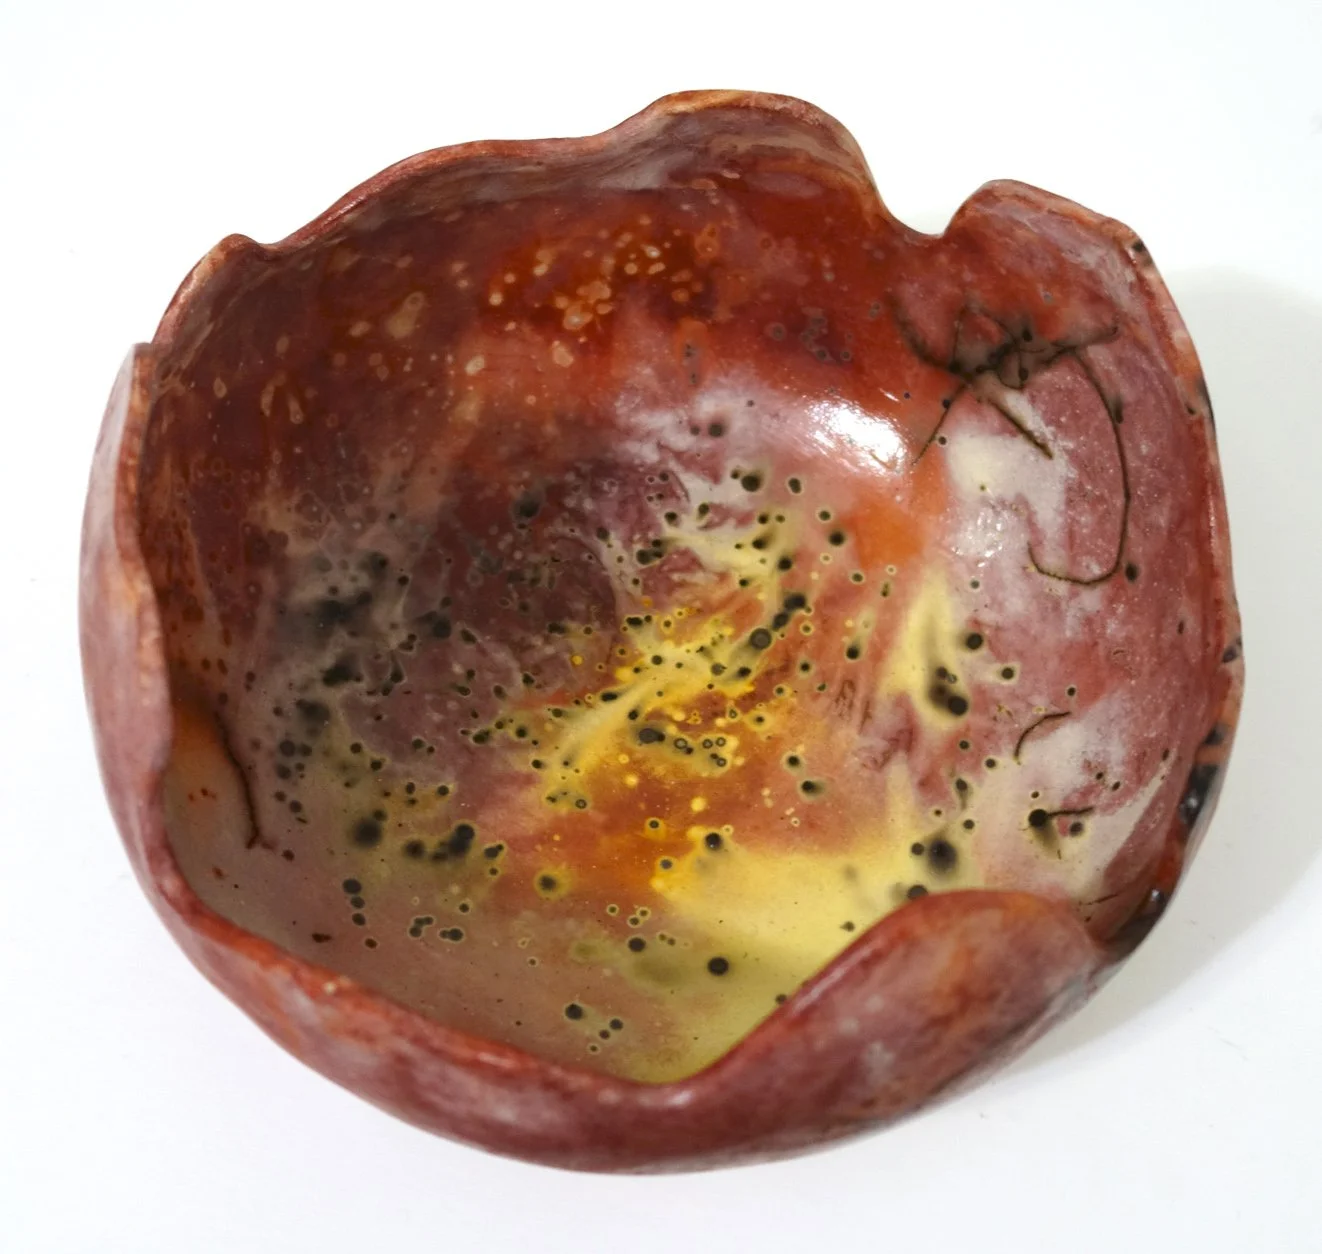
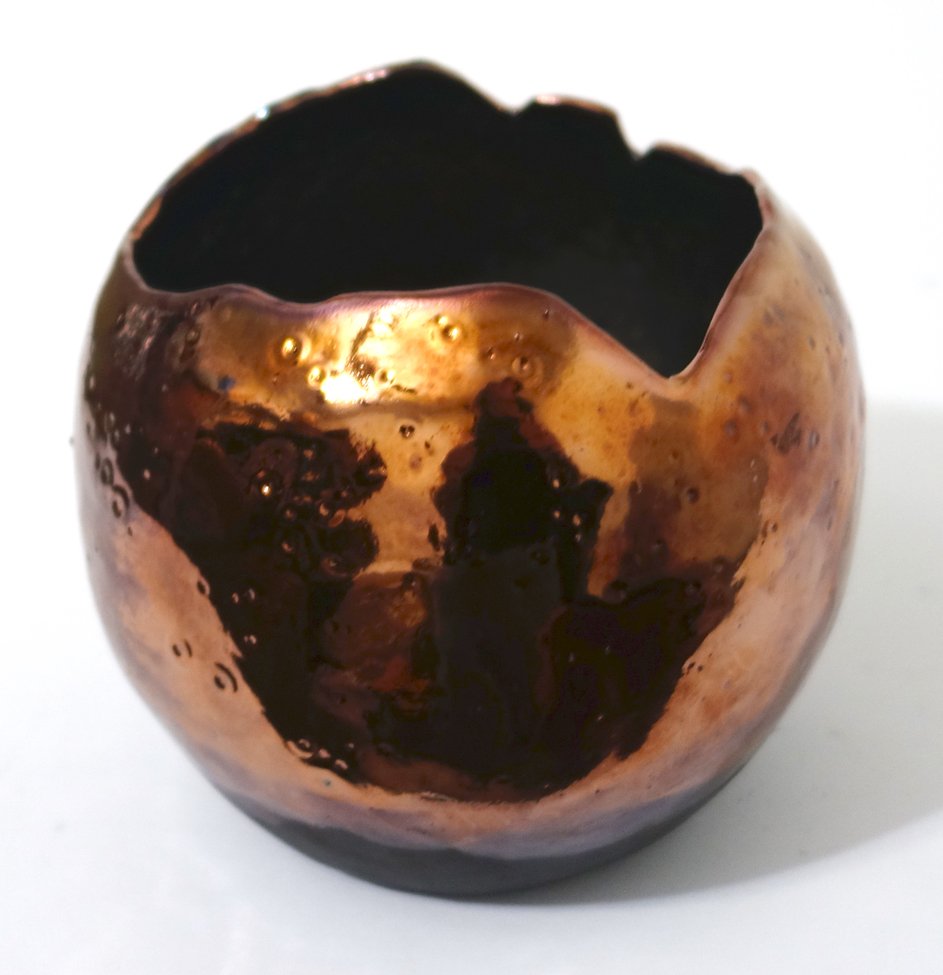
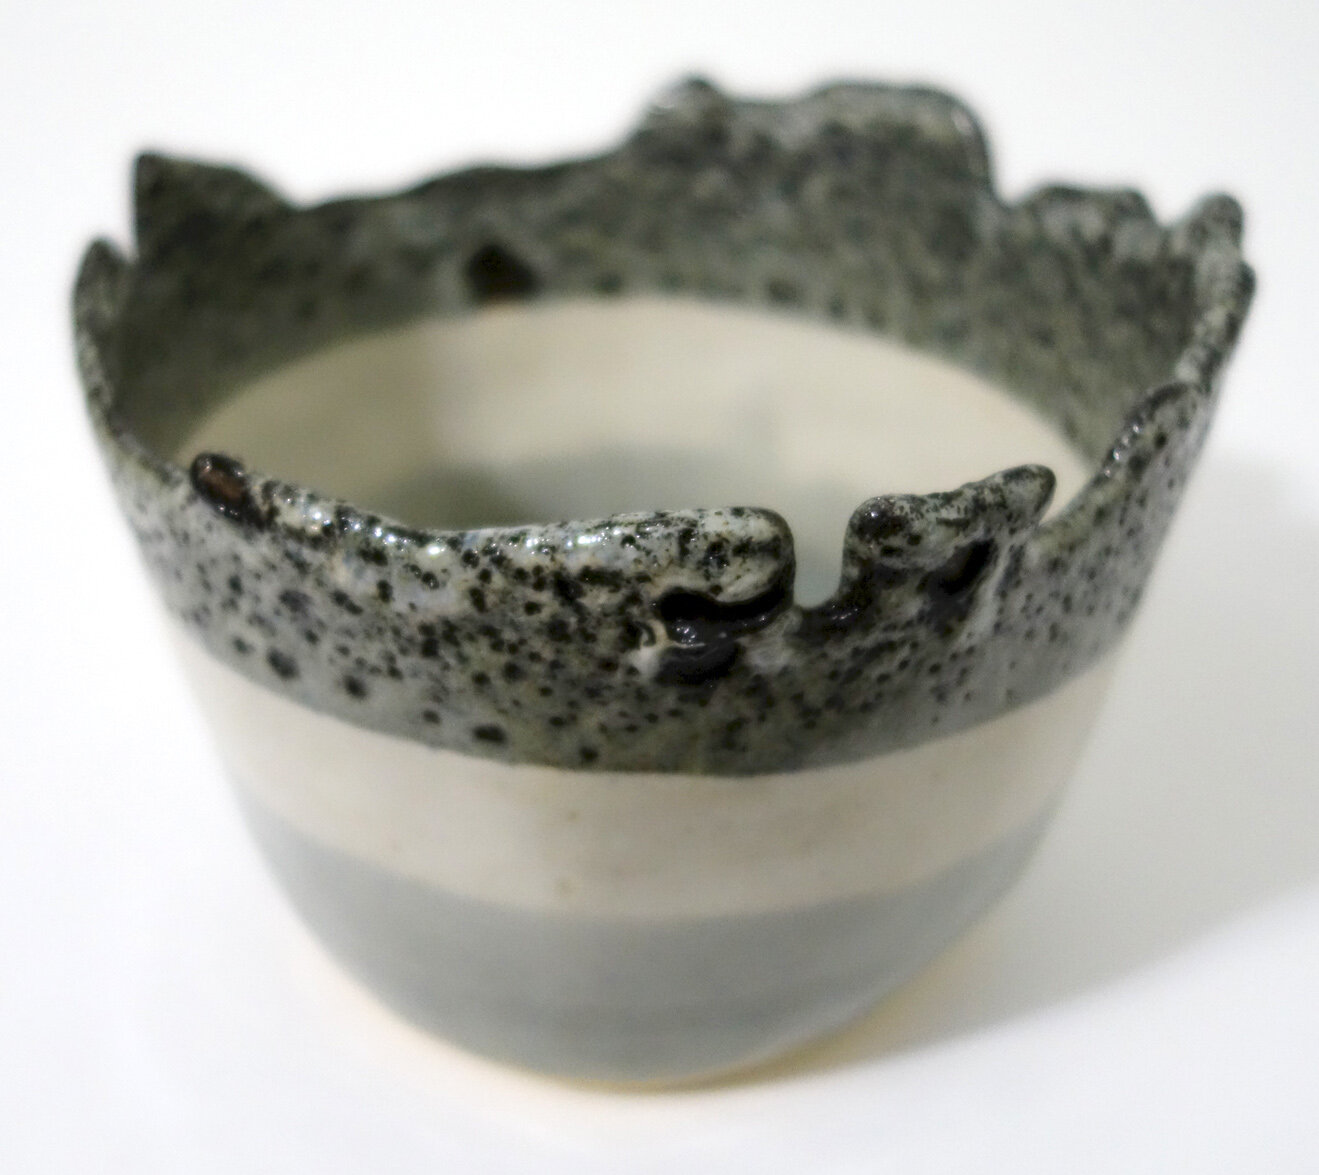
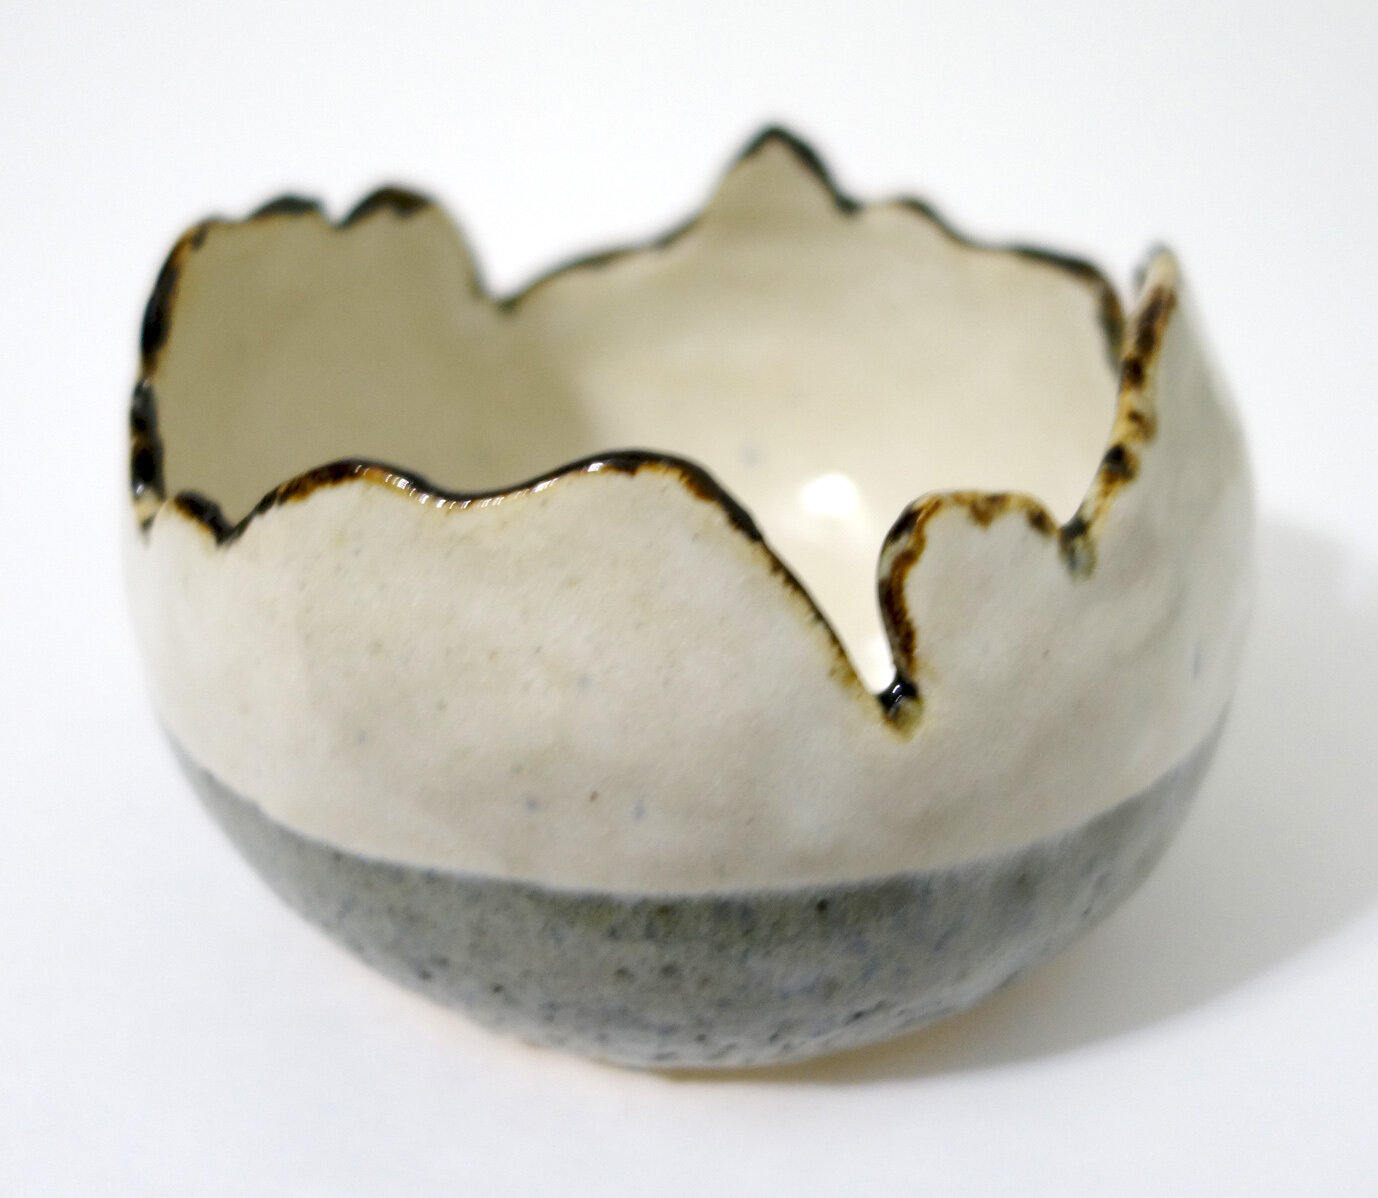
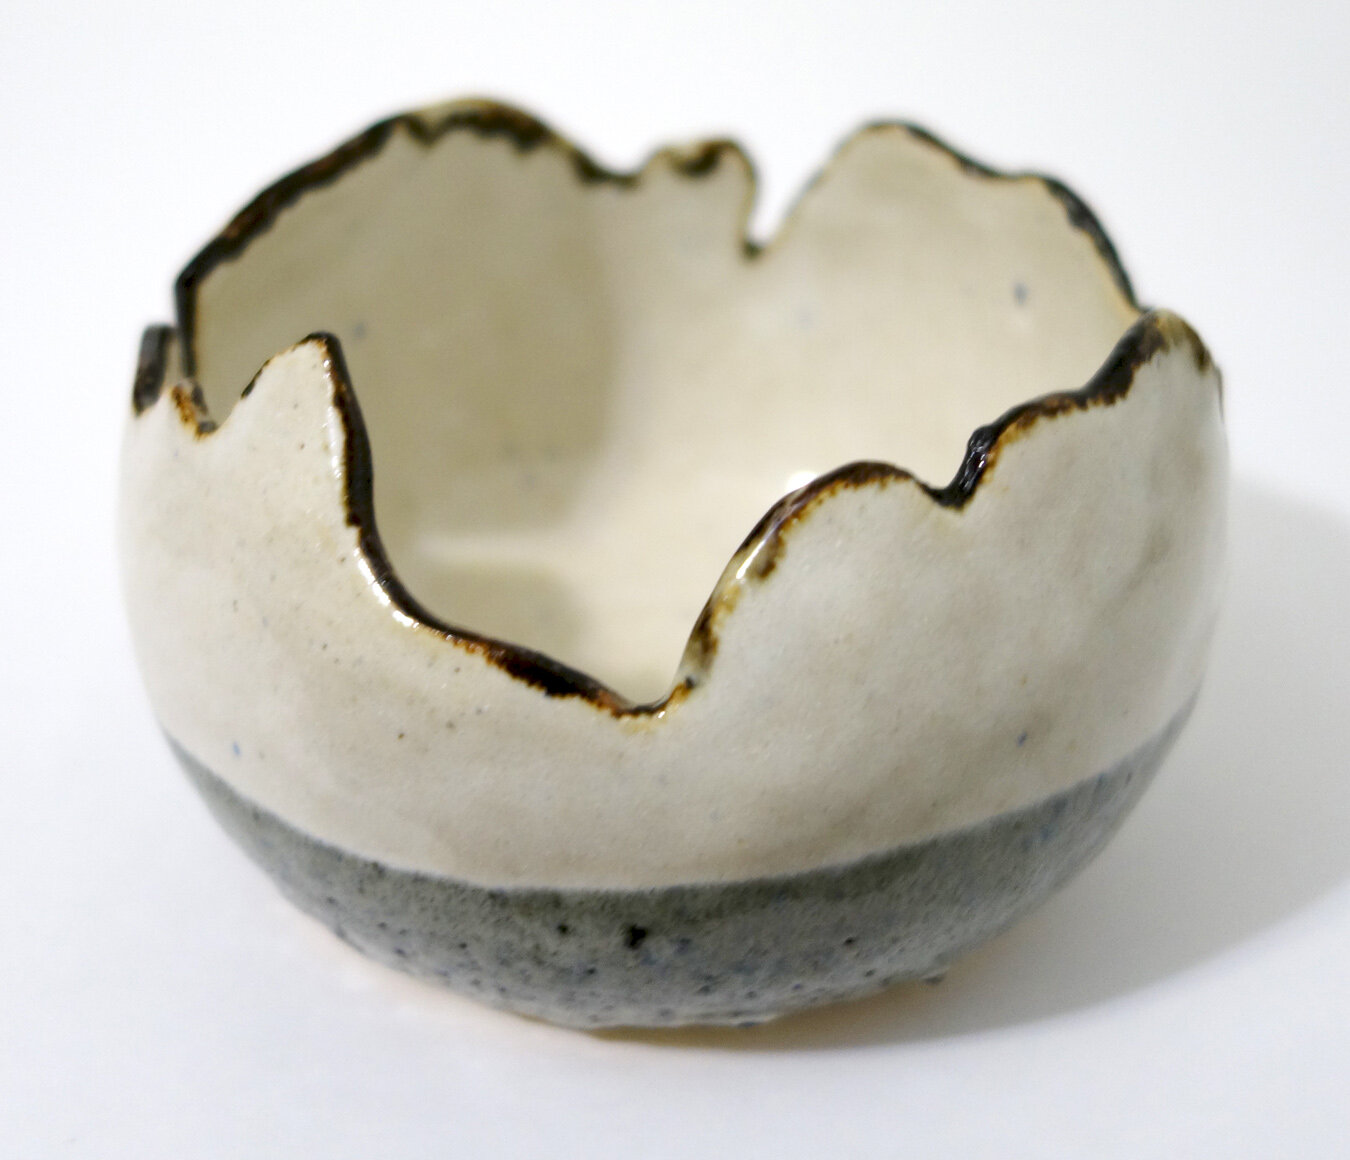
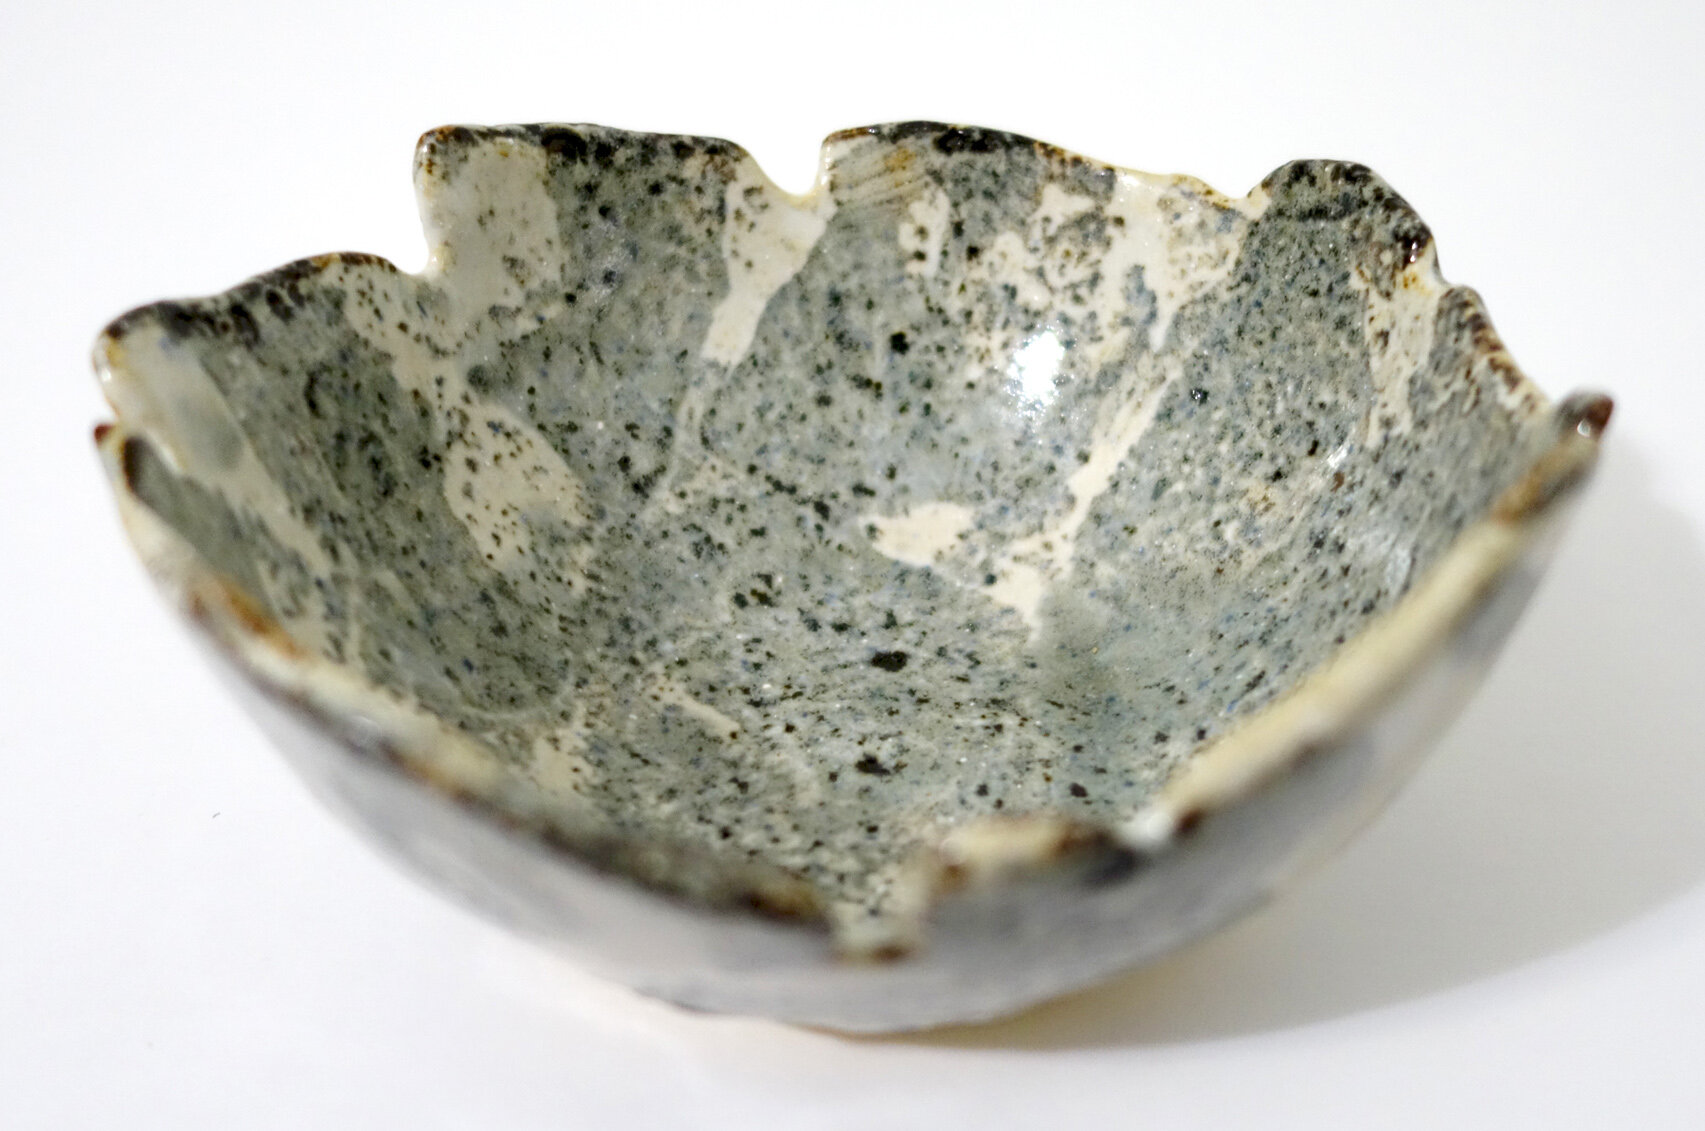
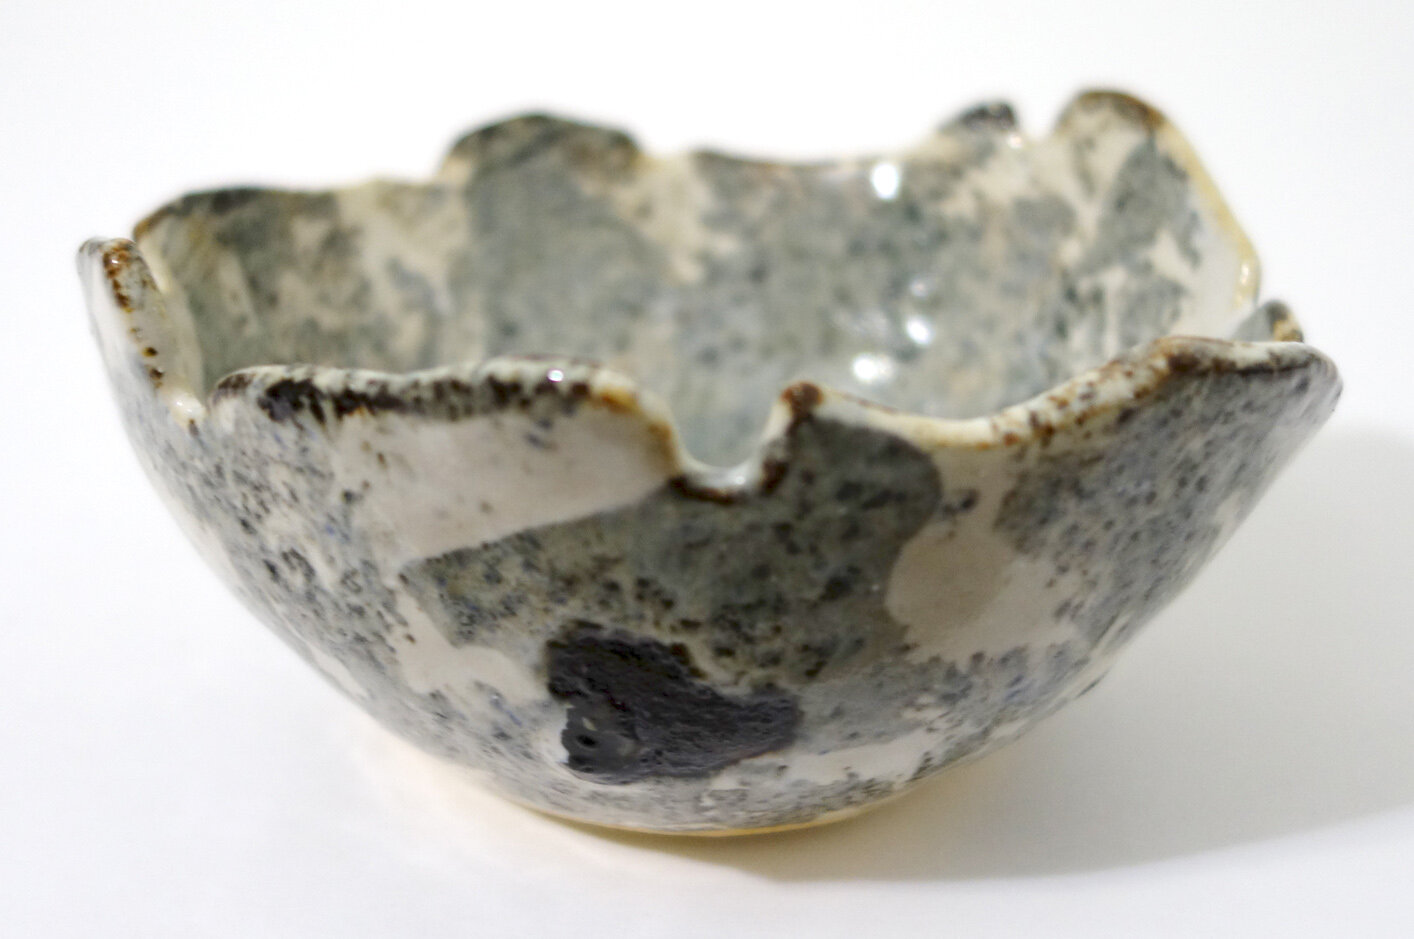
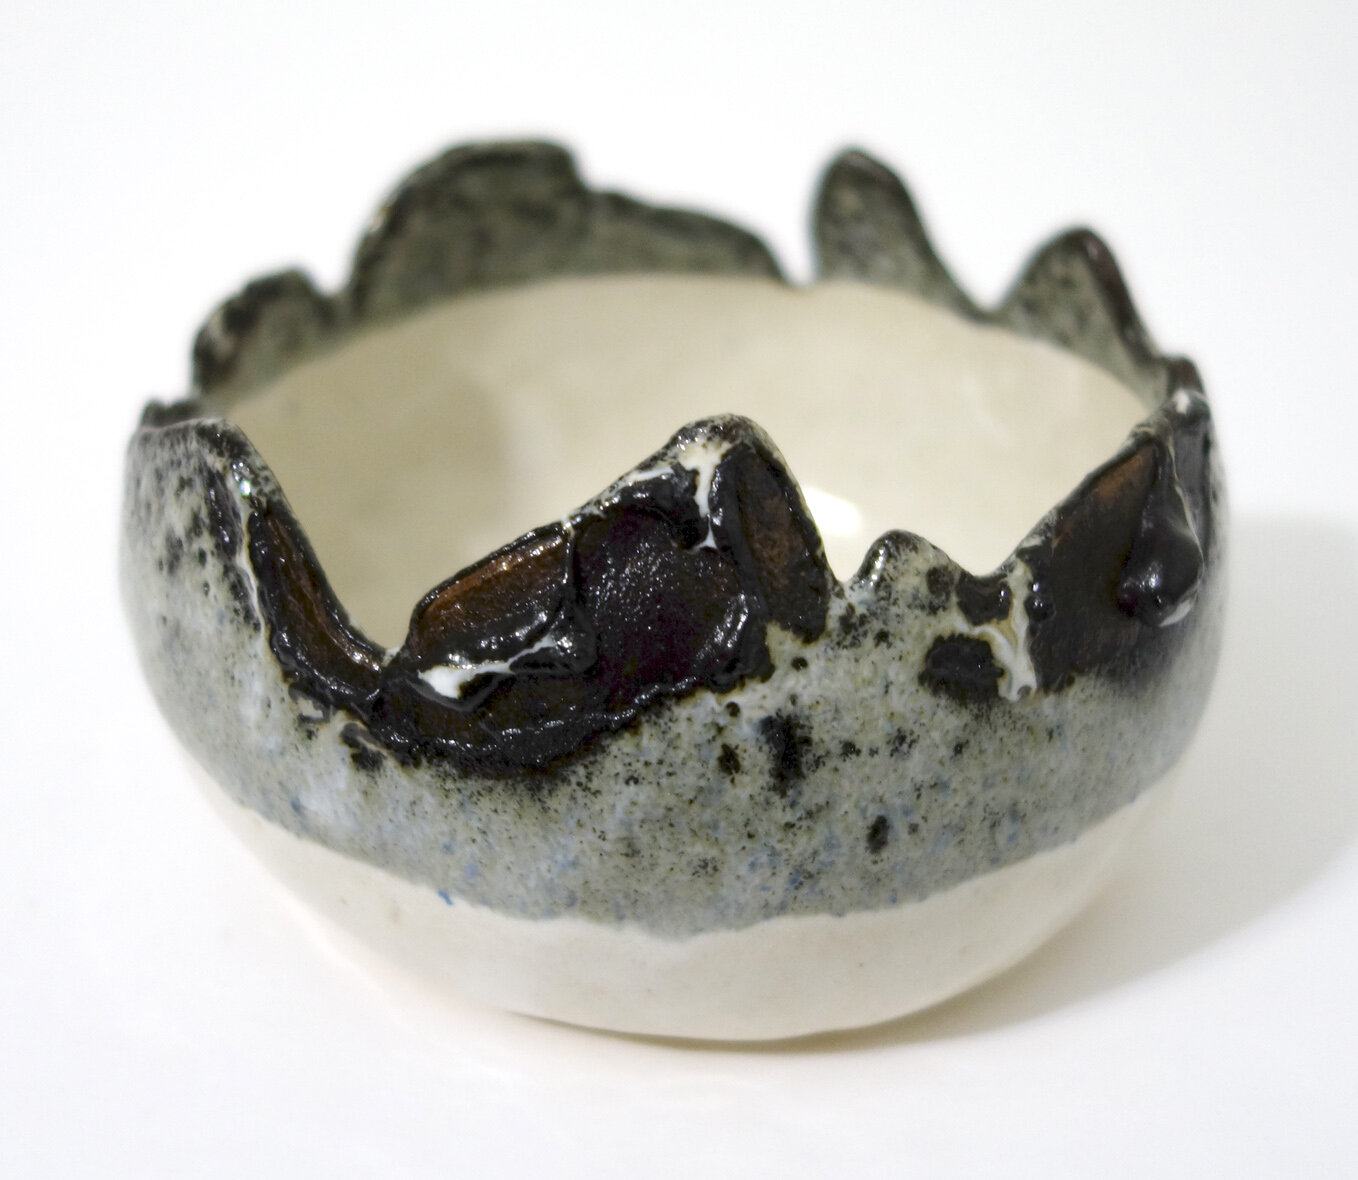
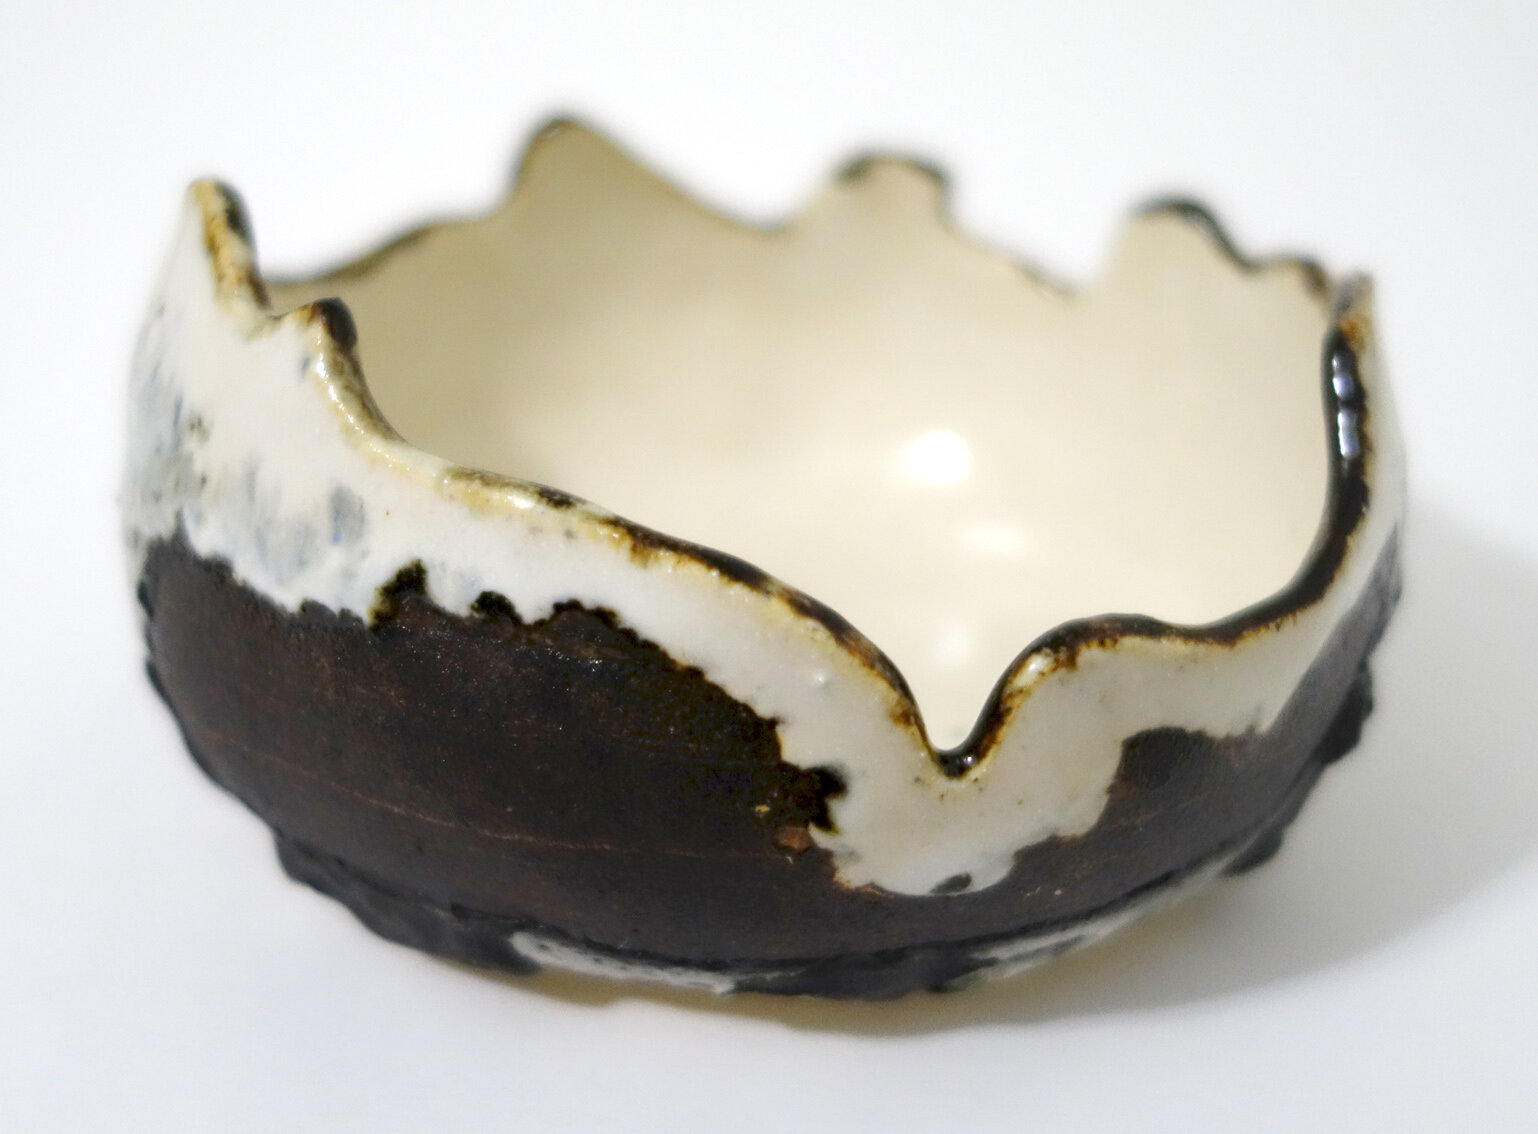
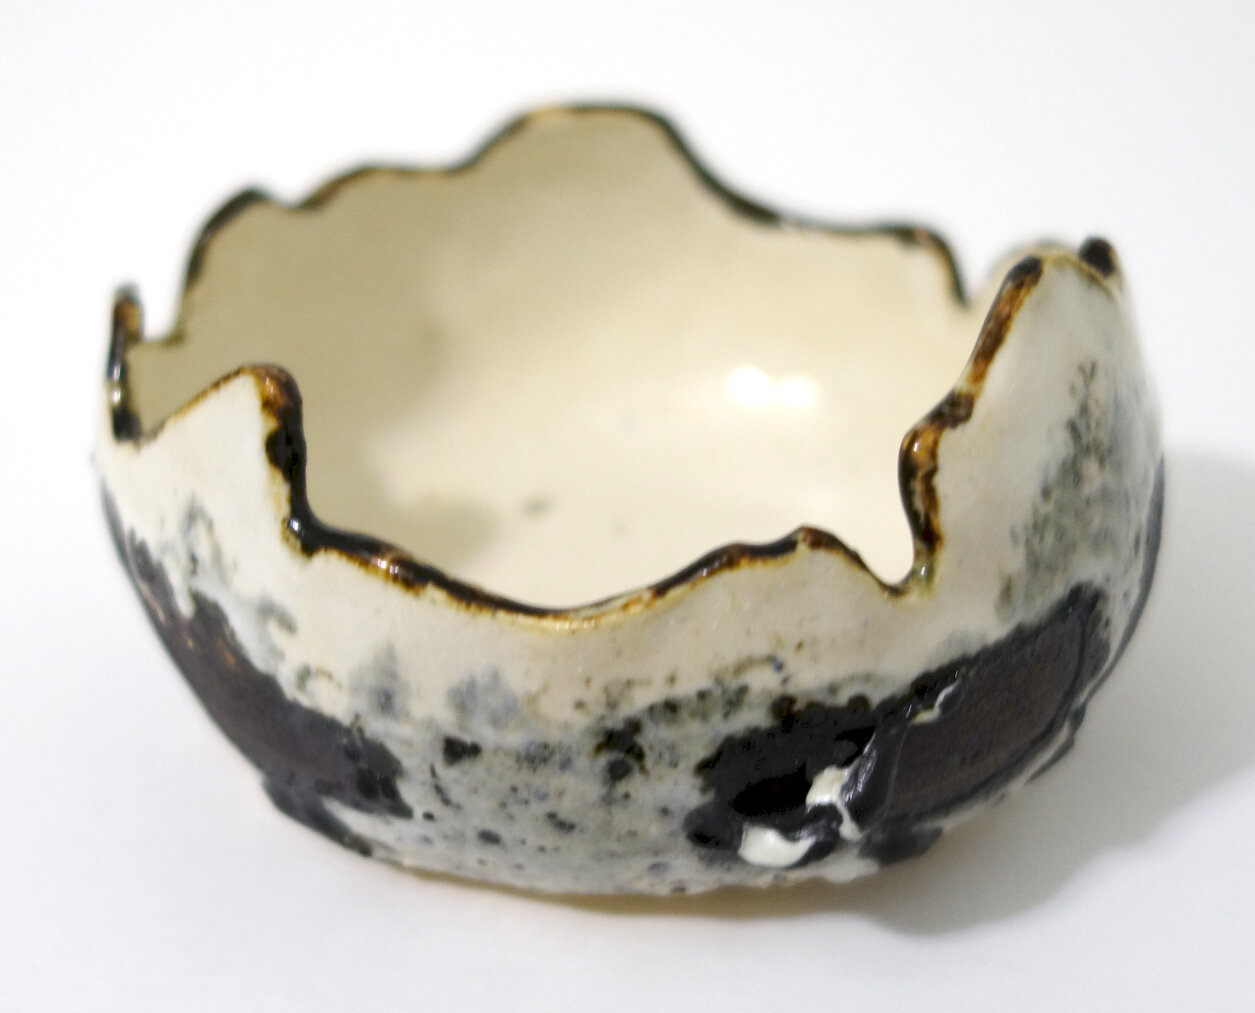
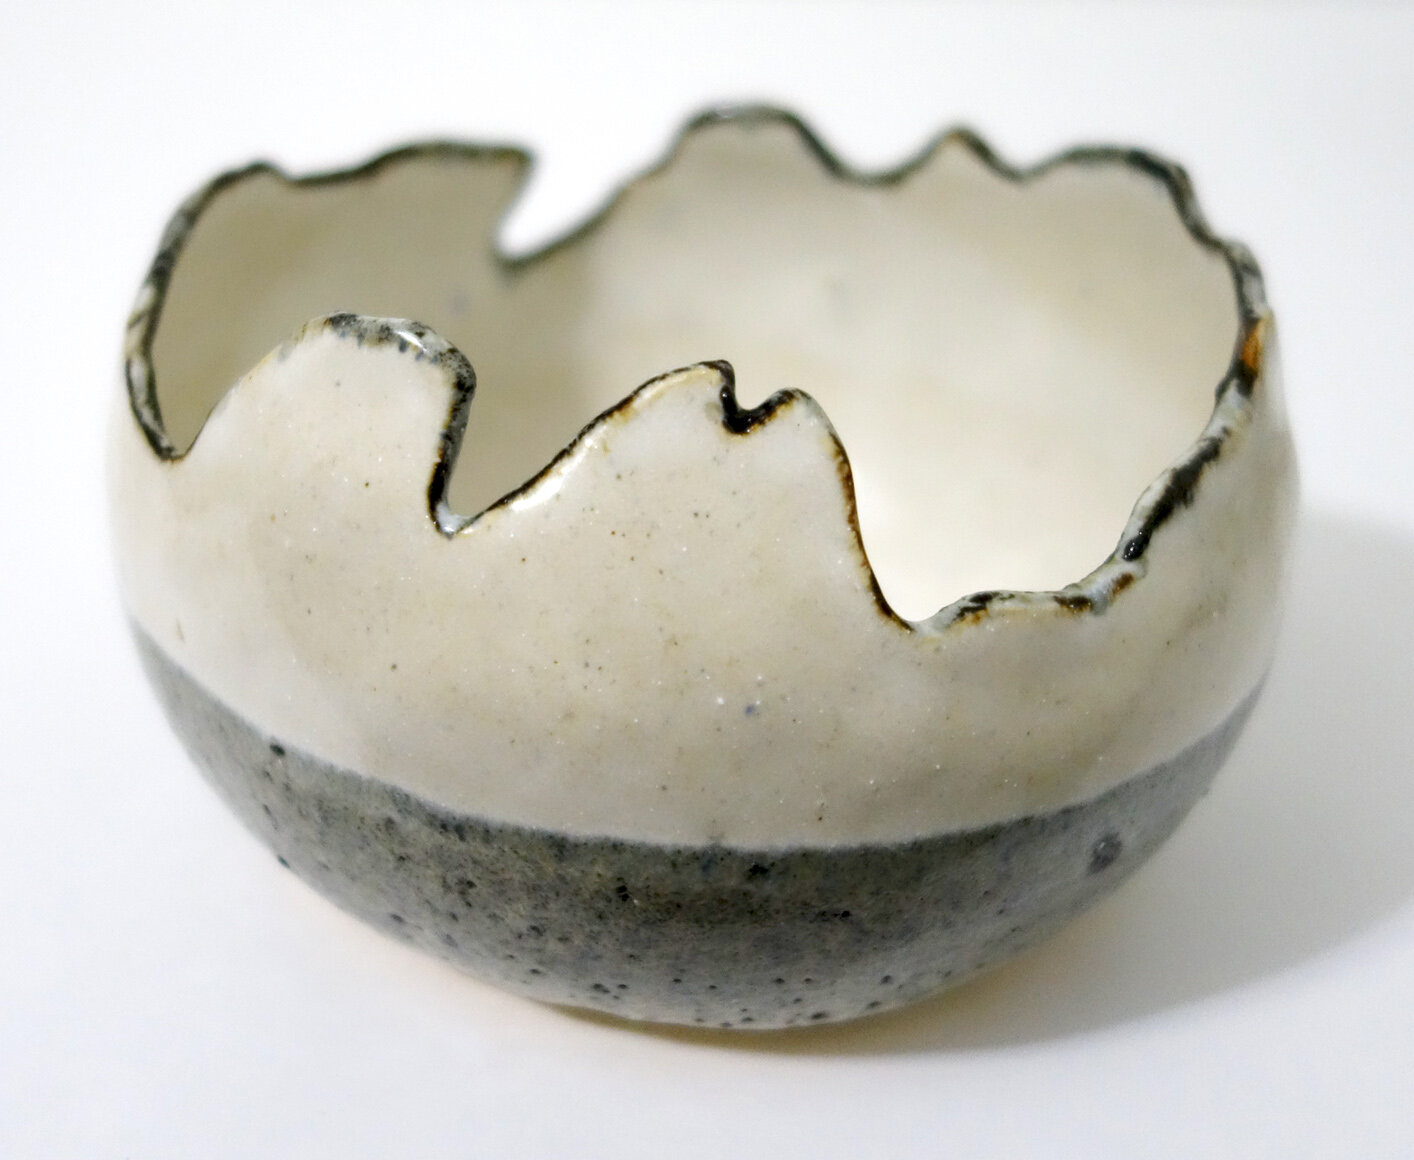
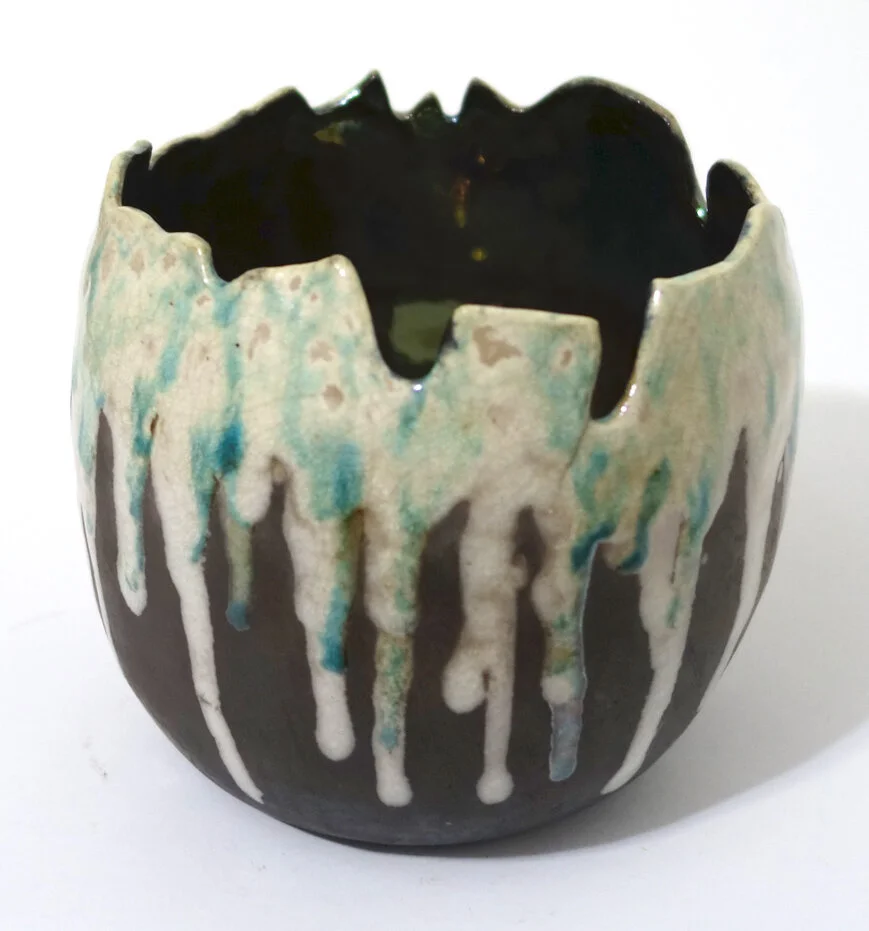
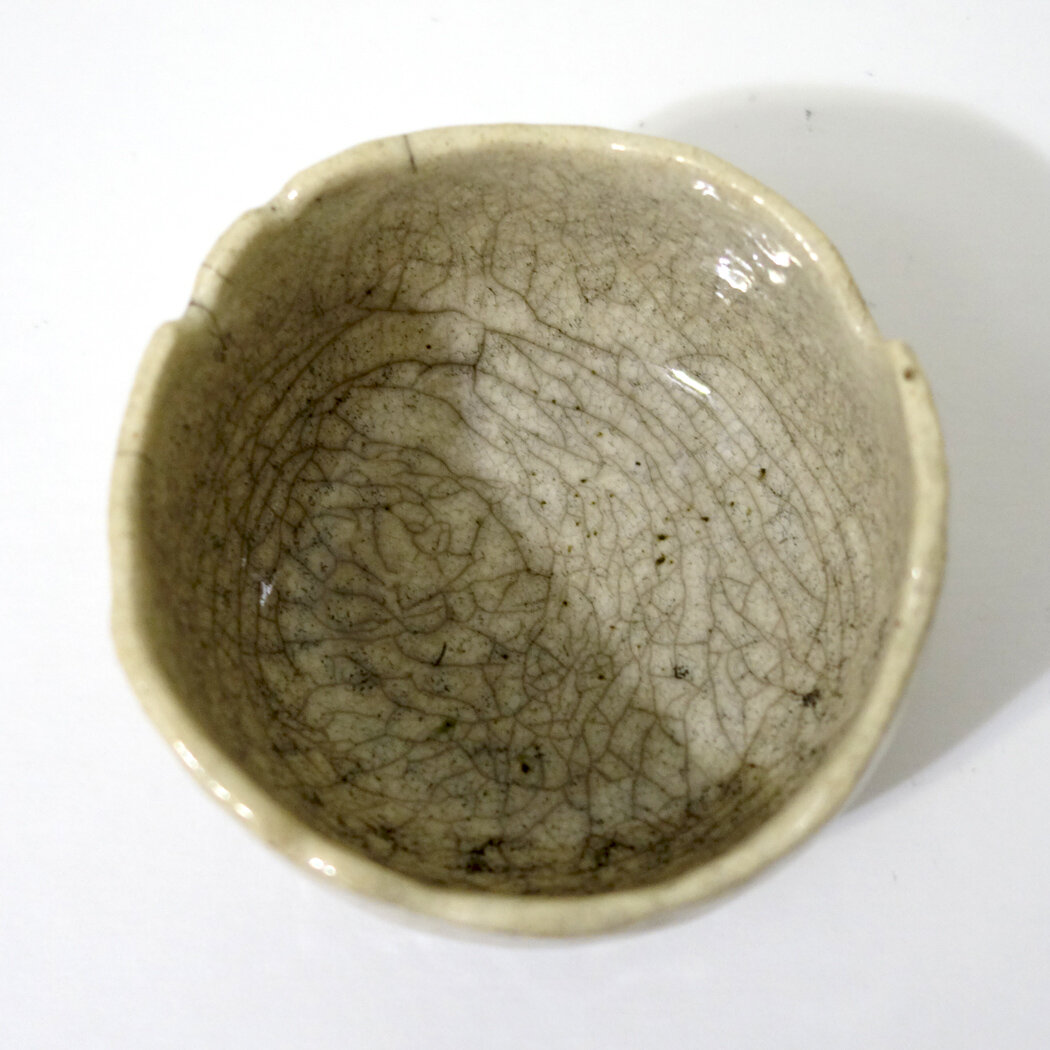
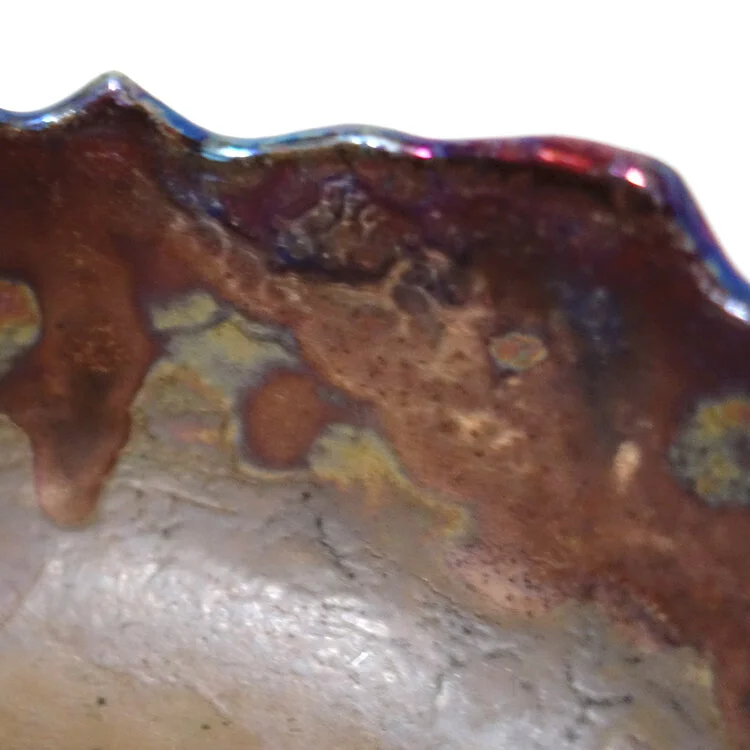
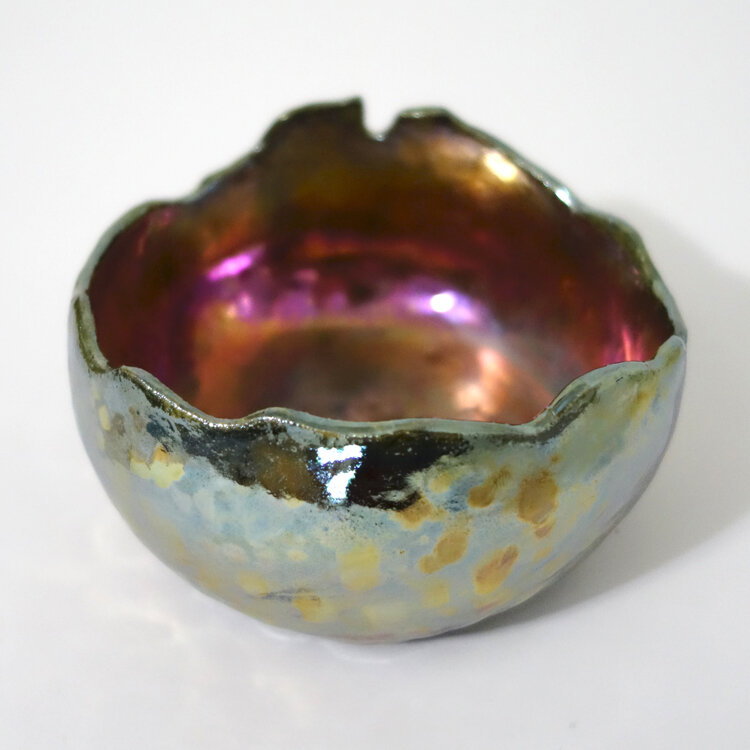
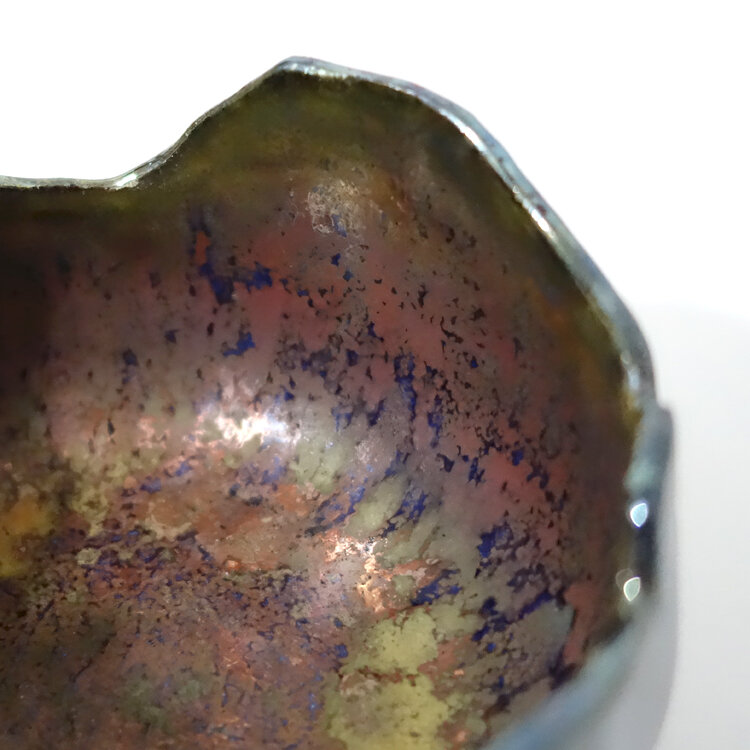
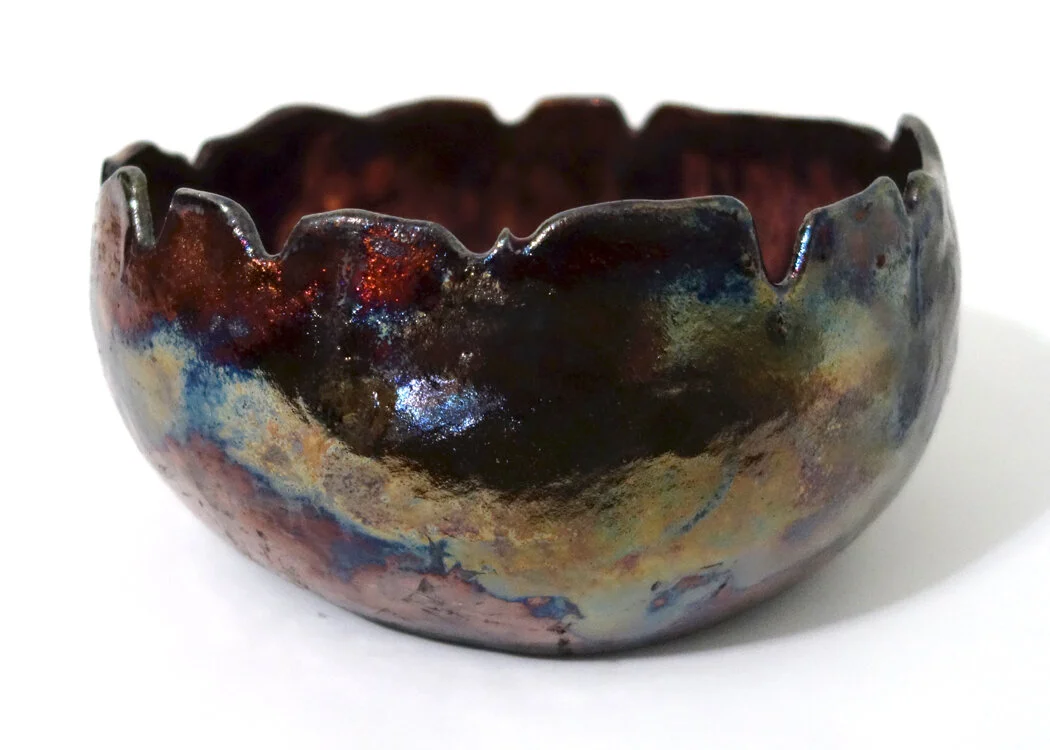
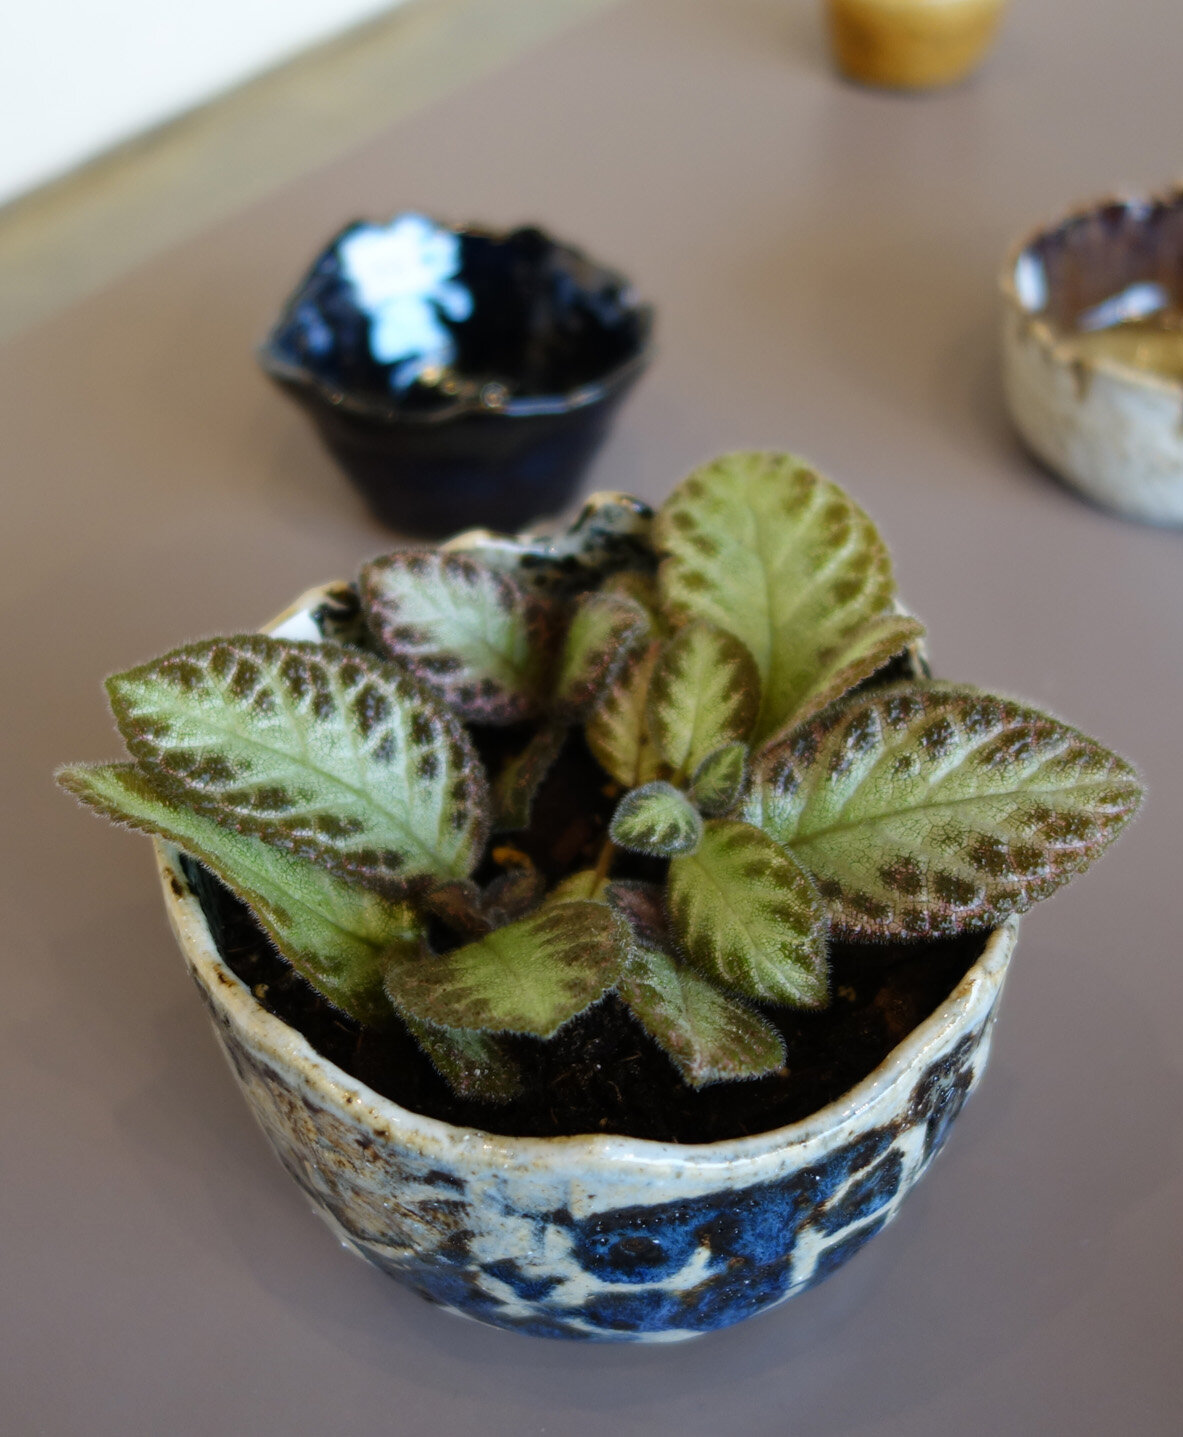
Here are some photos of one tumble from start to finish! (You can click into any of the images to see them at a larger size.)


Whiterock Art Show Photos!

Here are some photos from my three-person show Whiterock Art at the Betty Strong Encounter Center in Sioux City, IA! You can still check out this exhibition in person through November 13, 2022. I have 37 works on display, including 20 chromatograms, 15 site-specific ceramics, and 2 painted bas reliefs on panel using the polymer clay I helped create (QuickCure Clay).

As you can see, I arranged dried botanicals harvested from Whiterock Conservancy in four of my 41.816, -94.646 ceramic vessels to show this ceramic collection’s utility and connection to the landscape. My friend, former colleague, and master ceramist Susan Nelson inspired me to do this, as she often shows and photographs her ceramic work with ikebana, or the art of Japanese flower arrangements. I also placed a representative sampling of the small rocks, twigs, and other debris I cleaned out of the clay in a fifth display inside one of the smallest dishes.

At the reception for the show, I sold four of the 41.816, -94.646 ceramic pieces! I was pretty pleased with that, particularly because my price point for pieces in this collection was significantly higher than that of my stoneware work, given all the additional labor that went into this site-specific series. One of the buyers selected a piece holding dried botanicals, and another picked the vessel containing the rocks, twigs, and debris cleaned out of the clay body; both shared with me that they plan to keep those displays intact. That intent surprised me, but I’m happy that my decorative touches felt so appropriate that they’ll continue on beyond the exhibition!

Rolling with Ceramic Glaze Changes

Speaking of glazes: I’ve been learning that the discipline of ceramics involves many variables, and some of the variables are less constant than I’d expect. In the discipline of painting, when I use up paint and I need to buy replacement tubes, they are very consistent in formulation so they are almost never perceptibly different. In ceramics, due to weight, volume, and cost issues we mix most of our glazes ourselves. This introduces a lot more human error compounded by potential supply line vendor changes in the ingredients and user contamination. To continue the comparison, it’d be like if I switched brands and sometimes even types of paint and expected continuity!

To state it simply: I’ve learned that when a bucket of glaze is gone and we remix it, I cannot expect the same aesthetics or behavior from the new glaze as from the old, even if they are purportedly the same. In some ways this is disconcerting, of course. But it is also a real opportunity, and it adds some exciting pressure and novelty into the glazing process. The novelty is self-explanatory; the pressure comes from if you want consistency since you only have as long as those buckets last for the desired effects to relatively predictably result.

Below is how Cone 6 Larry’s Black under Iron White looked with the bucket of Iron White that we were using last year.

You can see that the Iron White behaved in a very glossy way, was relatively thin at one coat but varied in thickness dependent on number and types of application coats with opacity ranging from translucent to decently opaque. At its most opaque, it was white. The Larry’s Black underneath went to a glossy and stable spectrum of various values of blue dependent on the application thickness of both colors.

We used up that bucket of glaze a few months ago, and the new Cone 6 Iron White appeared. Below are two new pieces that use Green Tweed, Larry’s Black, and the new mix of Iron White.

This Iron White is thicker at one application coat, a little yellower, and more opaque and matte. It also interacts quite differently with Larry’s Black. The matte-over-gloss effect causes the Iron White to crater and blister atop Larry’s Black; you can see it does not do that over Green Tweed as Green Tweed is itself more of a matte glaze.

Cratering and blistering are frequently considered “glaze defects,” but I enjoy the texture that some “glaze defects” provide - if you review my body of stoneware ceramic work you’ll notice that I am drawn to crawling as well.

Since these were my first pieces with the new bucket of Iron White, I didn’t know about this new interaction yet - I was expecting glossy results aligned to that first batch above. Now that I know, I’ve glazed a bunch of new ceramics with this cratering/blistering effect in mind, and they are waiting in the kiln until it’s filled up and ready to fire. I’m excited to see them come out!

New Cone 6 Glaze Combination!

When my parents visited this past fall, my mom tried her hand at ceramics! Then at Thanksgiving, she glazed her first piece. She decided to use four different Cone 6 glazes on the small dish - she overlapped Green Tweed, Red Earth and Iron White around the sides, and then filled in the bare central triangle left in the middle with Baby Blue.

Red Earth was a new-to-the-studio glaze that we had recently acquired; it was an old recipe our ceramics faculty Paul Adamson unearthed and wanted to try again. I didn’t imagine it would look very good in combination with Green Tweed, but the overlap on my mom’s dish was small so I figured it wouldn’t matter.

When my mom’s first piece of ceramics came out of the glaze firing, I was really surprised - the overlapped spot of Red Earth over Green Tweed looked metallic and reflective! So far, I’ve only seen that kind of glaze result from raku, and those are somewhat unstable and decorative (not watertight). I was excited to see what this new food-safe stoneware glaze combination would look like on a larger scale, so I tried it out on several pieces! This glaze combination seems somewhat chaotic in terms of its uniformity, density, and reflectiveness, but I’ve always enjoyed the balance that natural chaos can bring to my tight artistic hand.

There are two views of each of the three pieces above. The bowl and egg-shaped vase both use Green Tweed as the base and then have Red Earth applied to most of the top. The striped planter combines Iron White, Green Tweed, and Red Earth in different layers.

Here are three more pieces - two more broken-eggshell vessels and another planter! These also experimented with Iron White, Green Tweed, and Red Earth in different ways. I need to take better notes on my processes, as I no longer remember the order of layering on each of these and I didn’t write it down, but more testing will reveal all such secrets in time.

Overall, I’m really pleased with how these all turned out and plan to continue experimenting with these glaze combinations more in the future!

More Raku!

You got a sneak peek at some of my recent raku work in my exhibition shots from Functional Aesthetic, but here is the full reveal!

Above are three photos of one “baked potato” bowl. I used my own hair again as well as sugar for the carbonized marks on this piece.

This vase is very difficult to photograph well; it’s currently on exhibit, but once it comes back I’m going to see if I can capture it a bit better digitally. A couple of my friends who viewed the show said this was their favorite piece of mine. The way the glaze dots turned out reminds me of inset abalone shell.

This piece certainly didn’t turn out as planned; I experimented with a turquoise crackle glaze, but I really did not like the way the color came out, so we went ahead and re-fired it. I much prefer this hammered copper look!

This above bowl is decently large, and I chose to do the outside in a relatively matte glaze while the inside is a high gloss. It gives me dragon egg vibes. The Functional Aesthetic curator placed this piece in the choicest display spot, and I learned today that it was sold! I did see a viewer admiring it and gesturing to and around it at the reception, so I wonder if she’ll be providing its new home or if a different patron snapped it up.

This above vessel is kind of football-shaped, and its surface reminds me of a somewhat aged/stained city map. It has my own hair and sugar burned into the white crackle surface. I am quite into this piece.

I was really excited about how this piece turned out, as it’s adding into the “broken egg” series of clear crackle pieces I’m developing. The shape is hard to convey in photo, but it leans in a way that feels quite anthropomorphic - at least to me!

This bowl was intended to be another in the “broken egg” series, but it cracked coming out of the kiln due to the thermal shock and my thin walls. That’s more literal than I’d like for the “broken eggs” to be. It is still in one piece, but even after I epoxy over the crack (which I plan to do to bolster its structural integrity), it will have that weakness as it’s a fairly sizeable crack. I’m not sure if given the severity of the crack if I’ll want to display this piece, but if I do I plan to list it as NFS (not for sale).

And here is yet another casualty; however, this football-shaped vessel’s crack is more minor.

More Stoneware Ceramics!

I’ve been posting about my raku productivity of late, but I have also continued to make stoneware pottery too!

I really like the combination of two glazes - standard Cone 6 recipes for a white and “smoky brown.” I particularly like the crawling that frequently results. I sometimes add in a complementing lighter grey glaze which is a discard mix of my own creation and therefore likely very difficult to reproduce once gone.

Below are eight different pieces. They include, respectively, a bowl, two images of a planter, two more of a second bowl, a third bowl, two images of a dish, a fourth bowl, two images of a fifth smaller bowl, and two images of a sixth bowl.

Second Raku Workshop - Crackle Edition

I only did one crackle piece (and this time, I went with the natural crackle as opposed to the white) this go-round, but it is my favorite of all of the pieces from either raku workshop. In fact, in a sense I think this might be my first professional piece of ceramic artwork. Or perhaps ceramic object.

What I mean by that is that so far, my ceramic studio practice has involved experimentation and learning, but my primary design purpose has been functional. The aesthetics matter, of course, but don’t take primacy over the form. I’ve been making pottery. That’s a completely valid ceramic arena!

However, in this piece, the function took a backseat to conceptual and aesthetic goals. I’m really pleased with how it turned out!

Second Raku Workshop - Copper Glazes Edition

I decided to try copper glazes again, but with some wild cards thrown in - I experimented more with unglazed negative spaces, and tested out some different types of glaze.

This first piece has “Midnight Luster” glaze on the interior and a lithium carbonate glaze on the exterior. It’s quite attractive in photo, but it did suffer from a bit of pitting, meaning the glaze pooled in some spots and it bubbled and hardened in ways that are suboptimal; instead of a smooth surface, there are rougher points within.

This next piece is interesting in that I had intended it to be a more standard bowl, but in the bisque firing process its sidewall accidentally got damaged and it was involuntarily edited into the shape it has now. I sanded it down a bit and decided to move forward with it; I can imagine that the cavity might improve accessibility to whatever is stored within!

I was pretty proud of this platter as a handbuilt piece, but unfortunately though it made it through the bisque firing unscathed it was unable to handle the temperature fluctuations of the raku firing and it sustained a crack across about 2/3 of its base. It is not salable now, but I still wanted to share the piece with you!

Finally, here is the most experimental piece of the metallic batch - I used both “Emerald Copper” glaze and a thinned out crackle glaze to create the exterior dripping decoration, and used “Midnight Luster” on the interior. The bottom of the exterior is just the result of carbon trapping in unglazed raku clay.

First Raku Workshop Pieces - White Crackle Edition

I’m just going to call it how I see it; the white crackle pieces I got out of this first round of raku firing were by and large underwhelming. The instructions say to put three coats of the white crackle glaze on; I think my interpretation of what three coats should be was thinner than the intended result. Next time, I plan to do at least five coats. However, it is also the case that in order to deter cracking, we did not plunge these pieces into water upon removing them from the kiln. Though dunking into cold water does increase the chances the whole piece shatters, it will also increase the crackle effect in any survivors. Not doing so may have also limited the resulting crackle in these ceramics.

I did apply and rinse off India ink on all the below pieces in a post-process attempt to heighten the crackle’s contrast; this did have a very slight effect, but it didn’t do nearly as much as I’d hoped.

Below is the first piece; it’s a small dish, and honestly, the crackle is more impactful in these photos than it is in person. To me, it’s not that interesting of a piece, which is a shame as the costs of the process make it more expensive than I think its aesthetics merit.

The second piece has a similar aesthetic; it is perhaps a bit stronger, but still not as powerful in the crackle as I’d like. This one is a planter; raku is not watertight, so I plan to coat the interior with Thompson's WaterSeal to hopefully increase longevity before planting inside.

The third piece is much the same as the second, including it being a planter. The India ink soaked into the general glaze body more on this one, though, in a kind of pitting or freckling effect.

I had completed all of my white crackle glazing on these pieces before I fired any of them, which I now realize was a mistake; I should have glazed and fired one and then adjusted my process for the subsequent pieces. Admittedly, that is only somewhat possible as there are a limited number of firings per workshop, but it is a strategy that I plan to consider moving forward.

Finally, I present to you the only white crackle piece from this workshop that I consider to be successful! A combination of luck and possibly forgetting how many coats of glaze I applied and thus erring on the side of adding another contributed to this result. The brownish tinge near the top rim is an artifact of the smoke staining the surface; it is easily removable in the first 24 hours of the ceramic’s post-glazing life but then settles in. I somewhat thoughtlessly removed it from all the above pieces, but with this one I realized I could use it as a design element and didn’t remove it all. The strong black at the base is an artifact of the burning substrate (newspaper, in this case); it too could have been readily removed early on in the process but I again thought it added a dynamism to the piece. This one, too, is a planter, and will be receiving the Thompson’s WaterSeal on the interior.

I am still intrigued by the possibilities the crackle glazes (white and clear are the most standard options; turquoise is a rarer possibility as well) offer, but I will be more conservative moving forward with this glaze type due to this overall turnout on my first batch of attempts.

First Raku Workshop Pieces - Copper Glazes Edition

Here are my copper glaze pieces! These all turned out beautifully, but let me tell you - I learned that I cannot control what I’m going to get, at least not with all the variables that were at play at this raku workshop! The local temperature and humidity, the time in transferring from kiln to reduction, the organics used, the timing and duration of any burps (adding oxygen back into the reduction environment) - each and every factor influences the final color, shine, and character.

Amusingly enough, from having surveyed some sample pieces in advance of glazing, I determined I quite liked lithium carbonate as the interior glaze and used it on the inside of all four of my copper pieces. For the lips and exteriors, I tried out a few different options - some more lithium carbonate with a touch of Molly’s banding purple, emerald copper, golden rainbow, midnight luster… and a couple of the exteriors look almost identical despite or perhaps because of my experimentation, in concert with the rest of the environmental factors! (Because the exterior glazes didn’t align with my expectations of them, I don’t remember which specific bowls got which exterior glazes.)

In this first bowl, the lithium carbonate interior is matte and relatively dull, and it provides a stark contrast to the dark shiny rainbow lip and exterior of the bowl.

This second, smaller bowl - like every bowl here - has lithium carbonate on the inside, but this time it resulted in a satin, coppery base and a high gloss, pink-and-rainbow interior side. The exterior is also high gloss but contrasts the interior with silvers, golds, and aqua hues, accented by some sooty squiggles. This is perhaps the loudest bowl, and it gives me a unicorn cupcake vibe.

Here is the third bowl! In many ways it’s the most subtle of the four, but it is nevertheless quite rich. The lithium carbonate here developed a semi-gloss interior that has a lot of variation, rings, and finely-detailed contrast. The exterior reflects some of the same color palette of the interior, but it adds some turquoise and blue into the mix and has a higher gloss.

Finally, we come to my favorite piece from the whole day! This bowl is really nice. The lithium carbonate interior here has a high gloss and is very coppery with splashes of blue and purple and finely detailed contrast. It is complemented by a high gloss dark rainbow exterior that is very reminiscent of the first bowl and pretty reminiscent of the third bowl in this post.

Though much of the reason this last bowl is so powerful is its glazing, another consideration is that it is the largest of the pieces I brought. With that in mind, I plan to bring mostly large pieces to my next raku workshop.

Which copper glaze bowl is your favorite?

First Raku Workshop Pieces - Baked Potato Edition

As I mentioned in my first raku post, the “baked potato” technique involves coating the bisqueware in ferric chloride, sprinkling it with sugar, salt, and/or horsehair, and then bundling it up in aluminum foil like a baked potato before firing it. The one example piece we were shown of this technique was interesting but not super compelling, so I just tried two “baked potatoes” out in the form of a couple cache pots.

Interestingly, the resultant pieces did not come out as advertised, but I do really like how they ended up. I was told the sugar and horsehair spots would turn black, but on my piece they are mostly white with some grays. This could be for a couple reasons: A) all the environmental variables at play - the local temperature and humidity outside, the ferric chloride purity and concentration, the thickness and tightness of aluminum foil, etc. B) at the time I understood I was to put one bundling of aluminum foil on, but afterwards I heard that perhaps the instructions called for two. Reason B is all the more interesting because some of my foil burned off in the kiln, exposing part of the pottery inside. The kilns did not have organics inside beyond what was in the “baked potatoes” and had vents providing air flow, so maybe the burning of the foil resulted in less carbon trapping than would otherwise have occurred?

Due to the general inconsistencies and vagaries of raku firing and the complicating factor of my still not being sure how many layers of aluminum foil is advisable, I’m very unclear on if I can replicate the appearance of my “baked potatoes” in the future.

Here is my first “baked potato” cache pot. As you can see, it kind of looks like red marble or agate. I had the choice of sealing these pots with a gloss or matte coat. I chose the matte, which I stand by.

And this is my second “baked potato,” which was fired in the same round as the first. I do really like the appearance of these, but I’m not as convinced that it’s best suited to cache pots though it certainly will look nice as such. I’d like to try a large bowl or two with this technique next time, as I think that could be even more gorgeous - though it’s all dependent on how the firing goes!

My Artist For the Earth Opening Reception!

Well, Earth Day 2021 was quite eventful! I’ll do a separate post on the ART 225 Painting I project we took on earlier in the day, but this post is all about how my opening reception went for my Artist for the Earth solo show at The Block Gallery in downtown Sioux City.

First of all, I want to say a big thank you to the Morningside Art Department federal work study studio art assistants Devyn Reilly and Rachel Steinkamp for helping me to install the show. While I’ve installed many a show alone, it is so much nicer to have skilled help working alongside you! I also had Rachel take some nice shots of the show after we installed it, so I might add more to the blog later, but here are a few photos I took tonight.

The last photo in the grid is thanks to some of my lovely friends, who not only came out to support me at the reception but also gifted me with a bouquet of flowers and purchased artwork and reproductions. A bunch of wonderful colleagues, students, and community members also came through and many left with various pieces of artwork as well. It was a lovely evening!