sugar

Second Raku Workshop - Horsehair Edition!

I attended a second raku workshop at Dakota Potters Supply in July! I brought eight pieces along, but this time unfortunately two of them did crack during the process as the wild temperature swings were too much for them. Thus only six pieces made it through.

At this workshop, I decided to try one of the techniques that I hadn’t yet attempted - horsehair and/or feather application! I had two twists in mind, though.

The first is that I had just had over seven inches of hair cut off in a summer chop, and my hairdresser kindly collected it for me upon my request to use in this raku process! I like the conceptual power of it being my own hair, plus human hair results in a more delicate line (though I do have pretty thick hair).

The second is that I had gathered in my ceramics research that sprinkling sugar is a possibility as well and decided to request giving that a simultaneous try. Dakota Potters had never heard of using sugar in this way, so Wanda was really curious to see the results too! She helped me add my decorations as there’s only a short window of time where the piece is at the right temperature to trap the carbonized additions.

Wanda and I adding the hair and sugar to my just-out-of-the-kiln, blisteringly hot bowl.

This above bowl turned out really nicely!

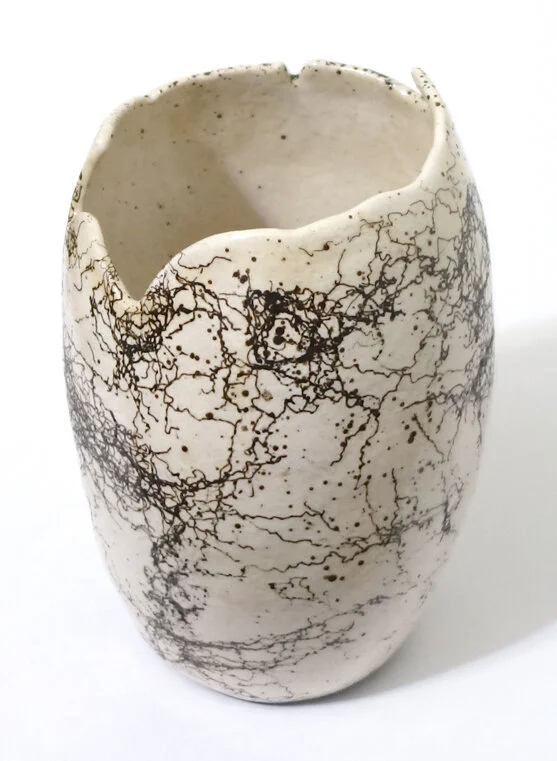
This vase was even more of a showstopper, as it is the tallest piece I’ve handbuilt thus far and the height lends drama to the overall impact.

I made three “horsehair” (my hair) pieces, but the third one cracked so these two are the ones that got through without issue!

First Raku Workshop Pieces - Baked Potato Edition

As I mentioned in my first raku post, the “baked potato” technique involves coating the bisqueware in ferric chloride, sprinkling it with sugar, salt, and/or horsehair, and then bundling it up in aluminum foil like a baked potato before firing it. The one example piece we were shown of this technique was interesting but not super compelling, so I just tried two “baked potatoes” out in the form of a couple cache pots.

Interestingly, the resultant pieces did not come out as advertised, but I do really like how they ended up. I was told the sugar and horsehair spots would turn black, but on my piece they are mostly white with some grays. This could be for a couple reasons: A) all the environmental variables at play - the local temperature and humidity outside, the ferric chloride purity and concentration, the thickness and tightness of aluminum foil, etc. B) at the time I understood I was to put one bundling of aluminum foil on, but afterwards I heard that perhaps the instructions called for two. Reason B is all the more interesting because some of my foil burned off in the kiln, exposing part of the pottery inside. The kilns did not have organics inside beyond what was in the “baked potatoes” and had vents providing air flow, so maybe the burning of the foil resulted in less carbon trapping than would otherwise have occurred?

Due to the general inconsistencies and vagaries of raku firing and the complicating factor of my still not being sure how many layers of aluminum foil is advisable, I’m very unclear on if I can replicate the appearance of my “baked potatoes” in the future.

Here is my first “baked potato” cache pot. As you can see, it kind of looks like red marble or agate. I had the choice of sealing these pots with a gloss or matte coat. I chose the matte, which I stand by.

And this is my second “baked potato,” which was fired in the same round as the first. I do really like the appearance of these, but I’m not as convinced that it’s best suited to cache pots though it certainly will look nice as such. I’d like to try a large bowl or two with this technique next time, as I think that could be even more gorgeous - though it’s all dependent on how the firing goes!