This is my second post reviewing my April 2023 raku workshop ceramics! This one will cover two of my three “baked potato” aluminum foil saggar-fired ceramics and my clear crackle piece.
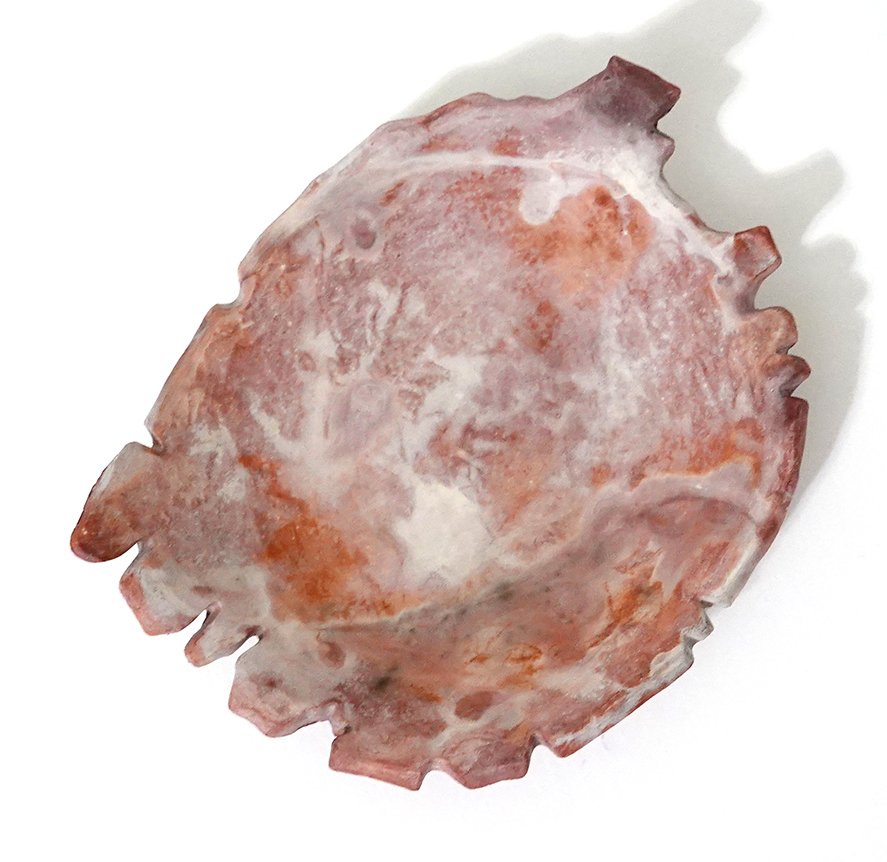
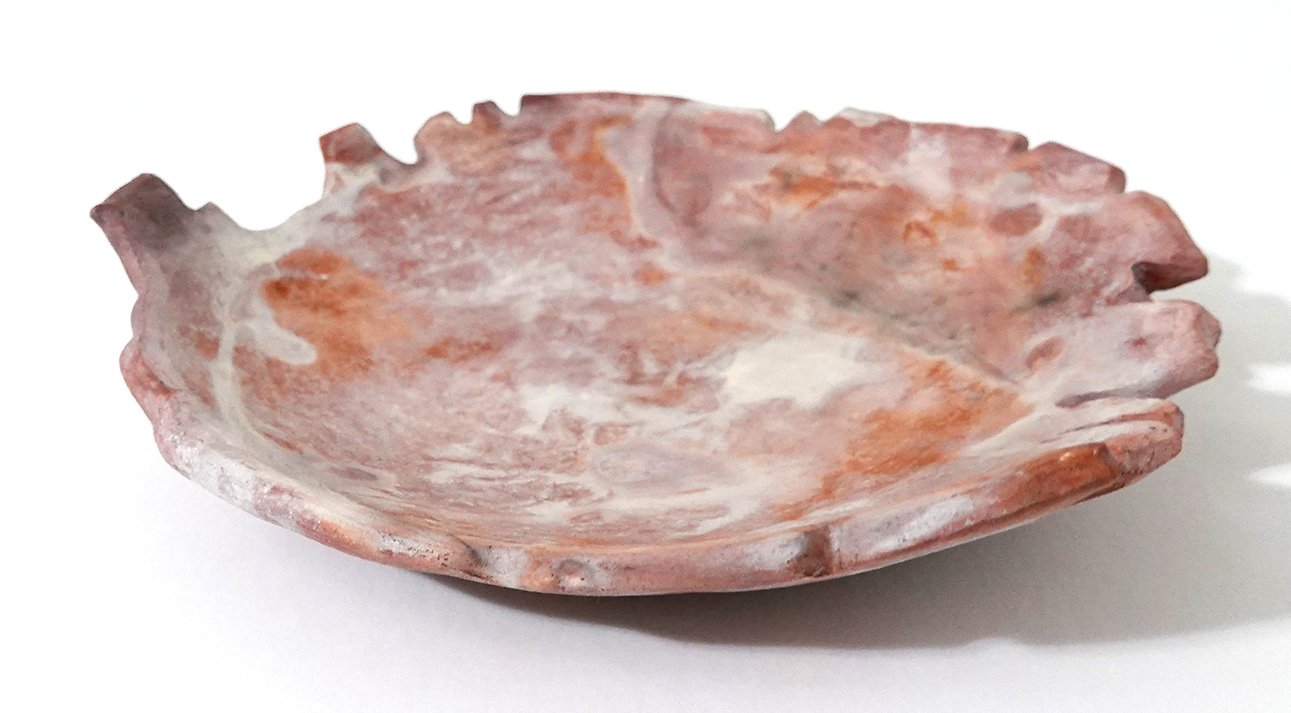
Based on my experimentation using plants at my April 2022 raku workshop, I only had real luck with saggar firing Muehlenbeckia axillaris, colloquially known as Creeping Wire Vine. I therefore used it again! Below is a plate that was dipped in three coats of ferric chloride and then wrapped in the vine and then aluminum foil and fired. The Muehlenbeckia axillaris impact is relatively subtle because it mostly went white to medium gray, but the plate overall turned out well. The very first time I did this “baked potato” technique, I used a matte clear acrylic spray. The second time, I went with gloss. I didn’t really love either, so this time, I went with applying a kitchen wax. I really like the way the wax looks, so I think that’ll be the winner moving forward!
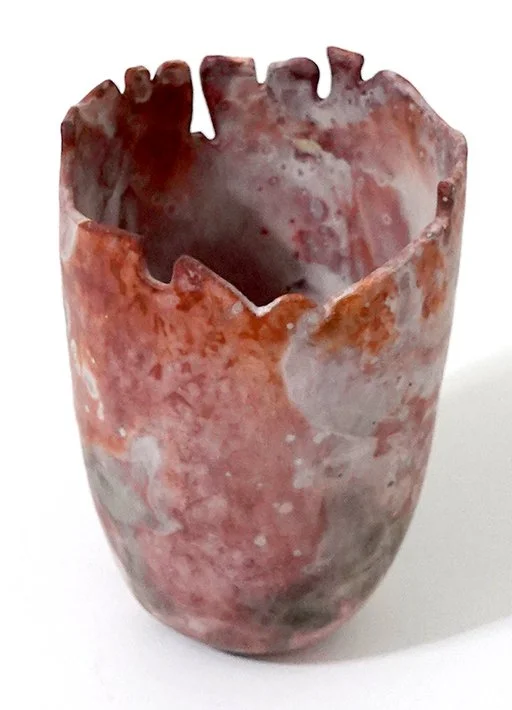
Next, I did the same process with a vase - on this piece, I also sprinkled just a little sugar on as well for some small-scale spotting in the design. This one’s interesting as the Muehlenbeckia axillaris is more apparent, and it produced the full value spectrum on the same vase; the top vine piece is white to light grey, while the bottom vine carbonized a lot more and turned medium grey to black.


And finally, I chose to do a clear crackle on a small, necked vase. Handbuilding necked vessels is tricky, and I complicated matters with this piece by leaving my building process evident on the outside to contribute texture (while smoothing it for structure and stability on the inside). This was quite risky; I knew there was a good chance this piece could crack or break with thermal shock due to the thinner seamed areas. However, I was fortunate - it made it through the firing completely unscathed! I wanted to enhance the seams and stress spots that I had intentionally retained, so I painted over each of them and the lip of the vase with wax before glazing with Clear Crackle on the exterior. As I’ve explained before, this means the glaze doesn’t stick to the waxed areas, and the wax burns off in the kiln. The exposed, unglazed clay body then carbon traps the smoke in the post-kiln reduction atmosphere, turning a dark, smoky grey. I finished the piece by putting kitchen wax on the unglazed areas.
Again, none of the “cracks” in the below piece are structural - they are all decorative and this vase is fully sound.


