ferric chloride

My Favorite Ceramic I've Made Yet: My Last April 2023 Raku Saggar Piece

I have a lot of my own ceramic pieces that I love, and there are a number of those that I plan to keep for myself for the foreseeable future! I’m pleased with each of the ceramics that came out of my recent April 2023 raku workshop; that work spans the realm between good to fantastic. One piece I made is my favorite ceramic I’ve made yet, though, which is a hurdle that was relatively easy to pass when I was a beginner back in early 2020, but is now a much rarer event.

This piece, like the others in this series I’ve made, was dipped in three coats of ferric chloride, wrapped in Muehlenbeckia axillaris or Creeping Wire Vine and then aluminum foil, and saggar-fired in a raku kiln. It is finished with kitchen wax.

Ceramic glazing in general is a lottery; there are a lot of variables and some are outside of your control. I think I won that lottery with this vessel!

April 2023 Raku Crackle and Saggar Ceramics

This is my second post reviewing my April 2023 raku workshop ceramics! This one will cover two of my three “baked potato” aluminum foil saggar-fired ceramics and my clear crackle piece.

Based on my experimentation using plants at my April 2022 raku workshop, I only had real luck with saggar firing Muehlenbeckia axillaris, colloquially known as Creeping Wire Vine. I therefore used it again! Below is a plate that was dipped in three coats of ferric chloride and then wrapped in the vine and then aluminum foil and fired. The Muehlenbeckia axillaris impact is relatively subtle because it mostly went white to medium gray, but the plate overall turned out well. The very first time I did this “baked potato” technique, I used a matte clear acrylic spray. The second time, I went with gloss. I didn’t really love either, so this time, I went with applying a kitchen wax. I really like the way the wax looks, so I think that’ll be the winner moving forward!

Next, I did the same process with a vase - on this piece, I also sprinkled just a little sugar on as well for some small-scale spotting in the design. This one’s interesting as the Muehlenbeckia axillaris is more apparent, and it produced the full value spectrum on the same vase; the top vine piece is white to light grey, while the bottom vine carbonized a lot more and turned medium grey to black.

And finally, I chose to do a clear crackle on a small, necked vase. Handbuilding necked vessels is tricky, and I complicated matters with this piece by leaving my building process evident on the outside to contribute texture (while smoothing it for structure and stability on the inside). This was quite risky; I knew there was a good chance this piece could crack or break with thermal shock due to the thinner seamed areas. However, I was fortunate - it made it through the firing completely unscathed! I wanted to enhance the seams and stress spots that I had intentionally retained, so I painted over each of them and the lip of the vase with wax before glazing with Clear Crackle on the exterior. As I’ve explained before, this means the glaze doesn’t stick to the waxed areas, and the wax burns off in the kiln. The exposed, unglazed clay body then carbon traps the smoke in the post-kiln reduction atmosphere, turning a dark, smoky grey. I finished the piece by putting kitchen wax on the unglazed areas.

Again, none of the “cracks” in the below piece are structural - they are all decorative and this vase is fully sound.

My April 2022 Raku Ceramics

I just completed another raku workshop this past weekend, and as I was looking through my files I realized I’ve not yet published the raku pieces I made at my last one in April 2022. Clearly I should do that before sharing my latest workshop photos and products!

On my April 2022 raku workshop, I wanted to try to carbonize various plant fronds or leaves onto the surface of my pieces. This was a complete experiment, and it was mostly a failure. I tried a variety of ferns and tropicals out, and one after another, they burned away without leaving a trace. Here are some plates that I attempted to salvage after that didn’t work out. With the first, I pivoted to a sugar and horsehair application. With the second, I tried to use ferric chloride to stain the surface with plant leaves that weren’t carbonizing, but they just left those not-terribly-appealing ferric chloride splotches.

Once I realized those techniques were not working, I tried etching fern fronds onto a plate in a “baked potato” aluminum foil saggar firing; it kind of worked, but I think it’s underwhelming. Since none of those plant techniques were doing super well, I just put a litho carb copper glaze onto my final plate.

I also made a rounded crackle vessel and the glaze turned out really well, but the ceramic physically cracked due to thermal shock so it’s got that permanent asterisk associated with it.

I glazed this spherical vessel with copper glazes (Copper Sand is on the exterior and I think that’s Midnight Luster on the interior), and it came out looking like a little planet! This one’s a definite favorite.

And finally, the one plant piece that turned out beautifully and justified all the failures: this is another “baked potato” saggar firing, and the Muehlenbeckia axillaris vines I used carbonized perfectly into this vase’s surface.

I also lost a large platter-like vessel (it broke into quite a few pieces and was not salvageable) and had another plate fuse with a kiln brick and lose part of its bottom. I eventually recycled that broken platter-like piece in my rock tumbler!

Ashlar Etching

I was invited to take part in the ART 246 Intaglio and Collograph Printmaking course’s finals etching trade. The end of the semester is always a busy time, but I said yes; I haven’t done an etching in ten years and it’s always good to refresh and grow, plus it’s a nice interaction for all involved. Our talented instructor Stephanie VonderAhe provided me with an already beveled 3x4” copper plate with hard ground applied. The assignment was themed “the view from here.” As I was mulling over the theme and how it might fit into my artistic practice, I decided to do a portrait of Ashlar - I see her every day.

I drew the piece at home, and I just accepted any mistakes I made as I didn’t really have time to re-ground any spots. When I thought it was done, I put the plate into the acid bath for a 40min etch, took it out, and printed it. That first print was pretty good, but the drawing seemed a little flat and there were a number of areas where I wanted to add or deepen shadows and develop a sense of volume. Stephanie added a new layer of hard ground for me, and I went back into the plate a second time. We then put it in the ferric chloride again for 40 more minutes.

I printed an edition of 16, but several of those had print errors (are you supposed to count those? - I’m now thinking you’re not, but I did!). As intended, I gave away 7 to the class. I framed up one for myself, and gifted another to my parents and a third to my sister. I have just a few good prints left, but of course I do still have my plate…

I’m pretty happy with how it turned out! Of course, I see some areas I could improve upon were I to do another plate or had time to fix mistakes prior to etching, but overall it’s a nice representation of Ash.

More Raku!

You got a sneak peek at some of my recent raku work in my exhibition shots from Functional Aesthetic, but here is the full reveal!

Above are three photos of one “baked potato” bowl. I used my own hair again as well as sugar for the carbonized marks on this piece.

This vase is very difficult to photograph well; it’s currently on exhibit, but once it comes back I’m going to see if I can capture it a bit better digitally. A couple of my friends who viewed the show said this was their favorite piece of mine. The way the glaze dots turned out reminds me of inset abalone shell.

This piece certainly didn’t turn out as planned; I experimented with a turquoise crackle glaze, but I really did not like the way the color came out, so we went ahead and re-fired it. I much prefer this hammered copper look!

This above bowl is decently large, and I chose to do the outside in a relatively matte glaze while the inside is a high gloss. It gives me dragon egg vibes. The Functional Aesthetic curator placed this piece in the choicest display spot, and I learned today that it was sold! I did see a viewer admiring it and gesturing to and around it at the reception, so I wonder if she’ll be providing its new home or if a different patron snapped it up.

This above vessel is kind of football-shaped, and its surface reminds me of a somewhat aged/stained city map. It has my own hair and sugar burned into the white crackle surface. I am quite into this piece.

I was really excited about how this piece turned out, as it’s adding into the “broken egg” series of clear crackle pieces I’m developing. The shape is hard to convey in photo, but it leans in a way that feels quite anthropomorphic - at least to me!

This bowl was intended to be another in the “broken egg” series, but it cracked coming out of the kiln due to the thermal shock and my thin walls. That’s more literal than I’d like for the “broken eggs” to be. It is still in one piece, but even after I epoxy over the crack (which I plan to do to bolster its structural integrity), it will have that weakness as it’s a fairly sizeable crack. I’m not sure if given the severity of the crack if I’ll want to display this piece, but if I do I plan to list it as NFS (not for sale).

And here is yet another casualty; however, this football-shaped vessel’s crack is more minor.

First Raku Workshop Pieces - Baked Potato Edition

As I mentioned in my first raku post, the “baked potato” technique involves coating the bisqueware in ferric chloride, sprinkling it with sugar, salt, and/or horsehair, and then bundling it up in aluminum foil like a baked potato before firing it. The one example piece we were shown of this technique was interesting but not super compelling, so I just tried two “baked potatoes” out in the form of a couple cache pots.

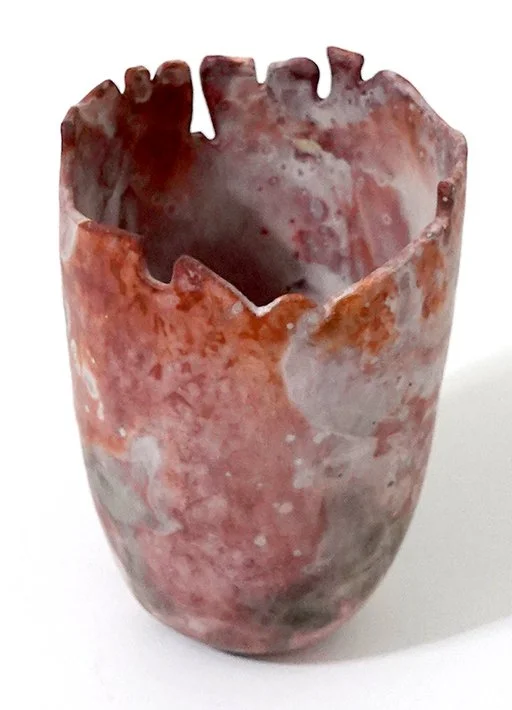
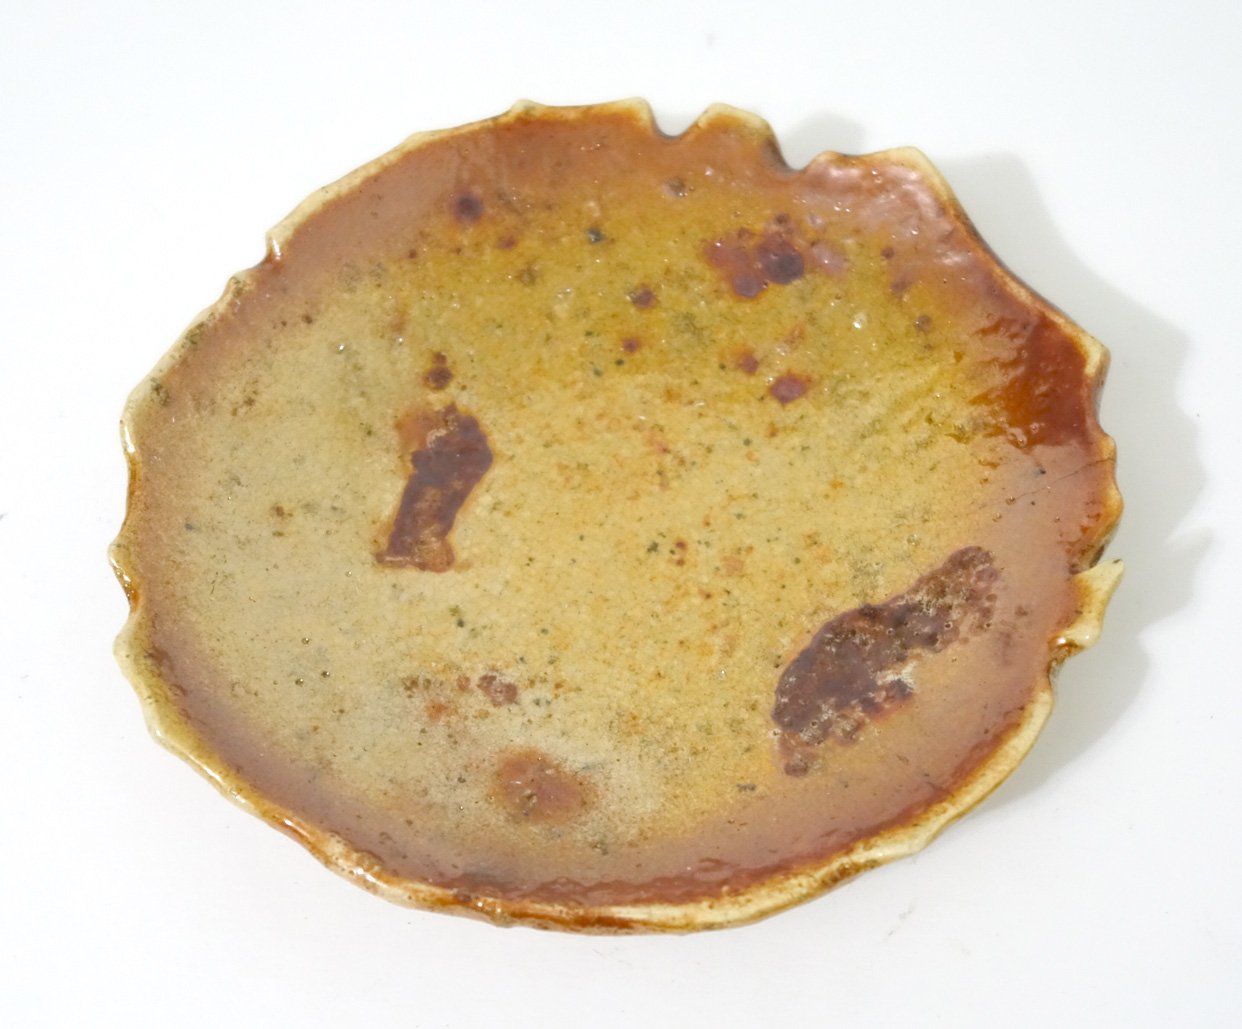
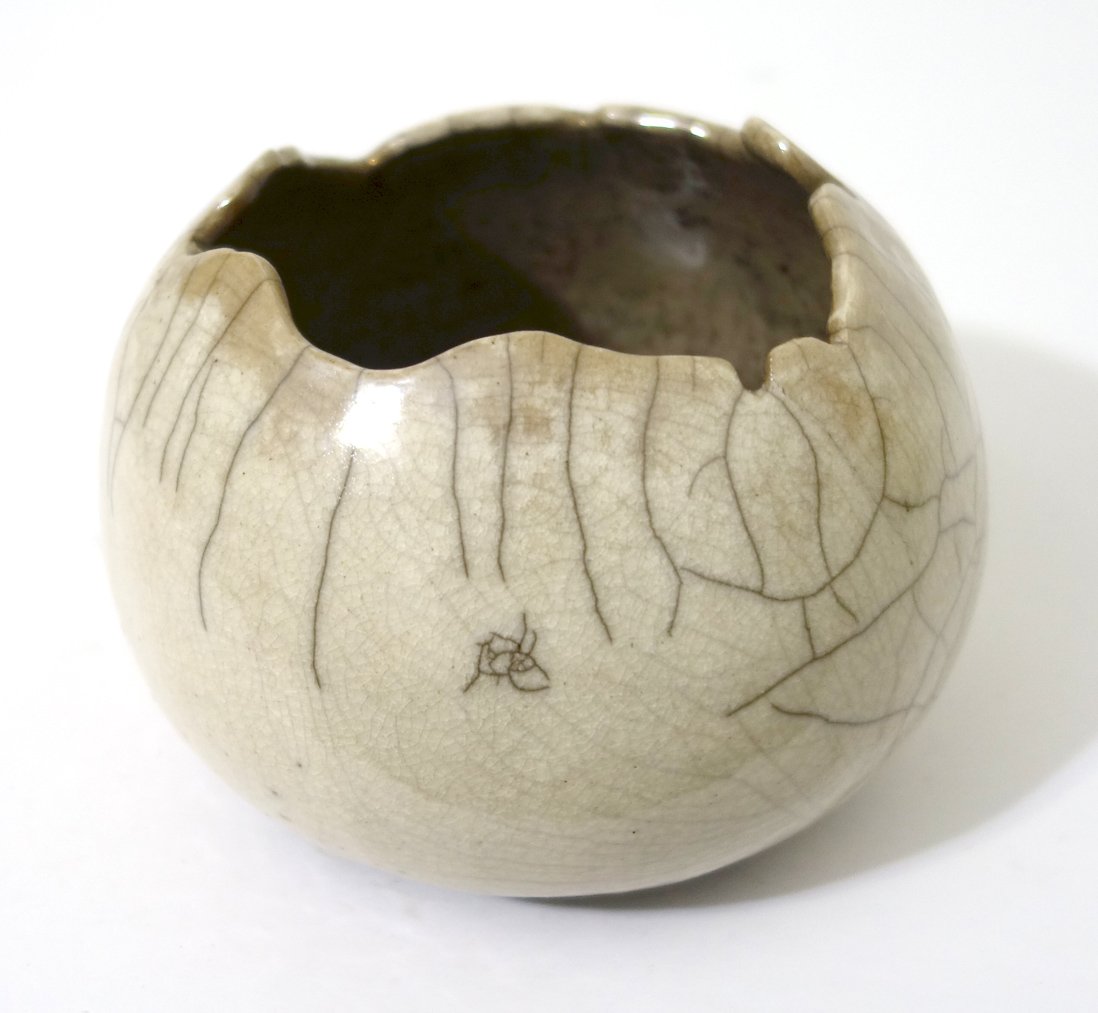
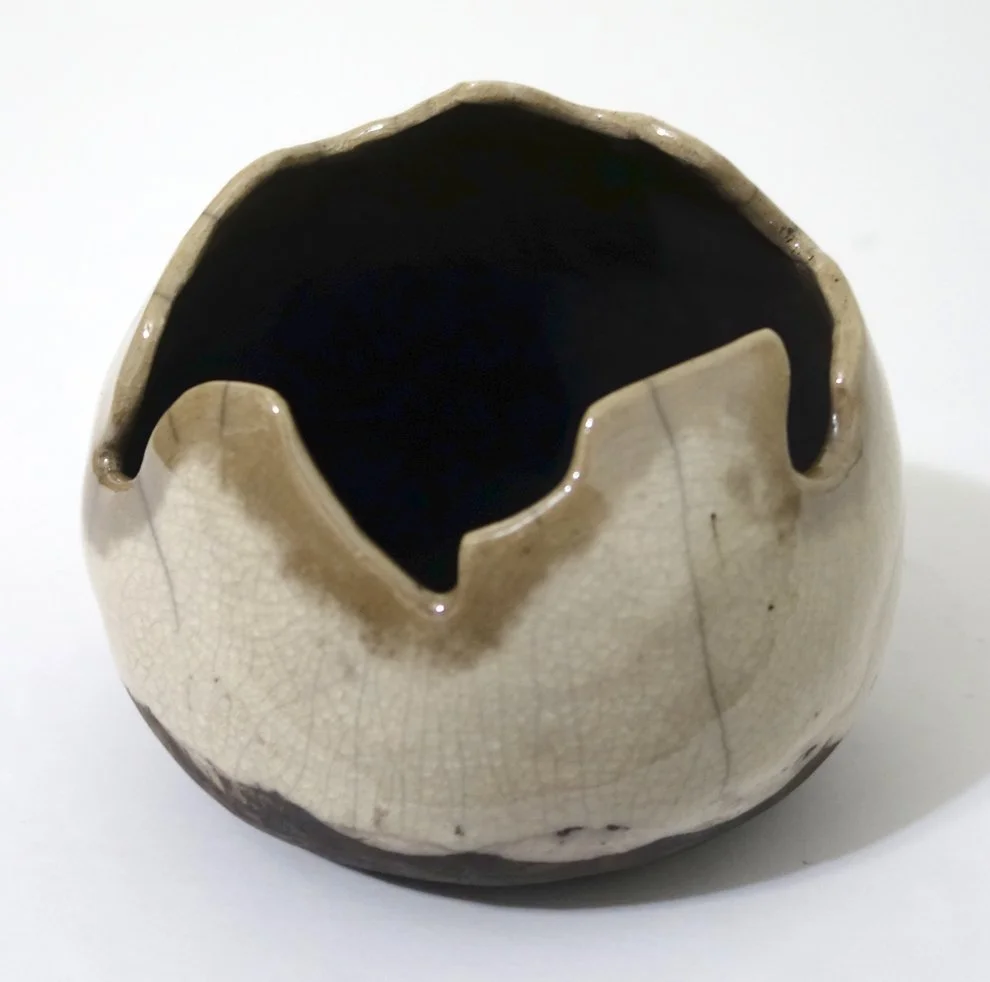
Interestingly, the resultant pieces did not come out as advertised, but I do really like how they ended up. I was told the sugar and horsehair spots would turn black, but on my piece they are mostly white with some grays. This could be for a couple reasons: A) all the environmental variables at play - the local temperature and humidity outside, the ferric chloride purity and concentration, the thickness and tightness of aluminum foil, etc. B) at the time I understood I was to put one bundling of aluminum foil on, but afterwards I heard that perhaps the instructions called for two. Reason B is all the more interesting because some of my foil burned off in the kiln, exposing part of the pottery inside. The kilns did not have organics inside beyond what was in the “baked potatoes” and had vents providing air flow, so maybe the burning of the foil resulted in less carbon trapping than would otherwise have occurred?

Due to the general inconsistencies and vagaries of raku firing and the complicating factor of my still not being sure how many layers of aluminum foil is advisable, I’m very unclear on if I can replicate the appearance of my “baked potatoes” in the future.

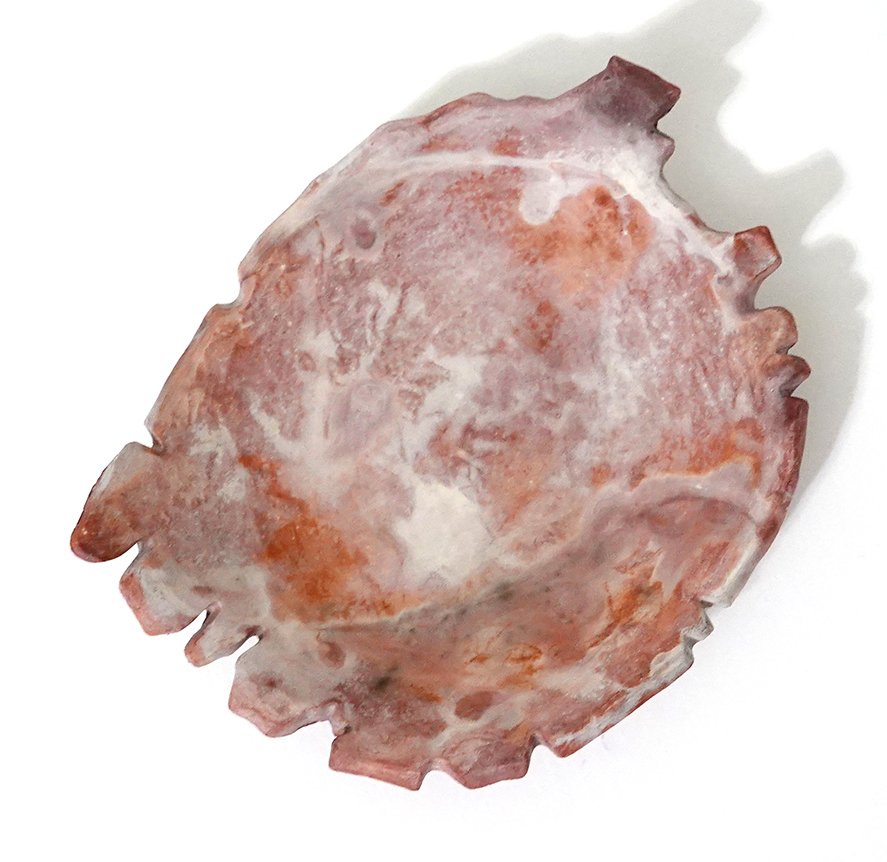
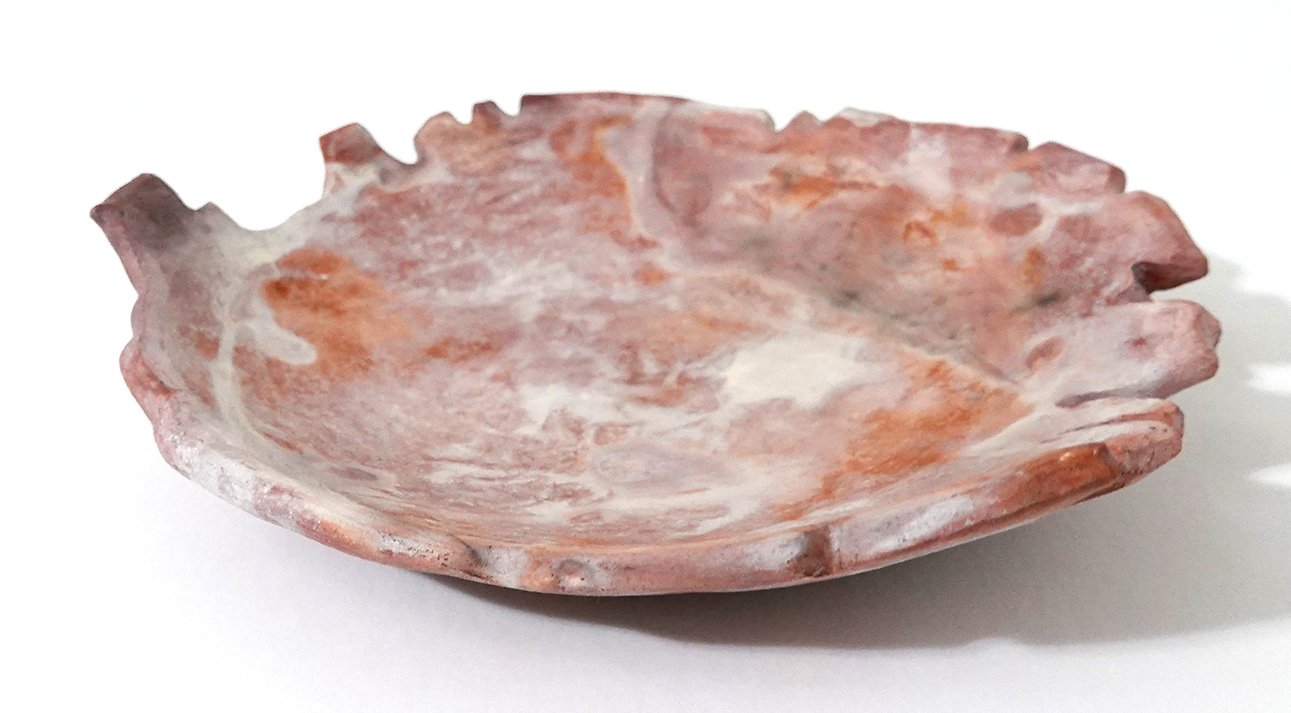
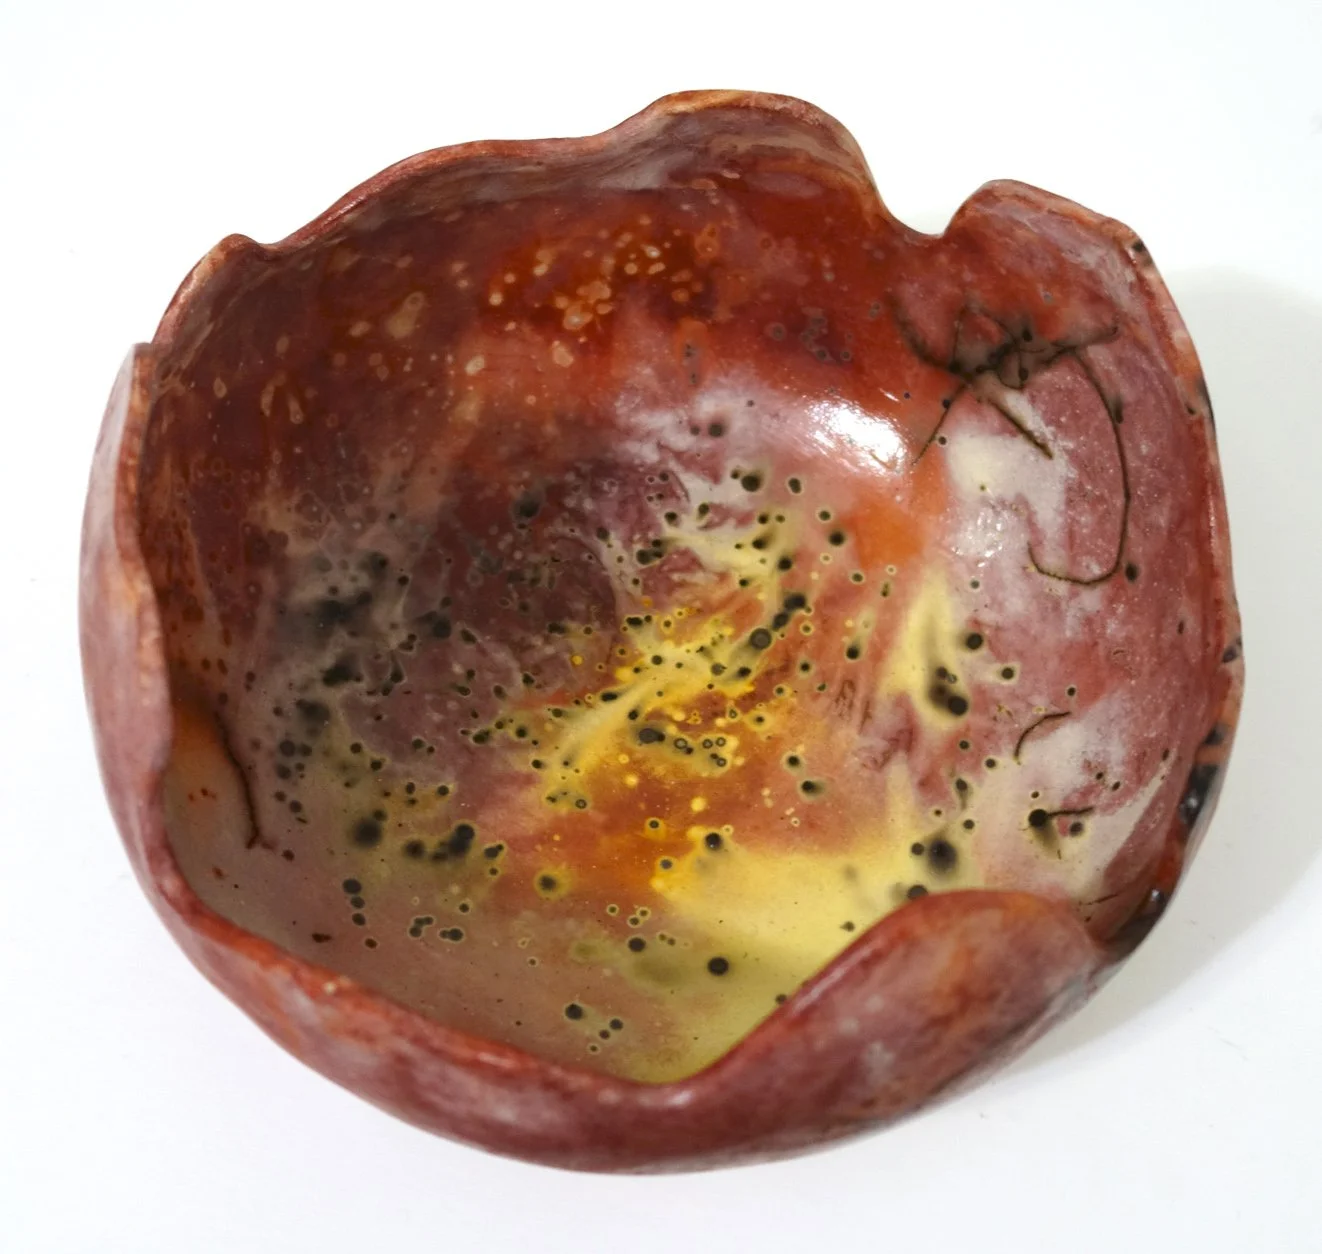
Here is my first “baked potato” cache pot. As you can see, it kind of looks like red marble or agate. I had the choice of sealing these pots with a gloss or matte coat. I chose the matte, which I stand by.

And this is my second “baked potato,” which was fired in the same round as the first. I do really like the appearance of these, but I’m not as convinced that it’s best suited to cache pots though it certainly will look nice as such. I’d like to try a large bowl or two with this technique next time, as I think that could be even more gorgeous - though it’s all dependent on how the firing goes!