Sioux Falls

Obvara and Slip Resist Naked Raku Workshop

I just got back from another raku workshop at Dakota Potters Supply in Sioux Falls, SD! I brought along a group of faculty, alumnae, and students from Morningside University.

This workshop specifically focused on obvara and slip resist naked raku. I really like obvara, but since I just did a bunch in the fall, I only put four pieces through the obvara process and ran ten through two slip resist processes: one-step and two-step slip resist. Dakota Potters Supply had tried to troubleshoot the slip resist one-step process in advance of our workshop, but they really hadn’t figured it out so we were all experimenting and troubleshooting with our the slip resist attempts throughout the day.

I still need to edit the photos of my pieces - plus, two of them were underfired enough that Dakota Potters Supply kept them back to refire again later, so I don’t know when those might rejoin me (if they stay whole)!

Here are photos from the day of the workshop (Saturday, April 20, 2024):

My Obvara Raku Vases

And here’s the last batch of obvara raku ceramics from my recent workshop at Dakota Potters Supply - these are the burnished vases!

This first oblong vase was the only one that I saw and heard crack during the sequential baths. It is still usable decoratively, but it does have that asterisk about it so I likely won’t exhibit or sell it. (Note, I purposely selected photos of it that don’t draw attention to the relatively large crack.)

While at the workshop, I thought that was my only casualty - but when I was applying kitchen wax to the surfaces at home, I noticed this next squat vase has a small hairline crack as well. It’s not nearly as apparent as the above piece’s flaw as it requires close examination to spot. While a crack is never ideal, in a low-fired piece like these which was always going to be decorative (not water-tight nor food-safe), it’s far less problematic than it would be in a piece intended for that kind of usage. I’ll probably keep this one myself!

The rest of the below vases are completely unblemished. This little bud vase is the smallest of the bunch.

Next we have a larger, somewhat soft rectangular vase!

And finally, a somewhat flared cylindrical vase.

I hope you’re as into the obvara pieces as I am. I really like the aesthetics this process produces - but more than that, from a conceptual standpoint I love the organic chaos that creates those aesthetics.

My Obvara Raku Plates and Platters

In my previous post, I shared the obvara raku bowls I made on my October 21, 2023 workshop at Dakota Potters Supply. I also made some plates and platters! As always, you can click on any of the photos below to see them larger.

This first burnished plate depicts a bear, and you can’t convince me otherwise.

This next burnished plate is smaller than the first - it’d be good to hold jewelry or other small items.

A small obvara raku plate by artist Shelby Prindaville.

This final piece is the largest - it’s a platter or tray, and it has some light texture on its inside surface.

An Obvara Raku Workshop!

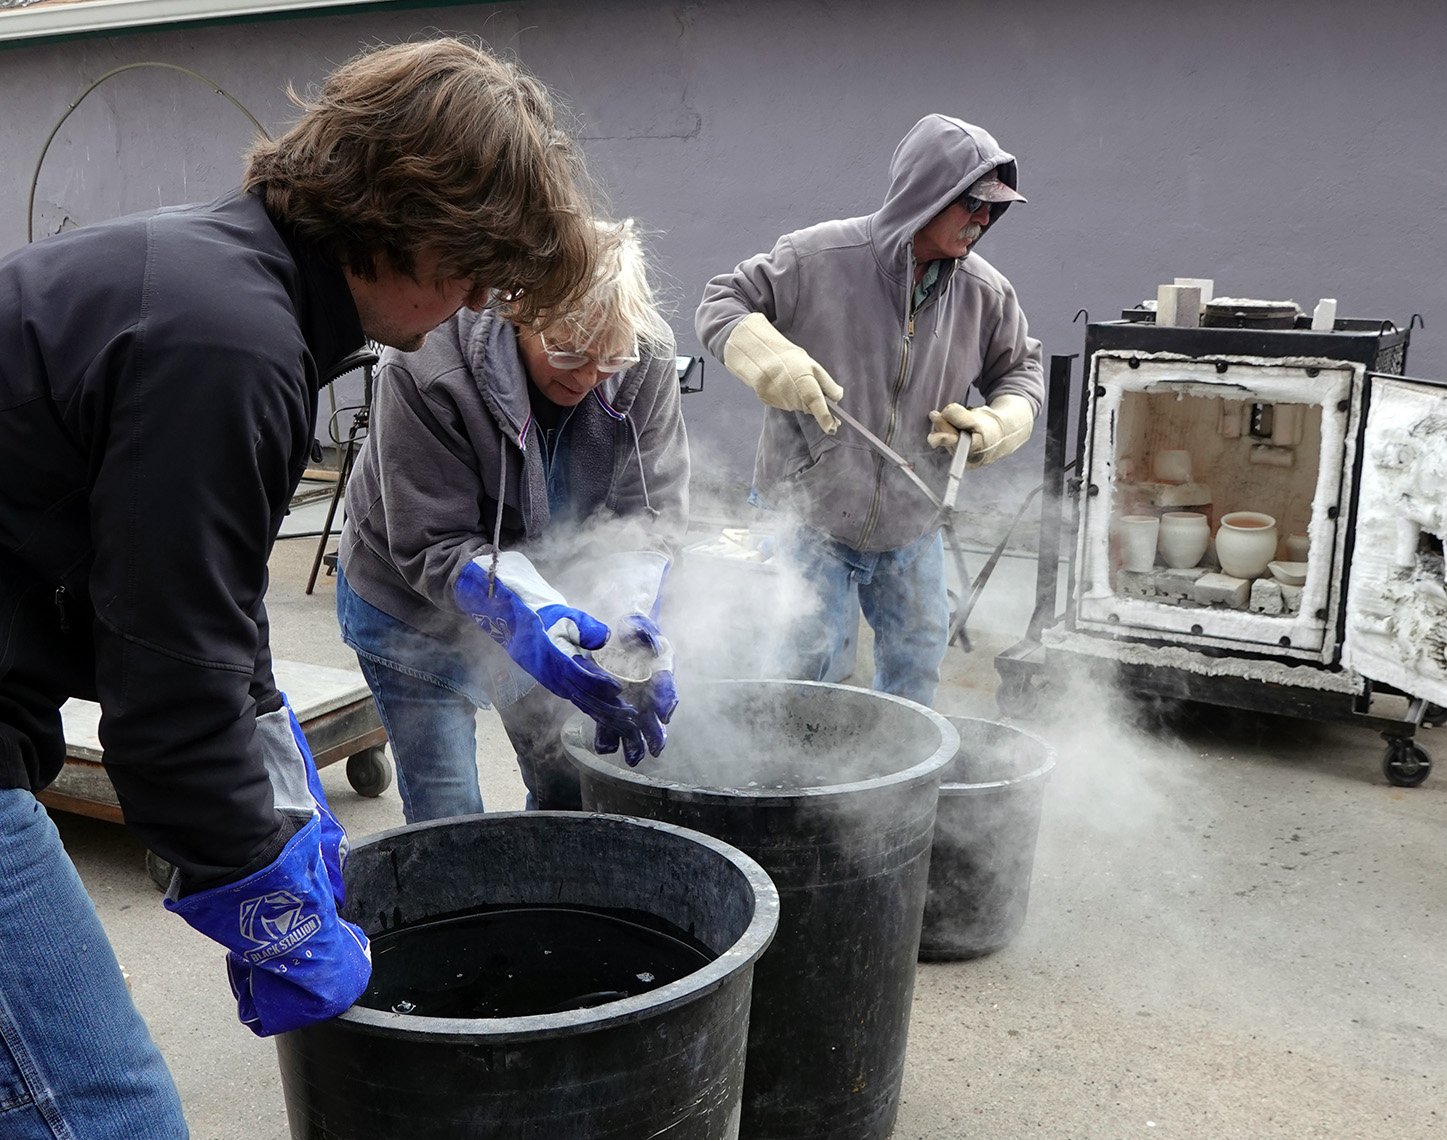
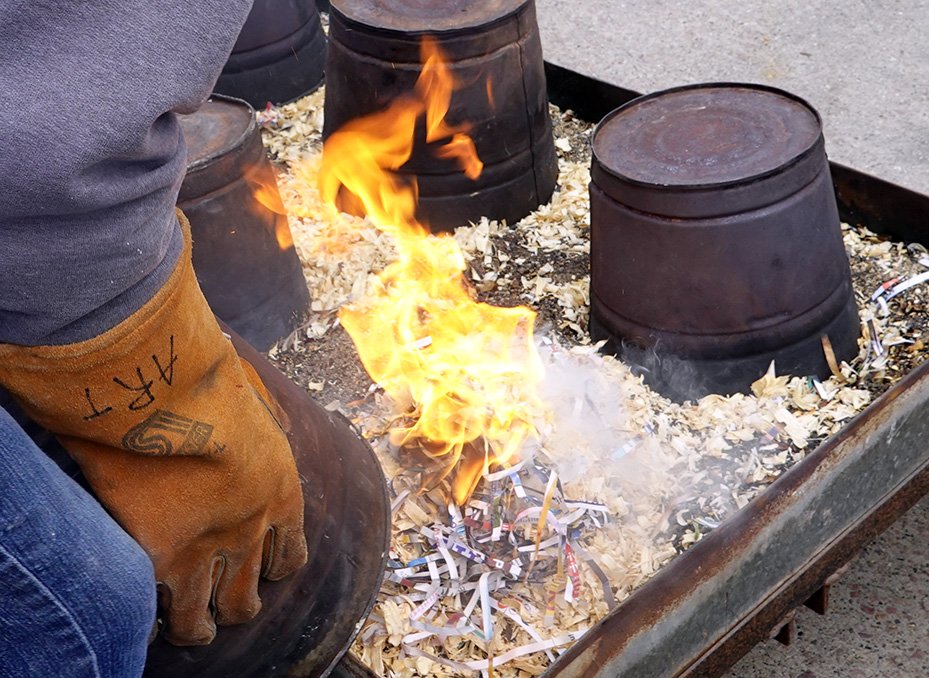
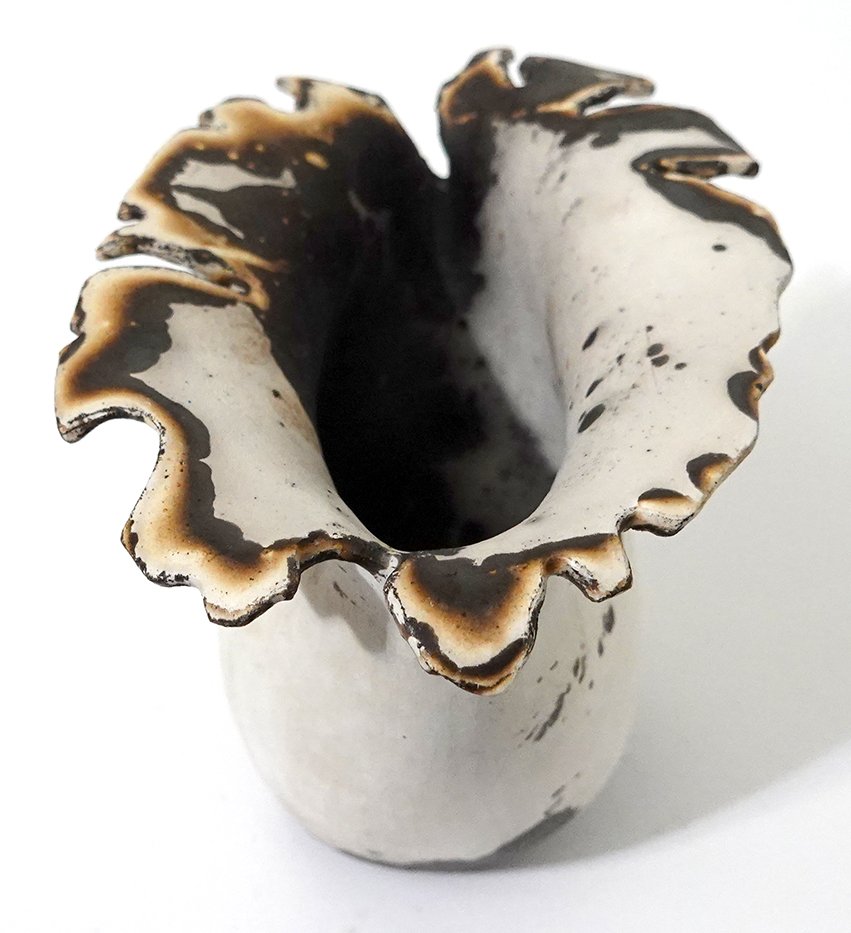
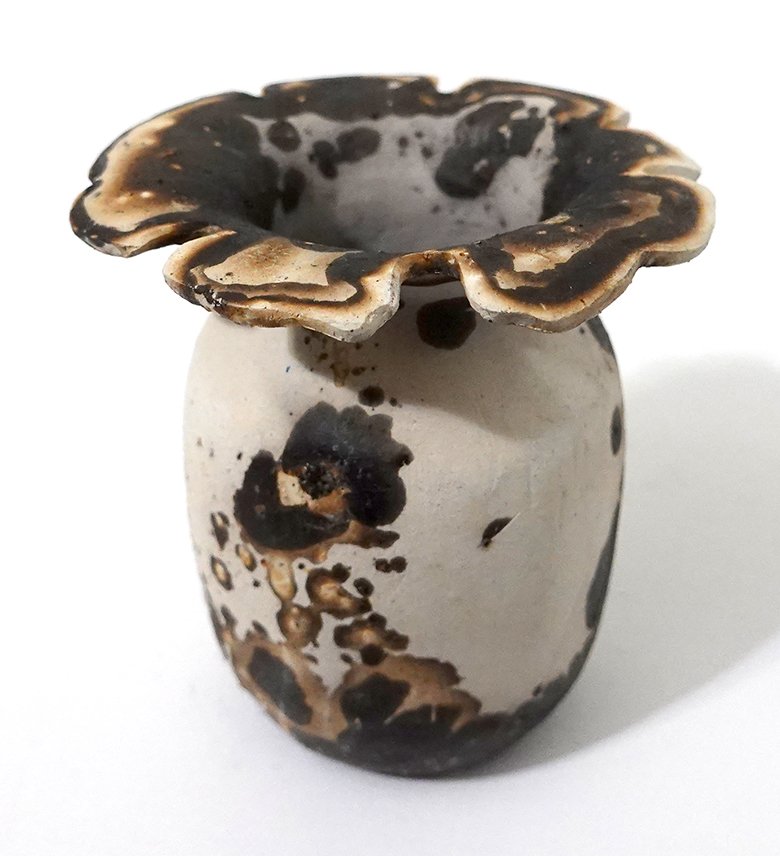
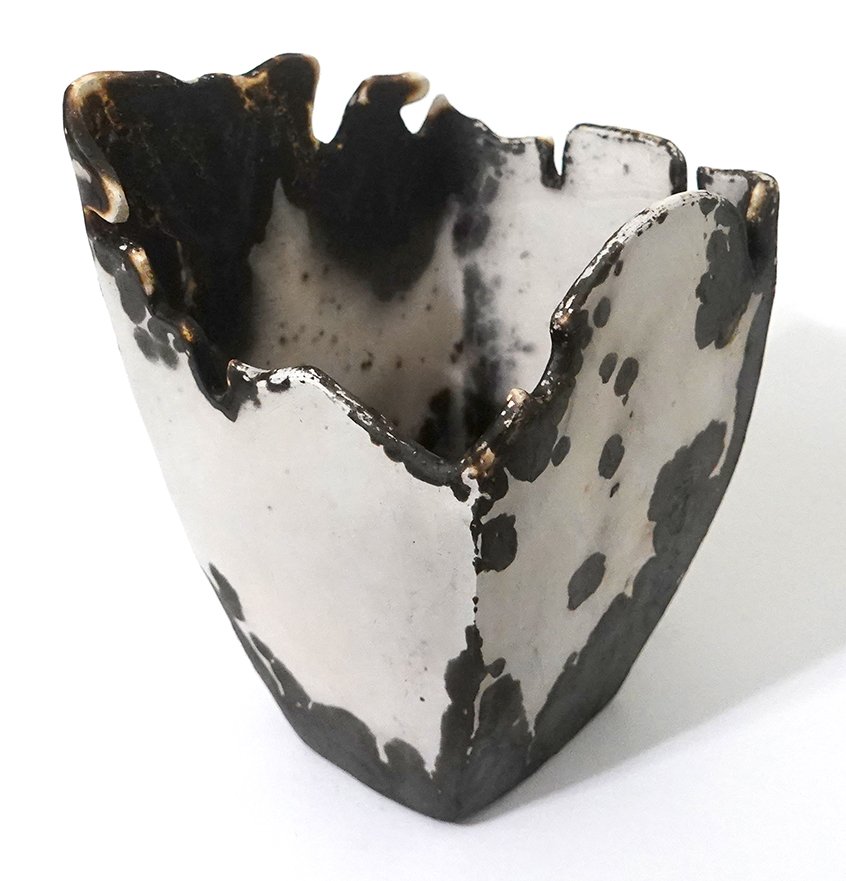
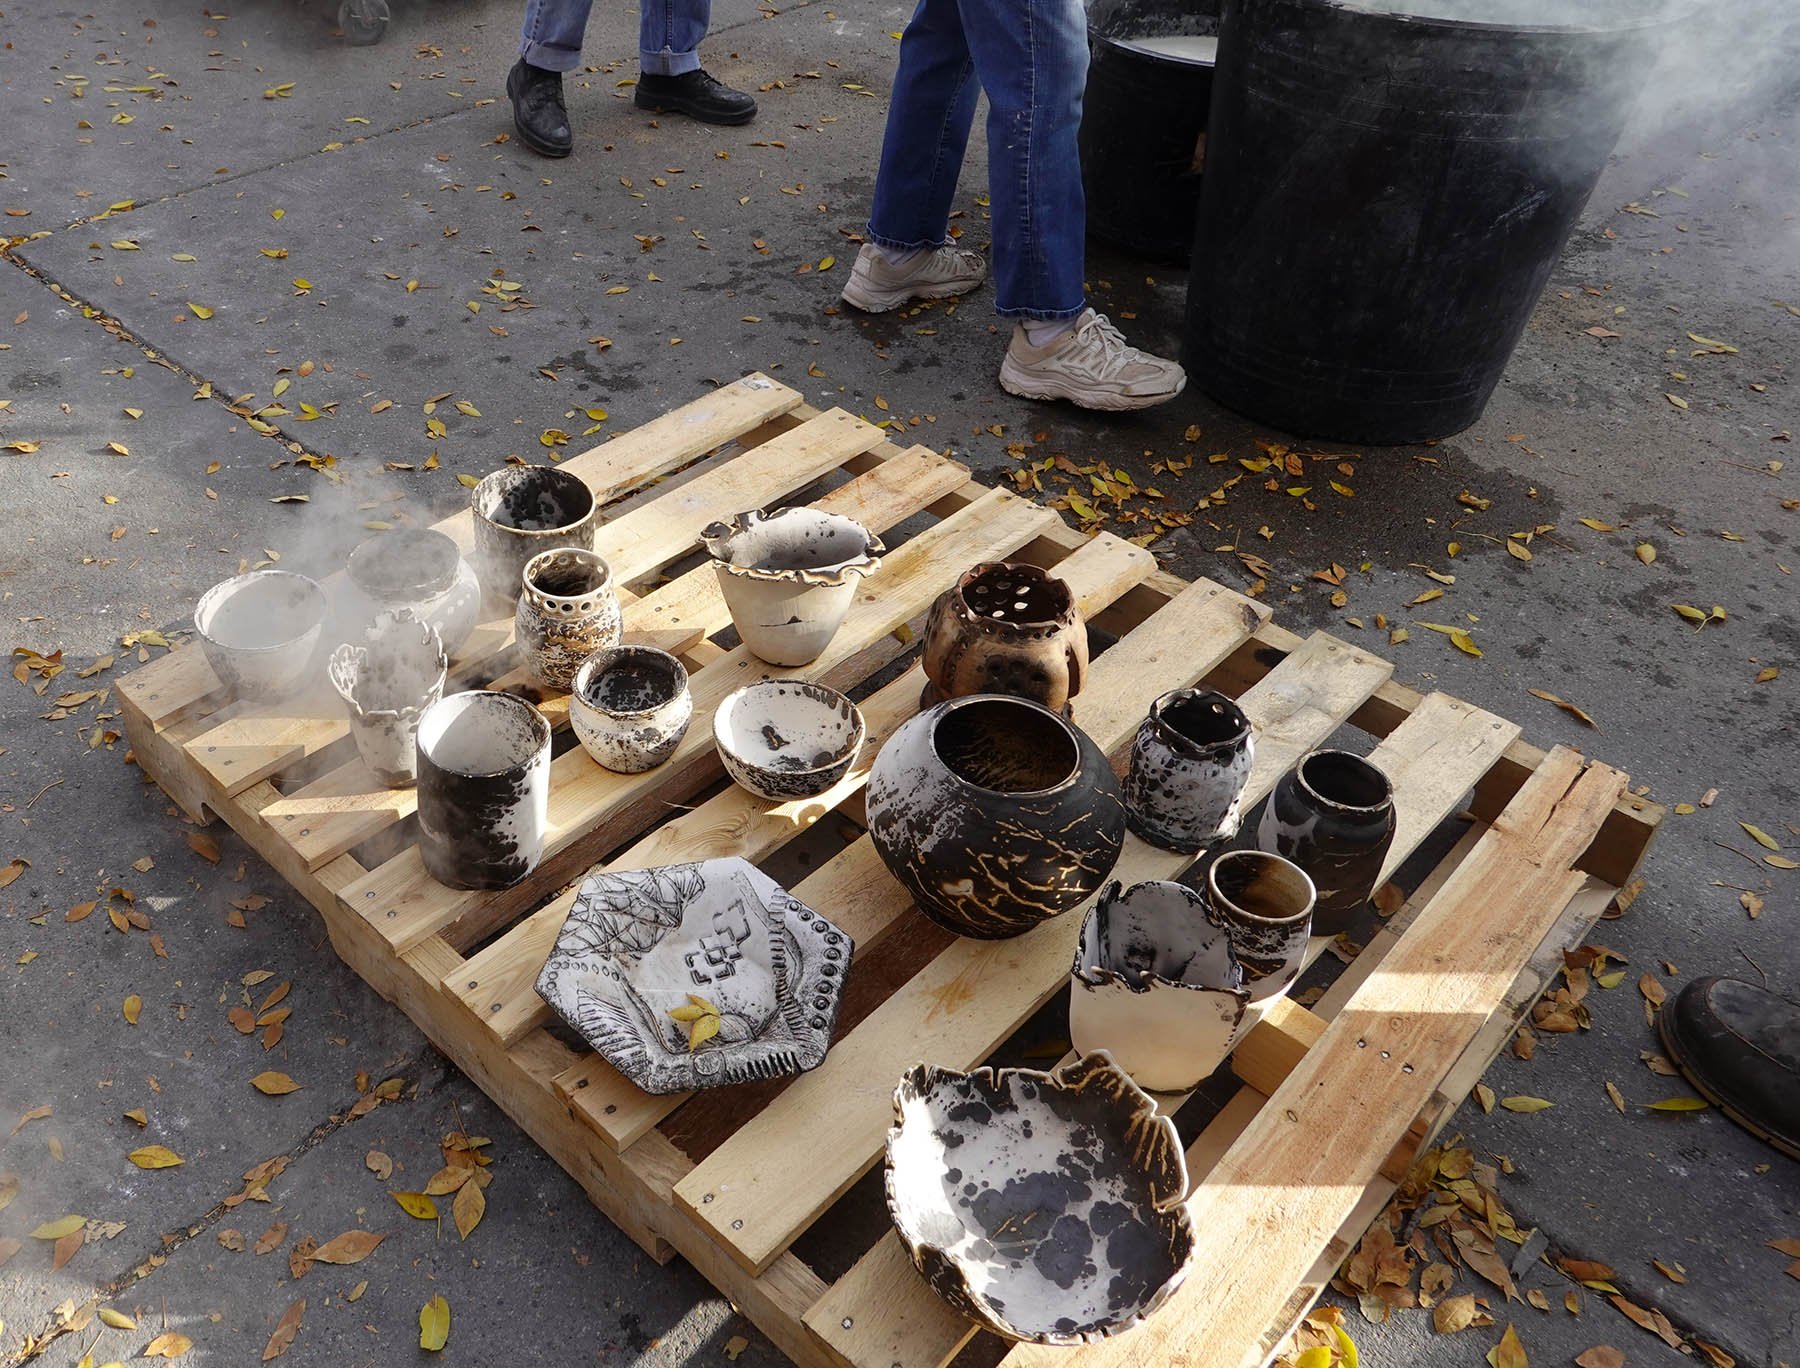
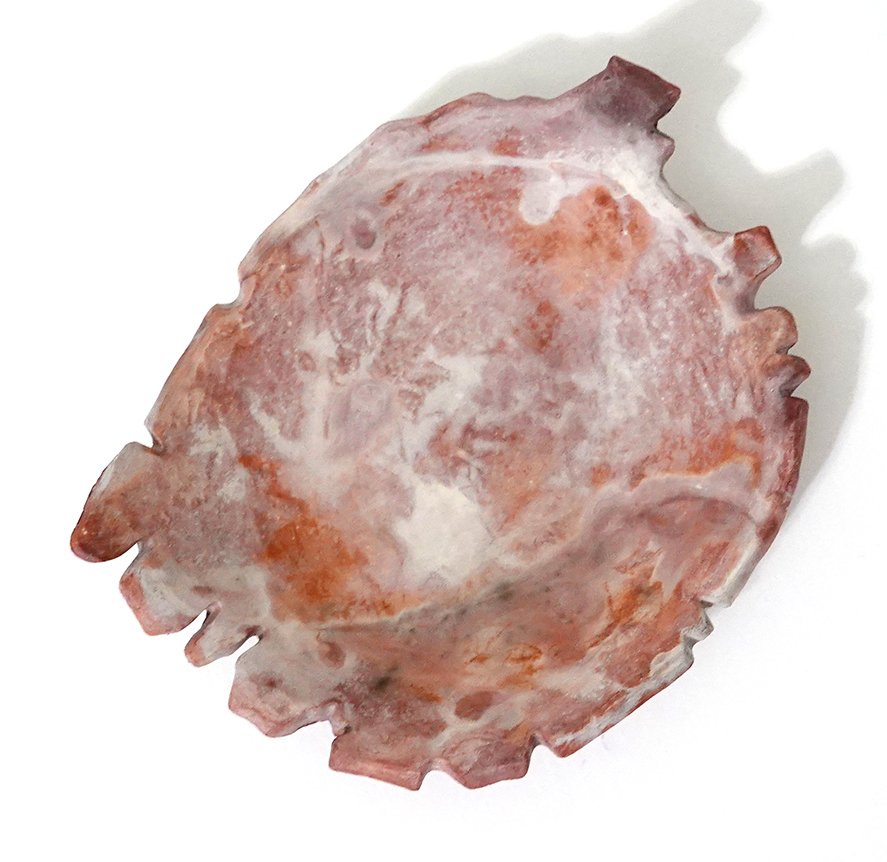
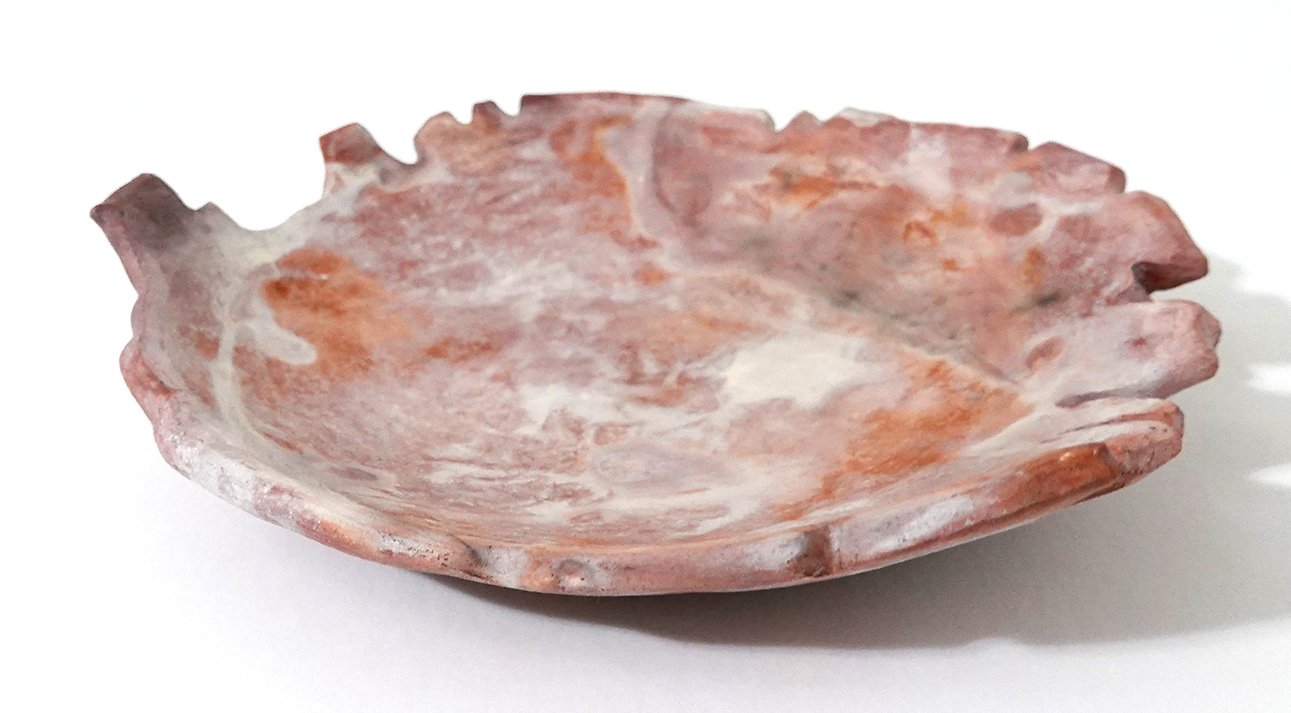
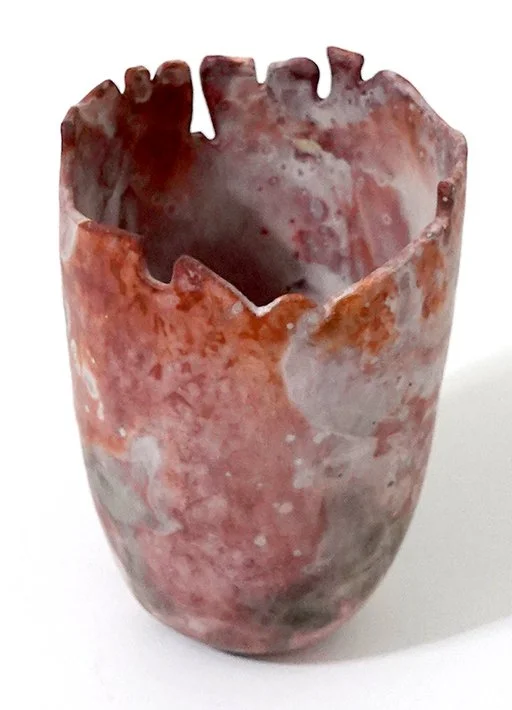
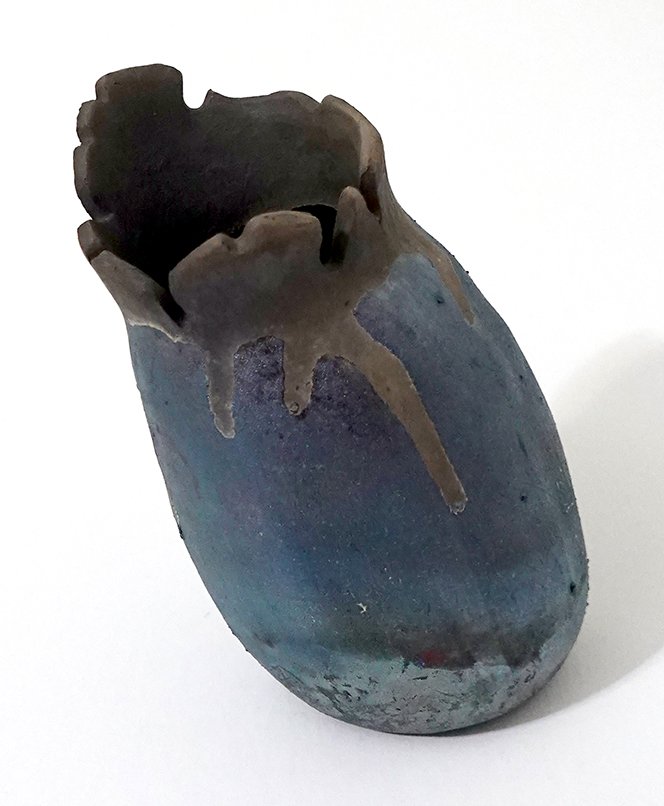
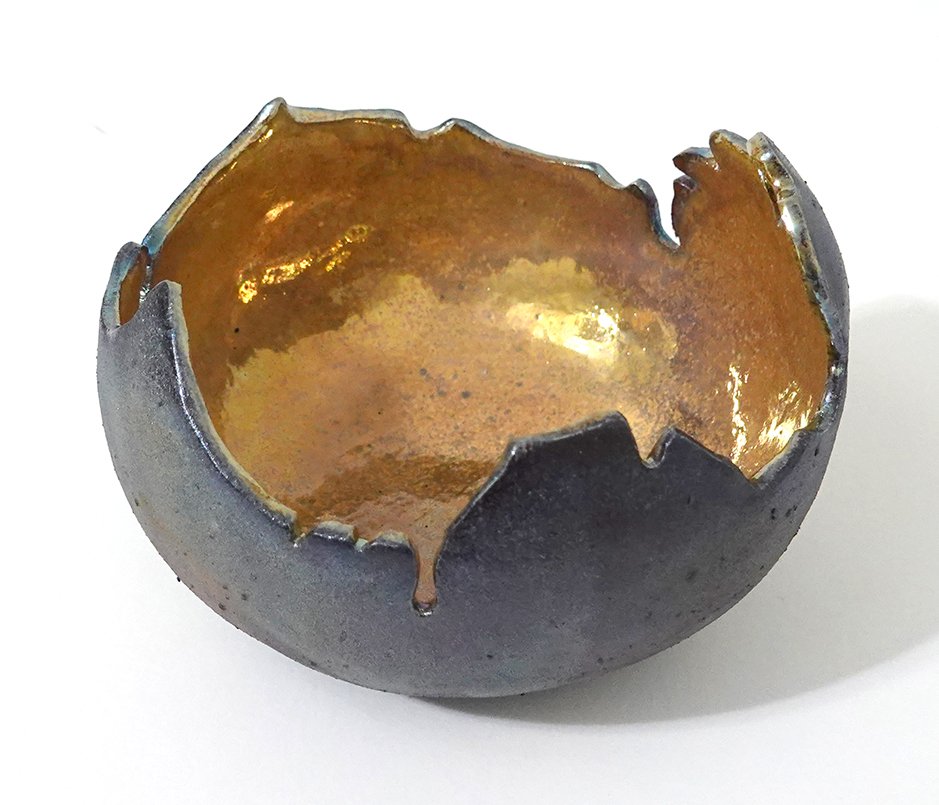
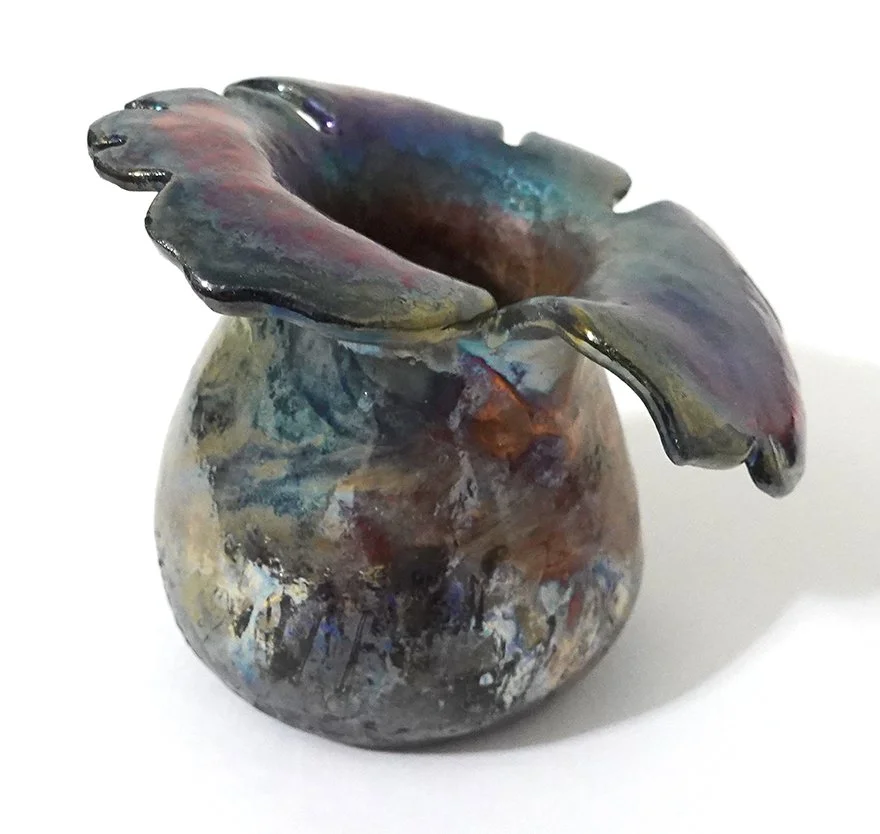
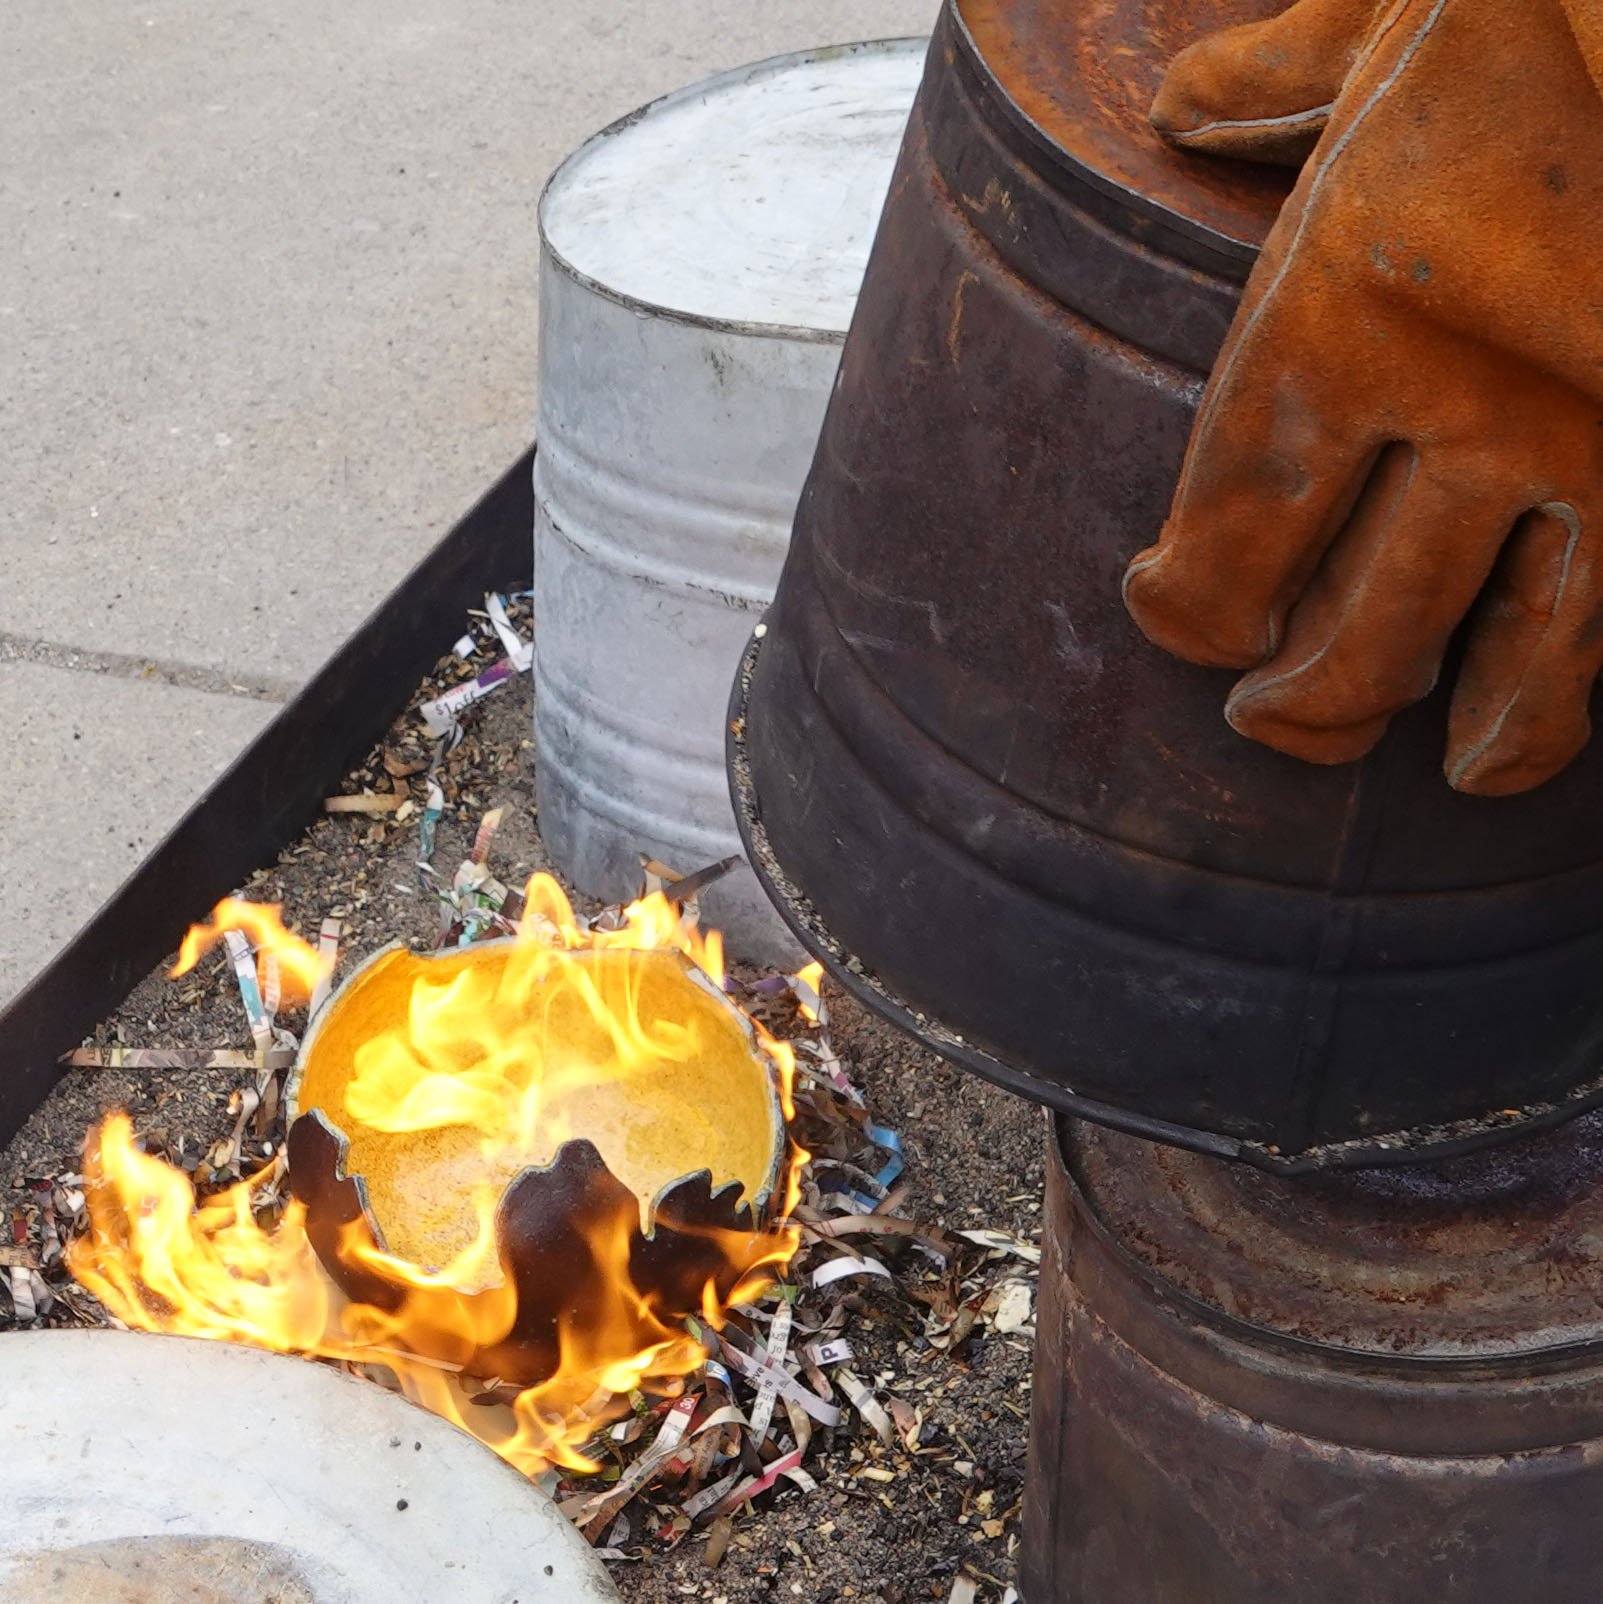
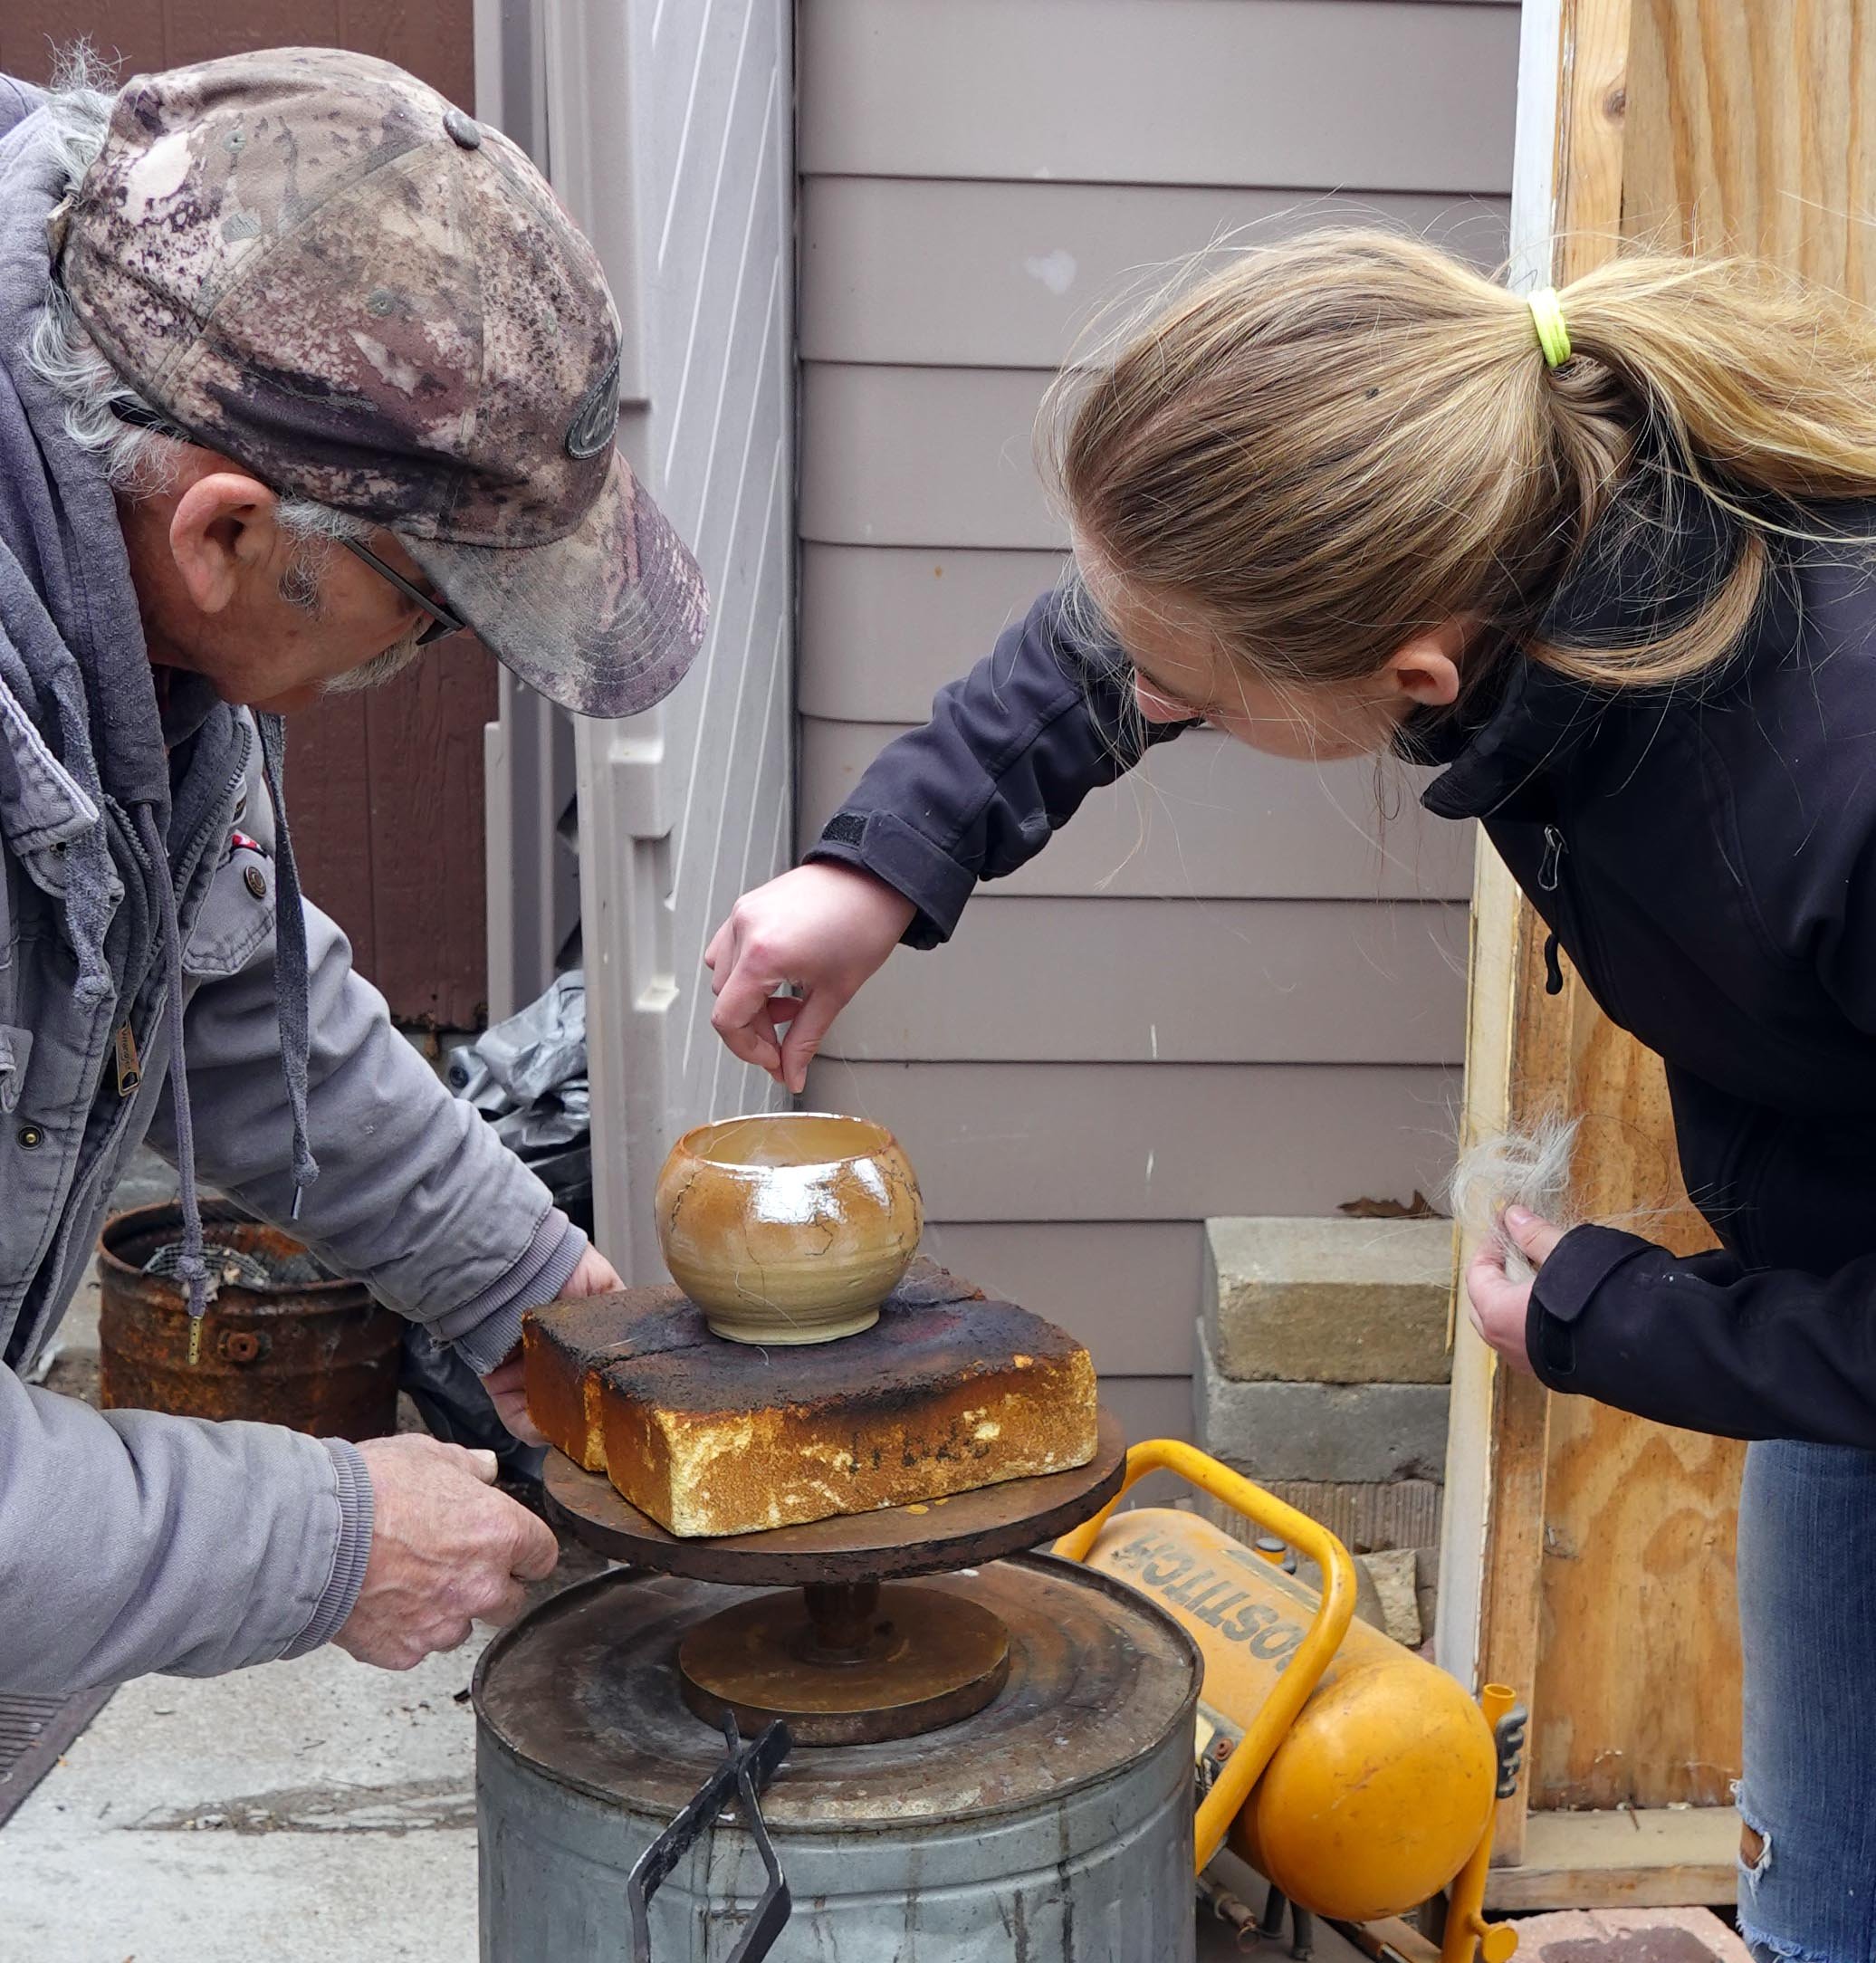
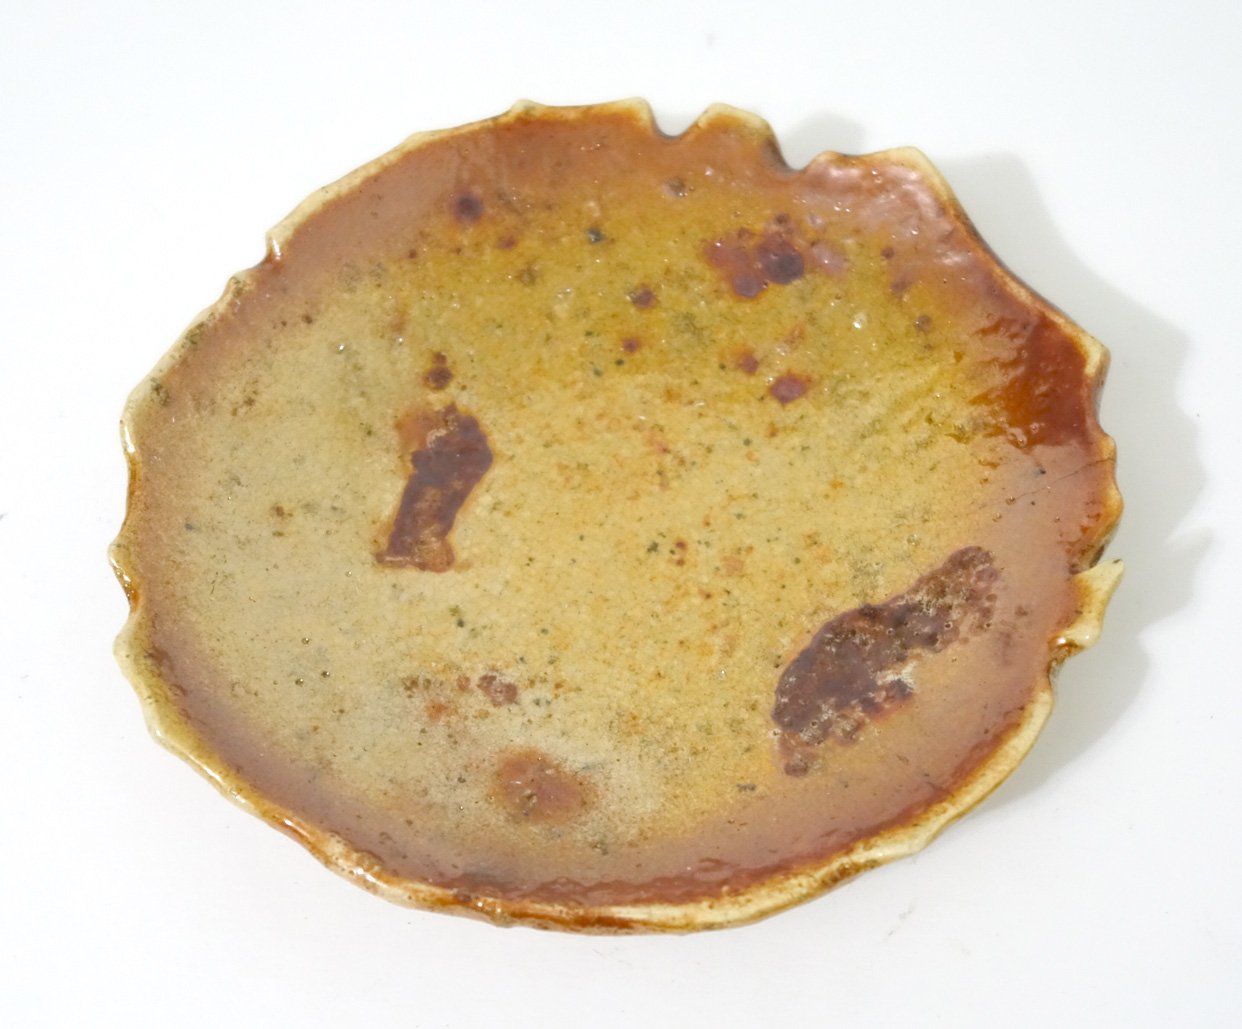
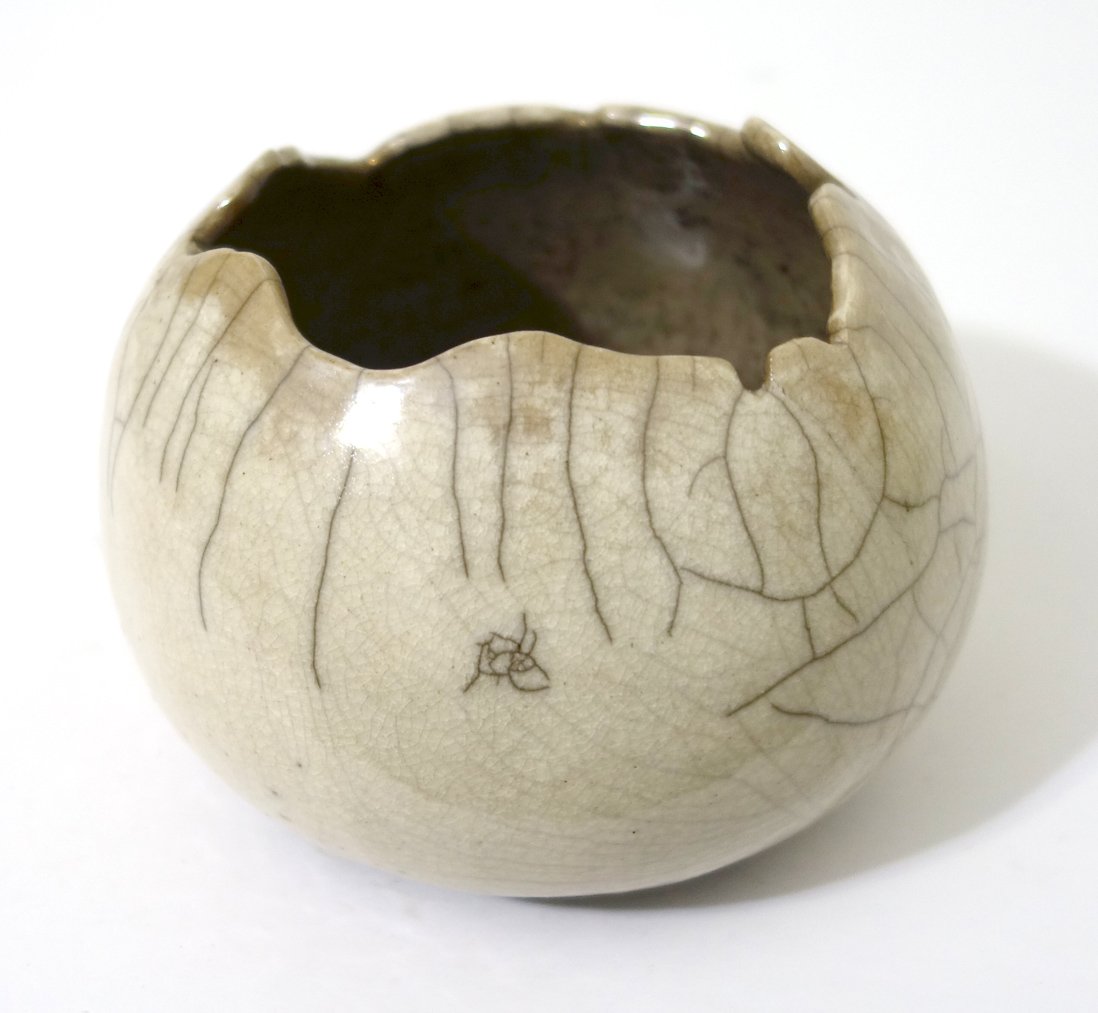
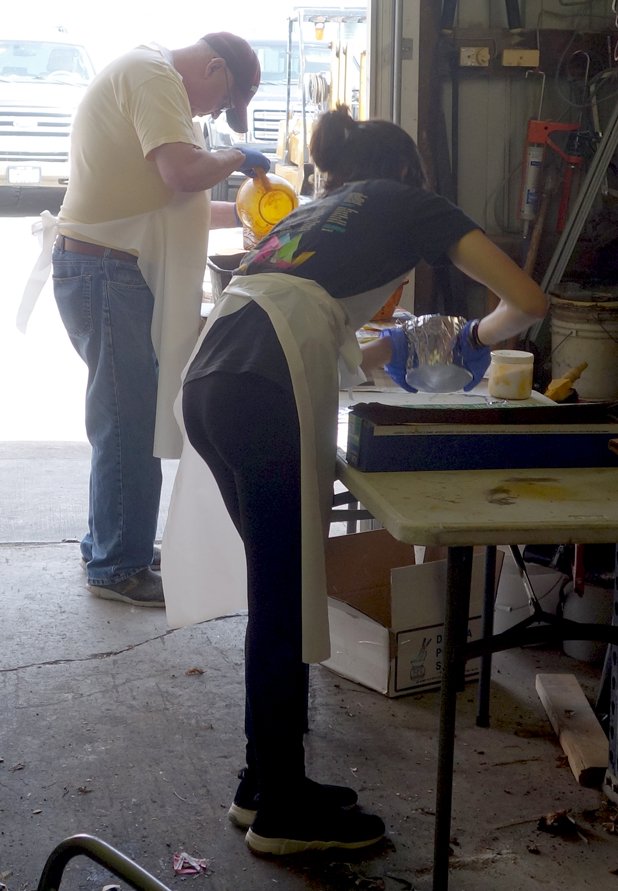
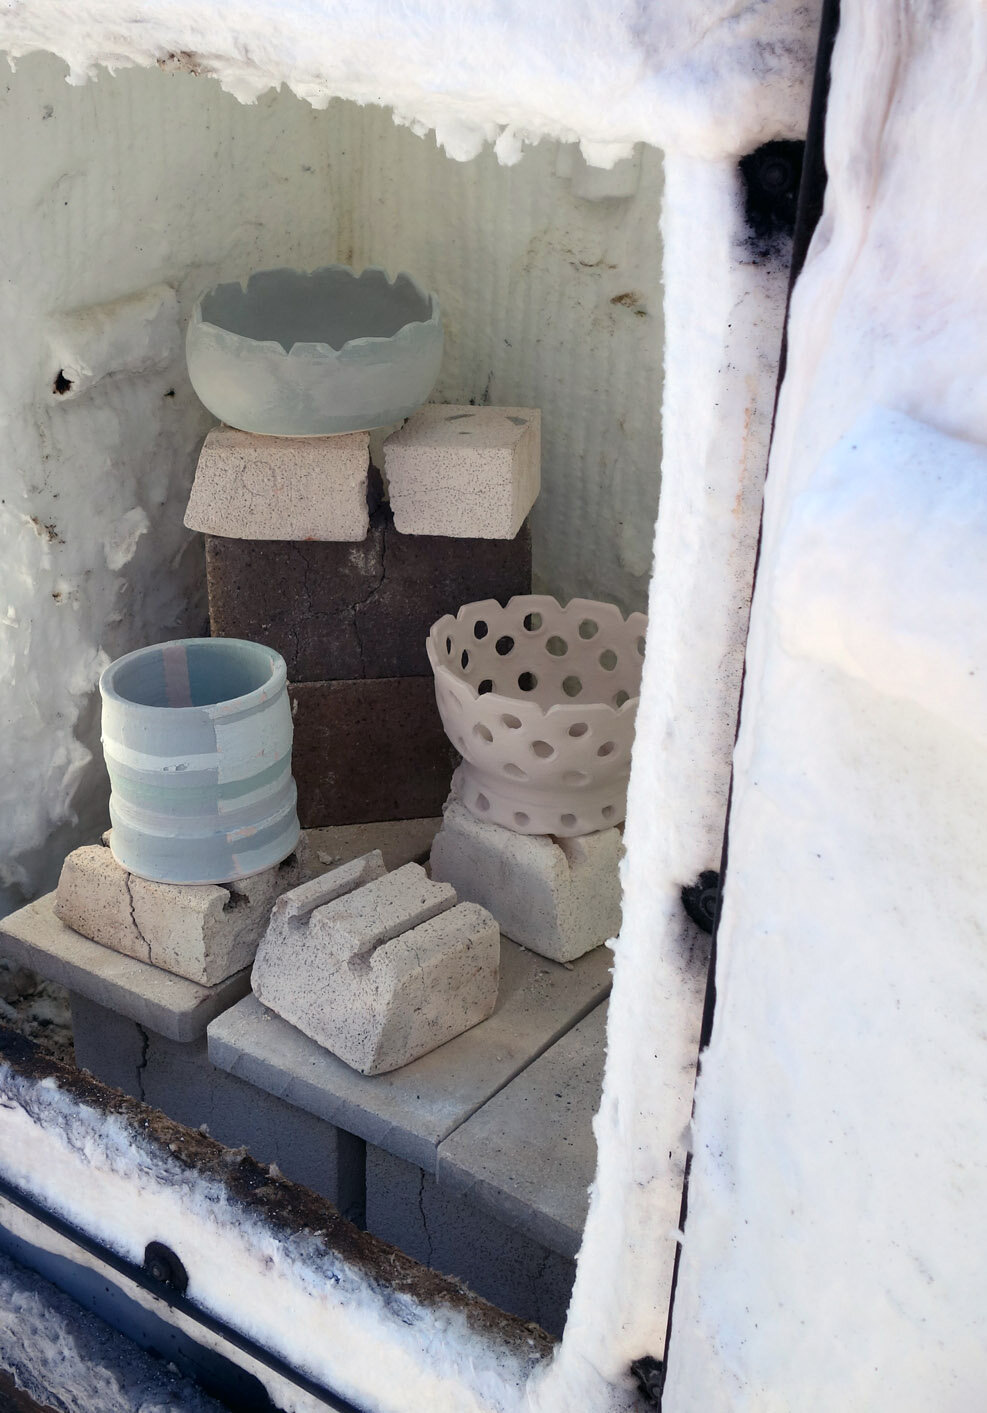
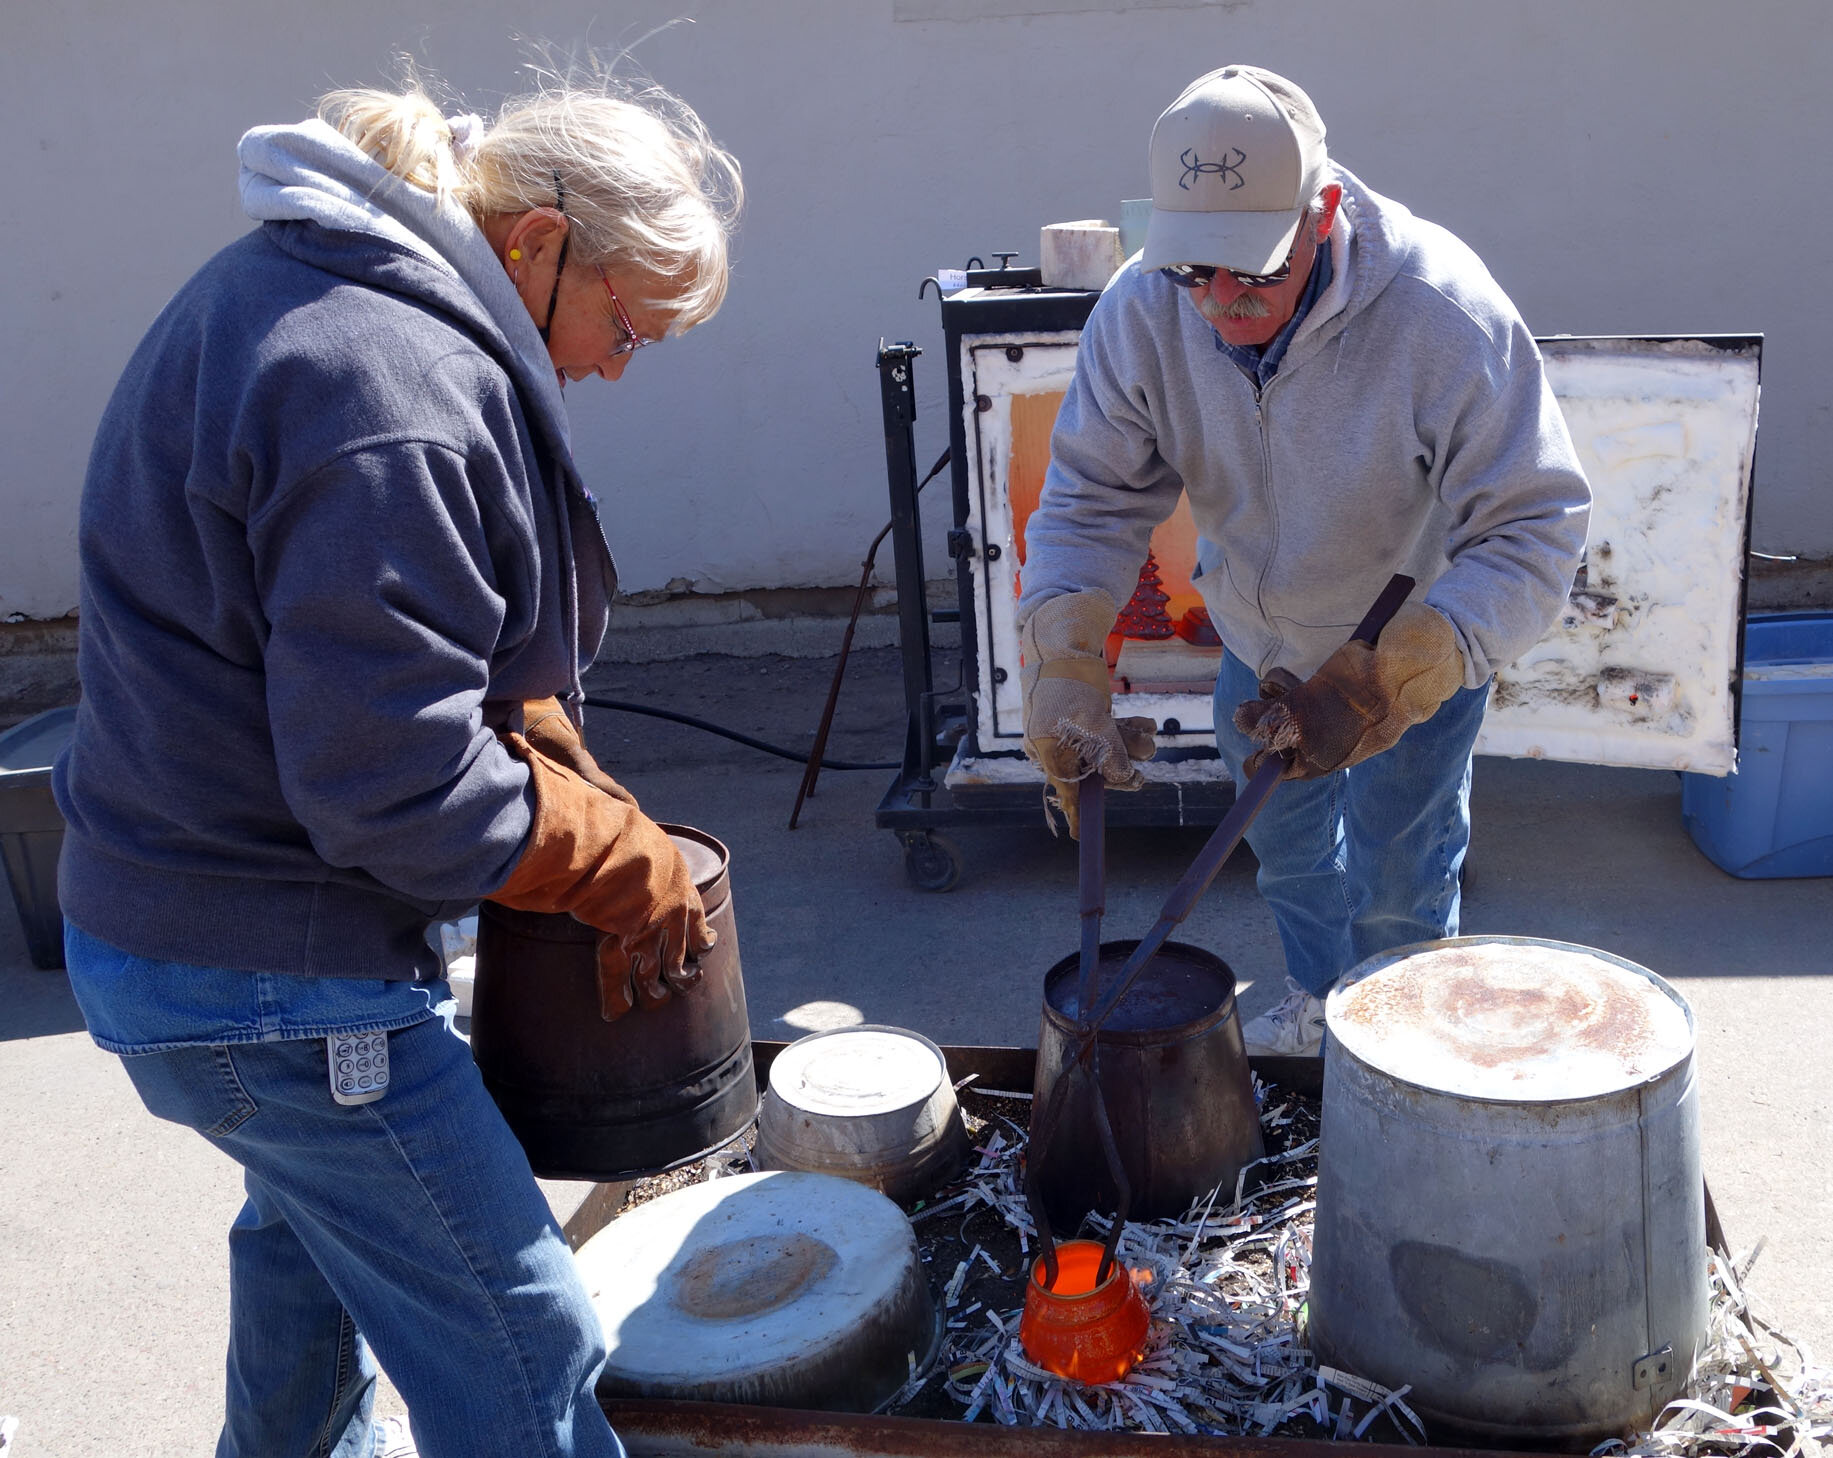
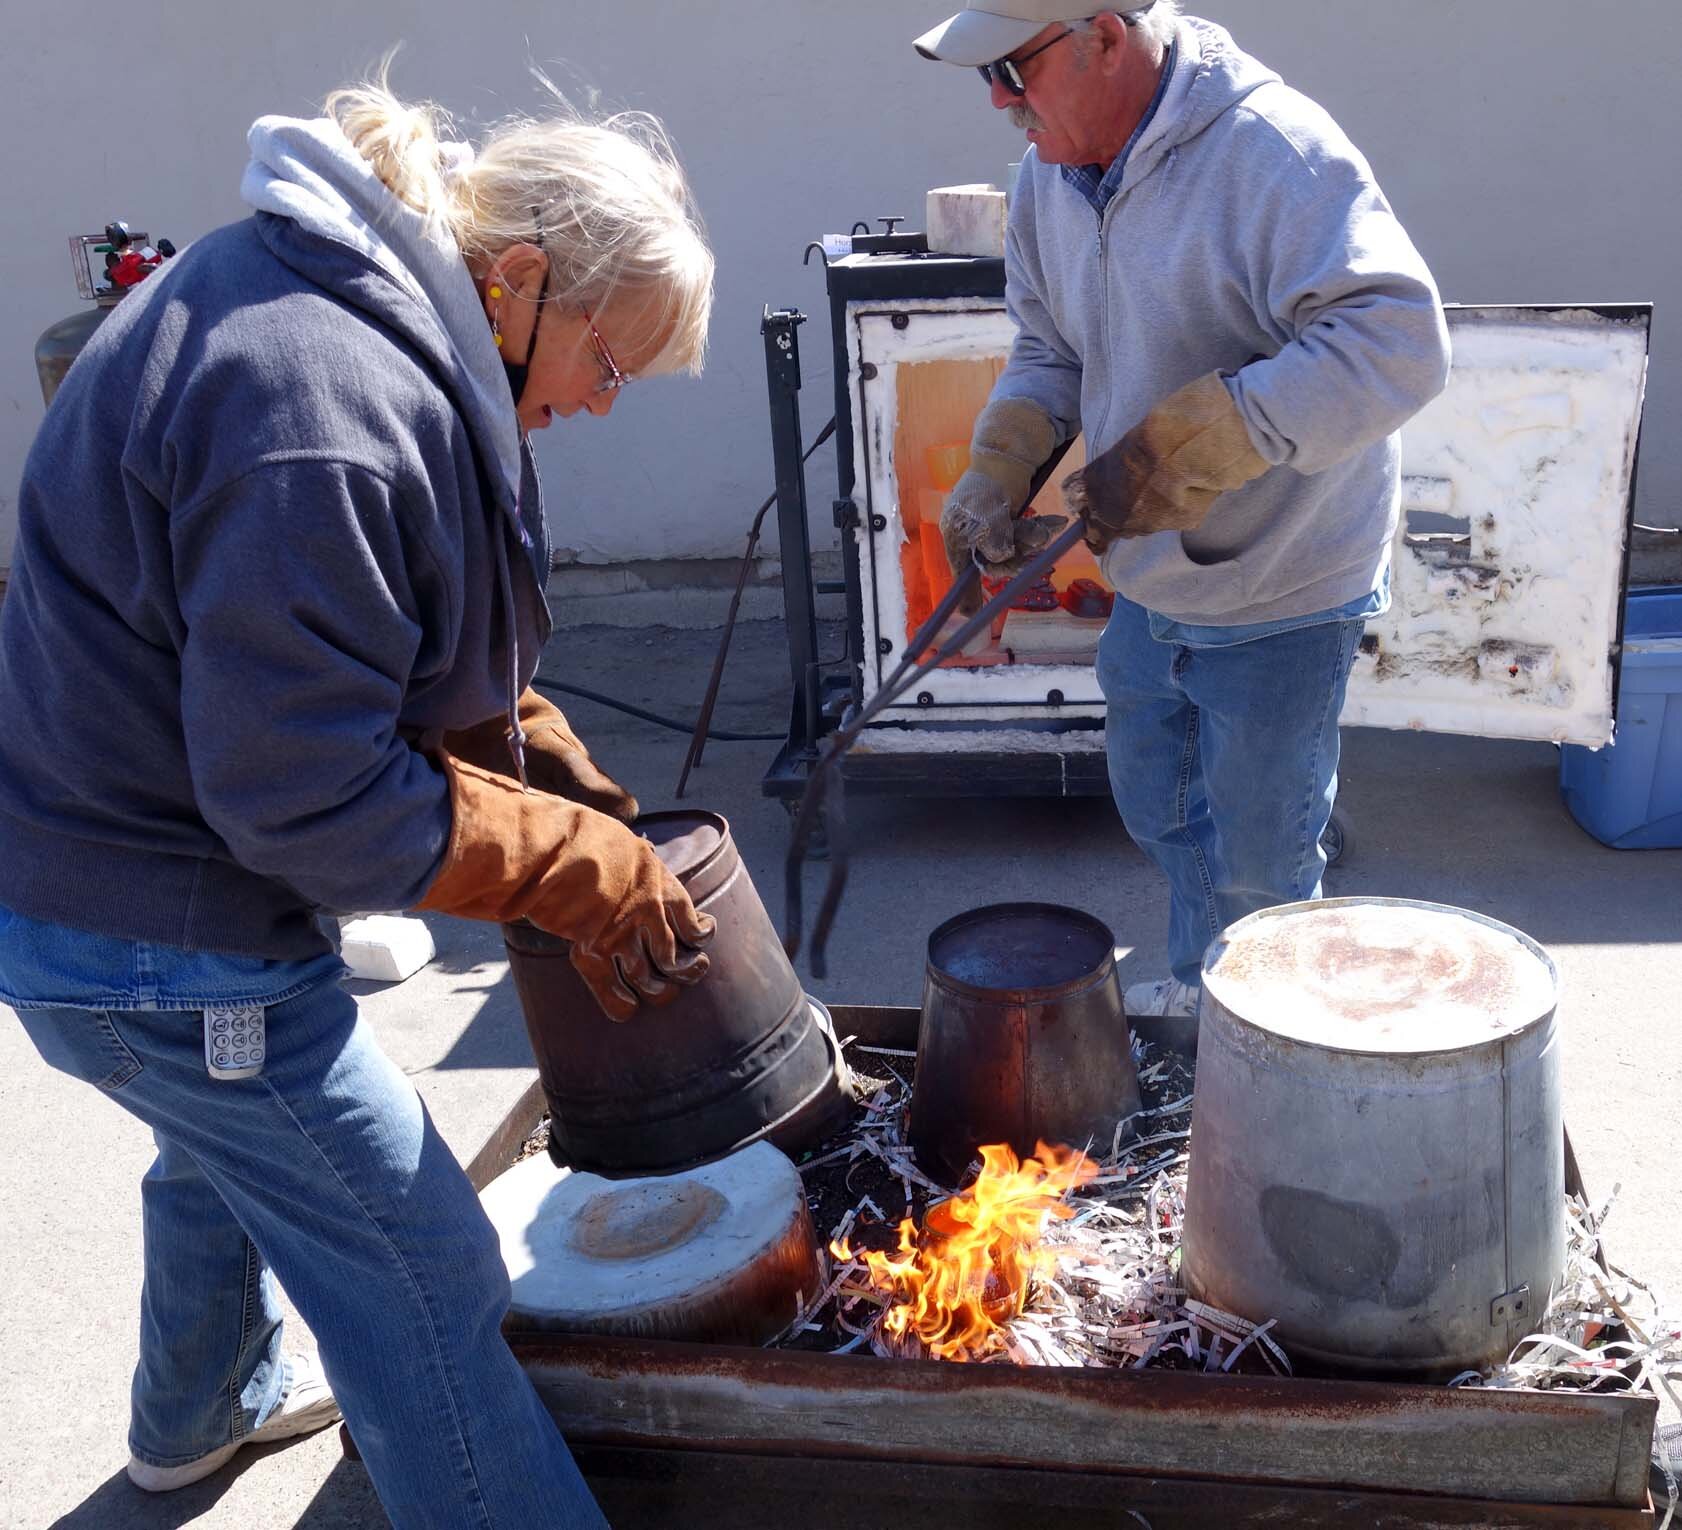
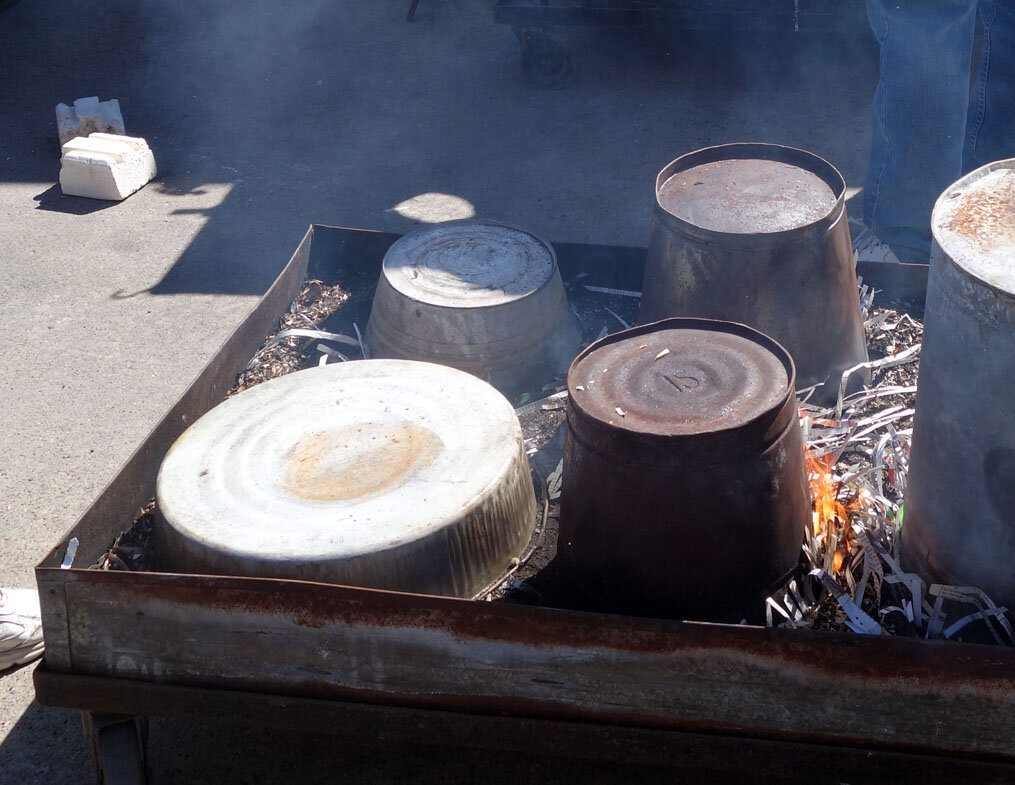
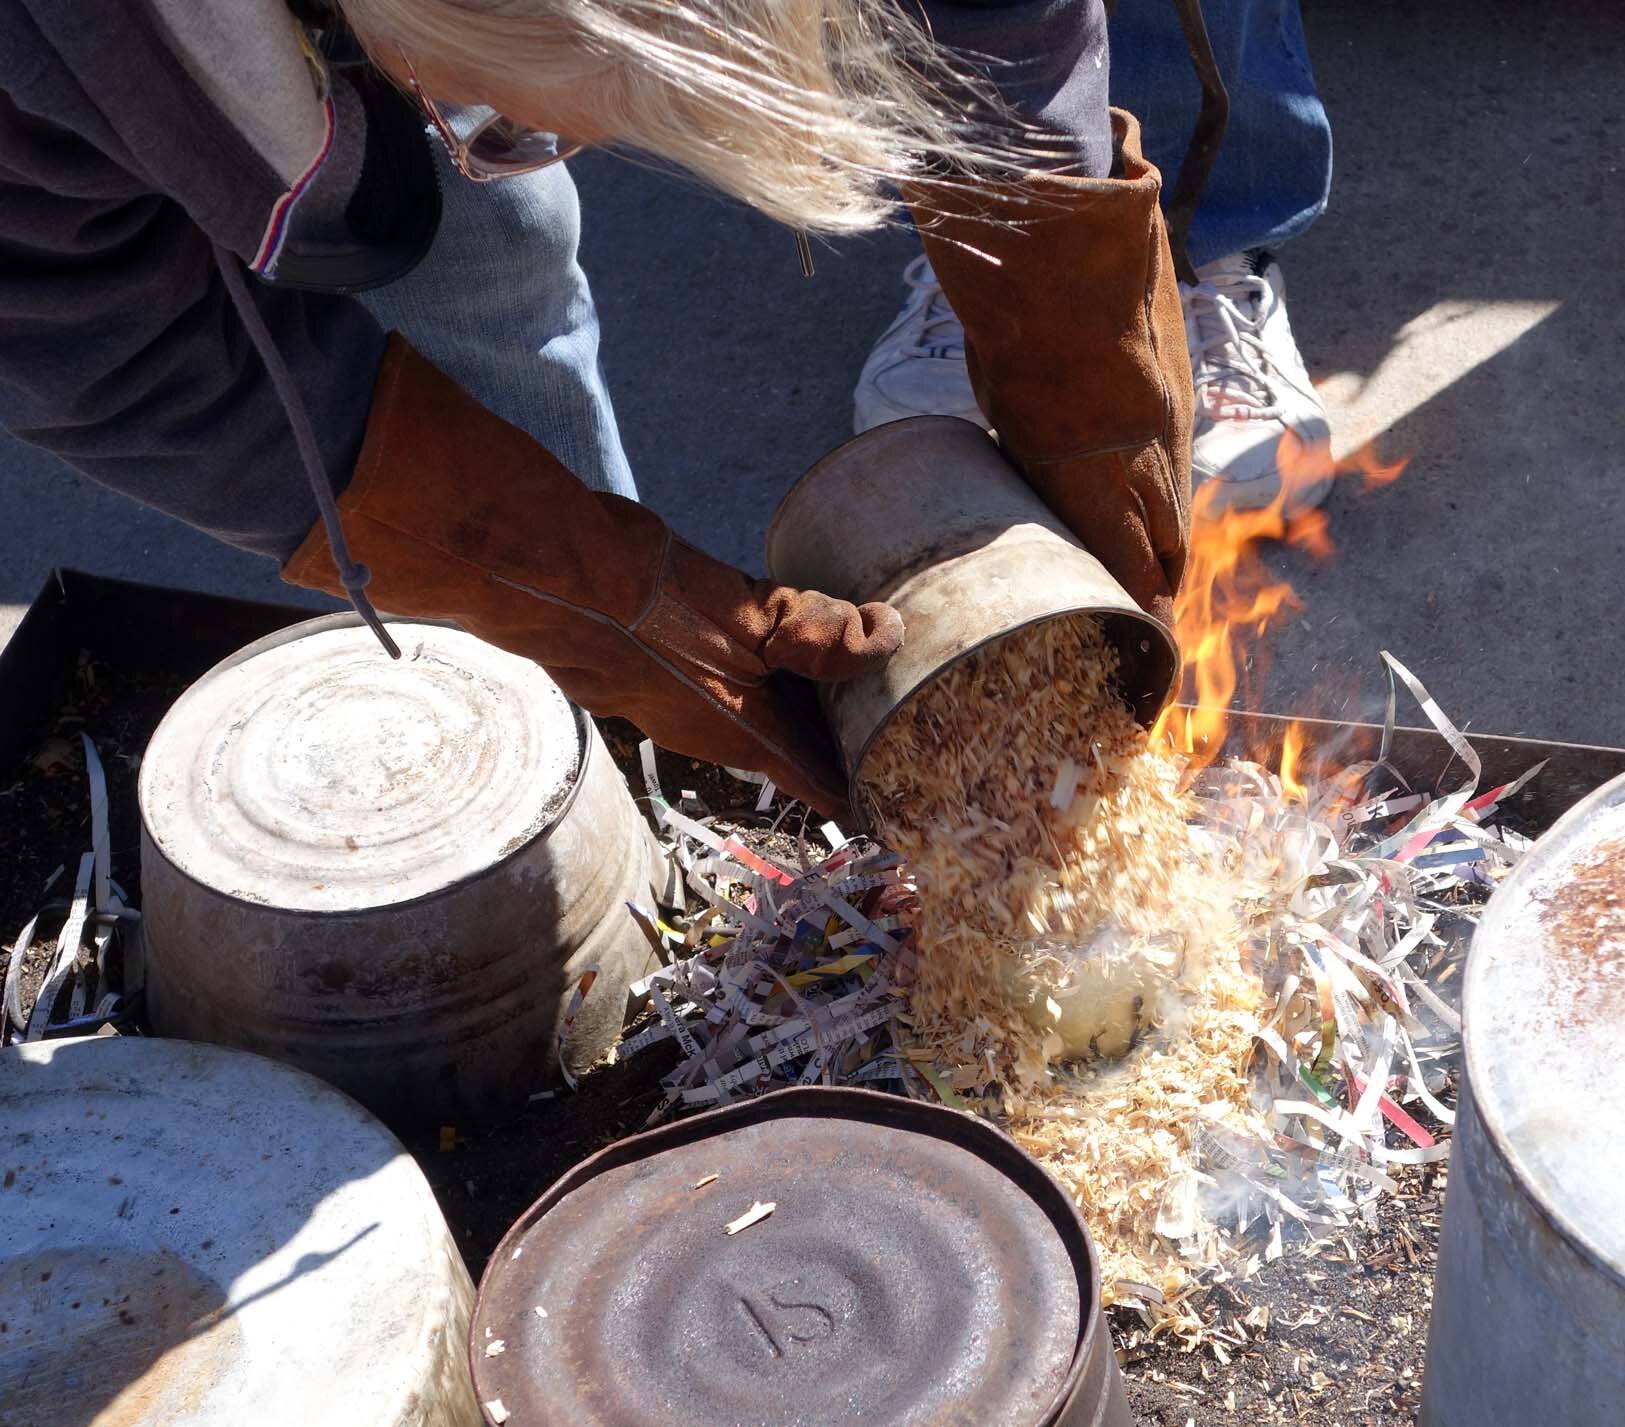
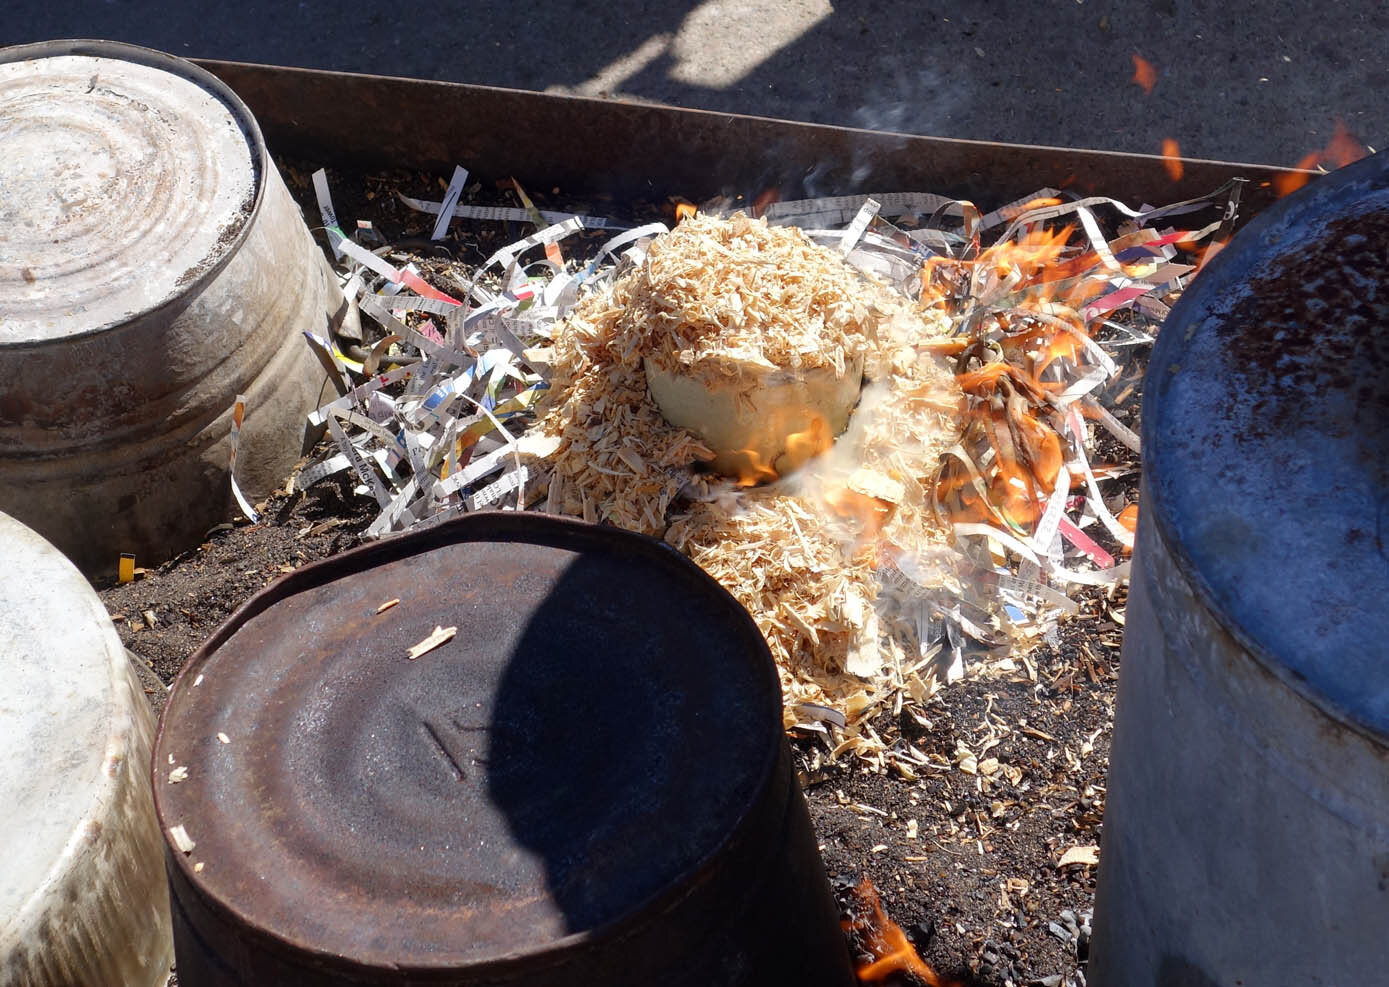
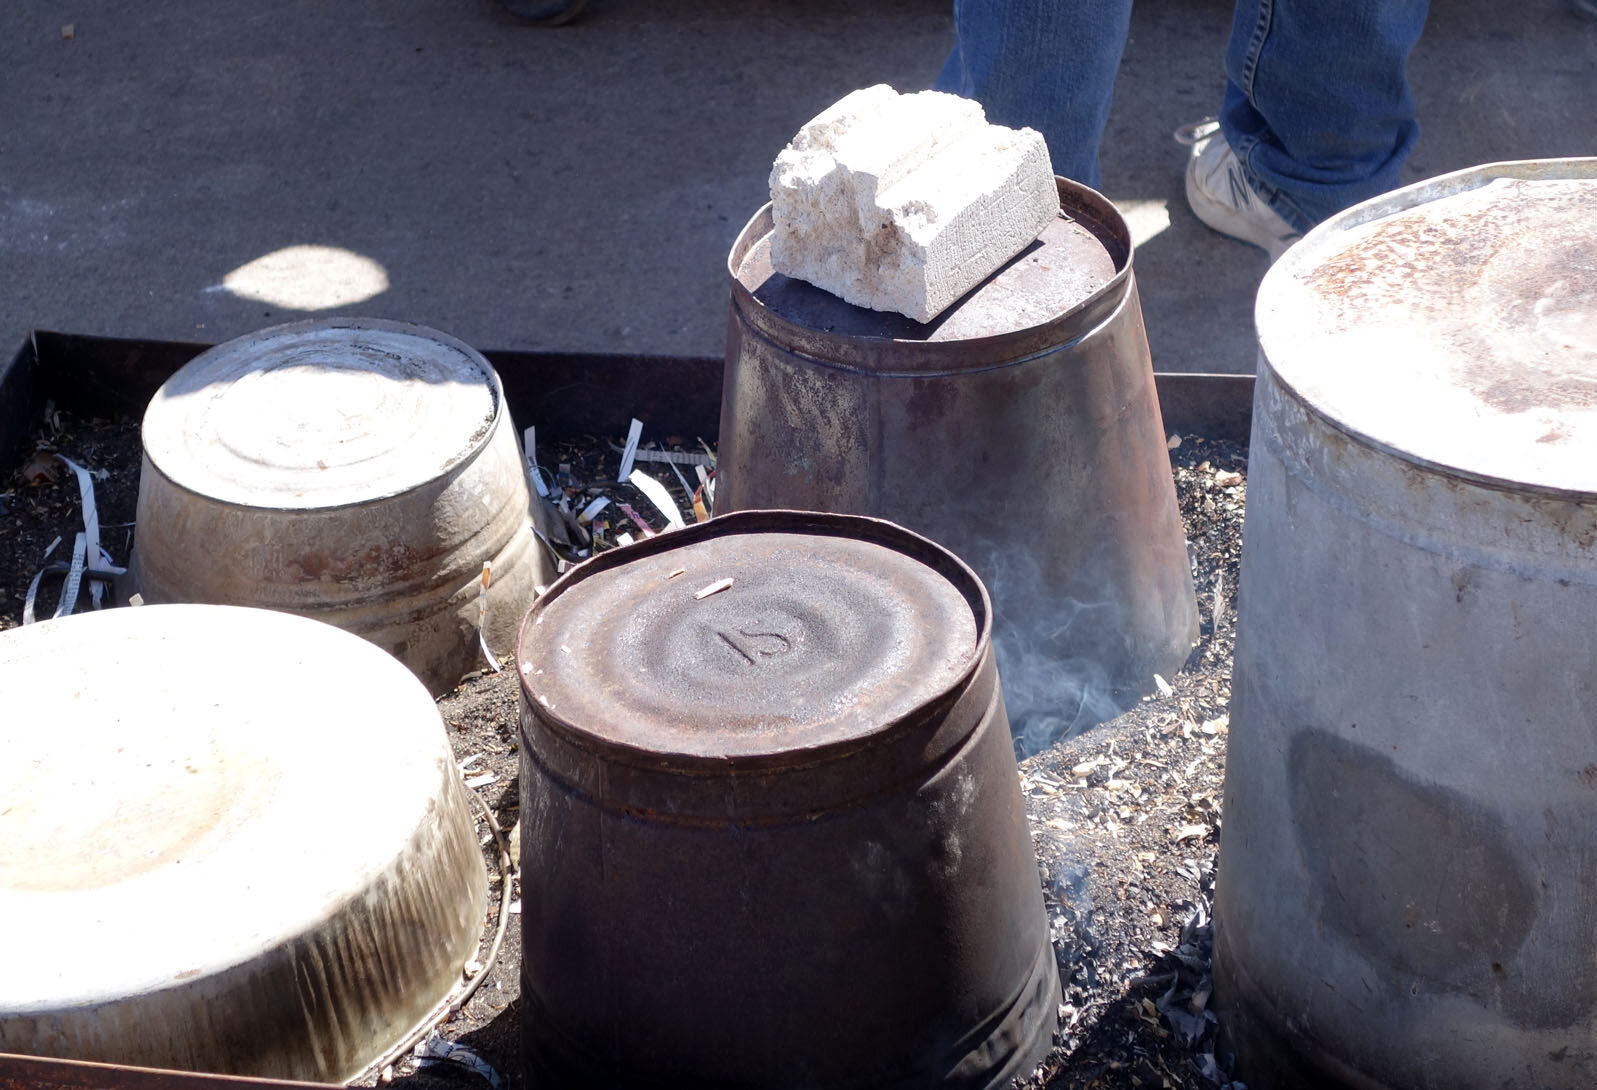
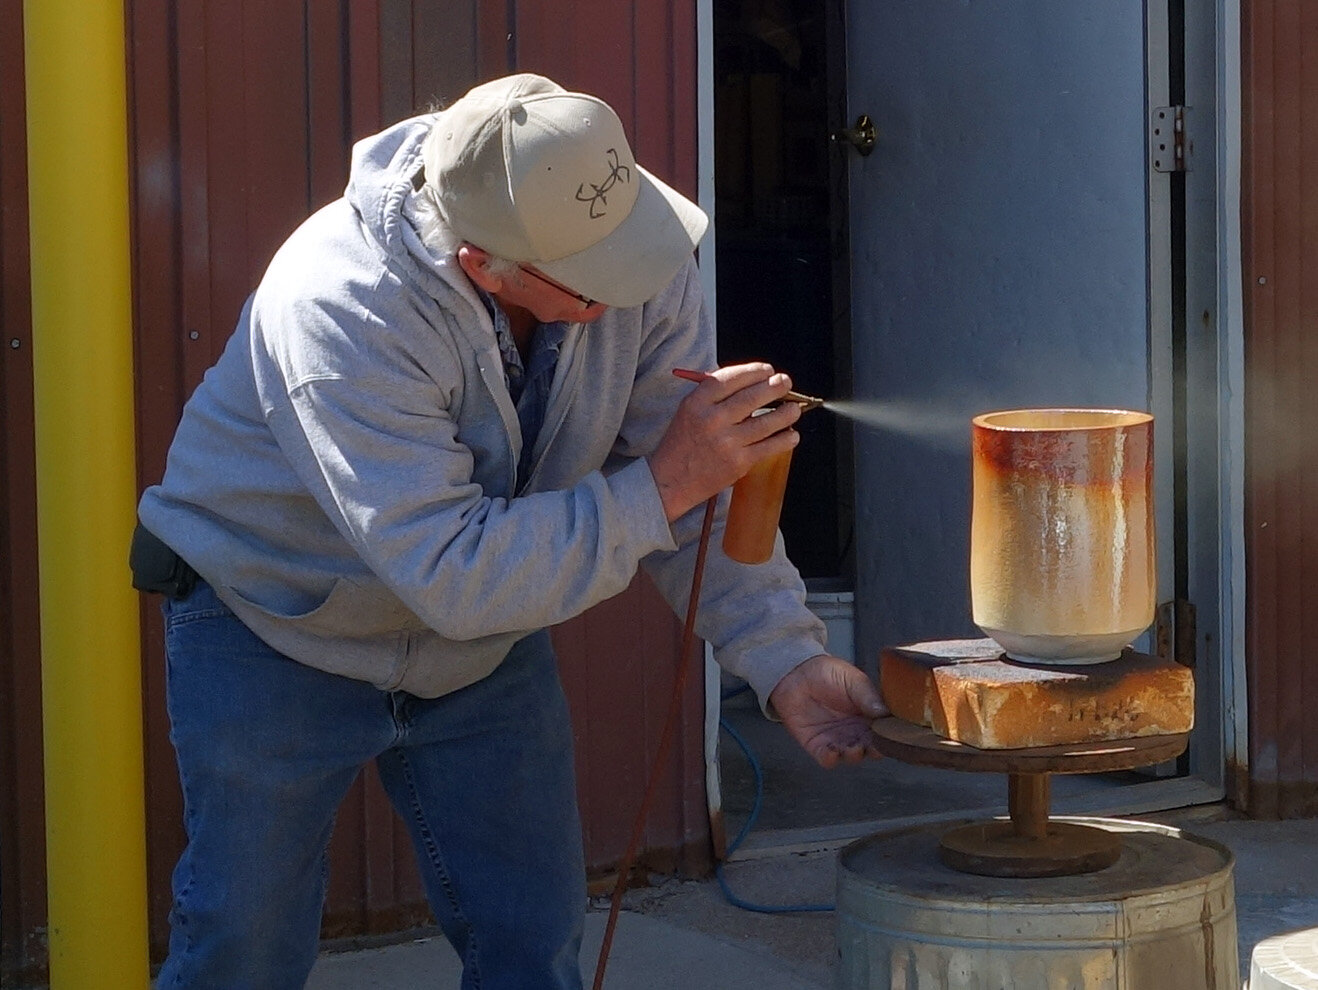
After asking about it repeatedly for three years, I successfully convinced the lovely folks over at Dakota Potters Supply to allow us to do an obvara raku workshop on October 21, 2023! Obvara is a low-fire scalding-and-sealing process wherein you create a fermented sourdough/beer bath, plunge approximately 980°C naked ceramics fresh out of the kiln into it, wait for them to start to bloom with different tan-to-brown markings, and then arrest the surface carbonization process by rinsing the pieces off in a water bath. Obvara has an even higher chance of cracking due to the extreme thermal shocks involved than non-bath raku processes.

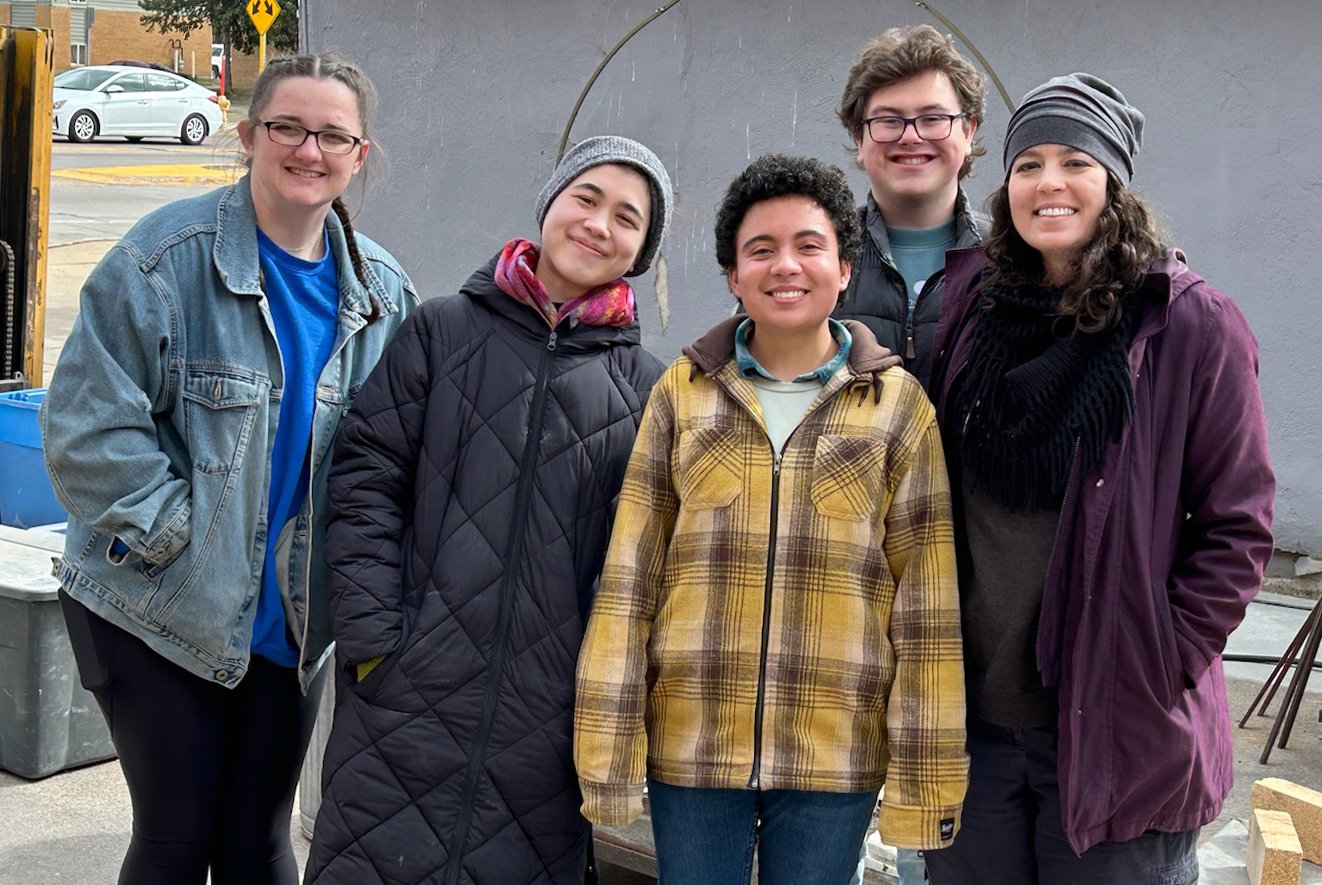
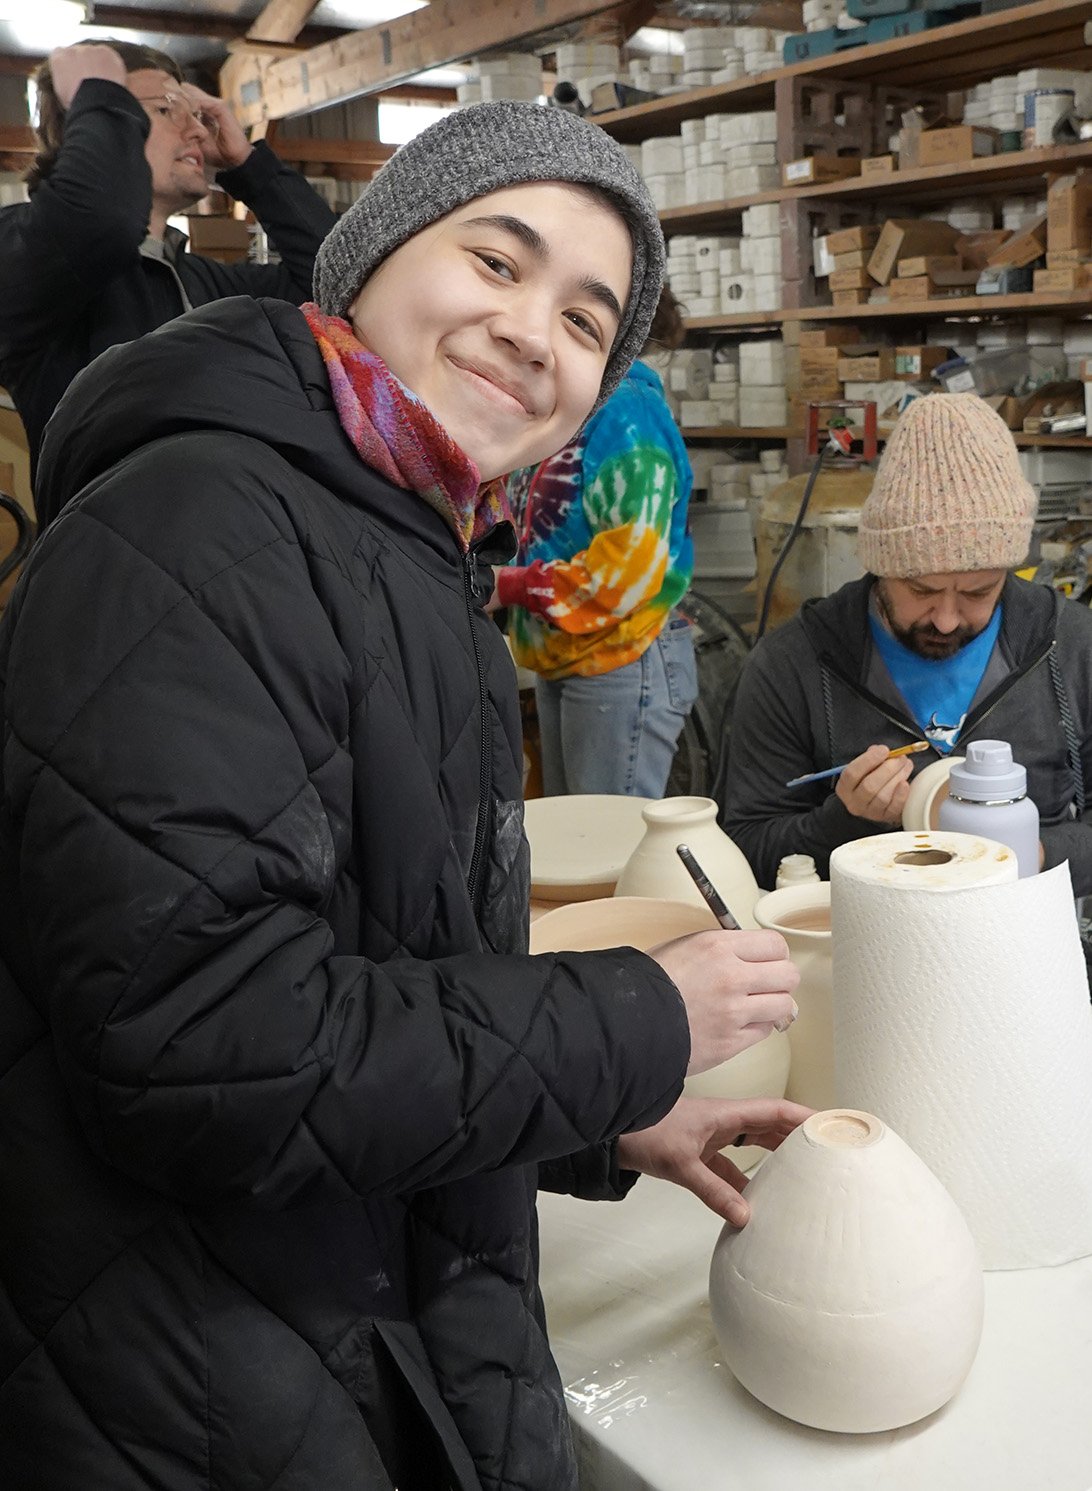
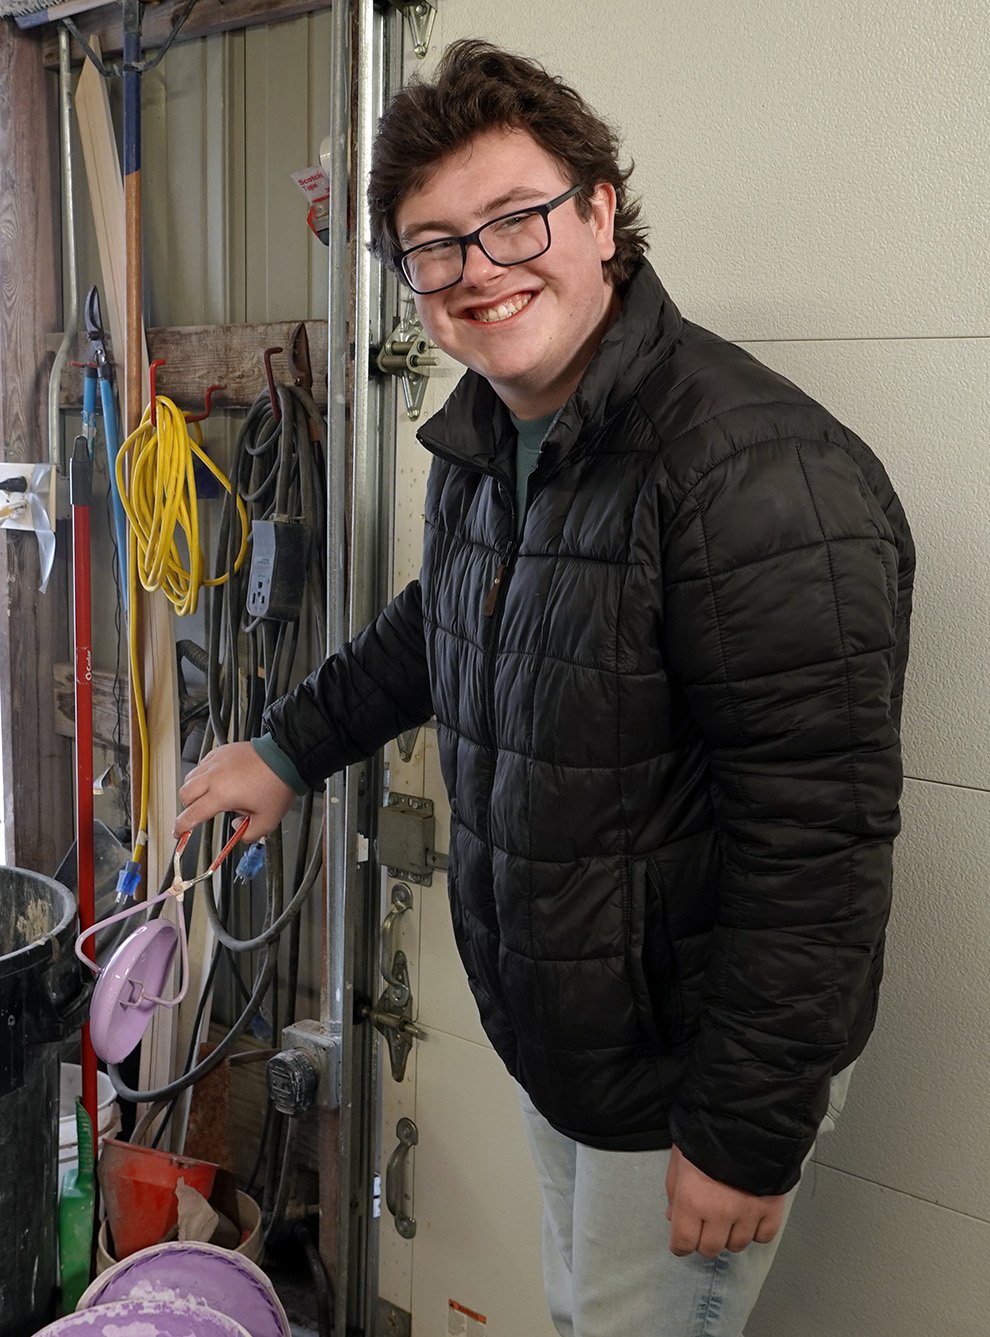
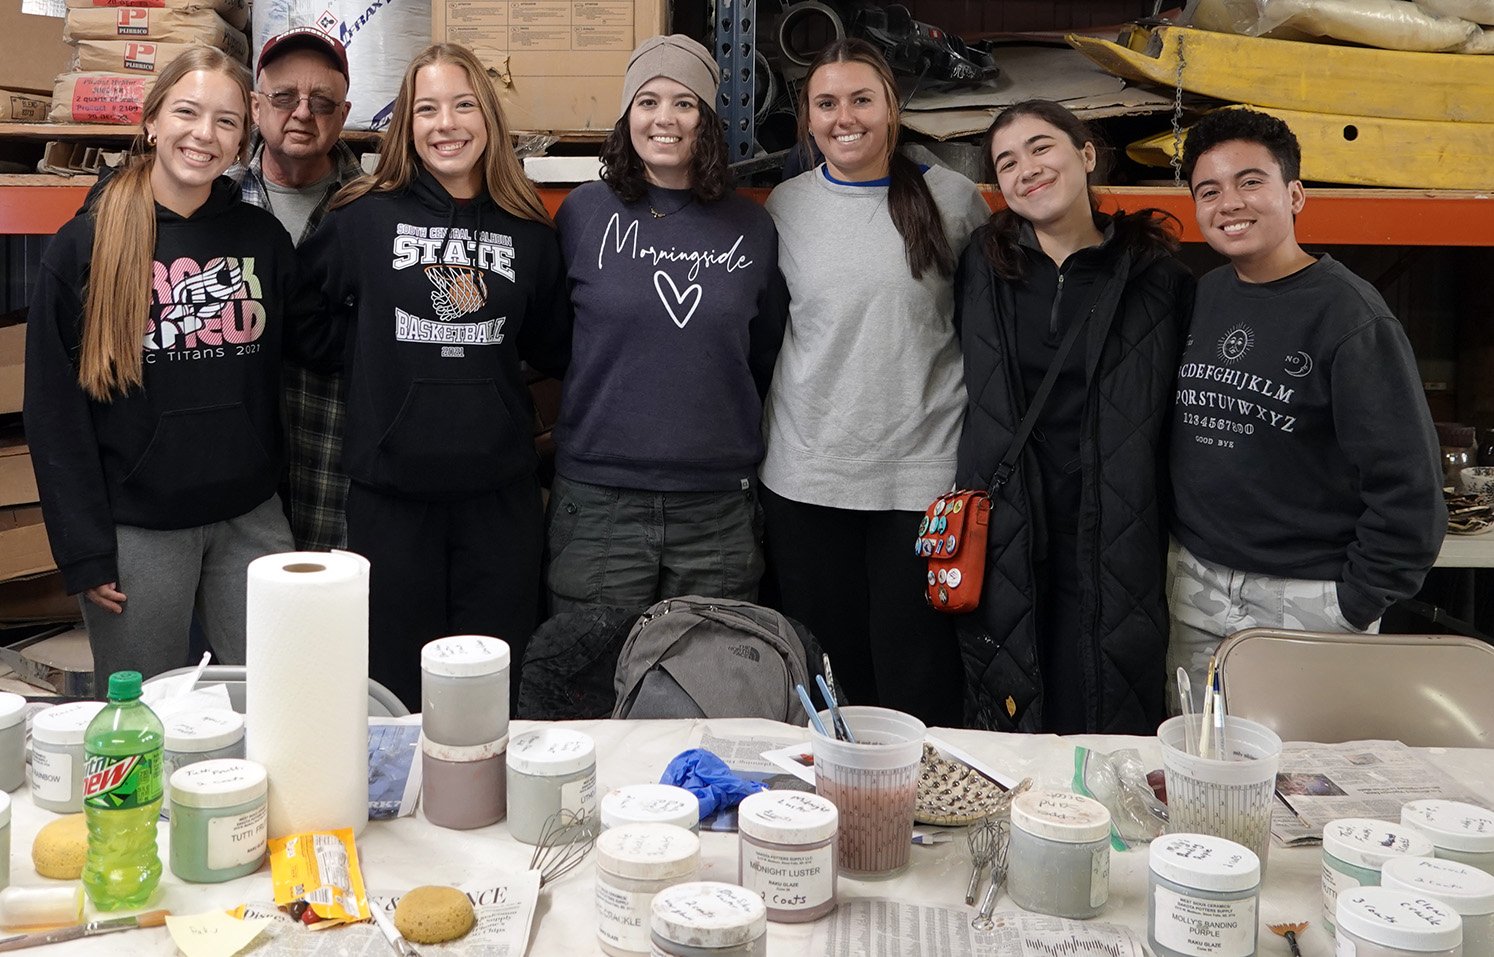
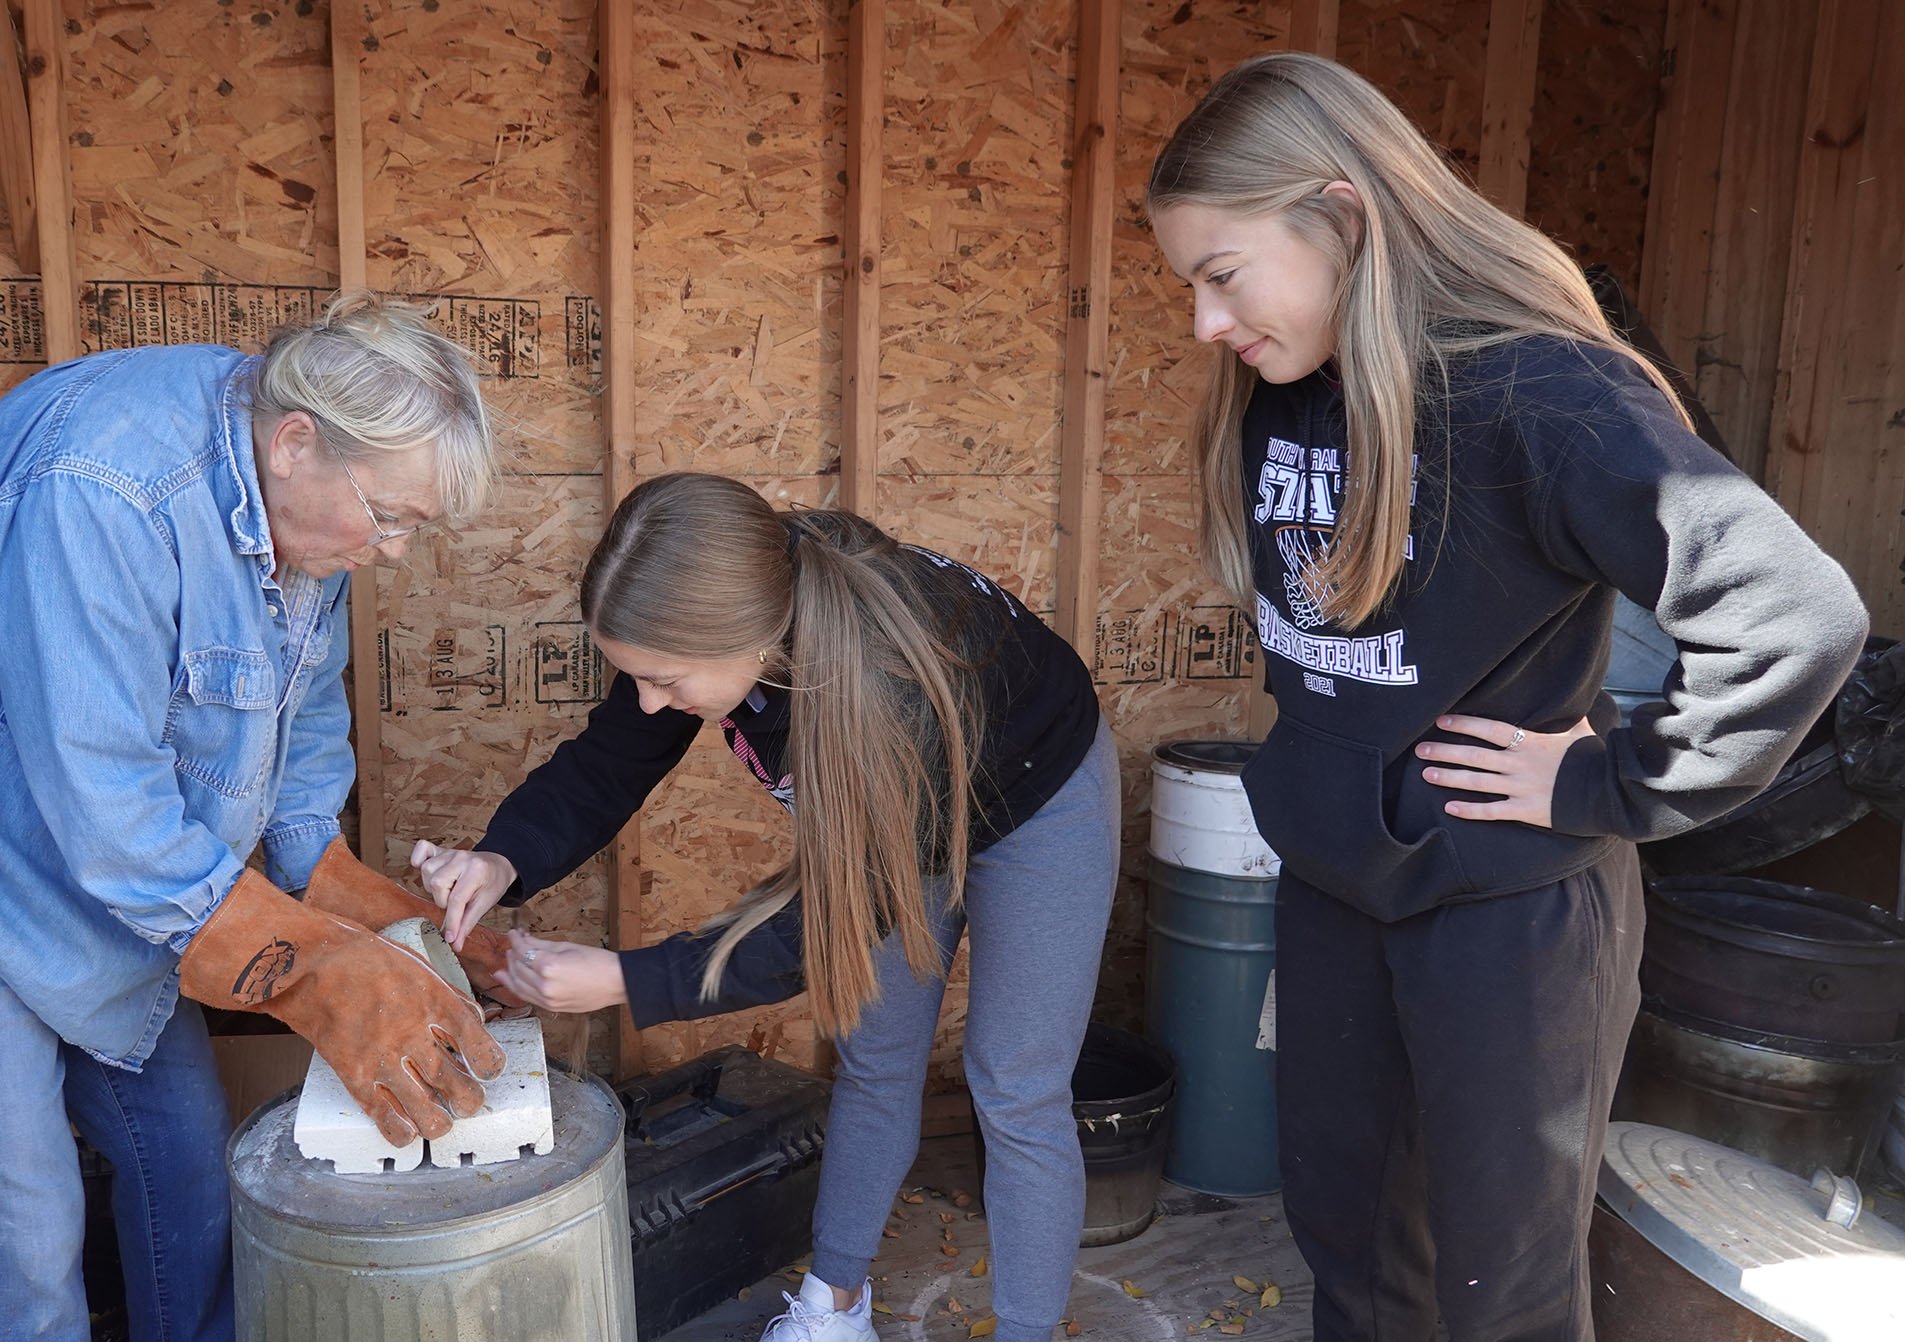
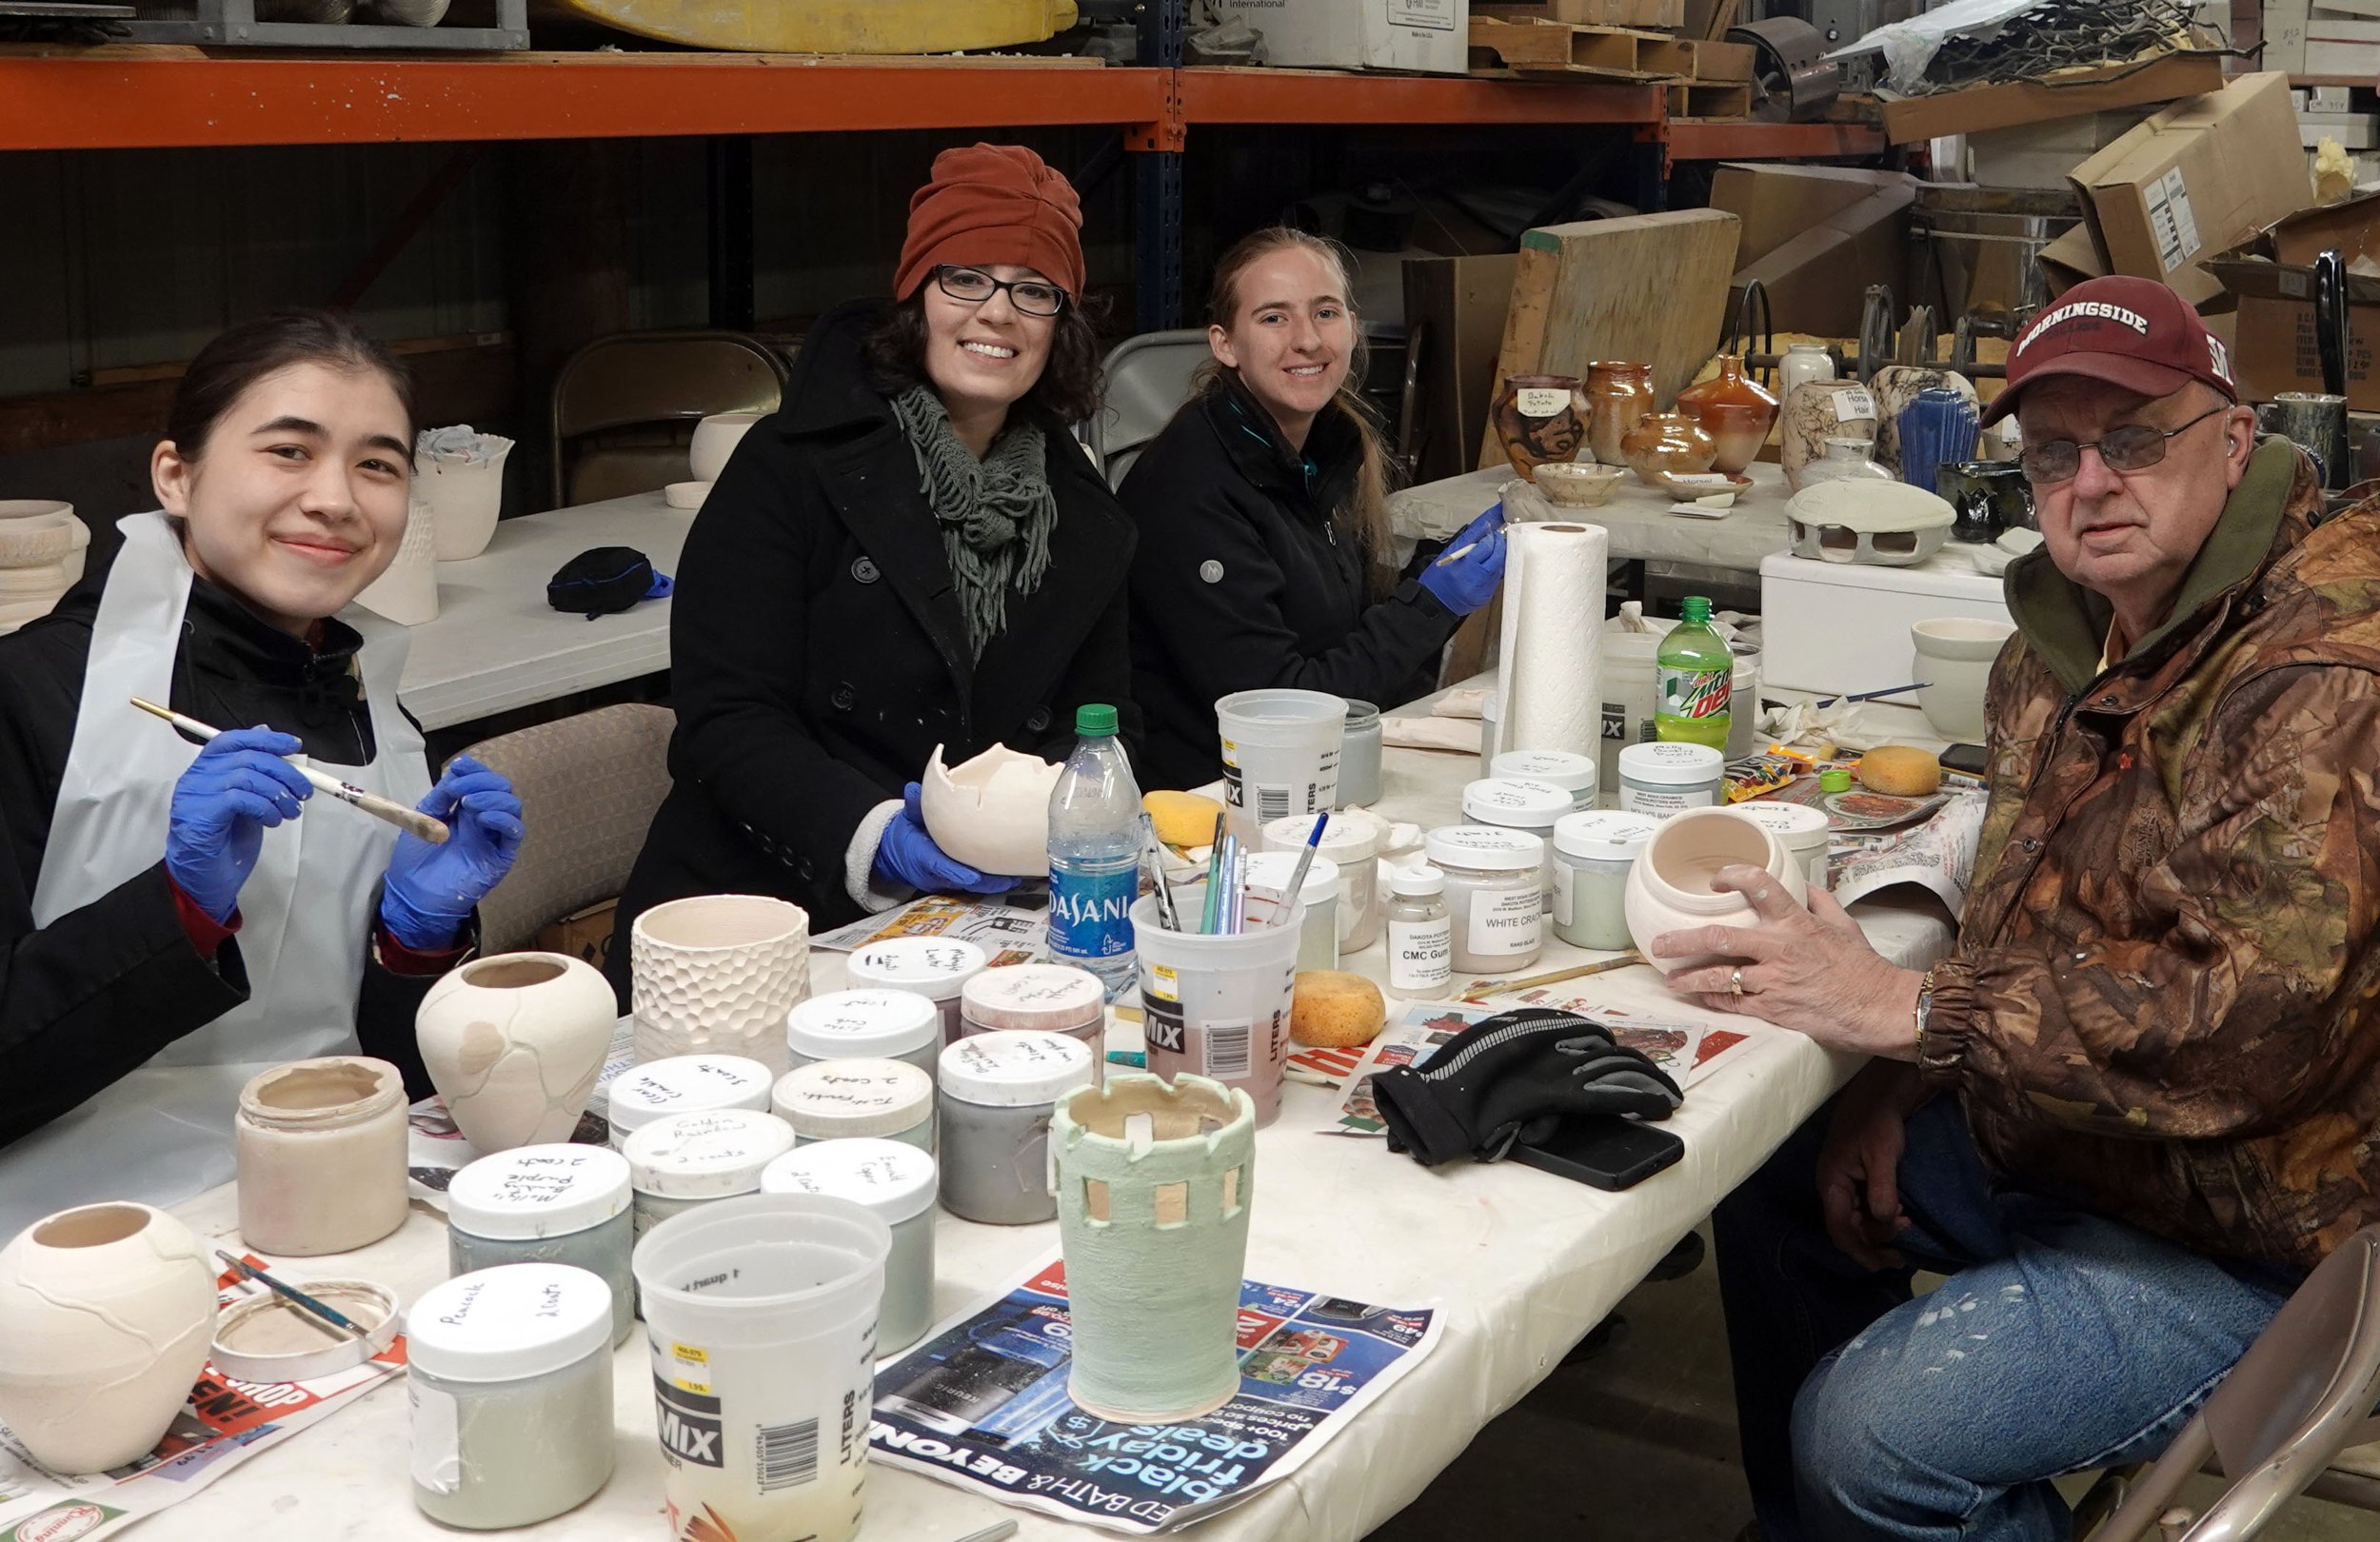
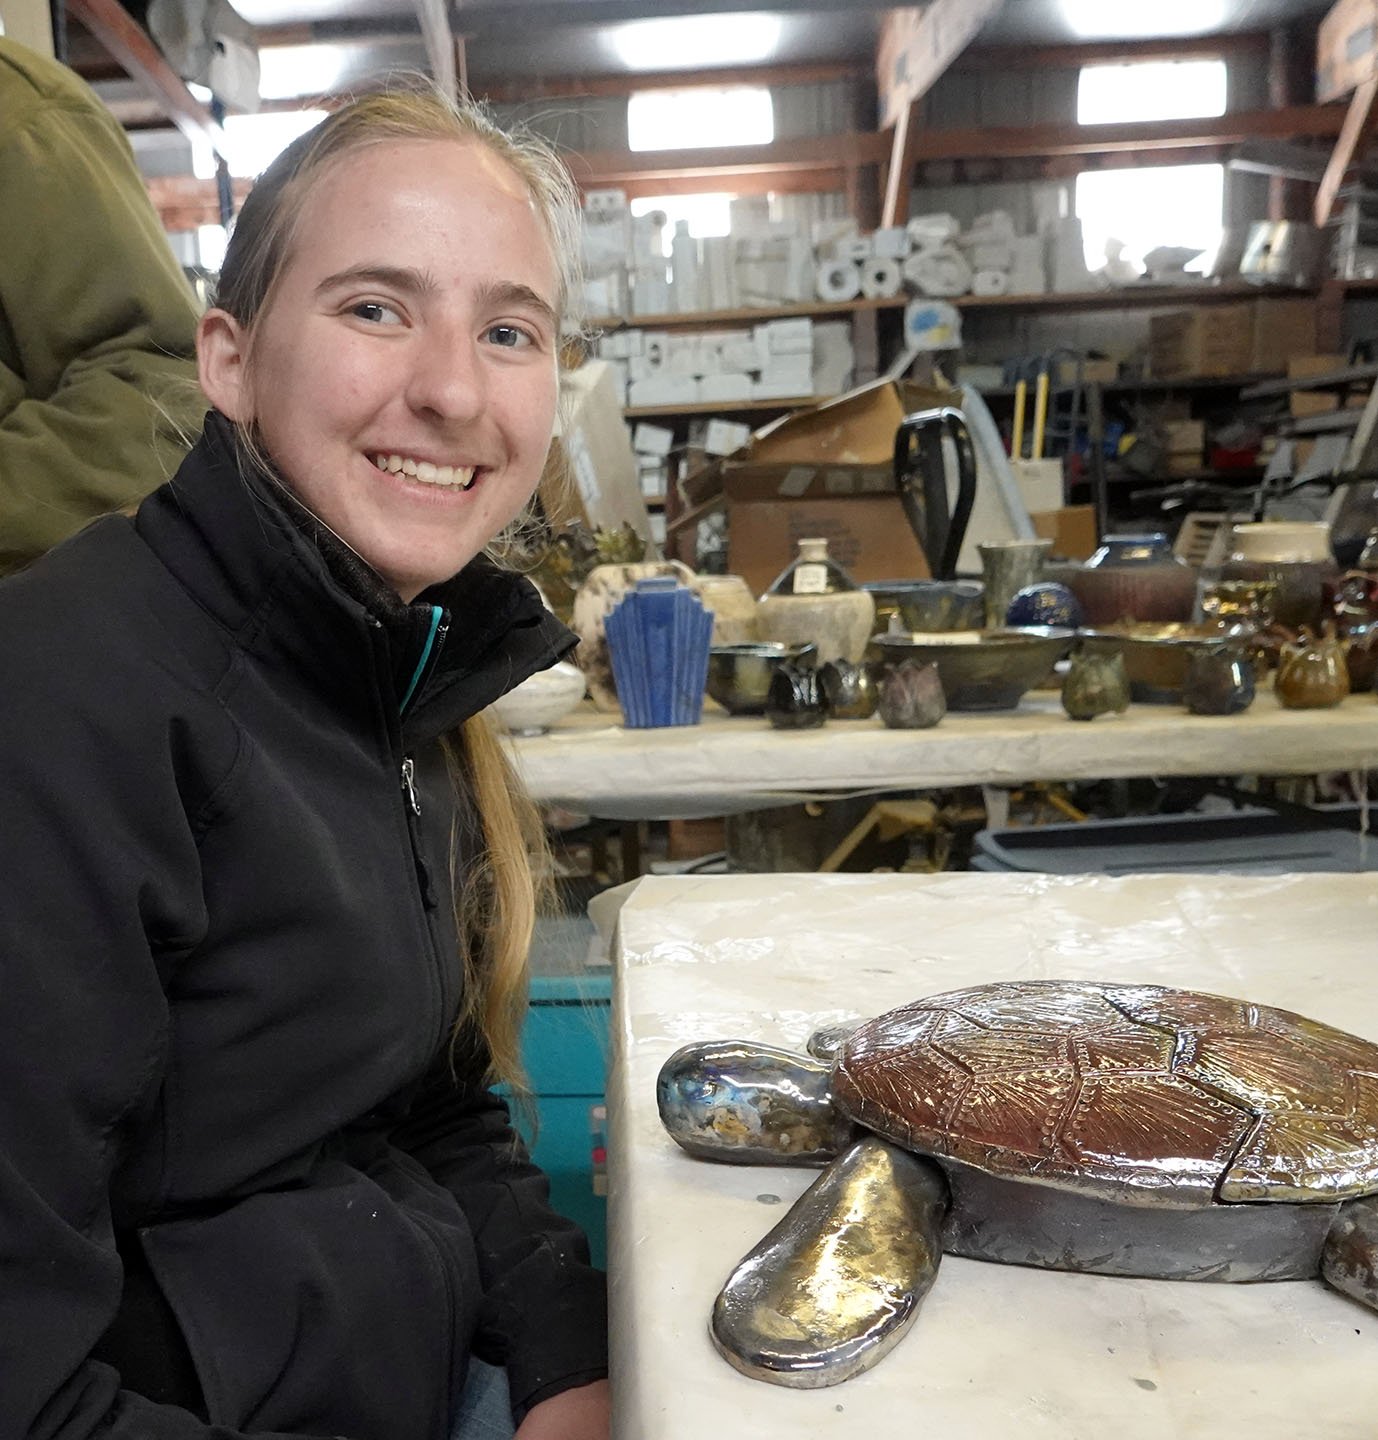
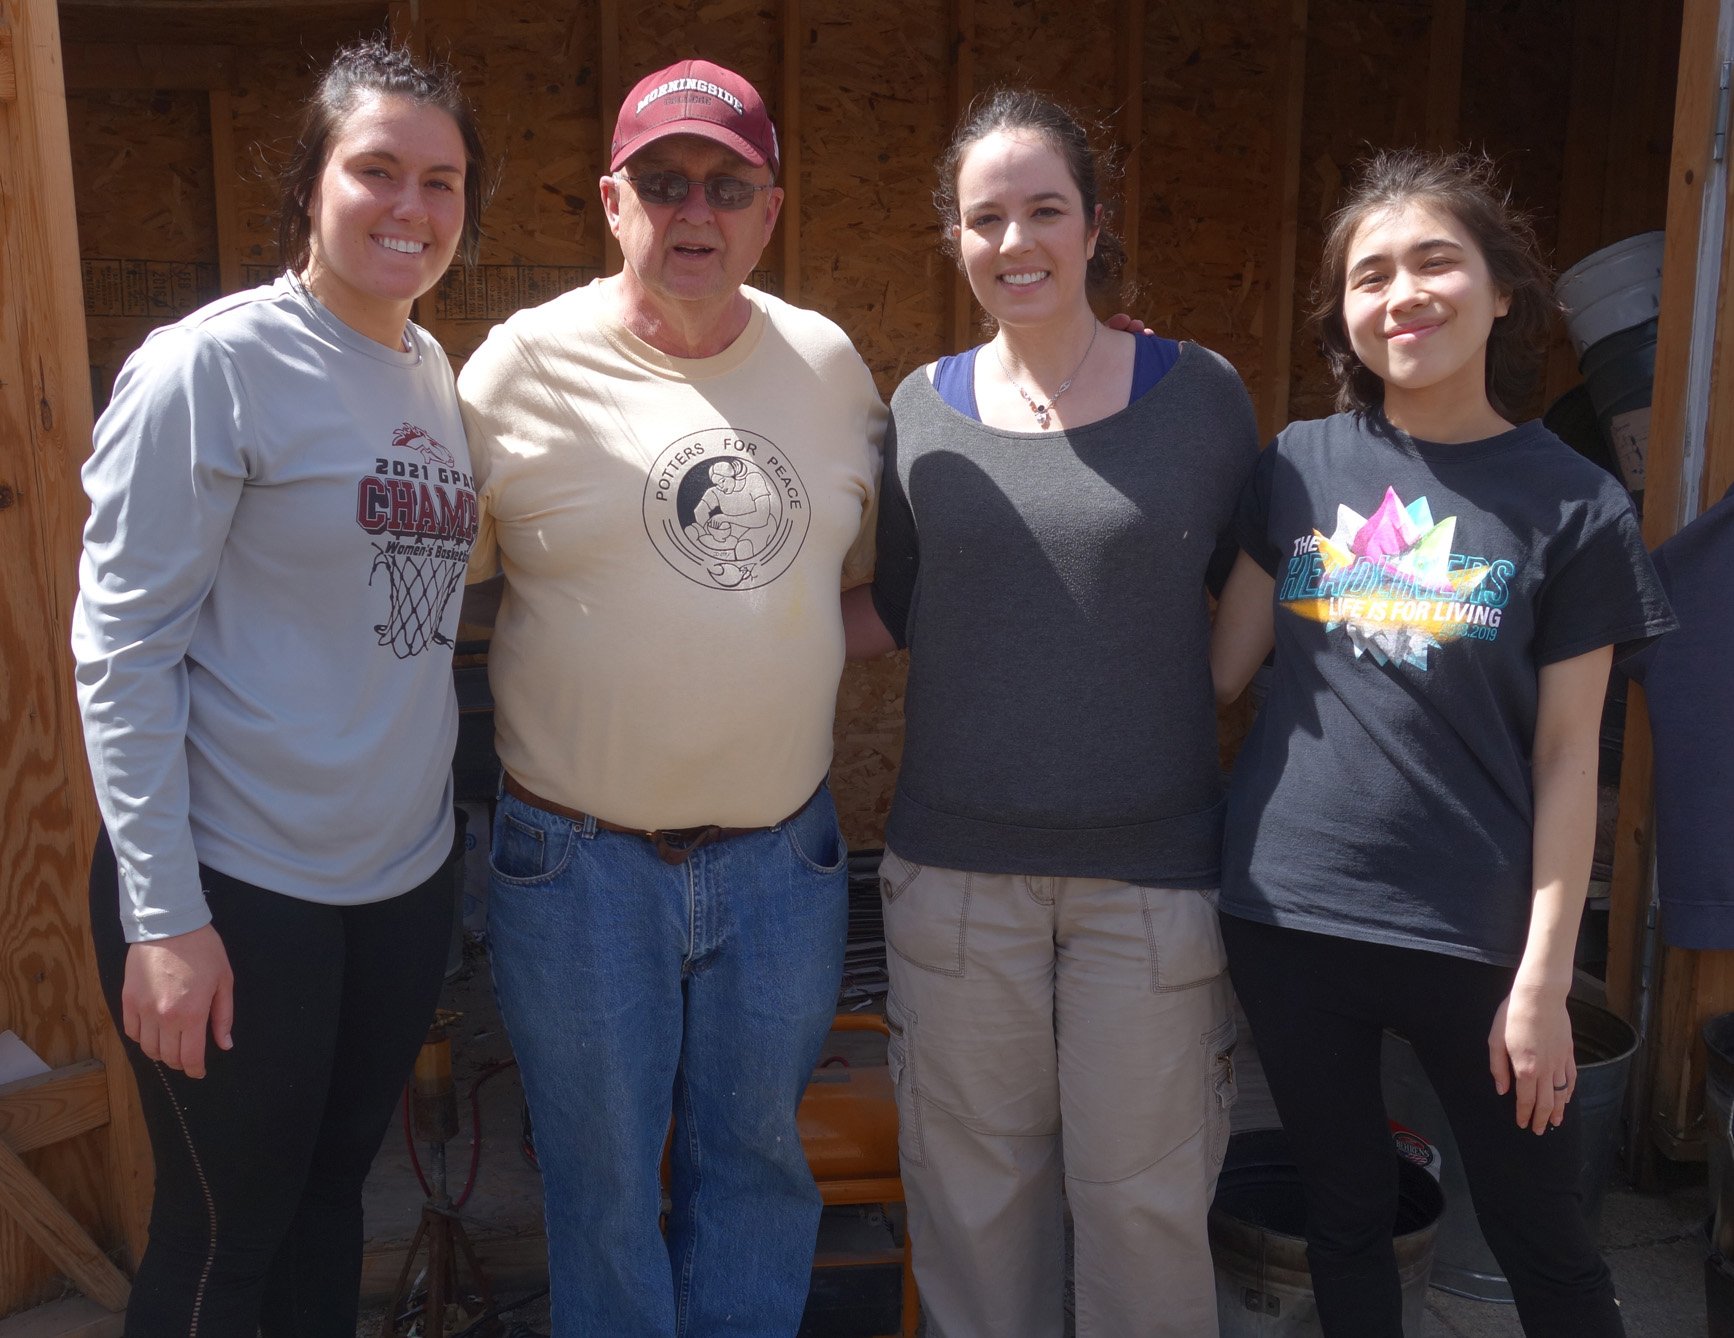
Getting the chance to do raku is relatively rare, and many ceramists haven’t even heard of obvara, let alone had the opportunity to do it - so I’m really grateful for the experience! Joining me on the trip were Morningside faculty Paul Adamson, alumni Calissa Hanson and Deb Murakami, and students Laura Greene, Taylor Greene, and Lauren Hedlund.

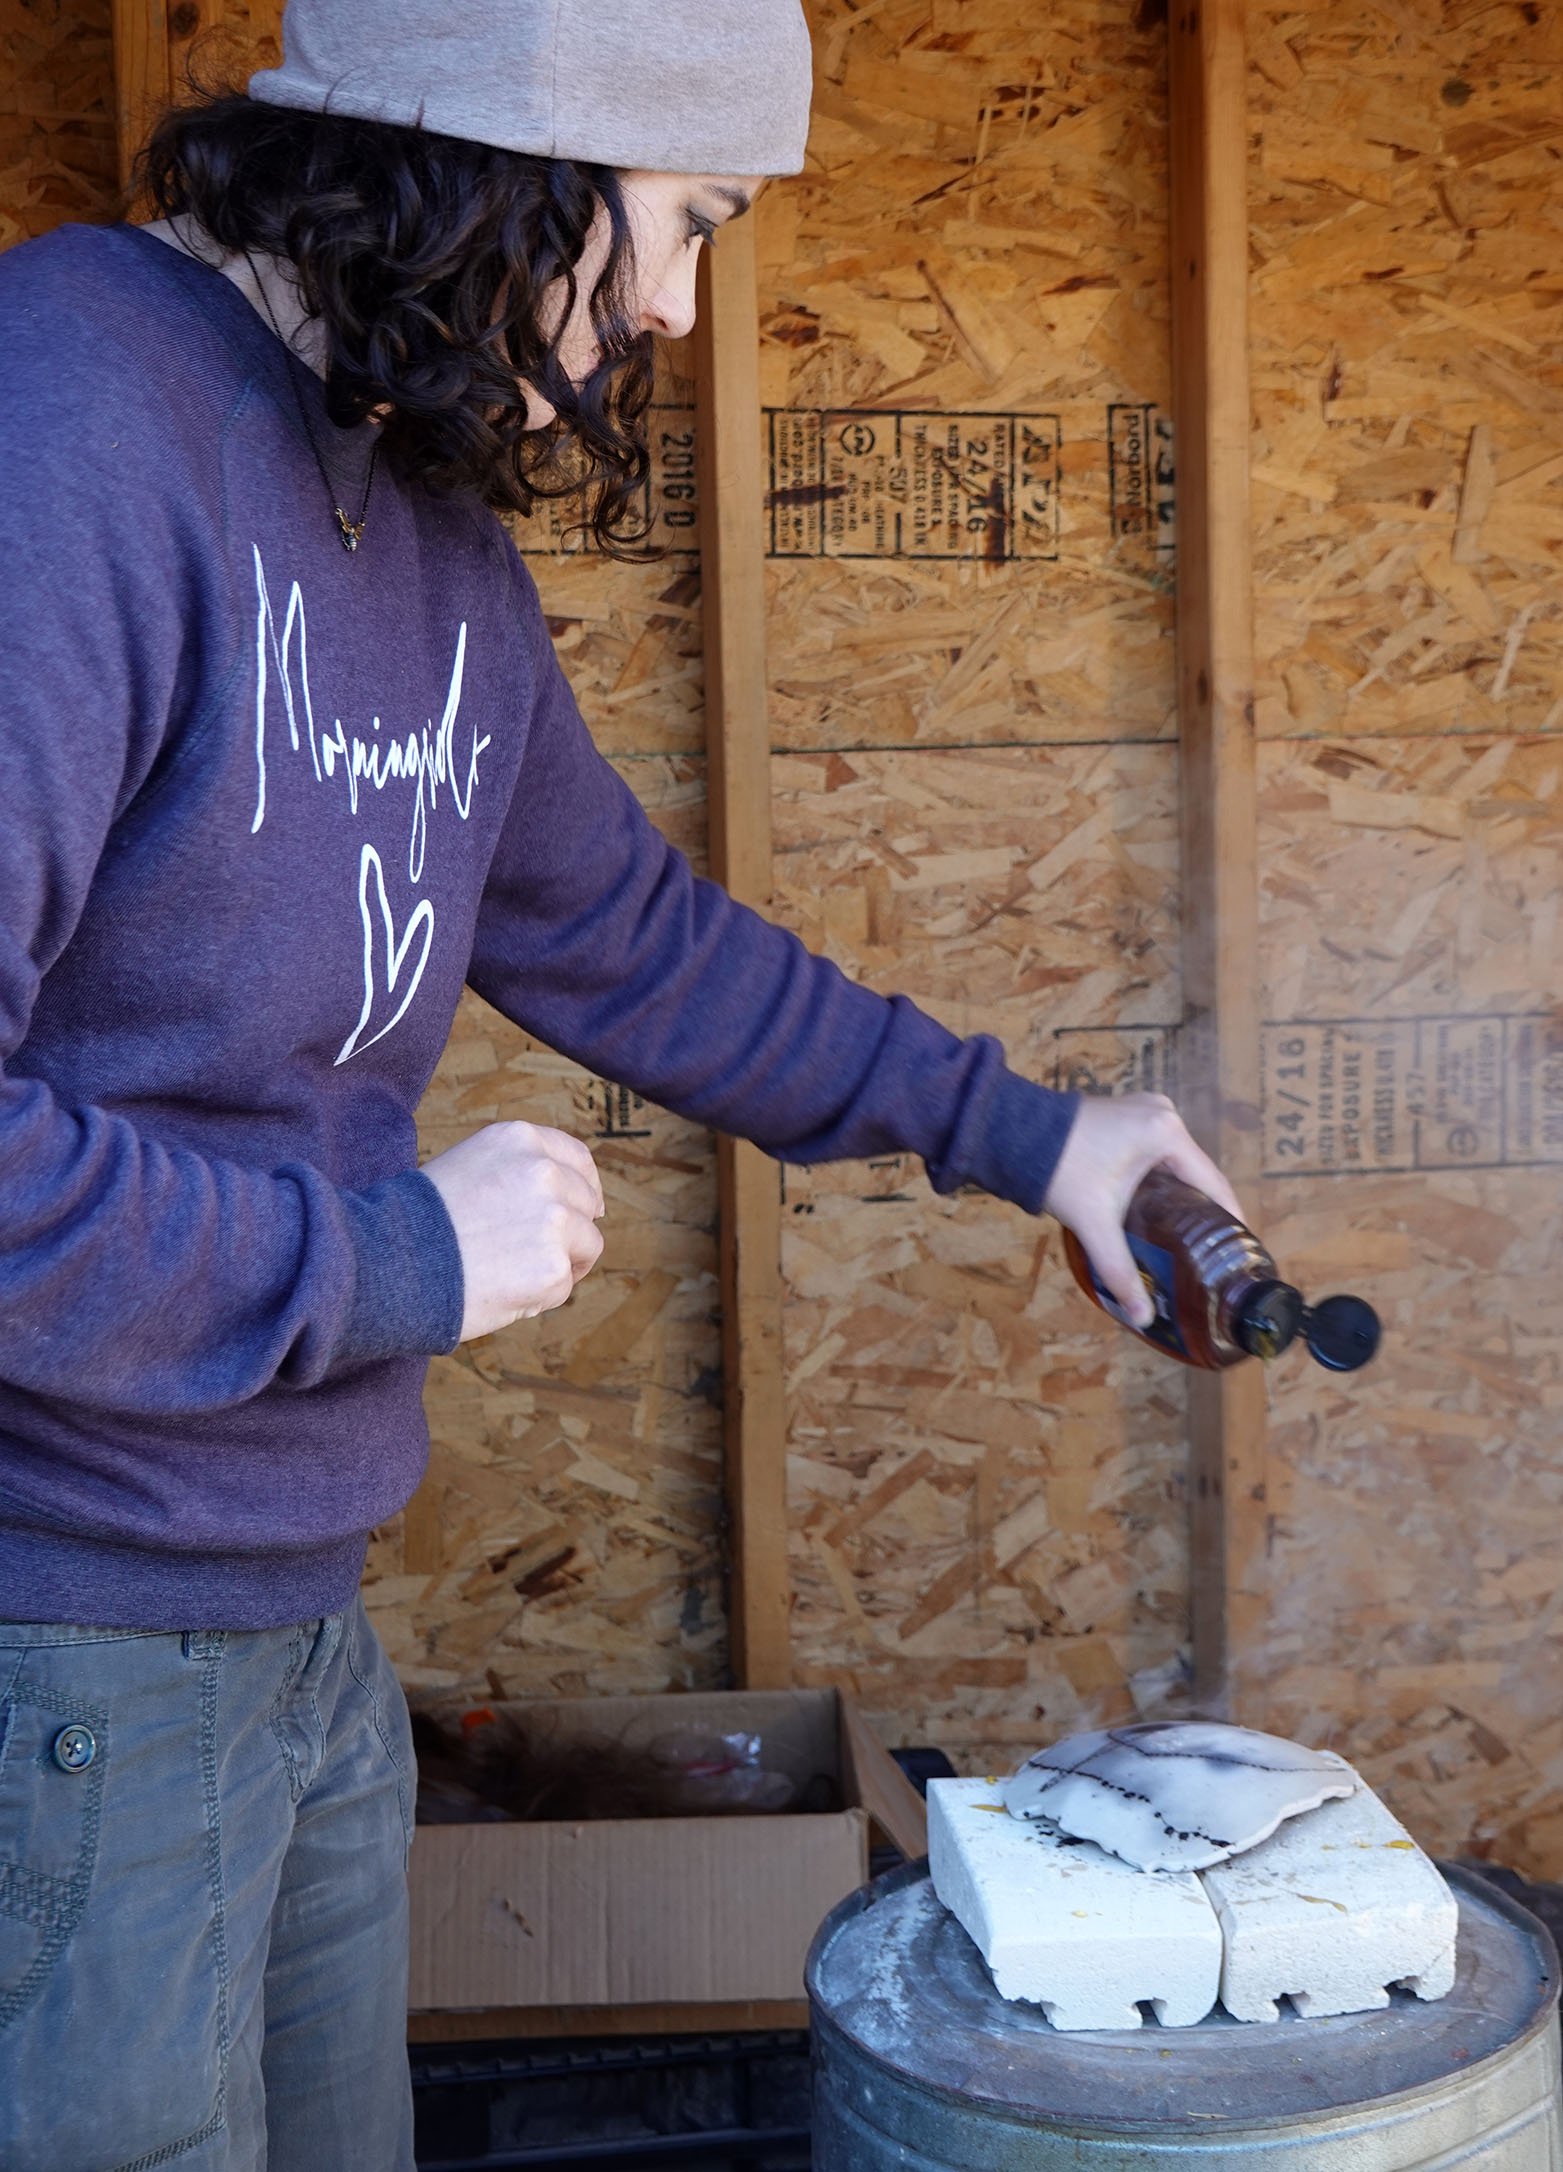
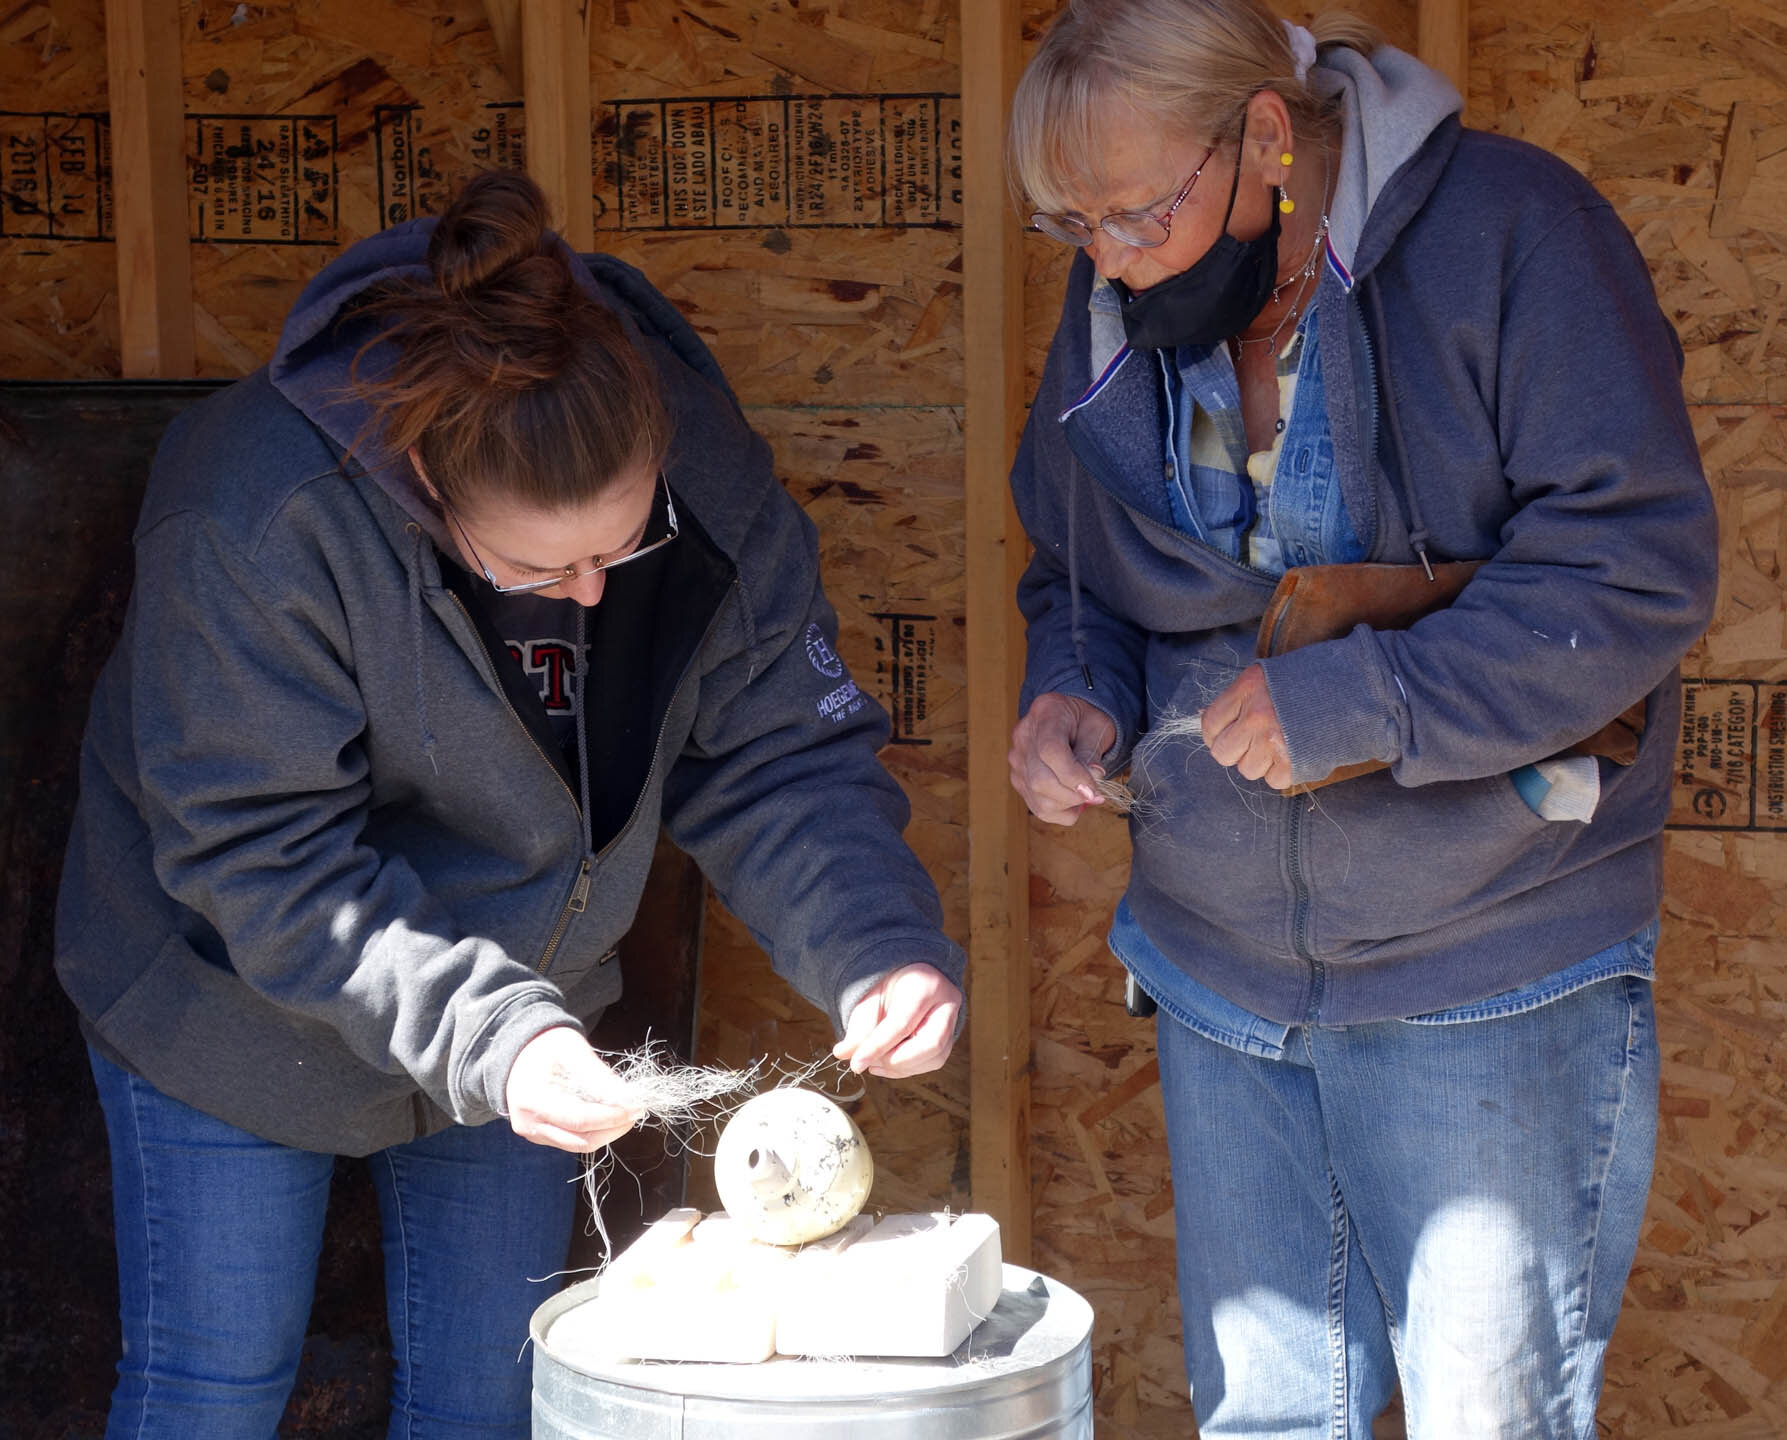
In addition, I learned about honey raku from a ceramist at this year’s ArtSplash festival - it’s basically like horsehair, feather, or sugar raku surface carbonization, but with honey! I brought some along and we tried it out too - though I want to experiment with it some more at future workshops as I was so excited about the obvara opportunity that I only kept one textured plate aside for honey raku.

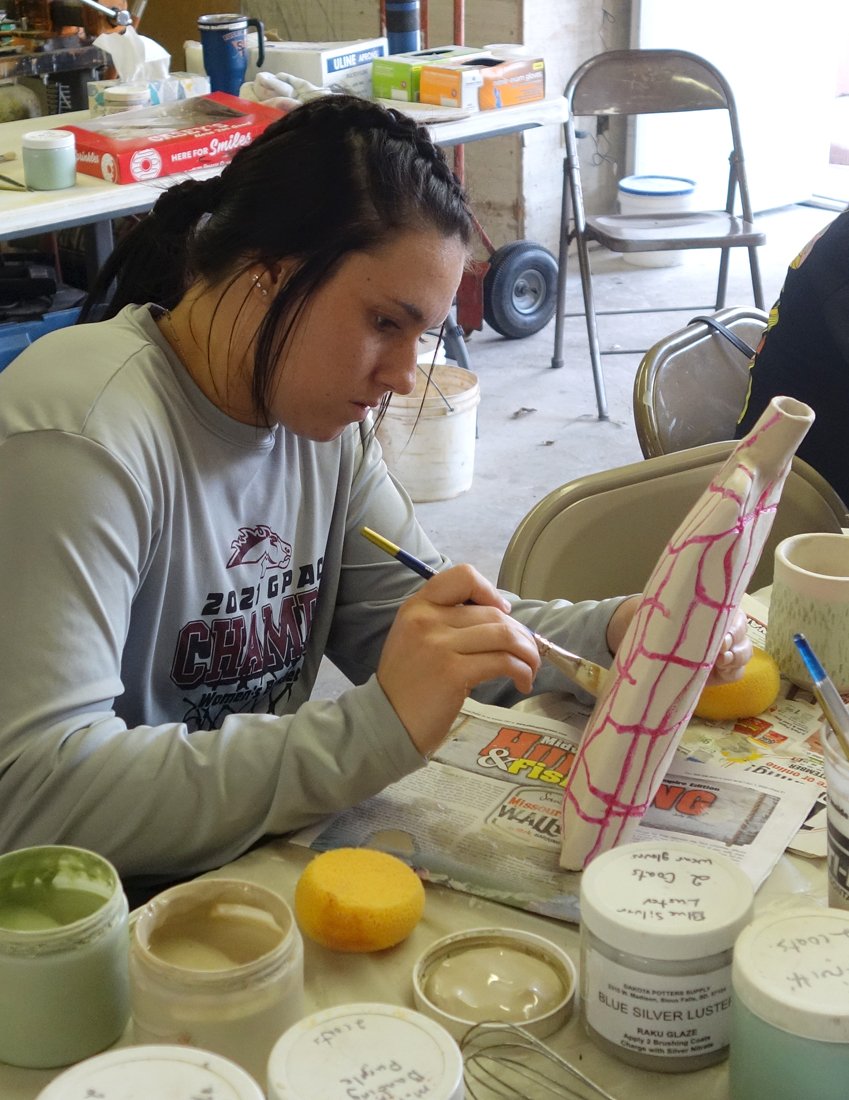
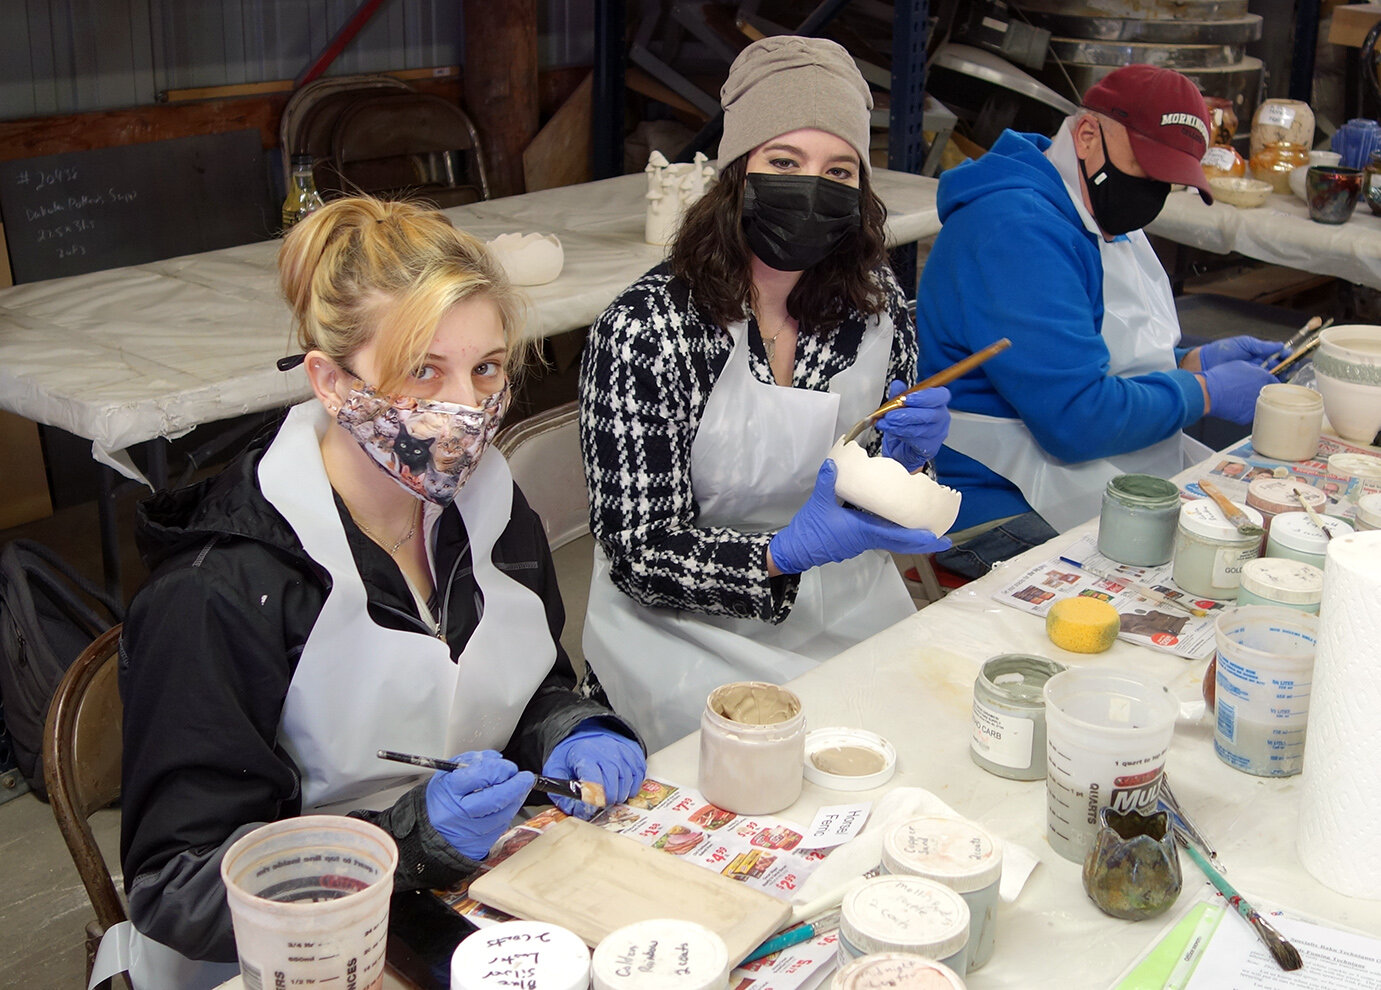
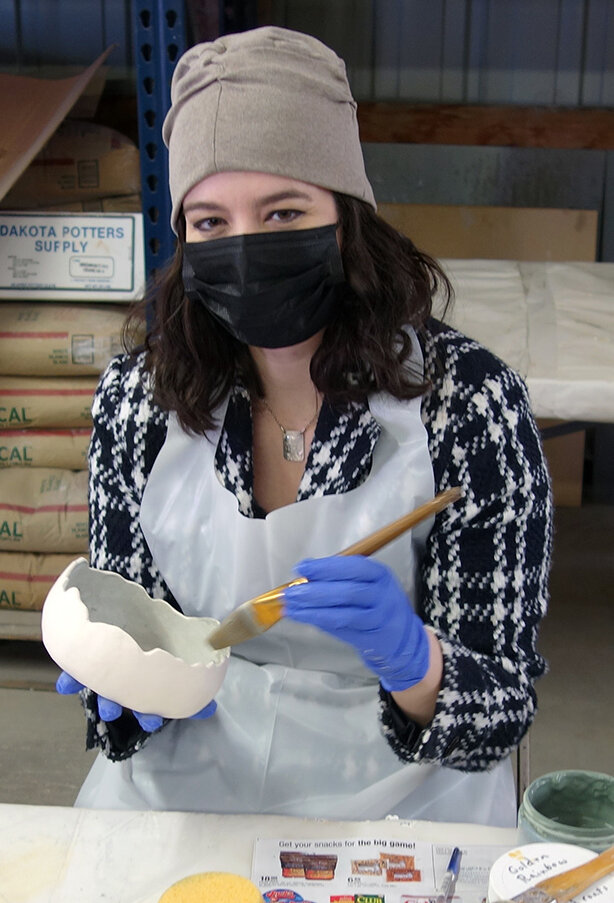
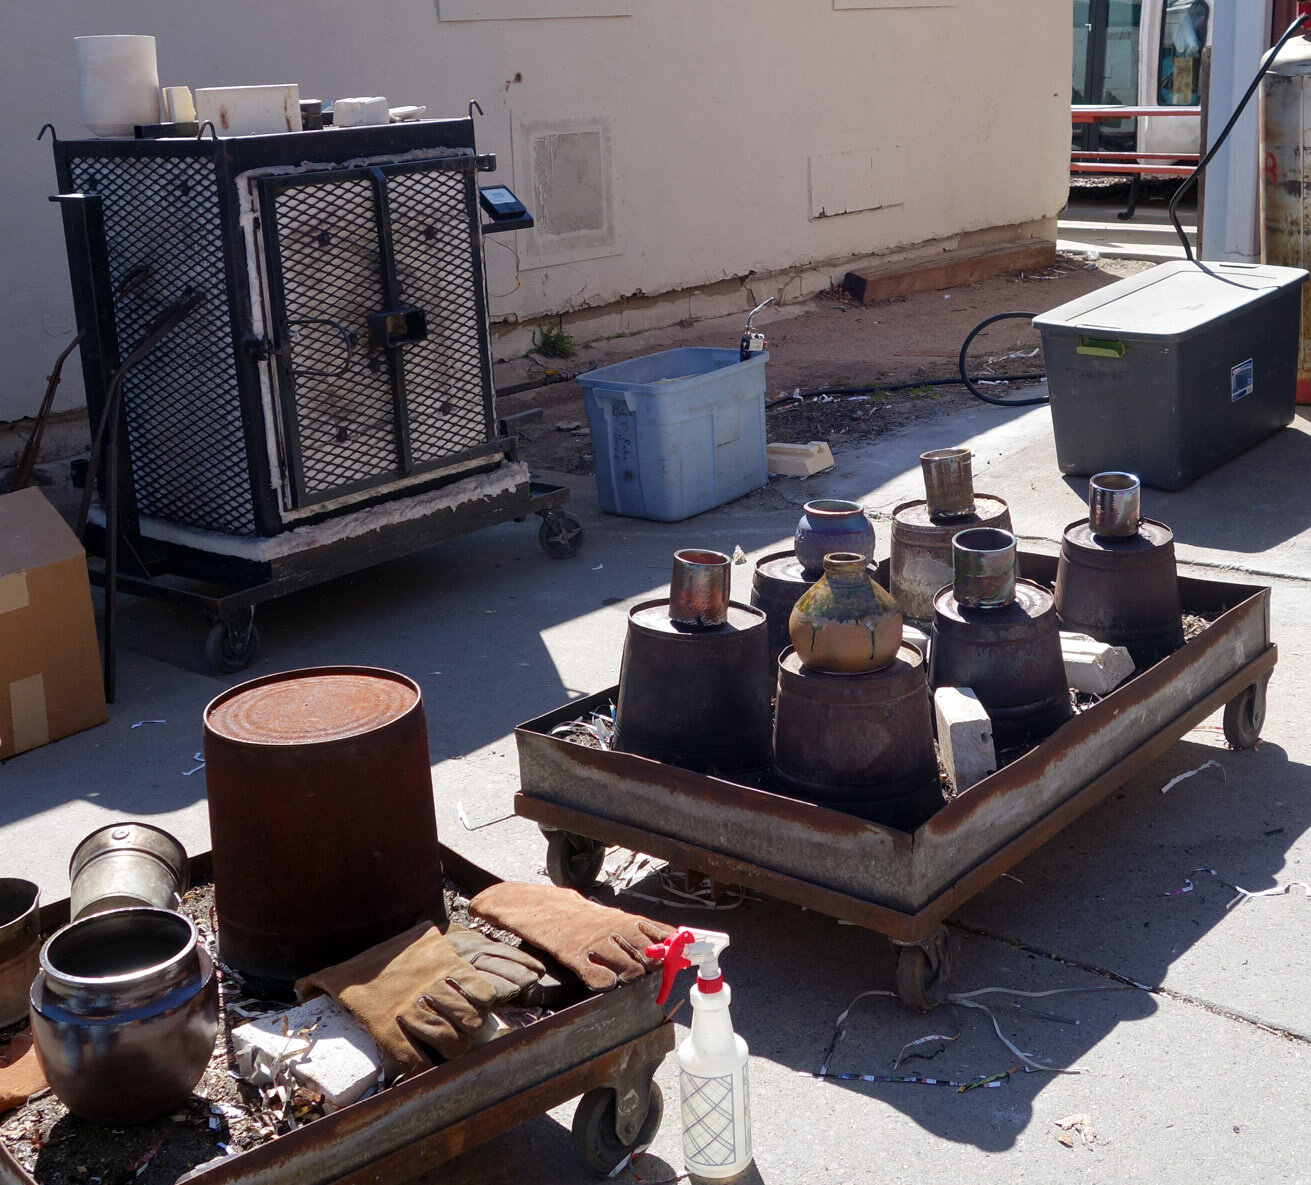
Here are some photos from the workshop itself, soon to be followed by pictures of my finished pieces! I applied for and was granted funding from our Faculty Development Committee to help with my costs, so I made and brought 18 pieces along this go-round - both to make up for any thermal shock victims, and because I didn’t need to apply glaze to my obvara or honey raku ceramics so I could get more processed compared to when I need to apply 1-8 layers of glaze to each piece on-site before firing (for crackle and copper glazes or ferric chloride dips). If you’ve been following my raku workshop production, 18 is about double the number of ceramics I typically aim to bring.

April 2023 Raku Crackle and Saggar Ceramics

This is my second post reviewing my April 2023 raku workshop ceramics! This one will cover two of my three “baked potato” aluminum foil saggar-fired ceramics and my clear crackle piece.

Based on my experimentation using plants at my April 2022 raku workshop, I only had real luck with saggar firing Muehlenbeckia axillaris, colloquially known as Creeping Wire Vine. I therefore used it again! Below is a plate that was dipped in three coats of ferric chloride and then wrapped in the vine and then aluminum foil and fired. The Muehlenbeckia axillaris impact is relatively subtle because it mostly went white to medium gray, but the plate overall turned out well. The very first time I did this “baked potato” technique, I used a matte clear acrylic spray. The second time, I went with gloss. I didn’t really love either, so this time, I went with applying a kitchen wax. I really like the way the wax looks, so I think that’ll be the winner moving forward!

Next, I did the same process with a vase - on this piece, I also sprinkled just a little sugar on as well for some small-scale spotting in the design. This one’s interesting as the Muehlenbeckia axillaris is more apparent, and it produced the full value spectrum on the same vase; the top vine piece is white to light grey, while the bottom vine carbonized a lot more and turned medium grey to black.

And finally, I chose to do a clear crackle on a small, necked vase. Handbuilding necked vessels is tricky, and I complicated matters with this piece by leaving my building process evident on the outside to contribute texture (while smoothing it for structure and stability on the inside). This was quite risky; I knew there was a good chance this piece could crack or break with thermal shock due to the thinner seamed areas. However, I was fortunate - it made it through the firing completely unscathed! I wanted to enhance the seams and stress spots that I had intentionally retained, so I painted over each of them and the lip of the vase with wax before glazing with Clear Crackle on the exterior. As I’ve explained before, this means the glaze doesn’t stick to the waxed areas, and the wax burns off in the kiln. The exposed, unglazed clay body then carbon traps the smoke in the post-kiln reduction atmosphere, turning a dark, smoky grey. I finished the piece by putting kitchen wax on the unglazed areas.

Again, none of the “cracks” in the below piece are structural - they are all decorative and this vase is fully sound.

April 2023 Raku Copper-Glazed Ceramics

I’m going to do a few different posts about my April 2023 raku workshop pieces because there’s a lot of good work to share. In this first one, I will review my copper-glazed pieces!

Below is a platter, which has some texture on its surface; I imprinted an equine femur into the clay body thanks to bones I was allowed to keep using from the LSU SVM anatomy lab. I first glazed it with White Crackle, then wiped the white crackle back down so that it stayed in the impressions, and also applied it to the rim. Then I glazed over the top with Copper Sand. I thought this would impact the coloration, but the white crackle (at least at that thickness) only really affected the sheen; where it was applied the glaze is glossy rather than matte. Though it’s not precisely what I envisioned, it’s a strong piece.

Next, we have a small, leaning vase. I chose to apply wax to the rim and throat. Then I glazed the exterior with Copper Sand, keeping in mind that the glaze doesn’t stick to the waxed areas. In the kiln the wax then burns off, allowing the unglazed clay body to carbon trap the smoke from the reduction afterwards. I was planning on staining the raw clay, but I ended up holding off as the variably smoky surface is interesting in its own right. I need to actually decide, as I will want to wax the raw surface if I don’t stain it.

This is probably the biggest of my raku pieces this go-round. This vase vessel has Litho Carb on the inside and Copper Sands on the outside. (I really like Copper Sand as it’s pretty predictable in its behavior for me, which is a rarity when doing raku.) The interior lip has an abalone-like appearance!

Next, we have my “golden bowl.” This piece is glazed with Dakota Potter’s new Peacock on the interior, and once again uses Copper Sand on the exterior. One of my students kept hovering her hands above it and singing reverential “aaah” noises!

And below is my final copper raku piece of the workshop! This one is an oddball shape; I wanted to push myself to make some handbuilt, necked vessels and in doing so created this flora-inspired vessel. I glazed it with Litho Carb on the inside and Midnight Luster on the outside.

April 2023 Raku Workshop at Dakota Potters Supply

Now that I’ve gotten the last workshop’s pieces published, I can tell you about the one I just finished! It took place on Saturday, April 22, 2023. Despite that late April date, the weather was decidedly more wintry - it was 34 degrees Fahrenheit with snow on the ground when we arrived, and I think it warmed up to around 40 by the time we left 8 hours later. Fortunately, the inside of the garage/storage room we glazed within got a bit warmer with the help of some space heaters, but I was still happy I wore my snow boots for extra warmth!

Possibly due to the weather, though, I had my best raku luck yet! I brought nine pieces, and all nine survived without even one crack - and my glaze results all fell on a scale of good to fantastic. I’ll share those with you shortly, but here are some photos from the workshop day itself first. In attendance from Morningside University was me, our ceramics instructor Paul Adamson, alumna Deb Allard and student Hannah Nichols.

My April 2022 Raku Ceramics

I just completed another raku workshop this past weekend, and as I was looking through my files I realized I’ve not yet published the raku pieces I made at my last one in April 2022. Clearly I should do that before sharing my latest workshop photos and products!

On my April 2022 raku workshop, I wanted to try to carbonize various plant fronds or leaves onto the surface of my pieces. This was a complete experiment, and it was mostly a failure. I tried a variety of ferns and tropicals out, and one after another, they burned away without leaving a trace. Here are some plates that I attempted to salvage after that didn’t work out. With the first, I pivoted to a sugar and horsehair application. With the second, I tried to use ferric chloride to stain the surface with plant leaves that weren’t carbonizing, but they just left those not-terribly-appealing ferric chloride splotches.

Once I realized those techniques were not working, I tried etching fern fronds onto a plate in a “baked potato” aluminum foil saggar firing; it kind of worked, but I think it’s underwhelming. Since none of those plant techniques were doing super well, I just put a litho carb copper glaze onto my final plate.

I also made a rounded crackle vessel and the glaze turned out really well, but the ceramic physically cracked due to thermal shock so it’s got that permanent asterisk associated with it.

I glazed this spherical vessel with copper glazes (Copper Sand is on the exterior and I think that’s Midnight Luster on the interior), and it came out looking like a little planet! This one’s a definite favorite.

And finally, the one plant piece that turned out beautifully and justified all the failures: this is another “baked potato” saggar firing, and the Muehlenbeckia axillaris vines I used carbonized perfectly into this vase’s surface.

I also lost a large platter-like vessel (it broke into quite a few pieces and was not salvageable) and had another plate fuse with a kiln brick and lose part of its bottom. I eventually recycled that broken platter-like piece in my rock tumbler!

April 2022 Raku Workshop at Dakota Potters Supply

Here are some day-of photos from the April 2022 raku workshop I attended at Dakota Potters Supply in Sioux Falls along with Morningside ceramics instructor Paul Adamson and students Lauren Hedlund and Debora Allard. The photo of finished works are some of the student pieces - I’ll post separately about my own!

Cross Off Another Bucket List Item: I've Done Raku!

I’ve always wanted to do raku firing ever since I first saw a piece of raku pottery and learned of the technique as a child - but it’s never been an opportunity I could take advantage of until now! A few months ago I attended a Saturday raku workshop at Dakota Potters Supply in Sioux Falls, SD, joined by my ceramics faculty member Paul Adamson and graduating senior Anna Uehling. Raku, first practiced in Japan, is a low-firing technique that makes use of wide temperature swings, reduction, and carbon trapping to create some really ornate artwork. Due to the low-fire nature of the process, the pieces are mostly decorative; they are neither watertight nor food-safe.

Here is a slideshow of the day’s adventures. This post will be followed by a series of posts exploring each of the three different glazing techniques I tried! There were five different techniques available, and I was most interested this first go-round in three of them.

  • Crackle glazes (either clear or white), with the goal that carbon gets trapped in the crackles

  • The “baked potato” technique, wherein you coat the bisqueware in ferric chloride, sprinkle it with sugar, salt, and/or horsehair, and then bundle it up in aluminum foil like a baked potato before firing it

  • Copper glazes

  • Ferric chloride spray

  • Horsehair and/or feather application