white crackle

April 2023 Raku Copper-Glazed Ceramics

I’m going to do a few different posts about my April 2023 raku workshop pieces because there’s a lot of good work to share. In this first one, I will review my copper-glazed pieces!

Below is a platter, which has some texture on its surface; I imprinted an equine femur into the clay body thanks to bones I was allowed to keep using from the LSU SVM anatomy lab. I first glazed it with White Crackle, then wiped the white crackle back down so that it stayed in the impressions, and also applied it to the rim. Then I glazed over the top with Copper Sand. I thought this would impact the coloration, but the white crackle (at least at that thickness) only really affected the sheen; where it was applied the glaze is glossy rather than matte. Though it’s not precisely what I envisioned, it’s a strong piece.

Next, we have a small, leaning vase. I chose to apply wax to the rim and throat. Then I glazed the exterior with Copper Sand, keeping in mind that the glaze doesn’t stick to the waxed areas. In the kiln the wax then burns off, allowing the unglazed clay body to carbon trap the smoke from the reduction afterwards. I was planning on staining the raw clay, but I ended up holding off as the variably smoky surface is interesting in its own right. I need to actually decide, as I will want to wax the raw surface if I don’t stain it.

This is probably the biggest of my raku pieces this go-round. This vase vessel has Litho Carb on the inside and Copper Sands on the outside. (I really like Copper Sand as it’s pretty predictable in its behavior for me, which is a rarity when doing raku.) The interior lip has an abalone-like appearance!

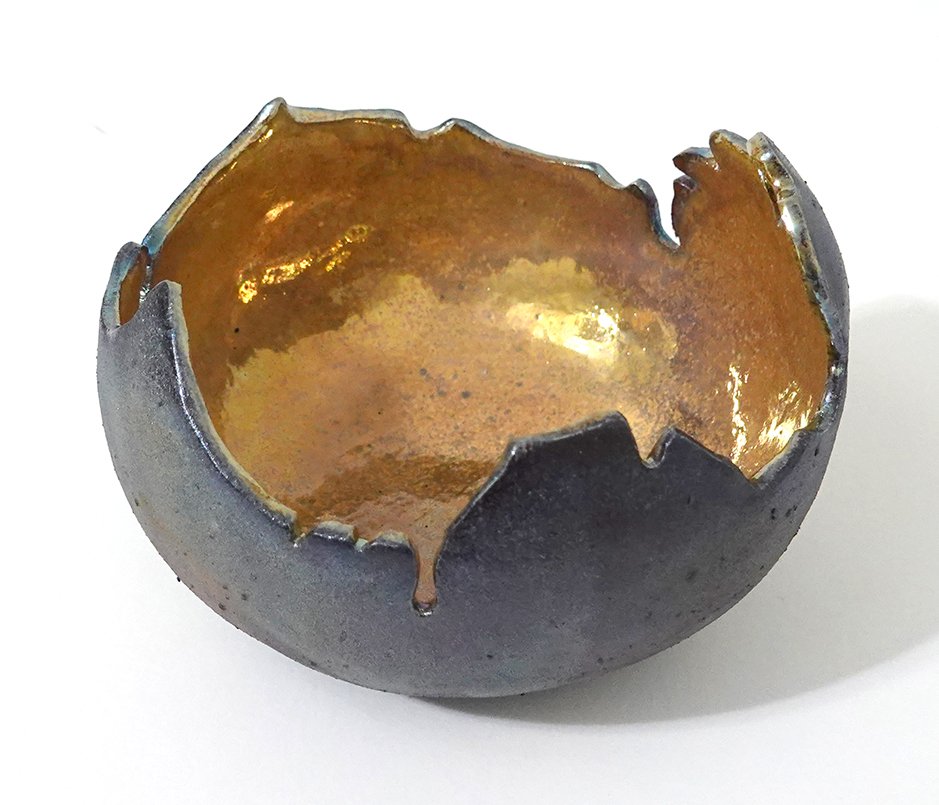
Next, we have my “golden bowl.” This piece is glazed with Dakota Potter’s new Peacock on the interior, and once again uses Copper Sand on the exterior. One of my students kept hovering her hands above it and singing reverential “aaah” noises!

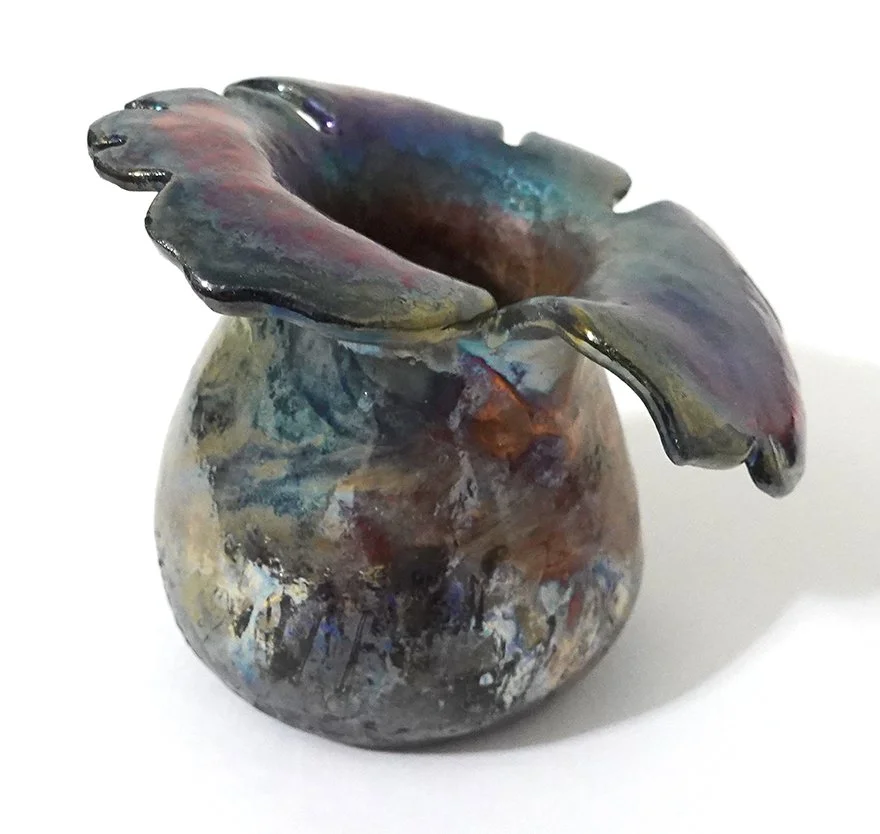
And below is my final copper raku piece of the workshop! This one is an oddball shape; I wanted to push myself to make some handbuilt, necked vessels and in doing so created this flora-inspired vessel. I glazed it with Litho Carb on the inside and Midnight Luster on the outside.

More Raku!

You got a sneak peek at some of my recent raku work in my exhibition shots from Functional Aesthetic, but here is the full reveal!

Above are three photos of one “baked potato” bowl. I used my own hair again as well as sugar for the carbonized marks on this piece.

This vase is very difficult to photograph well; it’s currently on exhibit, but once it comes back I’m going to see if I can capture it a bit better digitally. A couple of my friends who viewed the show said this was their favorite piece of mine. The way the glaze dots turned out reminds me of inset abalone shell.

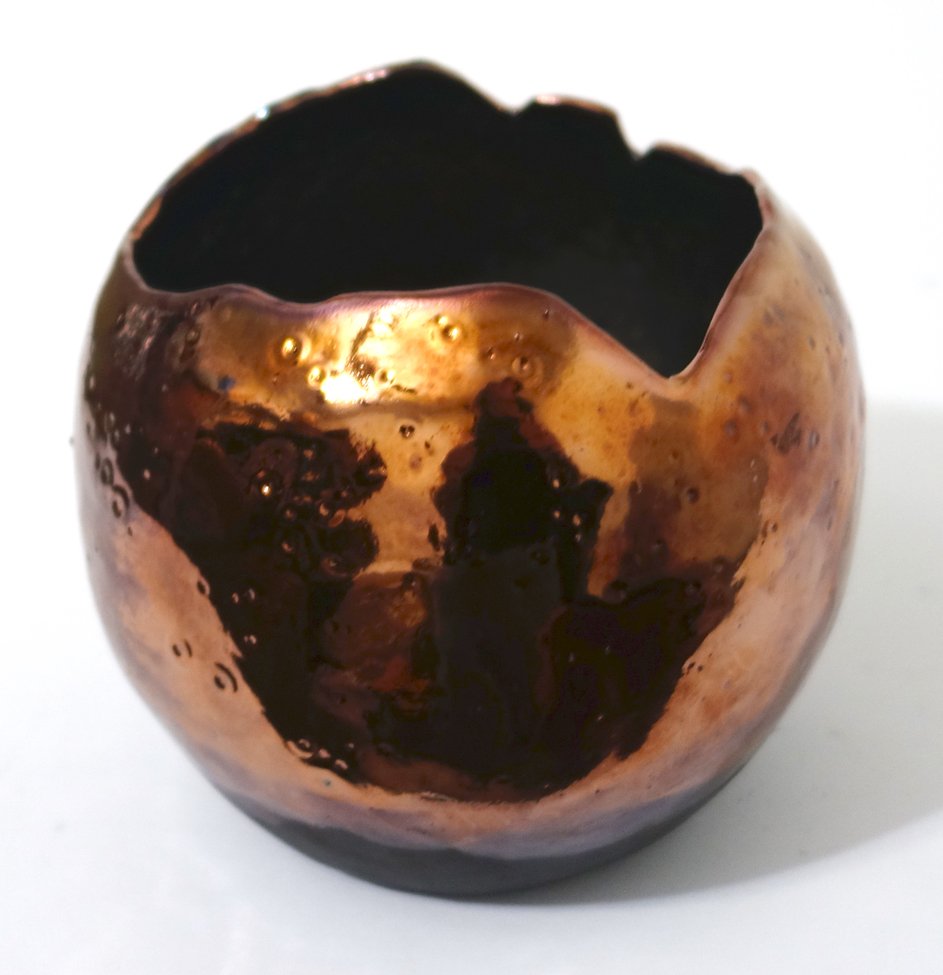
This piece certainly didn’t turn out as planned; I experimented with a turquoise crackle glaze, but I really did not like the way the color came out, so we went ahead and re-fired it. I much prefer this hammered copper look!

This above bowl is decently large, and I chose to do the outside in a relatively matte glaze while the inside is a high gloss. It gives me dragon egg vibes. The Functional Aesthetic curator placed this piece in the choicest display spot, and I learned today that it was sold! I did see a viewer admiring it and gesturing to and around it at the reception, so I wonder if she’ll be providing its new home or if a different patron snapped it up.

This above vessel is kind of football-shaped, and its surface reminds me of a somewhat aged/stained city map. It has my own hair and sugar burned into the white crackle surface. I am quite into this piece.

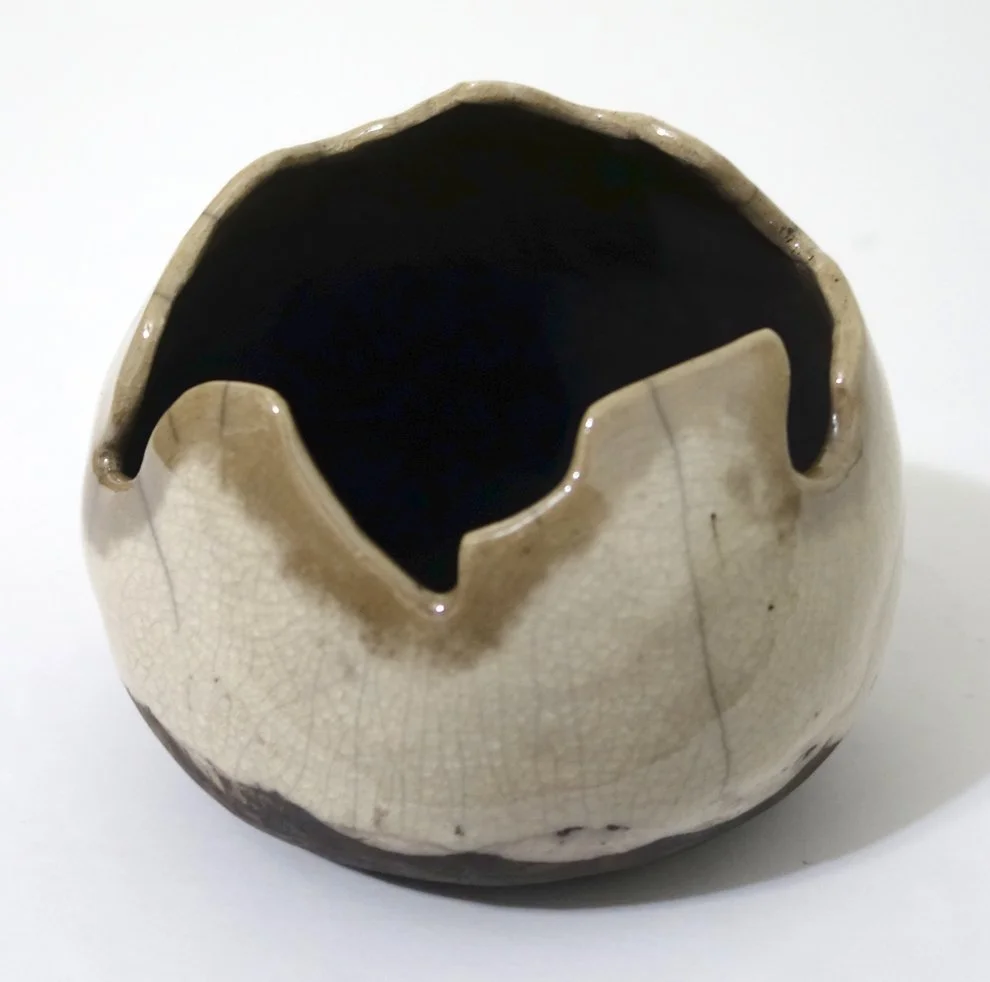
I was really excited about how this piece turned out, as it’s adding into the “broken egg” series of clear crackle pieces I’m developing. The shape is hard to convey in photo, but it leans in a way that feels quite anthropomorphic - at least to me!

This bowl was intended to be another in the “broken egg” series, but it cracked coming out of the kiln due to the thermal shock and my thin walls. That’s more literal than I’d like for the “broken eggs” to be. It is still in one piece, but even after I epoxy over the crack (which I plan to do to bolster its structural integrity), it will have that weakness as it’s a fairly sizeable crack. I’m not sure if given the severity of the crack if I’ll want to display this piece, but if I do I plan to list it as NFS (not for sale).

And here is yet another casualty; however, this football-shaped vessel’s crack is more minor.

First Raku Workshop Pieces - White Crackle Edition

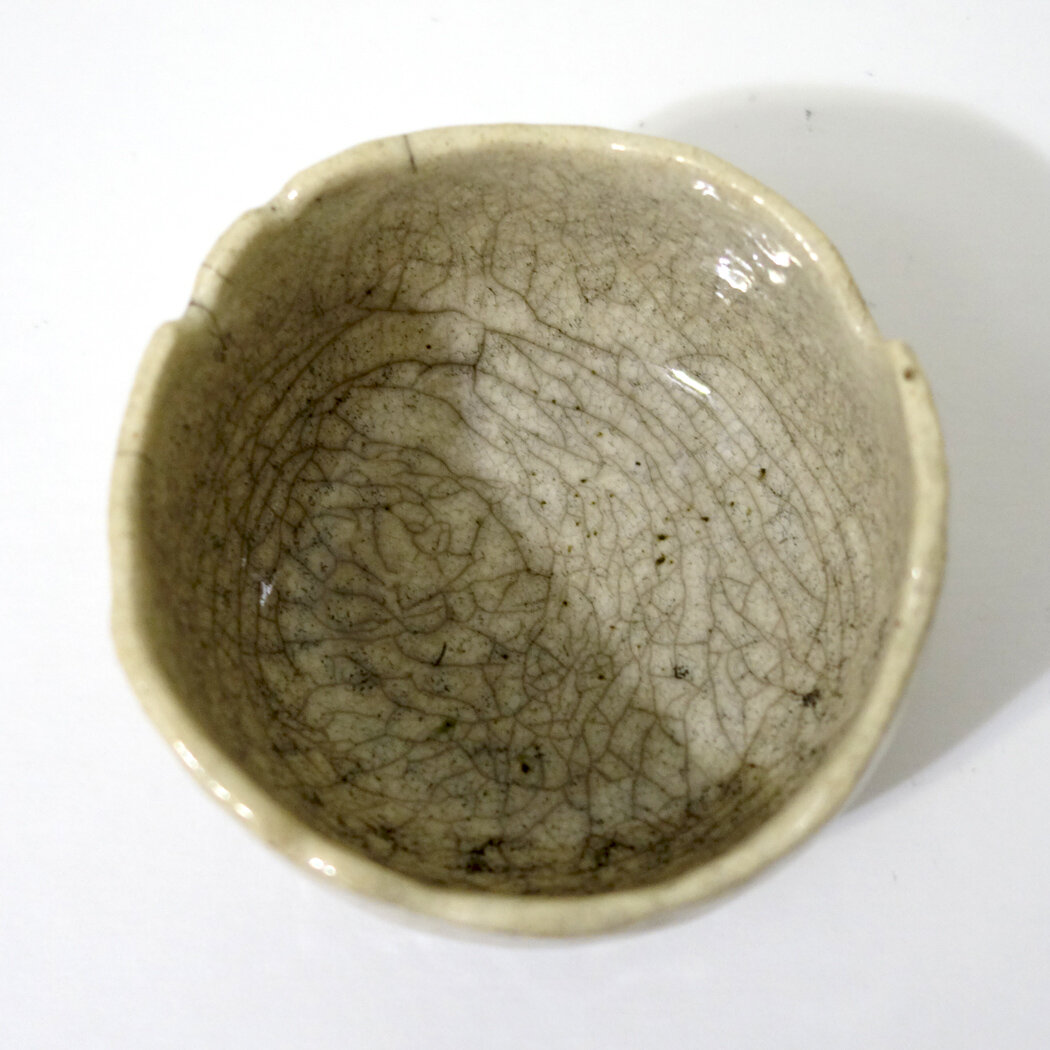
I’m just going to call it how I see it; the white crackle pieces I got out of this first round of raku firing were by and large underwhelming. The instructions say to put three coats of the white crackle glaze on; I think my interpretation of what three coats should be was thinner than the intended result. Next time, I plan to do at least five coats. However, it is also the case that in order to deter cracking, we did not plunge these pieces into water upon removing them from the kiln. Though dunking into cold water does increase the chances the whole piece shatters, it will also increase the crackle effect in any survivors. Not doing so may have also limited the resulting crackle in these ceramics.

I did apply and rinse off India ink on all the below pieces in a post-process attempt to heighten the crackle’s contrast; this did have a very slight effect, but it didn’t do nearly as much as I’d hoped.

Below is the first piece; it’s a small dish, and honestly, the crackle is more impactful in these photos than it is in person. To me, it’s not that interesting of a piece, which is a shame as the costs of the process make it more expensive than I think its aesthetics merit.

The second piece has a similar aesthetic; it is perhaps a bit stronger, but still not as powerful in the crackle as I’d like. This one is a planter; raku is not watertight, so I plan to coat the interior with Thompson's WaterSeal to hopefully increase longevity before planting inside.

The third piece is much the same as the second, including it being a planter. The India ink soaked into the general glaze body more on this one, though, in a kind of pitting or freckling effect.

I had completed all of my white crackle glazing on these pieces before I fired any of them, which I now realize was a mistake; I should have glazed and fired one and then adjusted my process for the subsequent pieces. Admittedly, that is only somewhat possible as there are a limited number of firings per workshop, but it is a strategy that I plan to consider moving forward.

Finally, I present to you the only white crackle piece from this workshop that I consider to be successful! A combination of luck and possibly forgetting how many coats of glaze I applied and thus erring on the side of adding another contributed to this result. The brownish tinge near the top rim is an artifact of the smoke staining the surface; it is easily removable in the first 24 hours of the ceramic’s post-glazing life but then settles in. I somewhat thoughtlessly removed it from all the above pieces, but with this one I realized I could use it as a design element and didn’t remove it all. The strong black at the base is an artifact of the burning substrate (newspaper, in this case); it too could have been readily removed early on in the process but I again thought it added a dynamism to the piece. This one, too, is a planter, and will be receiving the Thompson’s WaterSeal on the interior.
I am still intrigued by the possibilities the crackle glazes (white and clear are the most standard options; turquoise is a rarer possibility as well) offer, but I will be more conservative moving forward with this glaze type due to this overall turnout on my first batch of attempts.