mosaic

Phoenix Athens Residency Artwork 8

The wooden spool end before the mosaic and concrete.

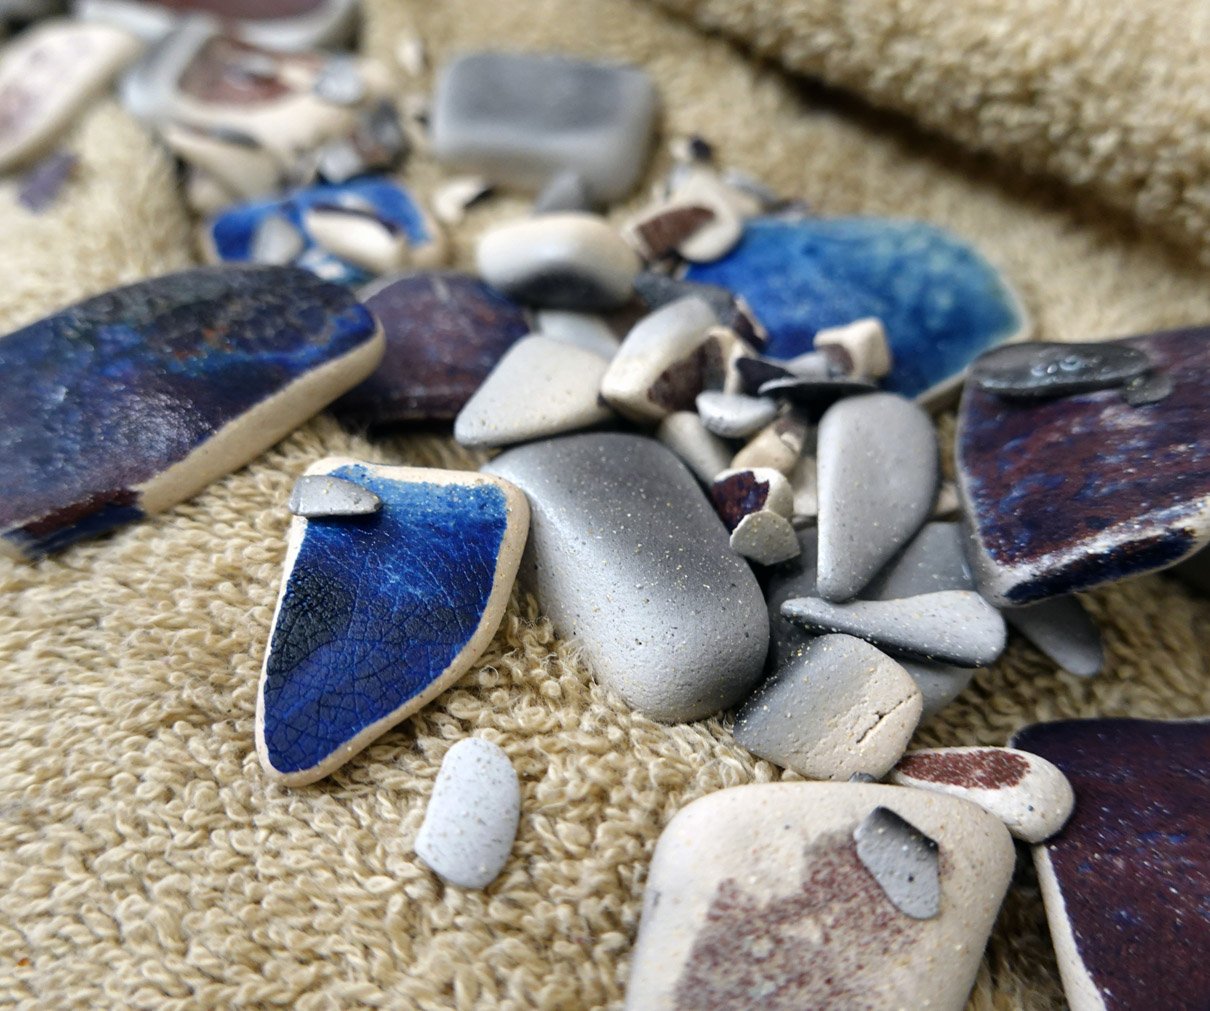
I’m always interested in manmade constructions altered by the environment and time, and when I kept finding broken fragments of marble paving stones, concrete pathing, ceramic tiles, and so forth, I started picking them up. After amassing quite a collection, I decided I’d make a mosaic that referenced some of the artifact displays I’d seen in Athenian museums, so I took the angle grinder with a diamond blade to them to cut them down to at or below my desired height.

I then put one unique piece per type into the second recycled wood round from the electrical spool - this one had the upraised interior wooden frame with a circular outside and a square inside. (To block the holes, I had already cut and glued down a piece of masonite to the back - see the image to the left.) Once I found the layout I wanted, I put a smoother white concrete (compared to the previous large-grogged grey type I used in Realms) in and around it. I thought I probably wanted to paint it, but by this point my show installation was the next day so we just installed it in that mid-way state.

Once installed, my show was up until my last day in Athens, so I then took it down and brought it back to the US. Then I began to test out different possible compositions in Photoshop, and I settled on painting a couple rings of color - the inner gold and the outer blue - around the central composition in a design that references the mati aka evil eye charms. The three cool-colored mosaic fragments in the center are intentionally reminiscent of an eye as well.

After I painted the two rings, they looked too new, so I weathered them a little and made the blue border bleed into the white band inside to soften that edge.

This is Pathways, found marble, concrete, and ceramic paver fragments with acrylic and concrete on recycled wood round, 17.5x17.5x.1.3, 2023.

Shelby Prindaville's Greek pathways mosaic relief.

I Bought a Rock Tumbler!

I’ve wanted a rock tumbler for a couple of years, but not quite enough to commit. However, I have also begun to amass broken ceramics, from raku thermal shocks to glaze fusing with kiln shelves to squirrel casualties (they try to bury nuts in my outdoor container plant collection in the fall, and repeatedly fail while digging up my plants and breaking planters in the process). Some of the broken pieces were favorites, so I just carefully collected the pieces and held onto them. (I did try to glue one planter back together, and realized that just doesn’t work well enough.)

It dawned on me that given my now multi-year interest in ceramics, I’ll have a renewable resource for the rock tumbler beyond an occasional rock harvest. I’ve beachcombed tumbled tiles before and even used them in assemblages, so I know I like the aesthetic - and, of course, the conceptual power of the push/pull between man and nature that creates them. If I make them myself out of my own handmade ceramics, I could generate enough to use the tumbled pieces for magnets or mosaics! I can also use any rejects as top dressing for plants, and I have a near infinite need there as my plant collection is unreasonably large and continuously expanding.

I began to research rock tumblers in early November. At first, I thought I’d just get a hobby one like the entry-level National Geographic model. However, I learned it doesn’t cost that much more to buy a quality version. I decided to go with Lortone as the maker. I wanted a rotary style - vibratory models also exist, but for my ceramic purposes I need the rotary tumbling action as vibrations are more helpful for surface polish while tumbling is what knocks down harsh edges.

Most rock tumbling aficionados recommend a double-barreled design, but those were sold out and I imagined it might take several months for stock to replenish given holiday demand - I didn’t want to wait that long! I considered going for a bigger volume barrel next, but then I thought about the quantity of material I have to do at any one time and in reality, it’s not that much. I eventually settled on the Lortone Model 3A tumbler. While I think I’d likely have gone with the double-barreled 33B if it’d been in stock, I also think that running two barrels at once is more for those who plan to process mostly rocks rather than ceramics. With rocks, you need to go through several stages of polish to achieve a smooth finish; with ceramics, they start with a smooth glass finish and you just need to knock the sharp sides down! I can do that in just one rough grit tumbling session.

I’ve only owned my tumbler for a few weeks, so I’m still learning, but I’m having a lot of fun and have run through my backlog of broken ceramics already! In trying to find more fodder, I’ve realized I can easily recycle my ash test tiles I created when testing ash glaze recipes for my Whiterock 41.816, -94.646 ceramic collection, so I’m still working on processing those. I love that I now have a use for otherwise already-served-their-purpose ceramics like test tiles too.

Here are some photos of one tumble from start to finish! (You can click into any of the images to see them at a larger size.)