low-fire ceramic processes

Slip Resist Naked Raku Ceramics

This was my first time doing slip resist naked raku ceramics, and it was definitely a learning process for everyone at the workshop, with more experimentation still needed moving forward! I did a fair amount of research the night before the workshop, and I was really glad I did. When we arrived the plan was just to do a one-step slip resist, but I had discovered David Roberts’ ceramics and wanted to try his technique. That required a two-step process (step one: dip into the slip resist, then let dry and step two: dip in clear glaze), which I convinced Wanda to let me do as well.

We began with the one-step system, but it was producing very low-contrast results for everyone. Some of them are still very cool, but I really wanted some full value finishes! As we fired the first of the two-step pieces, we saw that it was garnering better results. We’d already gotten through the majority of the slip resist pottery by then, but we pivoted the last third entirely to the two-step process regardless of whether folks wanted to carve through it. You may recall my last two pieces didn’t get fully fired, so I left them with Dakota Potters to refire another day. I recently got them back and in my opinion they’re the best of the bunch!

I put ten ceramics through the slip resist process; three were one-step and seven were two-step pieces. Unfortunately, we did find the two-step pottery were more likely to suffer casualties in the kiln. One of my two-step ceramics shattered so fully that it was just trashed there. Another blew a chunk of its side out, but is otherwise actually pretty cool so I plan to use a rotary tool to sand down the jagged edge and keep it.

Below I’ll show my eight undamaged pieces! First, two views of my first David Roberts inspired dish wherein I carved through the two-step surface to leave black lines:

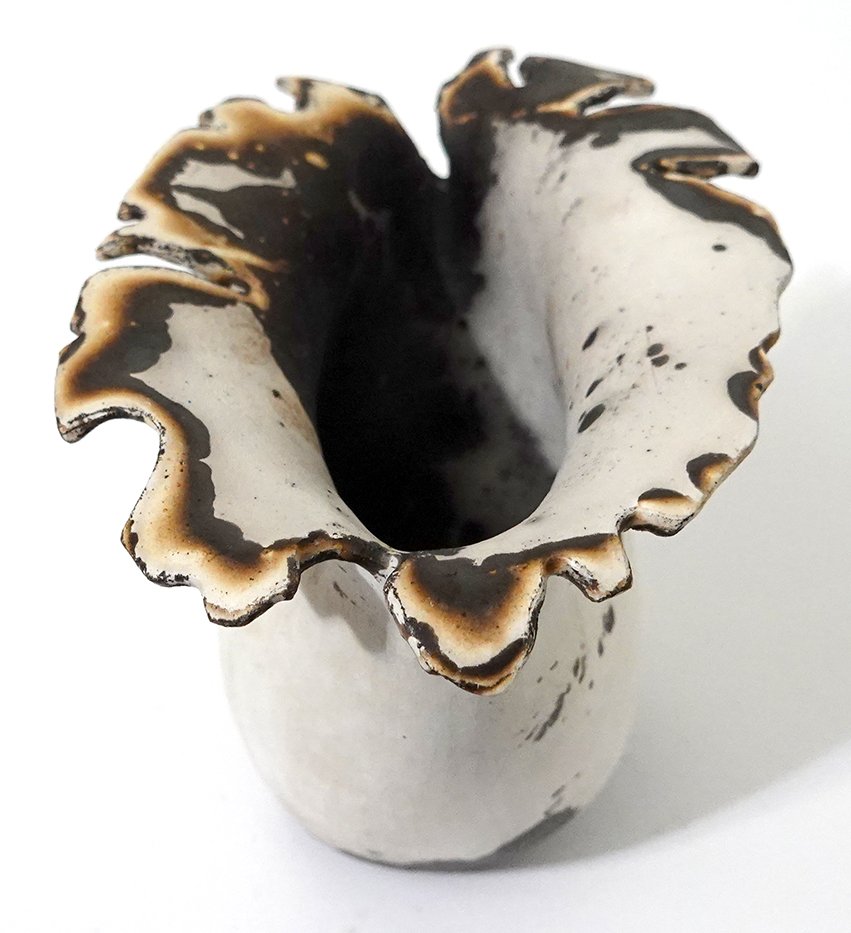
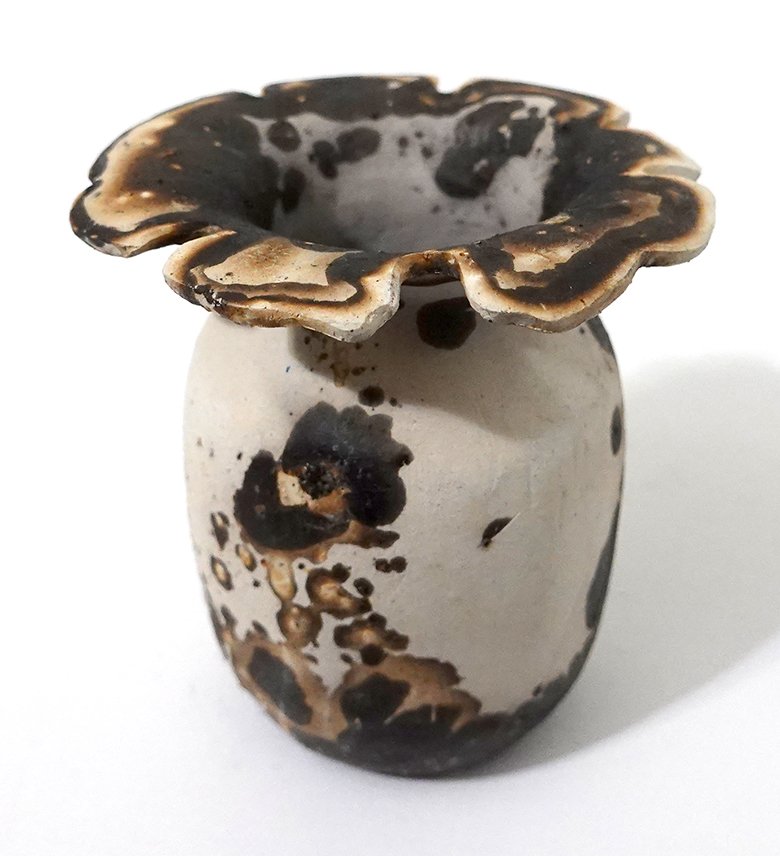
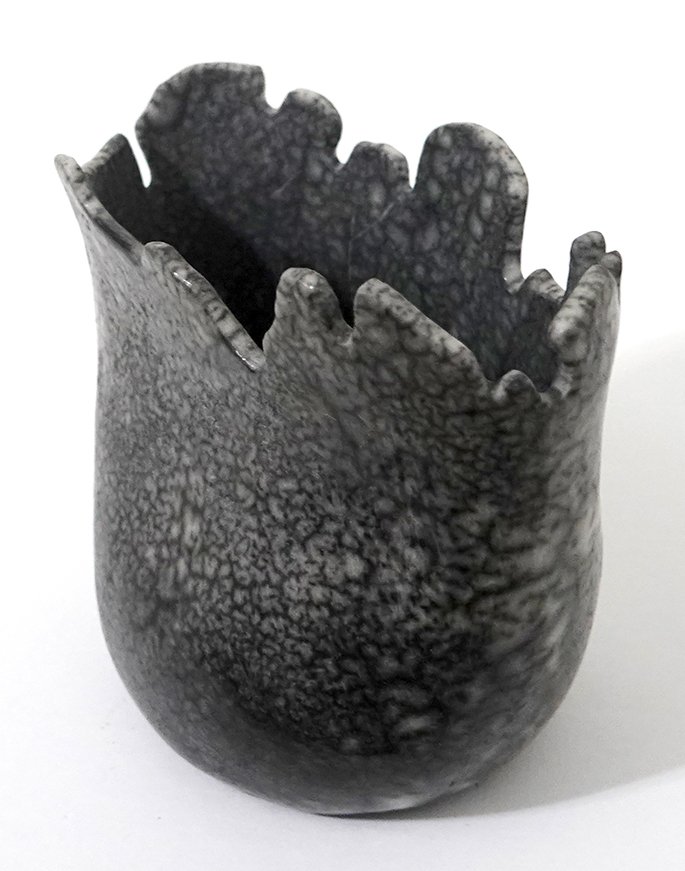
Next, one view each of a one-step vase and bowl:

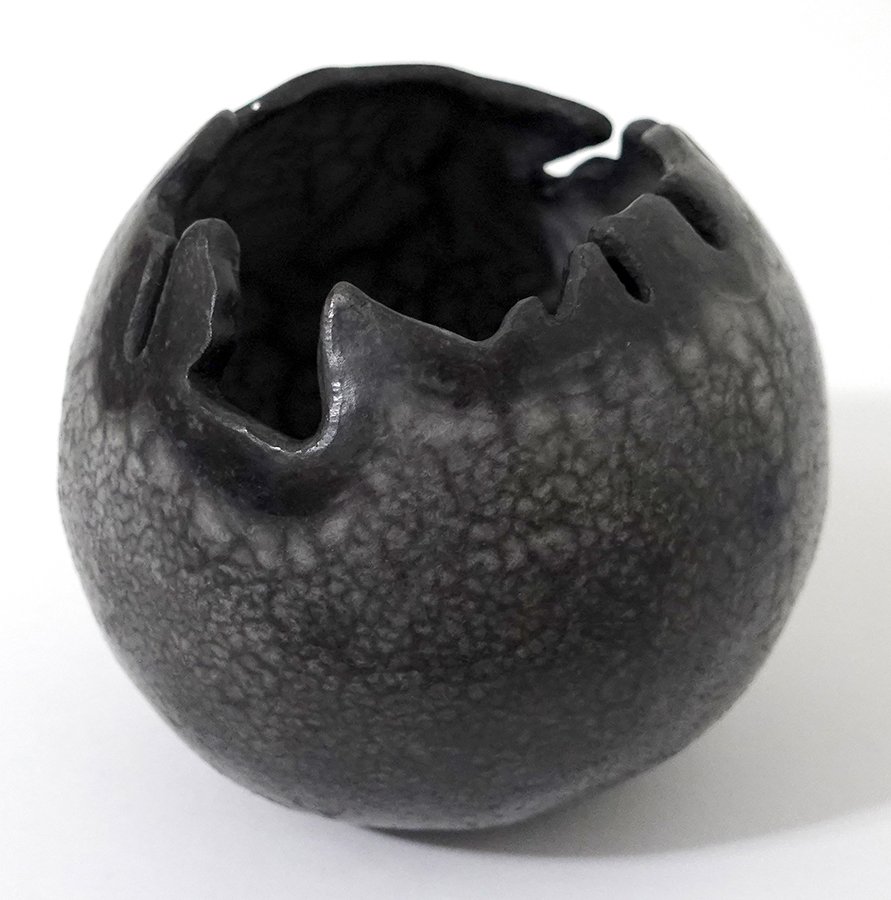
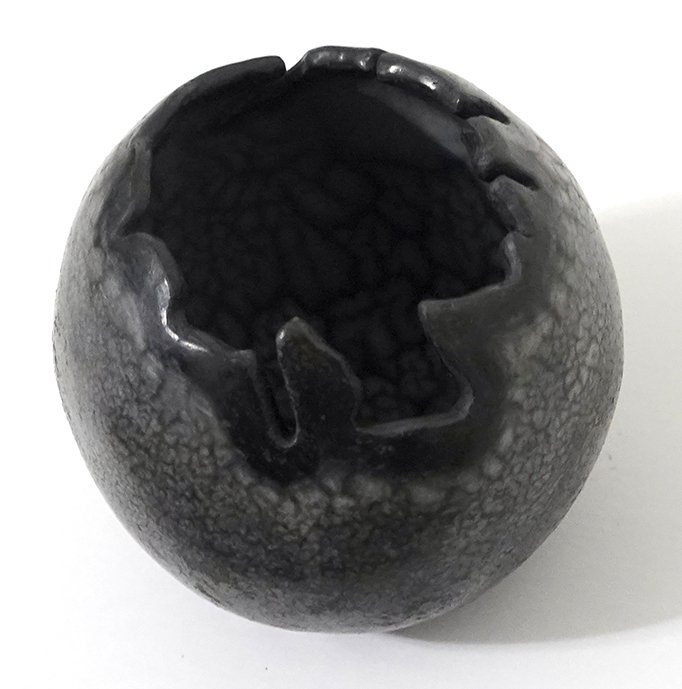
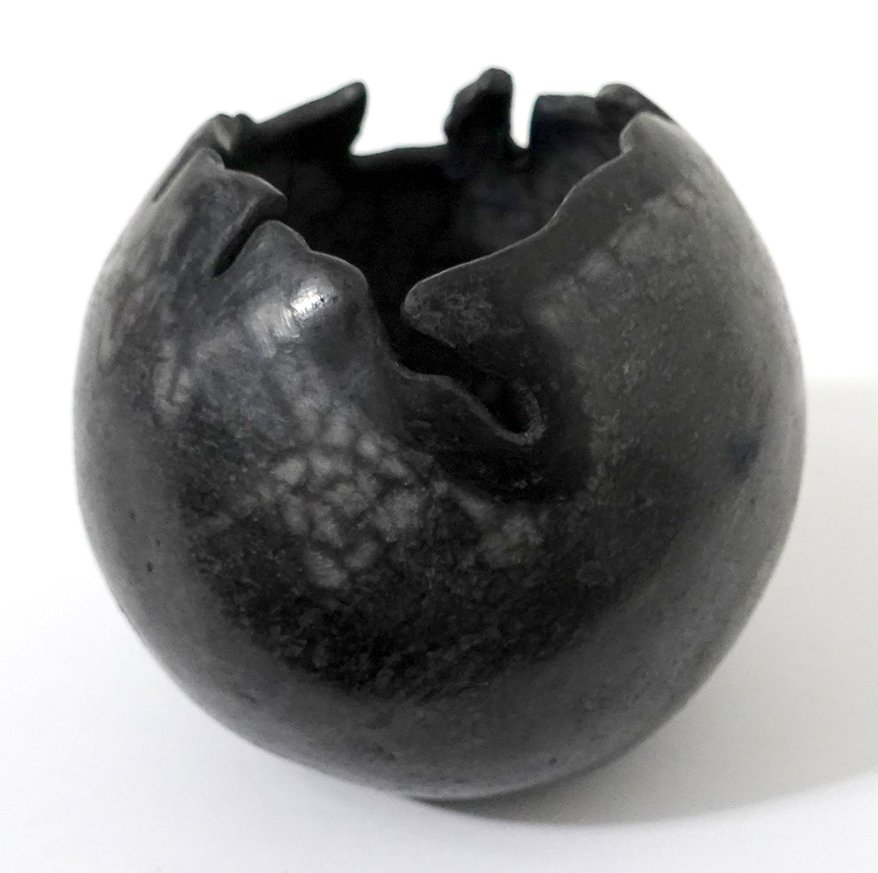
The below orb was also a one-step piece, but I added wax resist to the rim before dipping into the slip resist. Despite its low contrast, I think the pure black rim, the high burnish, and the shape contribute to making this one of my favorite pieces from this workshop. Here are three different angles of it:

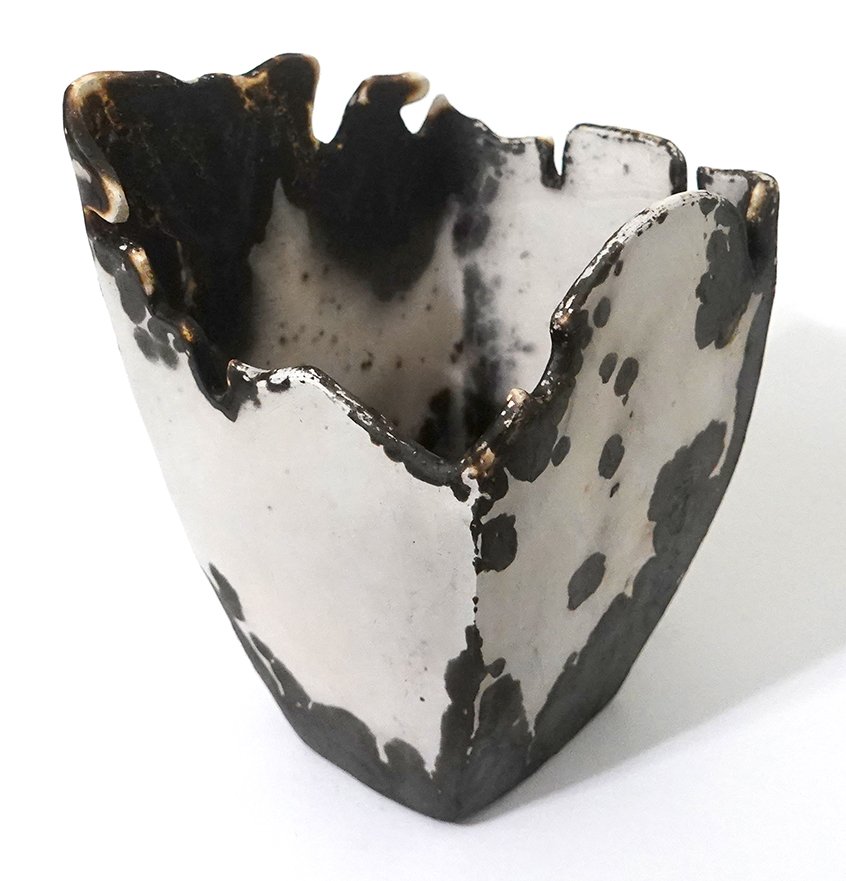
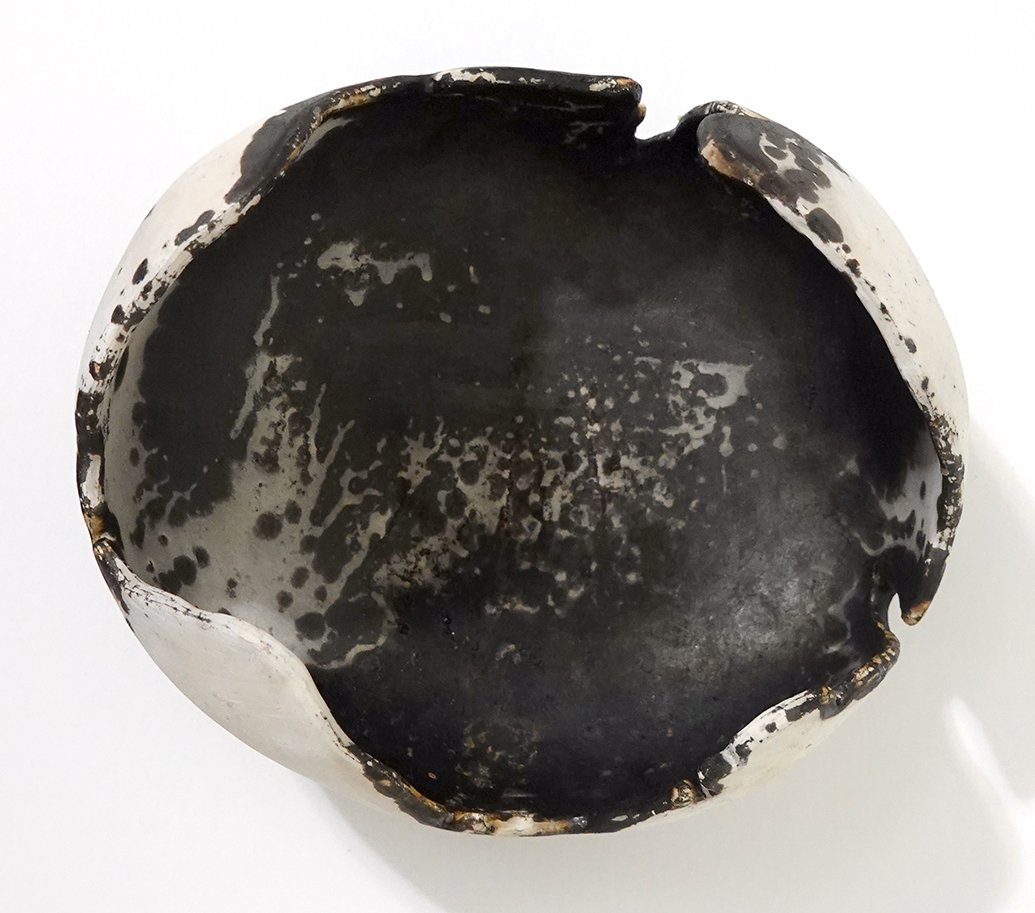
Next, we have one image of the largest piece I fired at this workshop, and two views of another attempt at carving through the two-step surface on a small tray.

Here is the first of the two pieces I left behind to get refired - a large two-step orb!

And finally, the second of those two, an oblong vase:

Overall, I’m quite happy with these results so far, though I’d like to figure out how to regularly preserve larger white areas for even higher contrast. My burnishing was more successful on some pieces than others, but I do think it was worth the effort and I plan to continue to burnish for naked raku ware.

My Obvara Raku Vases

And here’s the last batch of obvara raku ceramics from my recent workshop at Dakota Potters Supply - these are the burnished vases!

This first oblong vase was the only one that I saw and heard crack during the sequential baths. It is still usable decoratively, but it does have that asterisk about it so I likely won’t exhibit or sell it. (Note, I purposely selected photos of it that don’t draw attention to the relatively large crack.)

While at the workshop, I thought that was my only casualty - but when I was applying kitchen wax to the surfaces at home, I noticed this next squat vase has a small hairline crack as well. It’s not nearly as apparent as the above piece’s flaw as it requires close examination to spot. While a crack is never ideal, in a low-fired piece like these which was always going to be decorative (not water-tight nor food-safe), it’s far less problematic than it would be in a piece intended for that kind of usage. I’ll probably keep this one myself!

The rest of the below vases are completely unblemished. This little bud vase is the smallest of the bunch.

Next we have a larger, somewhat soft rectangular vase!

And finally, a somewhat flared cylindrical vase.

I hope you’re as into the obvara pieces as I am. I really like the aesthetics this process produces - but more than that, from a conceptual standpoint I love the organic chaos that creates those aesthetics.

My Obvara Raku Plates and Platters

In my previous post, I shared the obvara raku bowls I made on my October 21, 2023 workshop at Dakota Potters Supply. I also made some plates and platters! As always, you can click on any of the photos below to see them larger.

This first burnished plate depicts a bear, and you can’t convince me otherwise.

This next burnished plate is smaller than the first - it’d be good to hold jewelry or other small items.

A small obvara raku plate by artist Shelby Prindaville.

This final piece is the largest - it’s a platter or tray, and it has some light texture on its inside surface.

My Obvara Raku Bowls

Here is the first batch of my obvara raku pieces from my Dakota Potters Supply workshop on October 21, 2023 - I made enough that I plan to publish three posts covering the artwork! This post shares my obvara bowls and bowl-like vessels.

Again, as background, obvara is a low-fire scalding-and-sealing process wherein you create a fermented sourdough/beer bath, plunge approximately 980°C naked ceramics fresh out of the kiln into it, wait for them to start to bloom with different tan-to-brown markings, and then arrest the surface carbonization process by rinsing the pieces off in a water bath.

The obvara process itself scalds and somewhat seals the surface of the pottery, but I went ahead and added a thin layer of kitchen wax to these pieces as well for extra protection and sheen unification. All of the below images in each gallery row are of the same artwork from different angles.

This first open bowl has a burnished-smooth surface!

This second piece is another open bowl, but this time the surface has some light texture as well as a more variable form.

This third piece is burnished smooth and a bit more closed, though there’s a quite variable lip. All of the pieces I’ll be showing you are handbuilt, pinch-pot designs.

Next we have another burnished and even more closed vessel! This one was a favorite of my fellow workshop attendees; they loved how the obvara surface turned out.

While you can click into each of the above images to see them larger, I want to close this post out with just one large image of the last burnished bowl I made!

An obvara raku handbuilt bowl by artist Shelby Prindaville.