When I woke up for my first morning in Cerdeira Village, I was still a little tired and quite sneezy - I thought I would escape from my Kansas allergies but there are apparently still plenty of plants I'm allergic to in Portugal! I soon shook it off, though, and Julia and I made breakfast and started to get to know each other. Next I went to set up my studio space; the atelier is downstairs and next door from the residency housing. I took over two small pottery tables and a bigger workshop table and began working on my first piece.
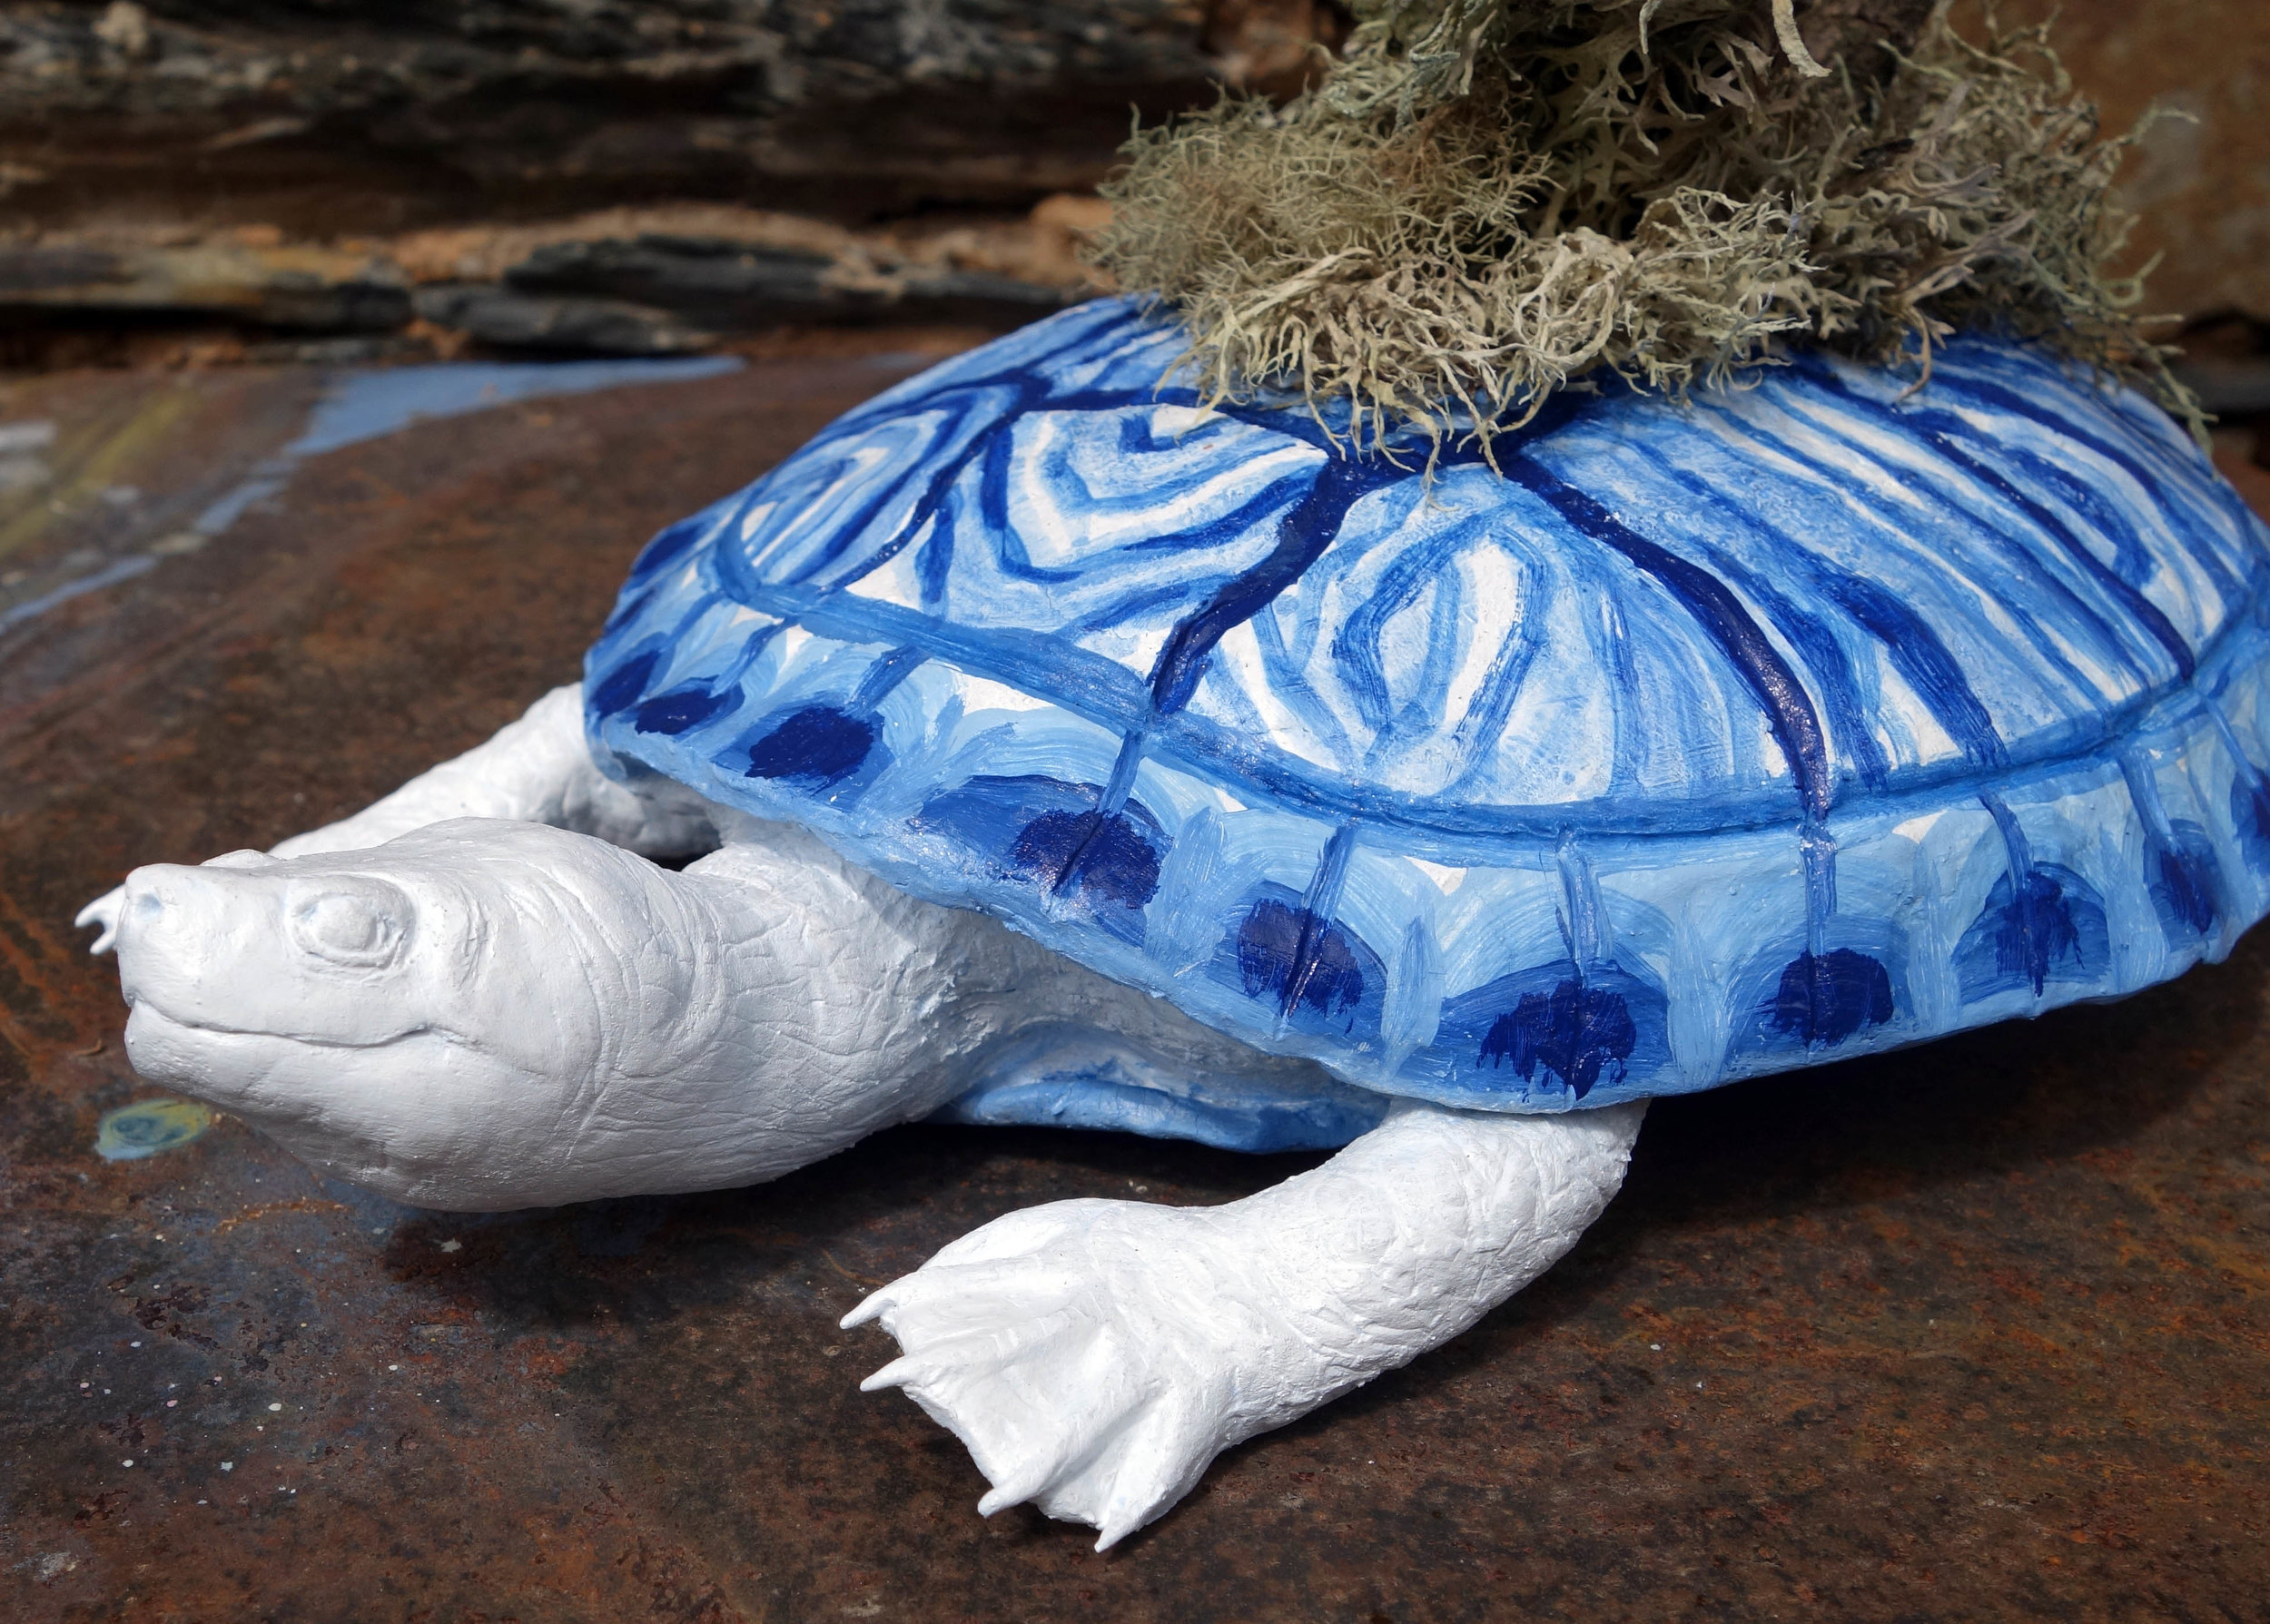
When I proposed my project for this very competitive residency, I took note of how ceramics-oriented the website was and my proposal was to make some fully 3D pieces out of QCC since of late I've been doing only relief work with QCC. For my first sculpture, I decided I would create a slider turtle with branches growing atop its back supporting a nest. I picked a turtle for a few reasons - 1) I'd sculpted two turtles a few years ago out of QCC but never felt I fully resolved their form and wanted to improve upon that work; 2) there is a multicultural myth that the world is supported on the back of a great turtle; 3) I hadn't seen very many animals in Portugal yet given that I'd only been there a couple days, but I had seen at least two different species of slider (red-eared and yellow-bellied) at the Estufa Fria in Lisbon.
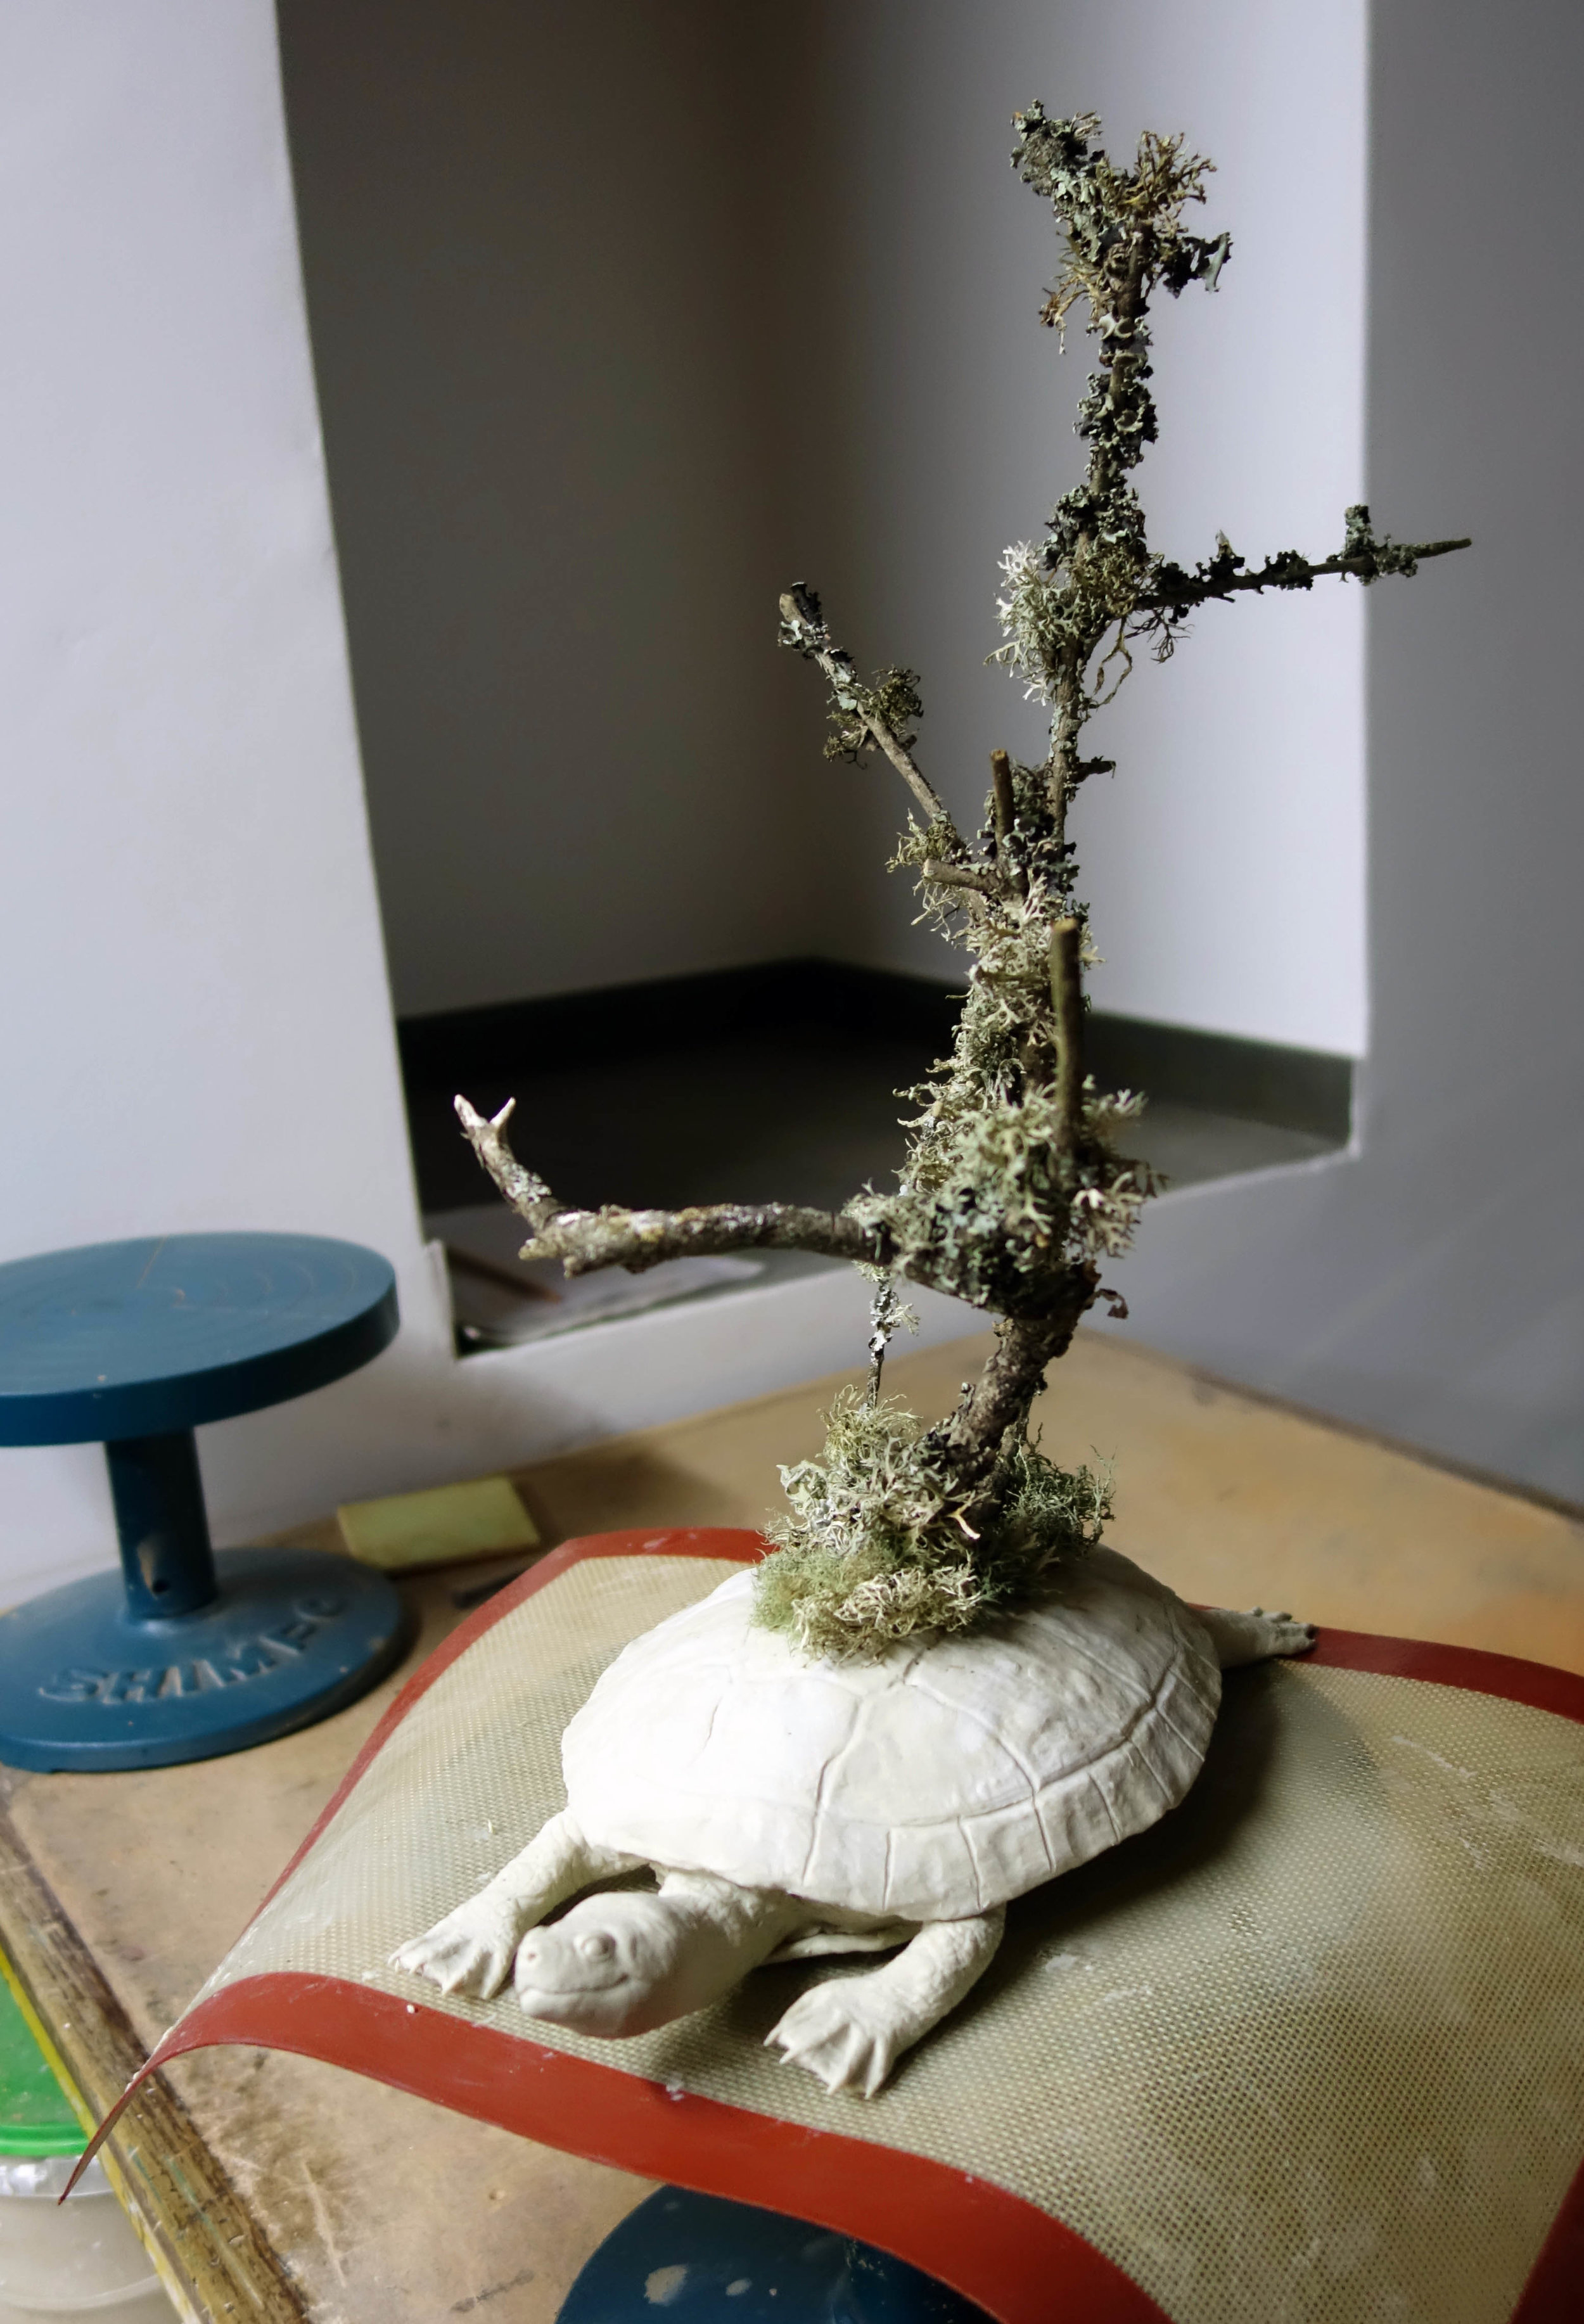
I started the sculpture by carving a rough approximation of the shell out of styrofoam. This was mostly to save on clay usage - I can only carry one bucket of it at a time due to the size and weight it occupies in my luggage, so I want to be smart in how I use it up - but also helps with the weight of the piece, which is important because I will have to ship my artworks back to the US and weight sharply increases the shipping costs.
Then I applied QCC in a relatively thin layer around the styrofoam and began to shape and detail it (hacking out bits of styrofoam as well if I needed to). The shell took a lot longer than I thought it would to really shape properly; I did not finish it the first day.
I continued work the second and third days on the turtle. After finally detailing the shell, I moved on to the head and feet. I did them all separately so I could be very considered in my markmaking, and finally I assembled all the pieces and added a tail and other final detailing by the end of the third day. I had planned to make the branches and nest out of the QCC as well, but I became enchanted by the local lichens that grow on the trees here and ended up pushing real branches into the turtle's back before curing the whole piece.

Afterwards, I did add a nest and two eggs made out of QCC into the branches.
On the fourth and fifth days, I painted the turtle, nest, and eggs white. I had got it into my head to reference the azulejos tiles so common to Portugal in the painting of the sculpture; the starting point was turning the natural light tan of the clay the bright white of the glazed tiles. I had only brought one type of paint with me - my Golden OPEN Acrylics - which are great for normal painting needs but are really poor as a base coat due to their long dry time. Here in Cerdeira Village, they seem to dry even slower - in fact, barely at all - and I ended up just going ahead and painting the turtle shell with an azulejos-inspired, painted-turtle-shell-based design on the sixth day here despite the shell still being faintly wet. I also painted the eggs with a small decorative motif seen in the corners of some azulejos tiles. The turtle and eggs took almost a week to dry, but aided by my eventual realization that I needed to put them outside in the sun to assist, they were handle-able by the time I needed to install them in their exhibition space the morning of June 2.
So here's the piece! I haven't measured it yet, nor titled it (I've got some ideas mulling), but that will come. It is a mixed media ceramic sculpture including 3P QuickCure Clay, acrylic, and found branches and lichens.