Back in January, I began to try to learn about the discipline of ceramics for professional development as an administrator and artist (and maybe even further down the line it’ll be a course I feel capable of teaching, too)! Of course, the pandemic descended right after we had begun to kiln fire and we went remote mid-spring so then there was no more firing for a time which was a barrier to progress.
You may remember my blog post titled Pandemic Productivity which I wrote toward the end of March discussing this topic, and over the spring and summer I generated a number of pinch pot raw ware from home - and an end-of-summer bisque firing was done, so all of those pieces were ready for glazing in early August.
(If you’re unfamiliar with how to make ceramics, you take clay and shape it which when ready is called raw ware. That raw ware is then bisque fired in a kiln. Once bisqued, you typically glaze your pieces and fire them again at a higher temperature. The pieces that come out of that second firing are usually finished, though you can do additional treatments beyond that as well.)
My very limited previous ceramics glazing (I believe one finished cycle only?) had been with Cone 9 glazes, which our gas kiln is theoretically capable of… but the first set of pieces that came out were not only experimental in terms of learning how to glaze but also very underfired due to the gas kiln needing repairs. The underfiring negatively affected their watertightness and texture. We have since fixed the gas kiln, and I do have some pieces from January through March that had been prepared with Cone 9 glazes for my second glazing attempt and are presently still waiting for whenever we next fire the gas kiln.
This fall we reopened Morningside College in person, and our ceramics course began again. It takes several weeks of creation before class bisque firing begins, and then once a decent stockpile of bisque pieces build up students begin glazing. Midway through this fall, I was able to rejoin the cycle by beginning to glaze my pandemic pinchware! The instructor teaching now prefers to fire at Cone 6 with our electric kilns. This meant any color mixing knowledge I had about our existing Cone 9 glazes - minimal anyway - was out the window, and I was starting from square one with the new Cone 6 glazes, many of which didn’t even have sample swatches yet. Again, there was a lot of experimentation and not a lot of control - but in only a few cycles I’m starting to develop some preferences! It’s also nice that these finished pieces have reached the proper temperature and their surfaces are, in contrast to the underfired pieces I’d done before, behaving as intended.
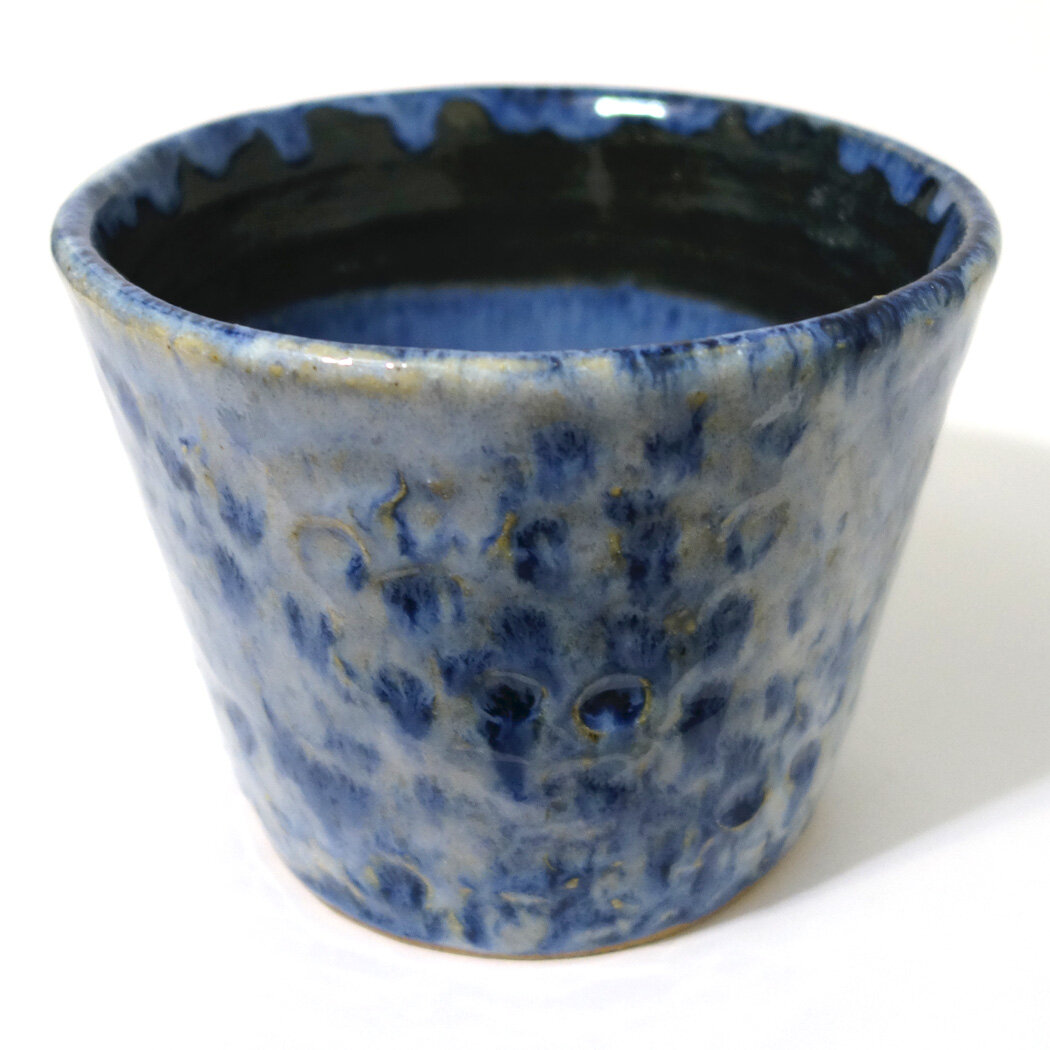
So, here are the first of my finished ceramics after almost a full year of work! All of these are planters with drainage holes, as the last three photos demonstrate. A couple are wheel thrown, and the rest are pinchware. They vary in size but most are relatively small - they’re all approximately 2-5” in diameter. Bigger pots are more time- and material-consuming to make and take up more room in the kiln so I’ve been sticking with smaller ones for now. I’ve made a few bowls (with no drainage holes) and vases, too, which I’ll share in a later post!


