New Artwork

Phoenix Athens Residency Artwork 7

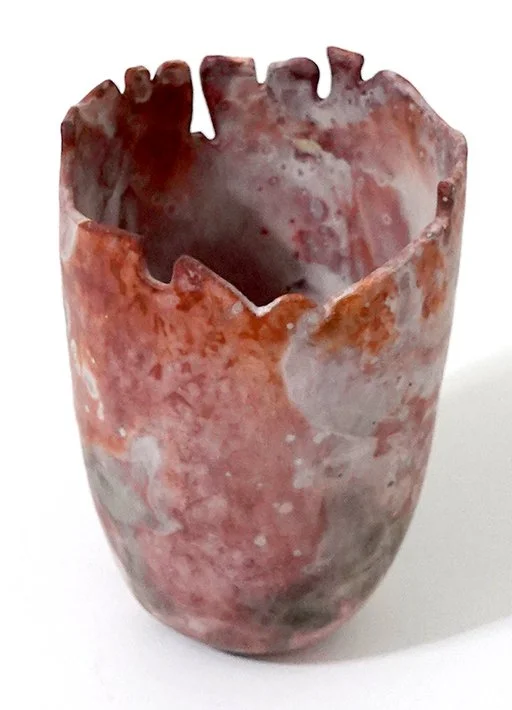
This painting was the third I started… but the seventh to finish! Many people have asked me how long it takes to finish a piece of artwork, and the answer is harder to provide than they might think because I’m usually working on multiple pieces at a time and each one’s process and progress looks different.

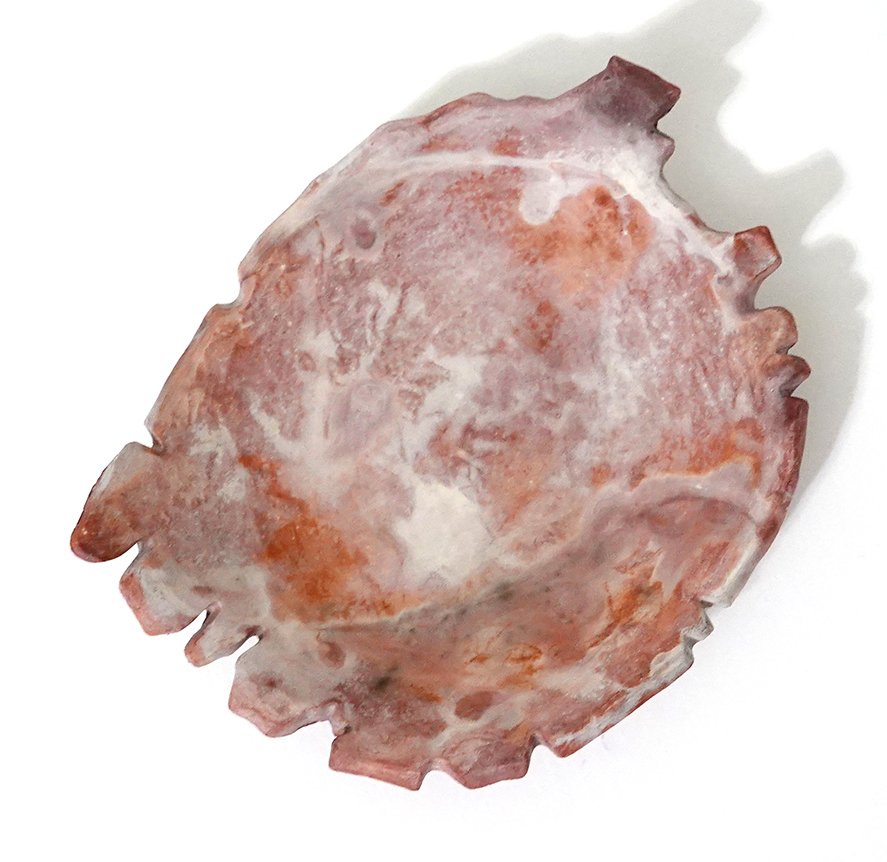
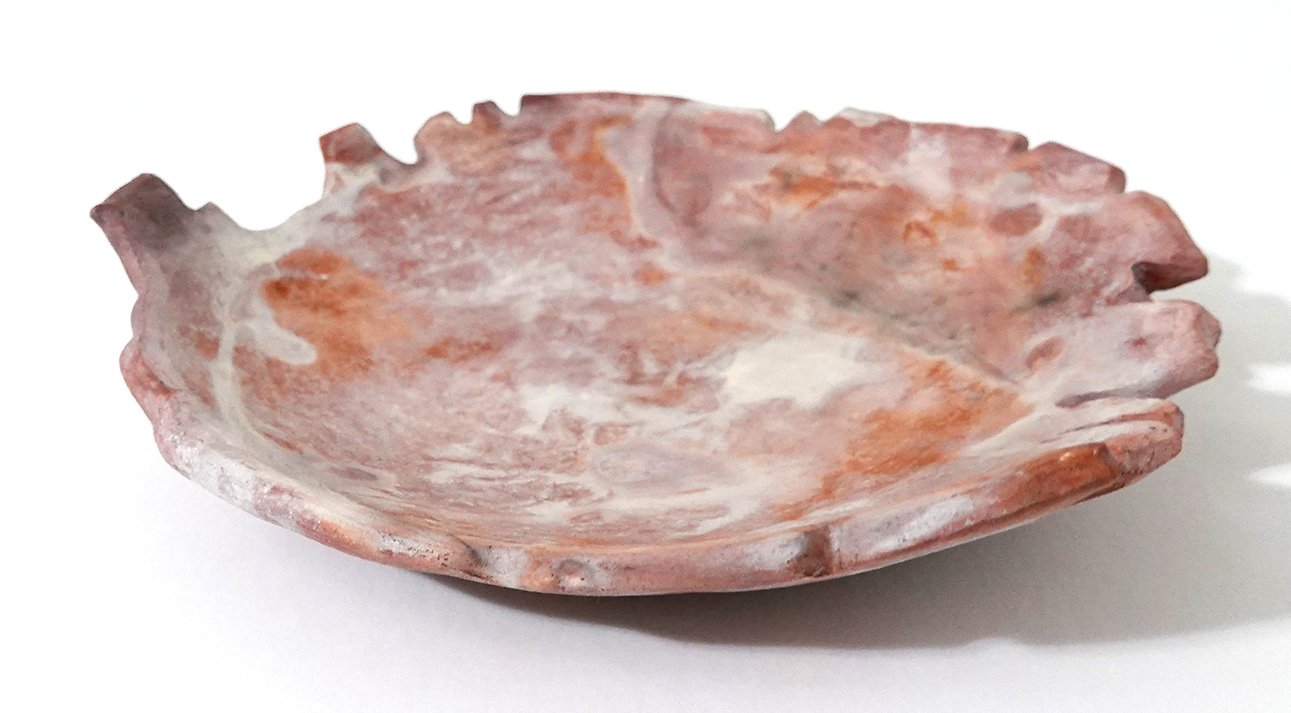
The substrate for this is once again papyrus, but for the first time I experimented with using crackle paste. This was particularly experimental in that you’re supposed to use crackle paste only atop rigid surfaces, and papyrus is flexible. This meant that as the crackle paste seized, it actually buckled the papyrus beneath, leading to less dramatic cracking in the paste but creating a very irregular topography and shrinking the overall dimensions of the papyrus. Painting a relatively detailed and representational subject on this surface was really difficult, which led to me fighting with it for weeks. I might’ve even abandoned it, except every visitor to my studio remarked on how much they looked forward to seeing it finished and that it was already a favorite! Eventually, I made peace with it and could see the light at the end of the tunnel.

I am really pleased with how it turned out; my studio guests were right to urge me to complete it! Also from a completionist angle, my Mount Lycabettus tortoise times were always spent with two tortoises - I painted the larger, presumed male tortoise on the antique tiles, and this papryus piece depicts his smaller, presumably female companion. It feels nice to have finished portraits of each of them.

This is a tentative title: Heritage, acrylic and crackle paste on papyrus, 15.5x21.75", 2023.

Shelby Prindaville's acrylic and crackle paste on papyrus painting of a marginated tortoise.

Phoenix Athens Residency Artwork 6

After my sparrowhawk photoshoot the second day with my new field biologist friend, I thought I might want to pay homage to the spotting scope’s field of view by working on a circular composition. Dimitri helpfully found me some wood-and-cardboard spools in the neighborhood trash, and he salvaged them. After taking them apart (they were bolted together), there were two wooden circles on each end. One was flush with holes for the bolts and center, and one had an extra central wooden ledge around the center along with the requisite holes. The Phoenix Athens residency director Dimitri is really into working with concrete, and I like trying new media so I embraced his suggestion to test it out!

I cut down a piece of masonite and glued it to the back, and then put some mesh over the top of the holes to help strengthen the cement’s fill of them. I then mixed up the concrete and added some crushed local snail shells I had collected on Mount Lycabettus as well.

The concrete adhered pretty well, but it wasn’t very level on the surface. I filled in most of the worst of the cavities with matte medium and then went to work drawing and painting atop it! I decided on a composition with three of the Eurasian sparrowhawk chicks, and I added a subtle dark vignette as another nod to the spotting scope.

I confess I am very nervous about how any of these rounds will handle the transit back, as they slightly exceed the width of my largest suitcase; it is flexible, so I can squeeze them in, but I can’t really do anything about their getting hit on those two sides. I can pad out the top and bottom, at least! I’m hoping they’ll be OK, but if they break, I hope they break in such a way that I can try to patch the pieces à la the archaeological fragmented displays I’ve admired in Athenian museums.

This is Realms, acrylic, concrete, and crushed snail shells on recycled wood round, 17.5x17.5x.75”, 2023.

Shelby Prindaville's circular acrylic and concrete on wooden panel painting of three Eurasian sparrowhawk chicks.

Phoenix Athens Residency Artwork 5

When I first conceived of a nine-tile piece (Marginated) and a five-turned-into-four-tile piece due to one of the pieces being destroyed at a sandblasting facility (though then one of the four remaining tiles broke into two during sanding, so it reconverted to five total pieces-and-fragments), I had planned to paint an animal on the larger composition and a plant on the narrower one. I imagined it might be a tortoise and an olive branch, and as time passed and I gathered experiences and reference imagery, both ideas resonated more and more strongly.

Athens is named as such because Athena and Poseidon battled out becoming the city’s patron god through each giving it a gift. Poseidon gave a salt-water sea, while Athena gave the gift of an olive tree atop the Acropolis. The olive tree was deemed the better gift, and so the city was named Athens with the patron of Athena (and was punished with insufficient fresh water by Poseidon). Olive trees are ubiquitous in Athens and Greece, growing in the ground as well as in decorative containers throughout the city. They are easy to identify due to their iconic appearance. Their fruit, oil, and wood are each major industries, and squatters can even gain land rights by planting an olive tree on contested parcels. The olive branch has become a worldwide symbol of peace.

I decided to paint an olive branch with immature olives on it, and atop the roughened glaze sections, I kept its coloration standard while on the raw clay body I converted it into a hot/burnt color palette that bring global warming, fires, and drought to mind (as I did to a lesser degree on Marginated as well).

Once again, this piece can be displayed variably, and/or in combination with Marginated.

Symbolism, acrylic on five partially deglazed 19th century ceramic tiles and tile fragments, variable display dimensions with core dimensions of 17.25x5.5x.25", 2023.

Shelby Prindaville’s acrylic painting of an olive branch on partially deglazed 19th century tiles, displayed in its core composition.

Shelby Prindaville’s acrylic painting of an olive branch on partially deglazed 19th century tiles, displayed in an alternative layout.

Shelby Prindaville’s acrylic painting of an olive branch on partially deglazed 19th century tiles, displayed in an alternative layout.

Phoenix Athens Residency Artwork 4

I am so happy with how this overall project turned out! The tiles fought hard to keep their slick glass surfaces and people kept trying to persuade me to give up, but after a lot of failed attempts, I eventually prevailed in removing the top-most surface but leaving most of the glaze, crackle, and chip defects (and adding more defects of my own in the process).

From conception, I had planned on a nine-tile ceramic artwork and a five-tile-and-fragment ceramic artwork. One of the whole tiles ended up completely ruined while at the second sandblasting facility, so I was down to nine and four. I was initially pretty sure my nine-tile square artwork was going to be a tortoise, but I tried out a variety of compositions… and confirmed that a tortoise was my favorite option!

This project is exciting in that it is an experimental fusion between ceramics and painting, and it also uses as its substrate antique tiles from the 1840s. The multiple components means that I can display this piece in infinite ways; the “core composition” is of course the most resolved option but irregular spacing and/or scrambling encourages additional viewer appreciation for the artistry of each tile in its own right as well as introduces additional room for conceptual narratives around ecology, encroaching human environments into the natural world, negative space, abstraction, and time.

The subject is the larger, presumably male adult marginated tortoise I met on Mount Lycabettus - at least one group of locals call him Petros. When I was thinking about what to title this piece, I realized that marginated also means “marked or characterized by margins,” such that the word describes both the subject and substrate and therefore seemed to me to be the perfect title.

Marginated, acrylic on nine partially deglazed 19th century ceramic tiles, variable display dimensions with core dimensions of 16x16x.25", 2023.

Shelby Prindaville’s acrylic painting of a marginated tortoise on nine partially deglazed 19th century tiles, displayed in the core dimensions.

Shelby Prindaville’s acrylic painting of a marginated tortoise on nine partially deglazed 19th century tiles, displayed in a more conceptual, open configuration.

Phoenix Athens Residency Artwork 3

This is my first Eurasian hoopoe artwork! It is painted on a natural tree trunk slice which I obtained here in Athens. The central element, the “seed,” is the unaltered center-most part of the wood as well as its hollow. It also subtly references the “mati” or “evil eye” which is a prevalent design in Greece.

I plan to paint at least one, maybe two more hoopoe pieces… though I may not have time to complete them while I’m here in Athens. We’ll see!

The Seed, acrylic on tree trunk slice, 15.25x15.5x1”, 2023.

Shelby Prindaville’s acrylic painting atop a tree trunk slice of two hoopoes on a branch.

Phoenix Athens Residency Artwork 1

Here is my first finished painting completed as an artist in residence at Phoenix Athens in Greece! It depicts a wild sparrowhawk chick in a somewhat stylized nest of branches.

This is Potential, acrylic on papyrus, 24x16.5”, 2023.

Shelby Prindaville’s painting of a wild Eurasian sparrowhawk chick on papryus.

I've Finished a New LSU SVM Artwork: Overlooked!

I’m beginning a new artist residency, but I still have some paintings I’d like to do from my summer 2022 artist residency at the Louisiana State University School of Veterinary Medicine so I worked on them before I headed out! Last summer I had begun, but not yet finished, the contour drawing underpinning this painting of two juvenile possums. I worked on the background this past fall, and began to paint it at the beginning of this summer! The background is a chemical stain from the anatomy lab; I’ve had some trouble with the lightfastness of the veterinary stains I’ve tried in the past, which is why I gave this one so much time between setting it down and painting atop it! Both due to the time involved and my research, I have more faith in this particular stain’s staying power. This stain is called orcein and is derived from lichens, and it has been used as a fabric dye in addition to scientific usages.

This is Overlooked, acrylic and orcein stain from the LSU SVM anatomy lab on Aquabord panel, 24x18x1.5”, 2023.

My Favorite Ceramic I've Made Yet: My Last April 2023 Raku Saggar Piece

I have a lot of my own ceramic pieces that I love, and there are a number of those that I plan to keep for myself for the foreseeable future! I’m pleased with each of the ceramics that came out of my recent April 2023 raku workshop; that work spans the realm between good to fantastic. One piece I made is my favorite ceramic I’ve made yet, though, which is a hurdle that was relatively easy to pass when I was a beginner back in early 2020, but is now a much rarer event.

This piece, like the others in this series I’ve made, was dipped in three coats of ferric chloride, wrapped in Muehlenbeckia axillaris or Creeping Wire Vine and then aluminum foil, and saggar-fired in a raku kiln. It is finished with kitchen wax.

Ceramic glazing in general is a lottery; there are a lot of variables and some are outside of your control. I think I won that lottery with this vessel!

April 2023 Raku Crackle and Saggar Ceramics

This is my second post reviewing my April 2023 raku workshop ceramics! This one will cover two of my three “baked potato” aluminum foil saggar-fired ceramics and my clear crackle piece.

Based on my experimentation using plants at my April 2022 raku workshop, I only had real luck with saggar firing Muehlenbeckia axillaris, colloquially known as Creeping Wire Vine. I therefore used it again! Below is a plate that was dipped in three coats of ferric chloride and then wrapped in the vine and then aluminum foil and fired. The Muehlenbeckia axillaris impact is relatively subtle because it mostly went white to medium gray, but the plate overall turned out well. The very first time I did this “baked potato” technique, I used a matte clear acrylic spray. The second time, I went with gloss. I didn’t really love either, so this time, I went with applying a kitchen wax. I really like the way the wax looks, so I think that’ll be the winner moving forward!

Next, I did the same process with a vase - on this piece, I also sprinkled just a little sugar on as well for some small-scale spotting in the design. This one’s interesting as the Muehlenbeckia axillaris is more apparent, and it produced the full value spectrum on the same vase; the top vine piece is white to light grey, while the bottom vine carbonized a lot more and turned medium grey to black.

And finally, I chose to do a clear crackle on a small, necked vase. Handbuilding necked vessels is tricky, and I complicated matters with this piece by leaving my building process evident on the outside to contribute texture (while smoothing it for structure and stability on the inside). This was quite risky; I knew there was a good chance this piece could crack or break with thermal shock due to the thinner seamed areas. However, I was fortunate - it made it through the firing completely unscathed! I wanted to enhance the seams and stress spots that I had intentionally retained, so I painted over each of them and the lip of the vase with wax before glazing with Clear Crackle on the exterior. As I’ve explained before, this means the glaze doesn’t stick to the waxed areas, and the wax burns off in the kiln. The exposed, unglazed clay body then carbon traps the smoke in the post-kiln reduction atmosphere, turning a dark, smoky grey. I finished the piece by putting kitchen wax on the unglazed areas.

Again, none of the “cracks” in the below piece are structural - they are all decorative and this vase is fully sound.

April 2023 Raku Copper-Glazed Ceramics

I’m going to do a few different posts about my April 2023 raku workshop pieces because there’s a lot of good work to share. In this first one, I will review my copper-glazed pieces!

Below is a platter, which has some texture on its surface; I imprinted an equine femur into the clay body thanks to bones I was allowed to keep using from the LSU SVM anatomy lab. I first glazed it with White Crackle, then wiped the white crackle back down so that it stayed in the impressions, and also applied it to the rim. Then I glazed over the top with Copper Sand. I thought this would impact the coloration, but the white crackle (at least at that thickness) only really affected the sheen; where it was applied the glaze is glossy rather than matte. Though it’s not precisely what I envisioned, it’s a strong piece.

Next, we have a small, leaning vase. I chose to apply wax to the rim and throat. Then I glazed the exterior with Copper Sand, keeping in mind that the glaze doesn’t stick to the waxed areas. In the kiln the wax then burns off, allowing the unglazed clay body to carbon trap the smoke from the reduction afterwards. I was planning on staining the raw clay, but I ended up holding off as the variably smoky surface is interesting in its own right. I need to actually decide, as I will want to wax the raw surface if I don’t stain it.

This is probably the biggest of my raku pieces this go-round. This vase vessel has Litho Carb on the inside and Copper Sands on the outside. (I really like Copper Sand as it’s pretty predictable in its behavior for me, which is a rarity when doing raku.) The interior lip has an abalone-like appearance!

Next, we have my “golden bowl.” This piece is glazed with Dakota Potter’s new Peacock on the interior, and once again uses Copper Sand on the exterior. One of my students kept hovering her hands above it and singing reverential “aaah” noises!

And below is my final copper raku piece of the workshop! This one is an oddball shape; I wanted to push myself to make some handbuilt, necked vessels and in doing so created this flora-inspired vessel. I glazed it with Litho Carb on the inside and Midnight Luster on the outside.

My April 2022 Raku Ceramics

I just completed another raku workshop this past weekend, and as I was looking through my files I realized I’ve not yet published the raku pieces I made at my last one in April 2022. Clearly I should do that before sharing my latest workshop photos and products!

On my April 2022 raku workshop, I wanted to try to carbonize various plant fronds or leaves onto the surface of my pieces. This was a complete experiment, and it was mostly a failure. I tried a variety of ferns and tropicals out, and one after another, they burned away without leaving a trace. Here are some plates that I attempted to salvage after that didn’t work out. With the first, I pivoted to a sugar and horsehair application. With the second, I tried to use ferric chloride to stain the surface with plant leaves that weren’t carbonizing, but they just left those not-terribly-appealing ferric chloride splotches.

Once I realized those techniques were not working, I tried etching fern fronds onto a plate in a “baked potato” aluminum foil saggar firing; it kind of worked, but I think it’s underwhelming. Since none of those plant techniques were doing super well, I just put a litho carb copper glaze onto my final plate.

I also made a rounded crackle vessel and the glaze turned out really well, but the ceramic physically cracked due to thermal shock so it’s got that permanent asterisk associated with it.

I glazed this spherical vessel with copper glazes (Copper Sand is on the exterior and I think that’s Midnight Luster on the interior), and it came out looking like a little planet! This one’s a definite favorite.

And finally, the one plant piece that turned out beautifully and justified all the failures: this is another “baked potato” saggar firing, and the Muehlenbeckia axillaris vines I used carbonized perfectly into this vase’s surface.

I also lost a large platter-like vessel (it broke into quite a few pieces and was not salvageable) and had another plate fuse with a kiln brick and lose part of its bottom. I eventually recycled that broken platter-like piece in my rock tumbler!

My 39.57, -97.66 Ceramics

After I made my 100% wild, site-specific Whiterock Conservancy ceramic collection entitled 41.816, -94.646 Ceramics, I knew I wanted to add other geographic coordinates to my oeuvre. Upon discussing this wish with family and friends, my father suggested that I might be able to get some wild clay from the brick plant Cloud Ceramics in my hometown of Concordia, Kansas. We brainstormed different supplies of ash for me to create custom ash glazes with, and settled on ash from my parents’ Republican River Valley firewood and the local Cloud County landfill (they burn organics like fallen tree limbs).

Several calls and trips my dad took to fetch the requisite media later, I had two different colors of native clay as well as the two aforementioned sources of ash. The clay from the brick plant arrived in dry chunks, and it had a lot of rocks and different densities of clays embedded in the pieces. After trying a couple of other methods (sifting and straining), I ended up going back to my tried-and-true, low-tech solution for cleaning the clay: meticulously smushing little pieces of it by hand to remove the debris and equalize consistencies.

I began working on this series in late November. I had a deadline of mid-February if I wanted to include 100% site-specific ceramics in my solo show in the Frank Carlson Design Room. That’s a turnaround of less than three months! I tasked my studio assistant work study students with helping me clean the clay, which helped speed up the process. I also tried to keep the pieces relatively small to maximize the number of pieces I’d be able to complete.

Here are some photos of the process!

As you can see above, after we cleaned the clay I handbuilt 30 ceramic pieces (15 out of each clay color) and bisque fired them. I then separated them into two different firings: half went into a cone 8 electric kiln firing and half went into a cone 9 gas reduction firing. After sifting the ash and removing all the larger chunks, I created 9 different custom ash glazes: 8 using all possible combinations of yellow clay, grey clay, landfill ash, and fireplace ash in 1:3 ratios, and 1 hybrid glaze with 1:1:1:1 proportions of each. I wasn’t sure what any of the glazes would look like, so I ensured each color of clay and kiln setting had the full range of options and asked my work study students to take copious notes so that we could learn from the results.

Here are my 39.57, -97.66 Ceramics! I managed to finish these in time to include in my Frank Carlson Design Room solo show. I like them all, but I am particularly in love with the ones that came out of the cone 9 gas reduction firing. I’ve only fired a few times in gas kilns so far, and this is the first time I’ve gotten really good reduction - it’s gorgeous! I like them so much that I want to make more (and larger) pieces to add into this collection, and glaze with a little more intention now that I know what the custom glazes I created will do. The clay cleaning process is tedious enough that there is a limit to how long I’ll want to keep working with each wild batch of clay, but my interest hasn’t waned in the Concordia series yet.

New Artwork: Earth Measurer

An in-progress photo showing my contour drawing which underpins the finished painting!

I made the acquaintance of this inchworm at Whiterock Conservancy, and began the contour drawing over a year ago. I picked it back up this winter break!

The title of the piece, Earth Measurer, is the English translation of the Ancient-Greek-derived “geometer.” Geometridae is the scientific name for the family of caterpillars (and moths) that make use of the distinctive method of locomotion that is not only described in the family’s scientific name but also in many of their common names: inchworm, spanworm, looper, and measuring worm.

After spending a lot of time really looking at inchworm anatomy and learning terminology (FYI, they have true legs and prolegs), I am again impressed with the variety and richness of animal forms in the world; there’s plenty of alien to explore right here. This past summer, while painting mosquitoes from LSU Vet Med’s epidemiology department, I was surprised by how hairy they are upon examination. Similarly, on this so-called hairless caterpillar, there’s still a fair amount of hair, called setae! I included it in the painting as well, though you’ve got to get close to the painting or zoom in quite a bit to see it.

This is Earth Measurer, acrylic on basswood panel, 6x12x1.5”, 2023.

Landscape Ceramics

I’ve been working on a series of landscape ceramics for some time now, and I plan to continue to add pieces! Here are some I completed in early 2022; these are all stoneware fired to Cone 6. The first three are vases, and then there’s a bowl, an egg-shaped vessel, and six small planters.

My 41.816, -94.646 Ceramics

In my three-person show Whiterock Art at the Betty Strong Center here in Sioux City, IA, I have 37 pieces on display! There are 2 painted reliefs, 20 8x8” chromatograms, and 15 handmade ceramics. I’ll post photos from the show and reception shortly, but right now I want to focus on those 15 ceramic pieces in detail.

My Whiterock Conservancy ceramic body of work is special in that it is 100% site-specific in every component. I dug my own clay out of the Middle Raccoon river beach cliff, cleansed it of rocks, roots, and other debris, and then I did not amend it (often potters mix additives into their harvested clay to improve elasticity or other desirable characteristics, but I thought that would weaken this collection’s conceptual power). Below are images documenting my clay collection!

I handbuilt 15 different vessels, and as I was doing so, I thought about if I should glaze them at all, and if so, would transparent glaze from non-local sources taint the project…? I shared this quandary with friends, including my wonderful former colleague and master ceramist Susan Nelson.

After a couple of weeks mulling it over, Susan arrived at a different solution: ash glazing. I learned from her that ash can be used as a glaze, often in combination with clay to lower its melting point and smooth out the finish. I reached out to Whiterock Conservancy co-founder Liz Garst to see if I could collect some of the ash they generate, and she was kind enough to collect me a gallon bag of ash from a slash pile burn primarily composed of invasive honeysuckle bushes.

I inter-library-loaned a book on natural and ash glazes and conducted a variety of tests to determine the best ash glaze mixtures, application methods, and firing temperatures - but I also had deadlines to meet that meant I couldn’t dally too long in the experimentation phase. I eventually settled on using three ash glaze mixtures that used different proportions of clay to ash mixed with water and put 6 pieces in a Cone 8 electric kiln firing and 9 pieces in a Cone 9 gas kiln firing. Below (respectively from left to right) is a still wet raw ware handbuilt bowl, bisque-fired pieces, my work study students and I experimenting with ash glaze recipes in the ceramics studio, and ash-glazed bisque ware awaiting its glaze firing.

Below are are the finished pieces in the 41.816, -94.646 collection. Those title numbers are the latitude and longitude of the artworks’ origin, and if you input them into a map application you’ll see a pin drop on Whiterock Conservancy near the river beach! I love that these ceramics are made of the land itself, and are glazed with the conservation efforts of people today trying to restore what we’ve lost in ecosystem health and diversity. The colors, texture, and variation resonate in this body of work, and I look forward to comparing these pieces with future geographic coordinate collections, as I plan to create site-specific ceramics from other localities as well.

LSU Vet Med Artist Residency Artwork 20

This is the final piece of artwork I completed on-site at LSU Vet Med during my two-month summer 2022 residency! I think finishing 20 exhibitable pieces including mixed media paintings, a relief, ceramics, and a sculpture in 7 weeks is a remarkable feat, so I am very happy with my productivity.

I worked right up until the day of the exhibition opening on this piece, but I managed to get it “finished” in time - I put that in quotes as I still needed to briefly borrow it back from the exhibition midway through to put a protective varnish on top!

I had wanted to do a sculpture this whole time because A) I’ve always liked putting on exhibitions that have multiple disciplines and media on display to more deeply engage a broad viewership, B) I wanted to really highlight QuickCure Clay, as I’d helped create it with Dr. John Pojman at LSU a decade ago and it felt right to use it in at least a couple of pieces this summer, and C) I had been given a couple pieces of artificial turf from the wildlife hospital that I wanted to incorporate into artwork in some way, and relatively early on I had a lightbulb moment wherein I thought the astroturf had vulture neck-feather vibes! It worked very well, in that a lot of people couldn’t figure out where the artificial turf was used and at least one viewer told me she thought I thought the gravel I used as an installation aid was astroturf. Another viewer asked me if this was a taxidermied piece, which made me feel really good about the likeness!

I titled this piece Vulture Sculpture mostly because I didn’t have time to think about titling it when I had to make the show labels (I didn’t even think it was likely to get finished for it!), but I also do like the rhyme and the clear identification of the species of the bird. I sold this sculpture that same evening to the fabulous Dr. Mark Mitchell from Wildlife and ZooMed and his partner Dr. Lorrie Hale Mitchell from Integrative Medicine! They very kindly were willing to let me take it on exhibit first (as I’m doing with the rest of the sold paintings), but I made some delicate choices with this piece - the claws, the beak tip - that meant I thought it best to let them just take it after my LSU Vet Med solo show came down instead of potentially injuring the piece in shipping.

This is Vulture Sculpture, a mixed media sculpture of a black vulture including QuickCure Clay and ZooMed’s artificial turf, 13.5" x 7.5" x 20.5", 2022.

LSU Vet Med Artist Residency Artwork 8-19

This is Skeletal Ceramics, assorted handmade stoneware vessels imprinted with or formed around various canine, equine, and swine bones from the anatomy lab, 2022.

Shelby Prindaville's Skeletal Ceramics collection

I made this body of ceramics start-to-finish on site at the LSU School of Veterinary Medicine and with purchased supplies and firing assistance from Southern Pottery Equipment. The canine, equine, and swine bones used include skulls, jawbones, various vertebrae, scapula, femurs, and sacra. The glazes used were an Amaco Shino Cacao Matte Cone 5-6 Glaze (SH-32), a Spectrum Satin White Hi-Fire Cone 5 Glaze (1121), and a Spectrum Satin Mottle Hi-Fire Cone 5 Glaze (1122). I applied the Cacao Matte to all the textured/impressed areas and then sponged off the outer surfaces, then put on a generous two coats of the Satin White, and then painted a little of the Satin Mottle on kind of haphazardly and then more carefully at the lips. I fired to Cone 6. I was really happy with how this combination performed, as they do look like bone themselves! Seven of these pieces sold during the exhibition to three different buyers.

The anatomy lab allowed me to take the bones I’ve been using back with me so that I can continue to develop this collection, so stay tuned for more.

LSU Vet Med Artist Residency Artwork 7

Artist Shelby Prindaville holding Tigger the Kunekune pig.

My seventh artwork almost didn’t get made on site - I knew what I wanted to do, but tried in vain to get my hands on a necessary component until Dr. Clare Scully came to the rescue!

Let me back up and explain it from the beginning. A very cute Kunekune pig named Tigger came in for observation and diagnosis and he left the next day feeling much better (and after I gave him a quick cuddle). With his owners’ permission, I decided I’d like to feature him in a painting or two! As I always do when I see a new species here at LSU Vet Med, I started asking about what veterinary materials they use specifically with that species - in this case, pigs. After hearing about a handful of items, the ones that seemed the most useful for my purposes were the pig sorting panels or “pig boards” and Dremel rotary tools (used to sand down hooves). I had brought a rotary tool with me as a sculpting aid already, so that was easy - but the pig sorting panel was a harder acquisition. This is because all the ones they had on hand were made out of plastic, and were pretty clearly intended to be easy to clean in a way that would make it harder to work archivally on top of and they were also obnoxiously colored. Wooden ones are regularly used, too, but there weren’t any in the large animal hospital as typically the wooden ones are just created on demand in a farm woodshop to save money and time.

two small wooden pig sorting panels or pig boards

I started asking all the large animal veterinarians, residents, and students if they knew of a source, put word out via my communications liaison Sandy Sarr, and posted a Craigslist ad… but a week had passed and my show exhibition was drawing closer so I thought I’d need to wait until I could ask my agricultural colleagues back in Iowa. And then Clare came into the room, we chatted, she said she’d see what she could do, and a couple of days later, she had done it! She had found two wooden pig boards for me that were the dimensions I had been looking for from another LSU site and said they were sufficiently used as to be destined for the scrap heap, so this was a much better use for them.

I happily adopted them both and gave them a light sanding and heavy cleaning. For the first composition I had in mind, the slightly smaller and more “standard” board worked better, so that’s what I went with! I would like to photograph it again when I get back home and have access to a large white background, but this image will do for now.

This is Seeing Double, a mixed media relief including Dremel counter relief, QuickCure Clay, PVP Prep Solution (betadine), and acrylic on a used pig board / sorting panel, 29.75x19.25x1.25”, 2022.

Seeing Double painting by Shelby Prindaville

LSU Vet Med Artist Residency Artwork 6

As I may have shared before, I have met a bunch of amazing animals while here and there are a handful with whom I’ve really connected. This little fellow tops the list - you may recognize this brown thrasher from Wild Card, but here he is in his natural color palette and two different poses! I was fortunate enough to get to see pretty much his entire journey at the vet school in ZooMed’s wildlife hospital - from coming in as an abandoned nestling whose two siblings didn’t make it to his fledging and becoming a young adult, to his release! I will share his release photos in a different post.

The whole background is non-traditional veterinary media - namely, herbal treatments from Integrative Medicine! They created a really cool surface but were water-soluble and organic so I sealed over them several times with acrylic medium before painting the baby birds.

This is Crèche Chic, a mixed media painting including Integrative Medicine’s Jing Tang Herbal Concentrated Red Lung and Concentrated Prostate Invigorator and acrylic on panel, 18x24x1.5”, 2022.

A mixed media painting incorporating non-traditional veterinary herbs of two baby brown thrasher nestlings.

LSU Vet Med Artist Residency Artwork 5

This is actually the first piece I began here at the LSU School of Veterinary Medicine! I never know how to properly answer people as to how long a piece of artwork takes to finish, as my optimal process involves working on several different pieces simultaneously. If you count start to finish, I worked on it for a month and five days - however, there were a number of days in there that I didn’t touch this piece or only worked on it for a couple of hours…

The subject in this piece is a three-day-old baby Nubian goat; she was fully healthy but was brought in to accompany her brother who was failing to thrive and unfortunately didn’t make it.

Singularity, mixed media including Clinical Pathology’s Diff-Quik Eosin Y stain, Clinical Skills' fluorescein, Histology’s light green stain, and acrylic on basswood panel, 12x24x1.5”, 2022.

A mixed media painting of a baby Nubian goat in triplicate.